Big (or should I say Wide) Rivers
Kicking off the French Indian Wars project has given me the opportunity to really focus on the type of terrain I want for these skirmish games. The other night I watched Last of the Mohicans for the umpteenth time and what became apparent in the movie was the impact the rivers had on the terrain.
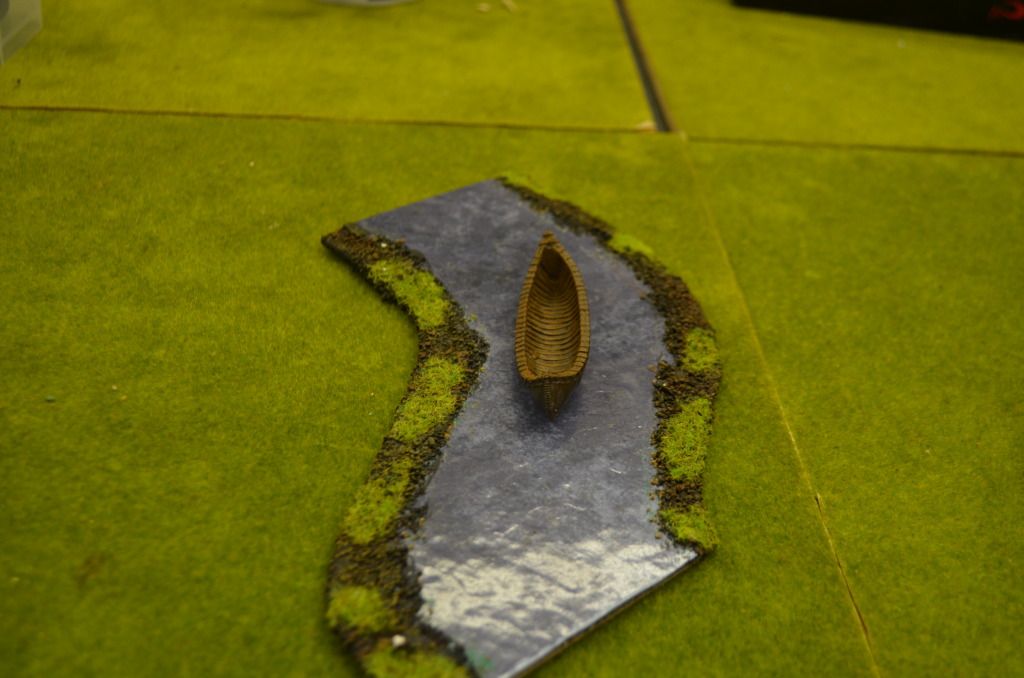
Like many gamers I had relied on a narrow ‘stream’ to illustrate the waterways on my battlefield. I needed something bigger that would make sense of the canoes, boats and other elements I want to introduce. So the idea was born.
I decided early on that the good old floor tiles from Homebase (Oxford Blue)would be the basis of my river and quite quickly decided that they would be c25cm in breadth. As you can see from the following pictures the canoes look too big for the old style but now work much better with the wider format.

As before the base boards are cut from hardboard with the tiles stuck to the rough side of the board.
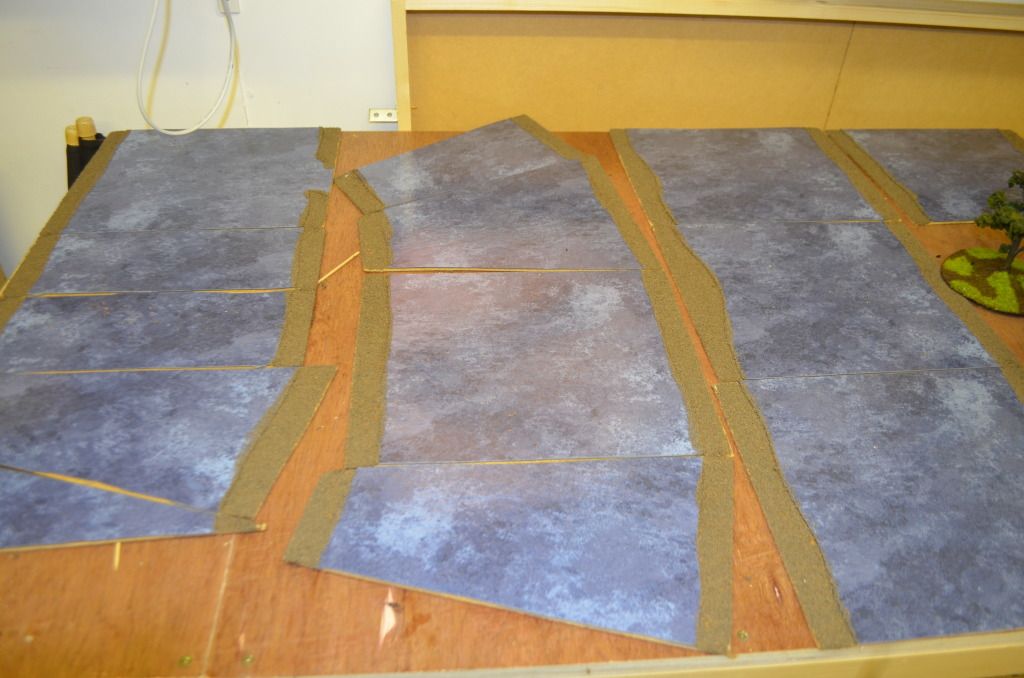
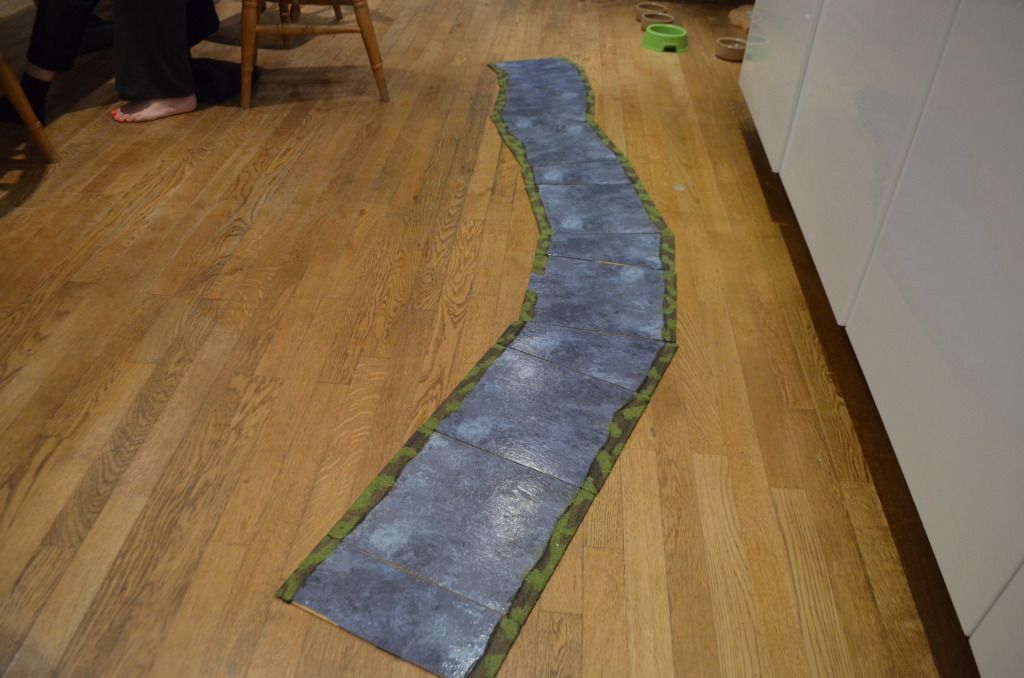
It became apparent that this river would not need twisty turns and bends but rather a sweeping turn if required. Given that I didn’t want the table to be dominated by the wide river I elected on building just over 2 metres. This used up just under two packs of tiles. Most of the sections are straights (25 cm long) with the bends made up of a series of rhomboids and triangles cut from the straight sections.

To meet my immediate needs I have built the ‘vanilla’ sections of my river course. The full construction followed exactly the same pattern as the smaller rivers (see link)

Next I decided to build a waterfall -


Finally the bits can be bought together. The ' splash as the bottom was created with more acetate whisked up at the bottom.

I was quite keen to create a waterfall for my big river – nothing too grand or too dominant. So the following illustrates how I went about it.
The Waterfall itself will be placed on the edge of the table, this gives the illustration that higher ground lies beyond. The base of this was constructed from the type of foam used by builders for insulation. I was lucky I still had some off cuts from my extension seven years ago and these came with a plywood backing. The foam itself stands about 12-15cm high. After hacking this about a bit I ended up with the rock shape I wanted.


Two outcrops either side of the river were separate pieces of foam glued onto the larger base. Heres a tip – I supported the glueing with skewers driven into both top and bottom of the outcrops. These serve to hold the outcrops in place whilst the glue sets and reinforce the total structure.
The whole construction was painted with two coats of acrylic black. This toughens the exterior.

On top of the black I dry brushed dark and then light grey. Static grass will add to the affect.

The river was constructed as before using the floor tiles. Now comes the fun bit. On other boards I read that flowing water could be represented by clear bathroom sealant. I sourced a product that seemed to fit the bill. Taking an old Ferrero Rocher lid (very useful things) I marked out the width of the waterfall. It’s about 25cm. Then steadily I squeezed the tube and created small runs of the acetate filler. Warning: This staff smells and should be worked outside – after 10 mins I was feeling quite woozy and realised my error after reading the instructions.
Slowly and steadily the water began to take shape. One a few runs were done I rouged them up with the same strokes downward with a cocktail stick.
Make sure the length of acetate runs are longer than the waterfall drop ! You are going to need to trim this and the bottom of the fall is going to need fixing.


It was now time to marry this up with the river...


From this angle I am pleased with the overall effect..

Some Galloping major Indians looking to cross the river....

The warcry (on the side of the waterfall)
If you want to see the bridge plus some more piccies head here
http://shedwars.blogspot.co.uk/2013/08/bridge-building-28mm.html
Cheers
http://shedwars.blogspot.co.uk/2013/08/bridge-building-28mm.html
Cheers
Come back soon
Eric
Great looking waterfall
ReplyDeleteReally effective looking waterfall, love the river sections as well
ReplyDeleteNice - don't see too many waterfalls.
ReplyDeleteThat's just brilliant.
ReplyDeleteWhat a great effect!!!! Well done that man!!!
ReplyDeleteFantastic waterfall!
ReplyDeleteWonderful modeling! My inner-little-boy can't wait until a dice roll forces a canoe over the falls! That will be an exciting river trip.
ReplyDeleteHi Eric
ReplyDeleteGreate looking river and wahterfall, very good inspiration. Might have to make me some to.
best regards Michael
excellent stuff
ReplyDeleteA less toxic option, for the waterfall, would be to paint some thin cardboard the correct colors (blue, root-beer browns, etc.), then apply Hot Glue, with the cardboard laying flat, to create the rivulets. It's been done by DM Scotty (search YouTube for his fountain video), so it is not my idea, but it works quite well. Be sure to use Low Temperature Hot Glue, as the High Temperature Glue Sticks take much longer to harden -- both will yield the same effect.
ReplyDeleteYour technique, by the way, is absolutely brilliant! I plan on stealing your floor tile river technique for my fantasy games. Love it! Thanks for sharing! Cheers!
This is a great idea for rivers!! I honestly had never thought about using tiles for them but they're perfect and look great. Thank you for the idea (A-Historian referred me :) )Lovely work.
ReplyDelete