Last night saw a cracking VBCW game in the shed.
As part of the Anglican Leagues northern push in Surrey they
are scouting the BUF perimeter outside the BUF held town of Woking. Woking has
a strategic importance of being a major railway hub for trains running to the
south coast and into the west country. Two flying columns were organised to
penetrate the perimeter defences. Each column was commanded separately (Mark
& Matt). I was to play the BUF forces. These would all be hidden at the
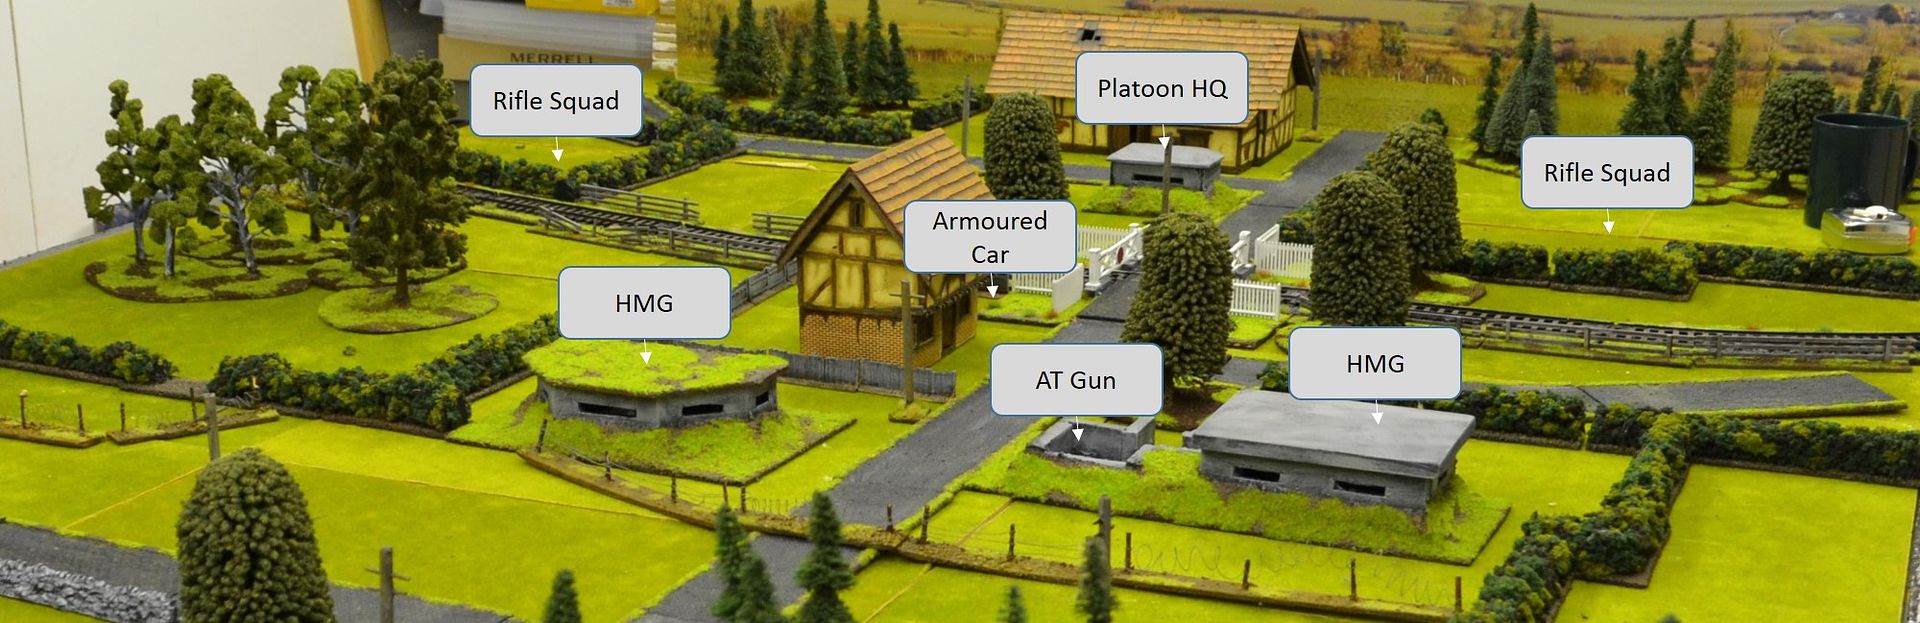
start of the game. I had previously drawn a map in the set up of the gamer and
marked up the BUF positions.
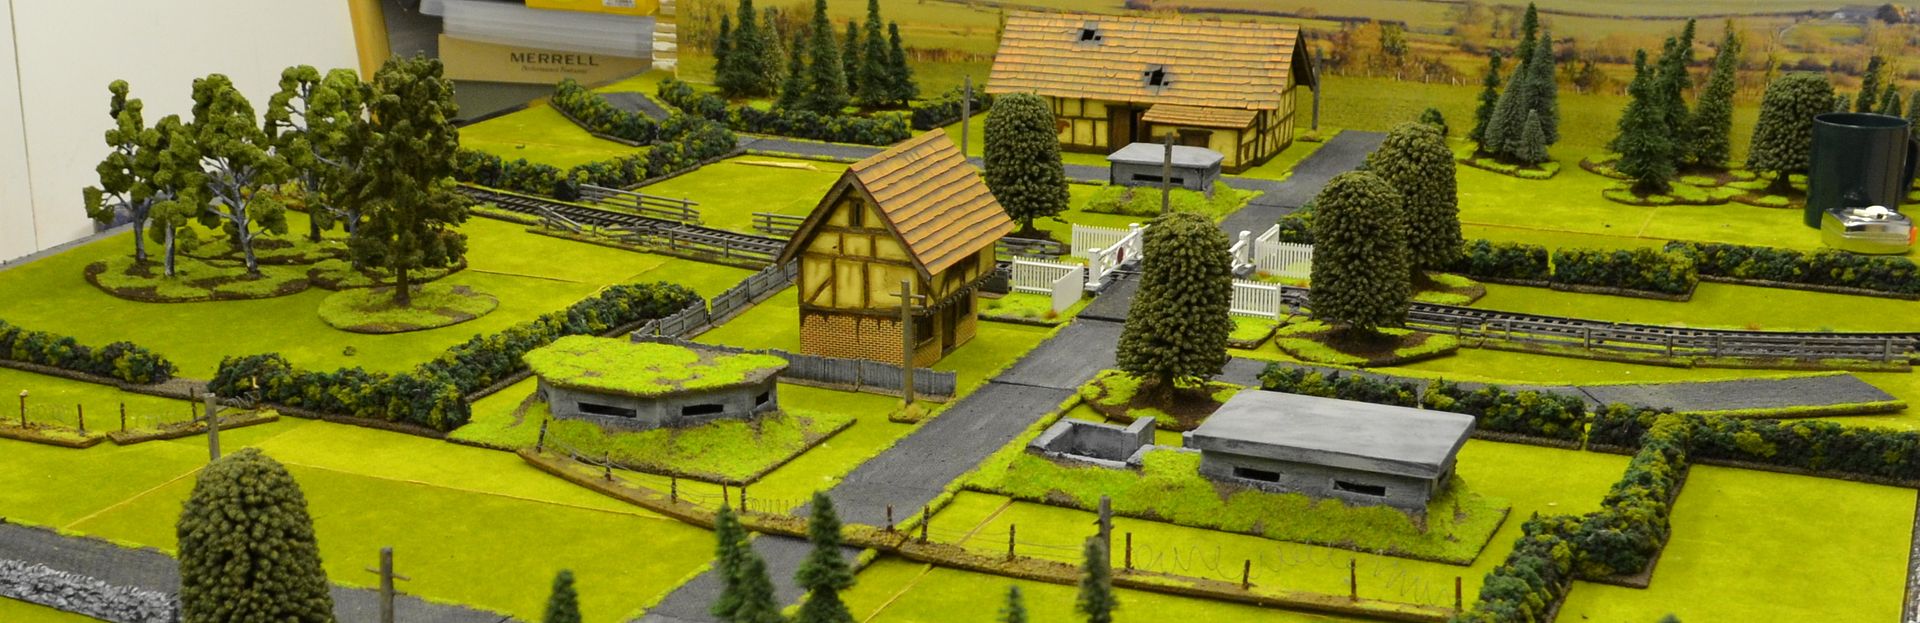
 |
| The Battlefield - Anglican League forces enter from the bottom |
I took advantage of Warlord games 2 for 1 offer on their
Bolt Action dice so we had sufficient colours to denote the three units on the
table. The battle also saw the use of some of my new toys for the first timer –
namely the empress miniature tanks, the AT gun and the VBCW cavalry recently
won on ebay.
Anglican League Forces
Grey
|
Green
|
Rolls Royce Armoured Car
|
Machine Gun armed Light Tank
|
Machine Gun Light Tank
|
Light AT Gun armed Tank
|
Rifle Squad + LMG (6 men) + Truck
|
Rifle Squad + LMG (6 men) + Truck
|
Rifle Squad (6 men) + Truck
|
Rifle Squad (6 men) + Truck
|
Rifle Squad (6 men) + Truck
|
Rifle Squad (6 men) + Truck
|
Platoon Command (Officer, Medic + MMG) + Transport
|
Platoon Command (Officer + Medium Mortar)
|
BUF Forces
Armoured Car (HMG)
|
HMG Squad 1
|
HMG Squad 2
|
AT Gun + 3 crew
|
Rifle Squad (6 men)
|
Rifle Squad (6 men)
|
Command (officer, 3 SMGs, Medic)
|
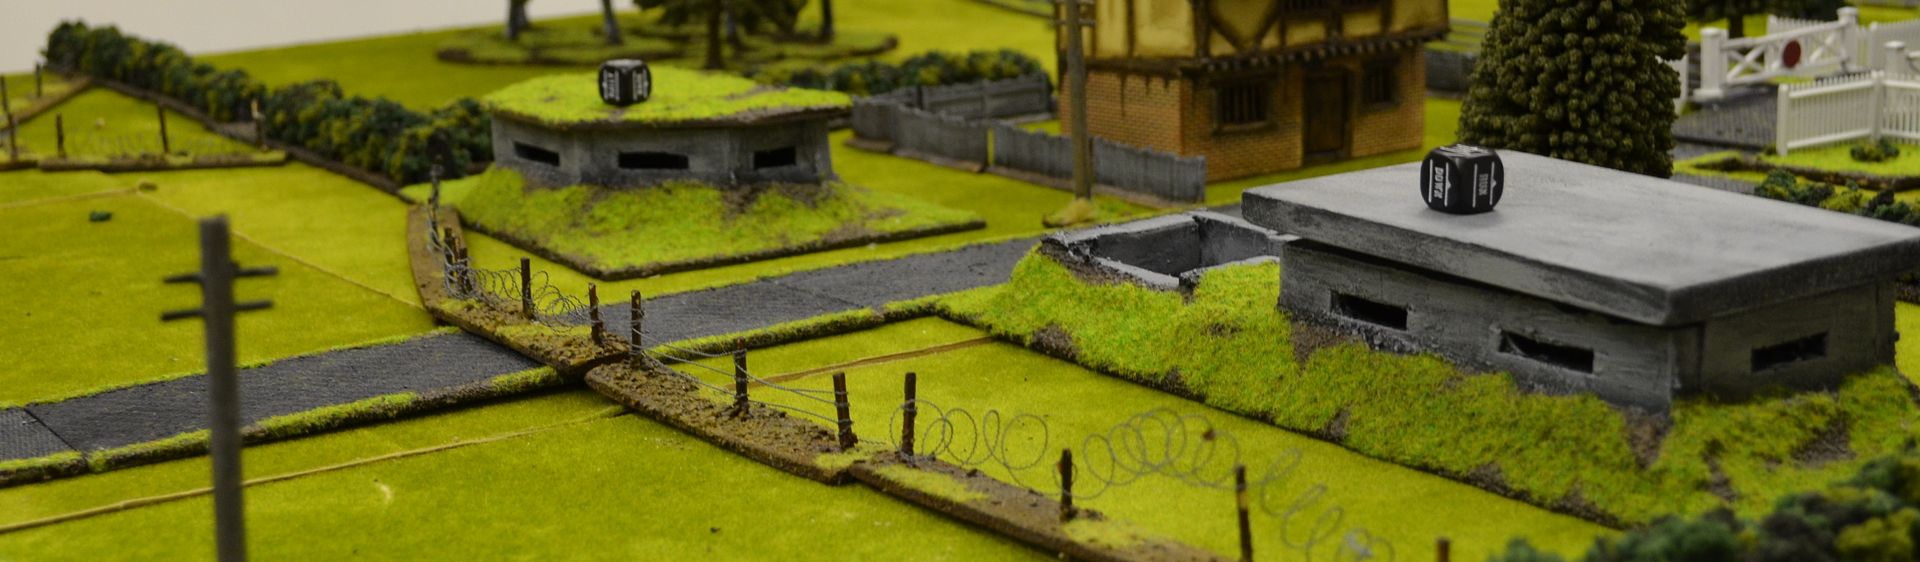
The following picture illustrates where these hidden troops
are.
You can see from the picture that I have used some barbed
wire terrain pieces. These were constructed years ago but I need to tidy them
up in the coming days so I’ll put together a tutorial then.
Given Matt arrived before Mark we kicked off with Matts
vehicles and troops pushing up the right hand road. Mark would enter from the
left.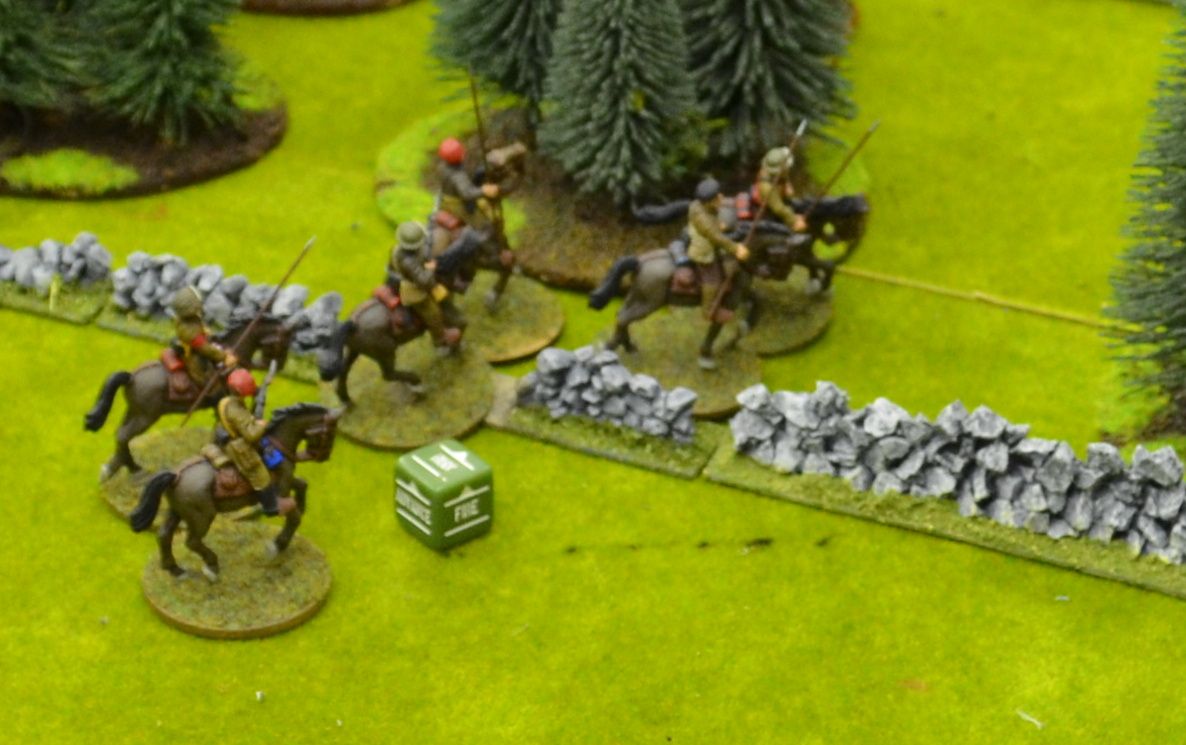 |
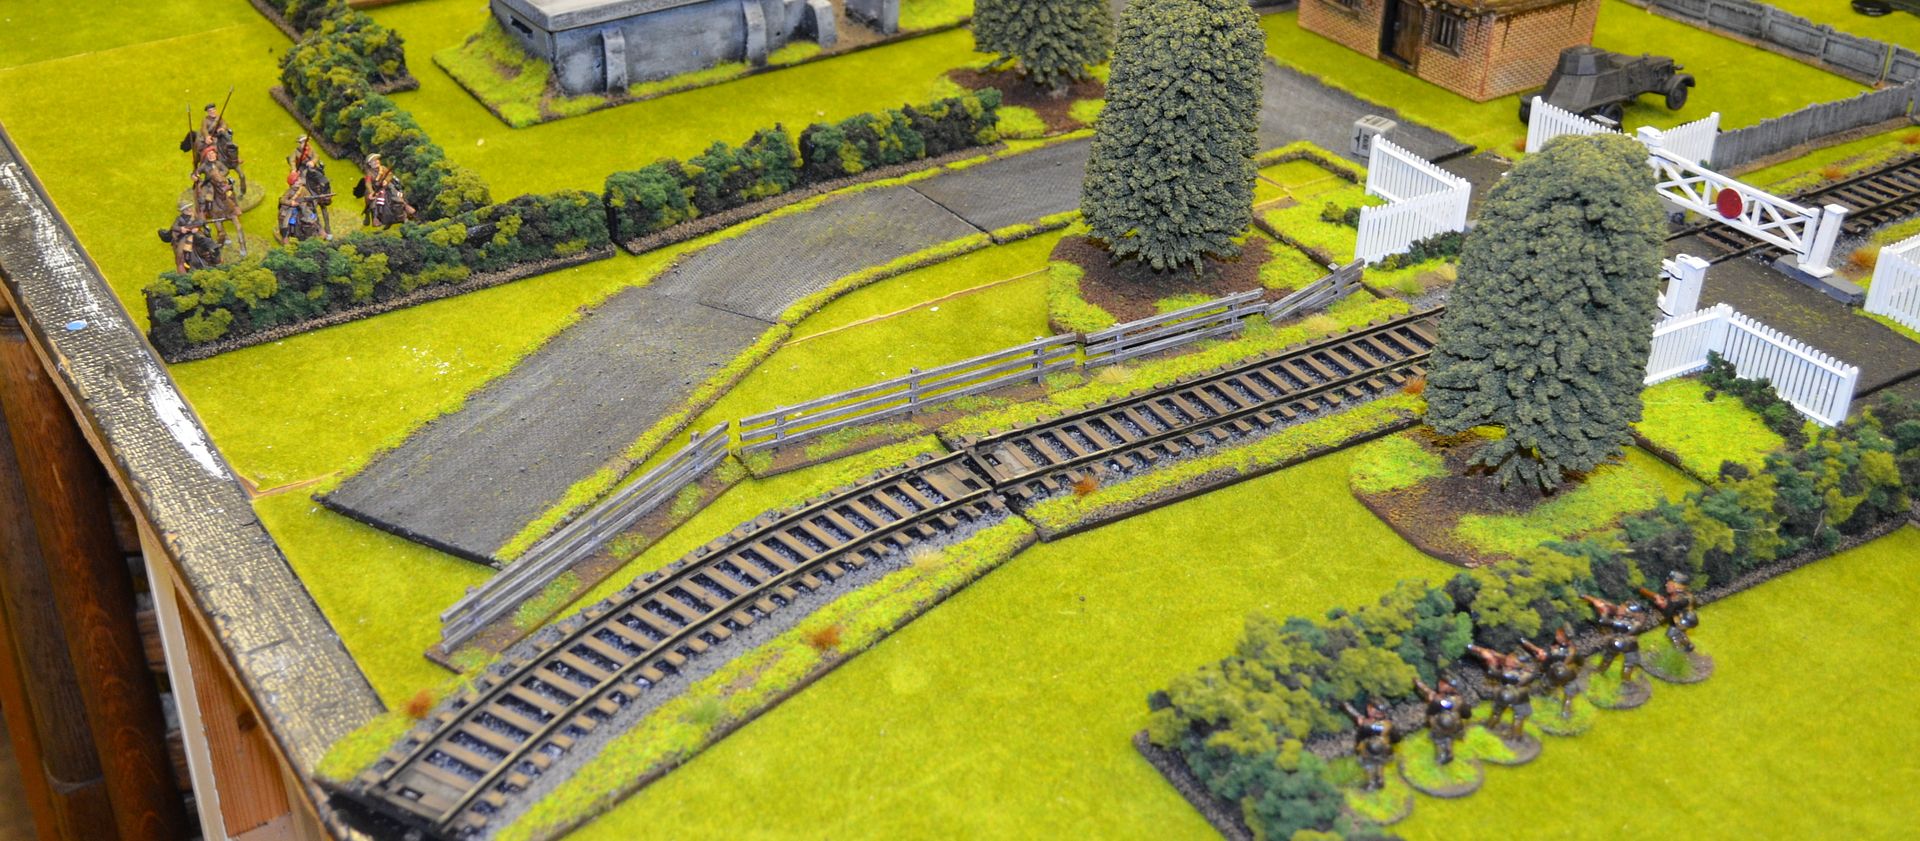
| The British Cavalry Scouts approach |
 |
| The defensive positions are all quiet - what awaits. The League players have no idea |
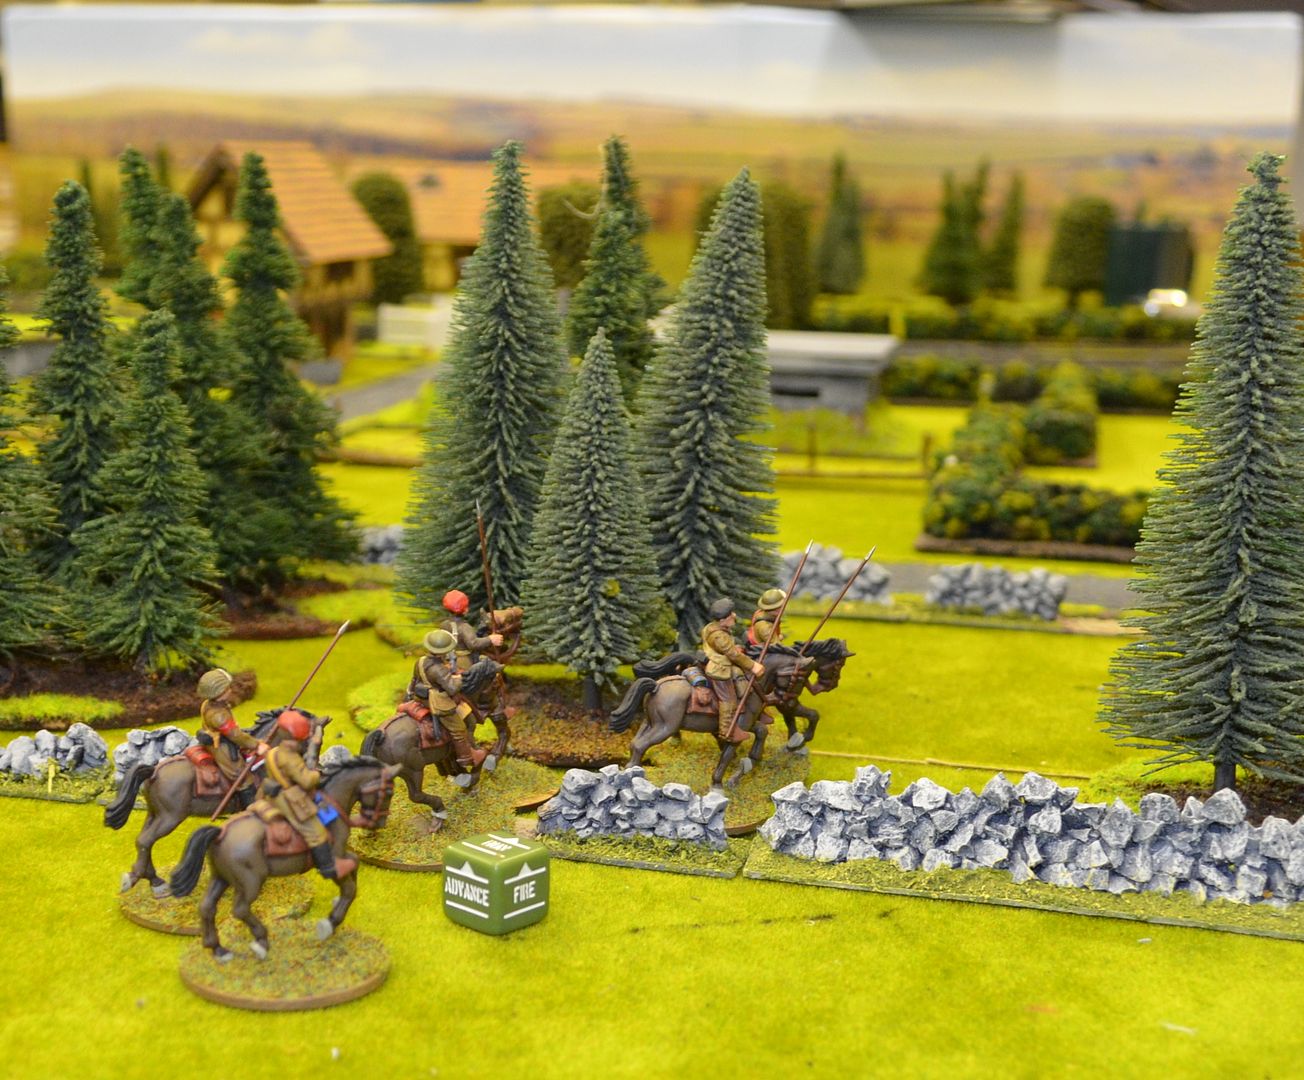 |
| The horsemen carefully enter the woods |
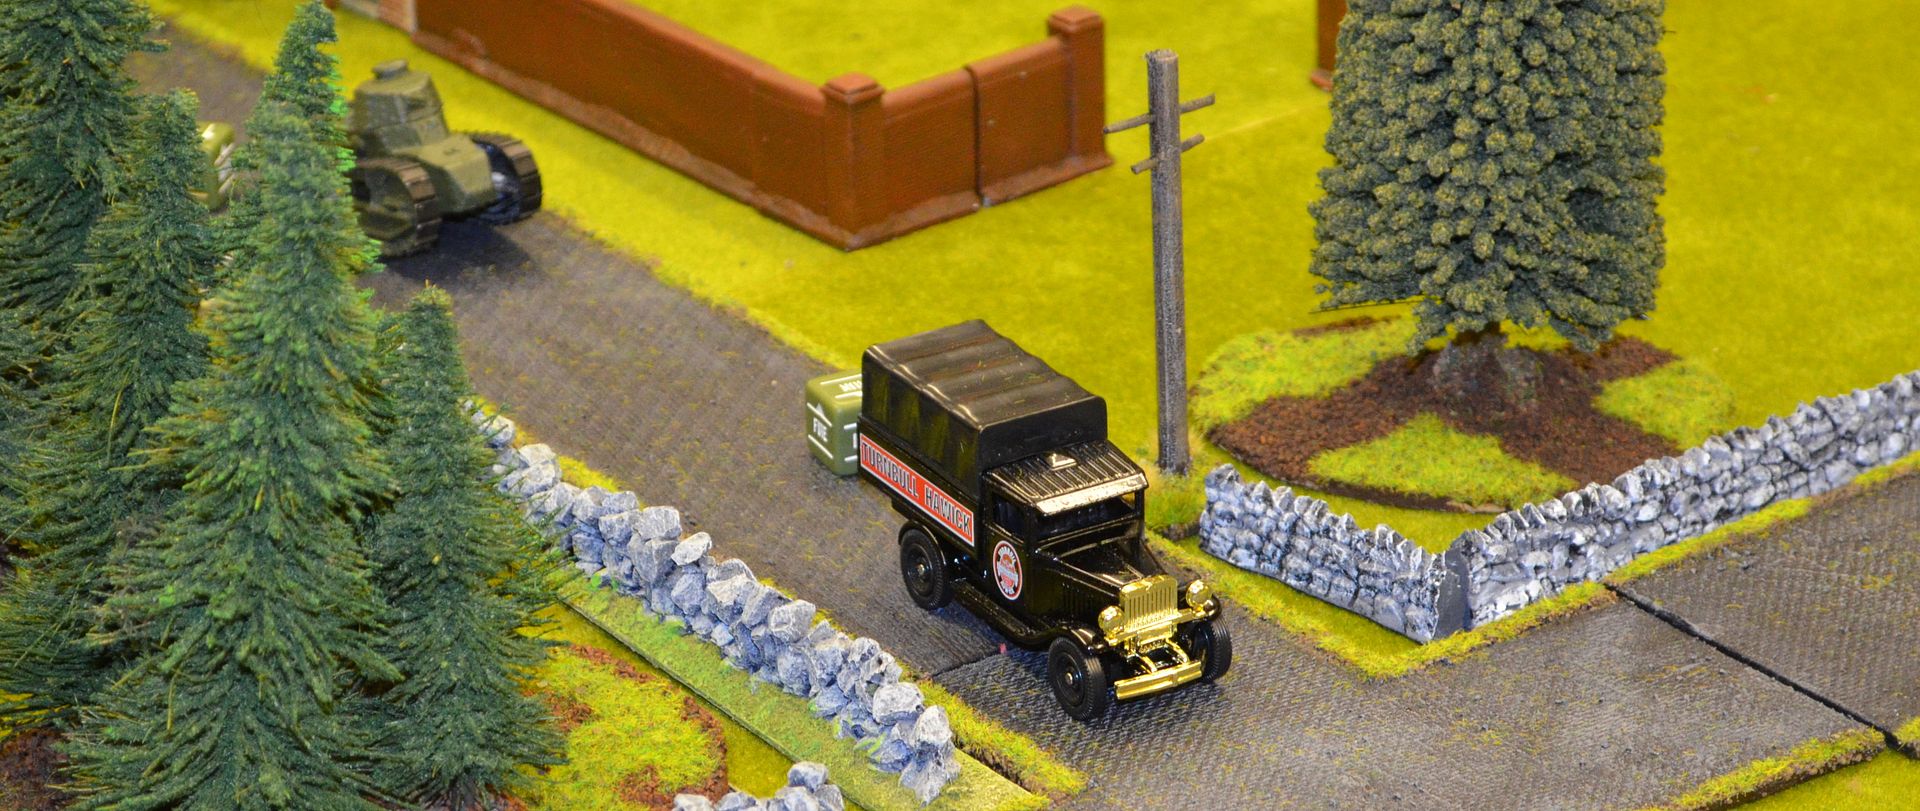 |
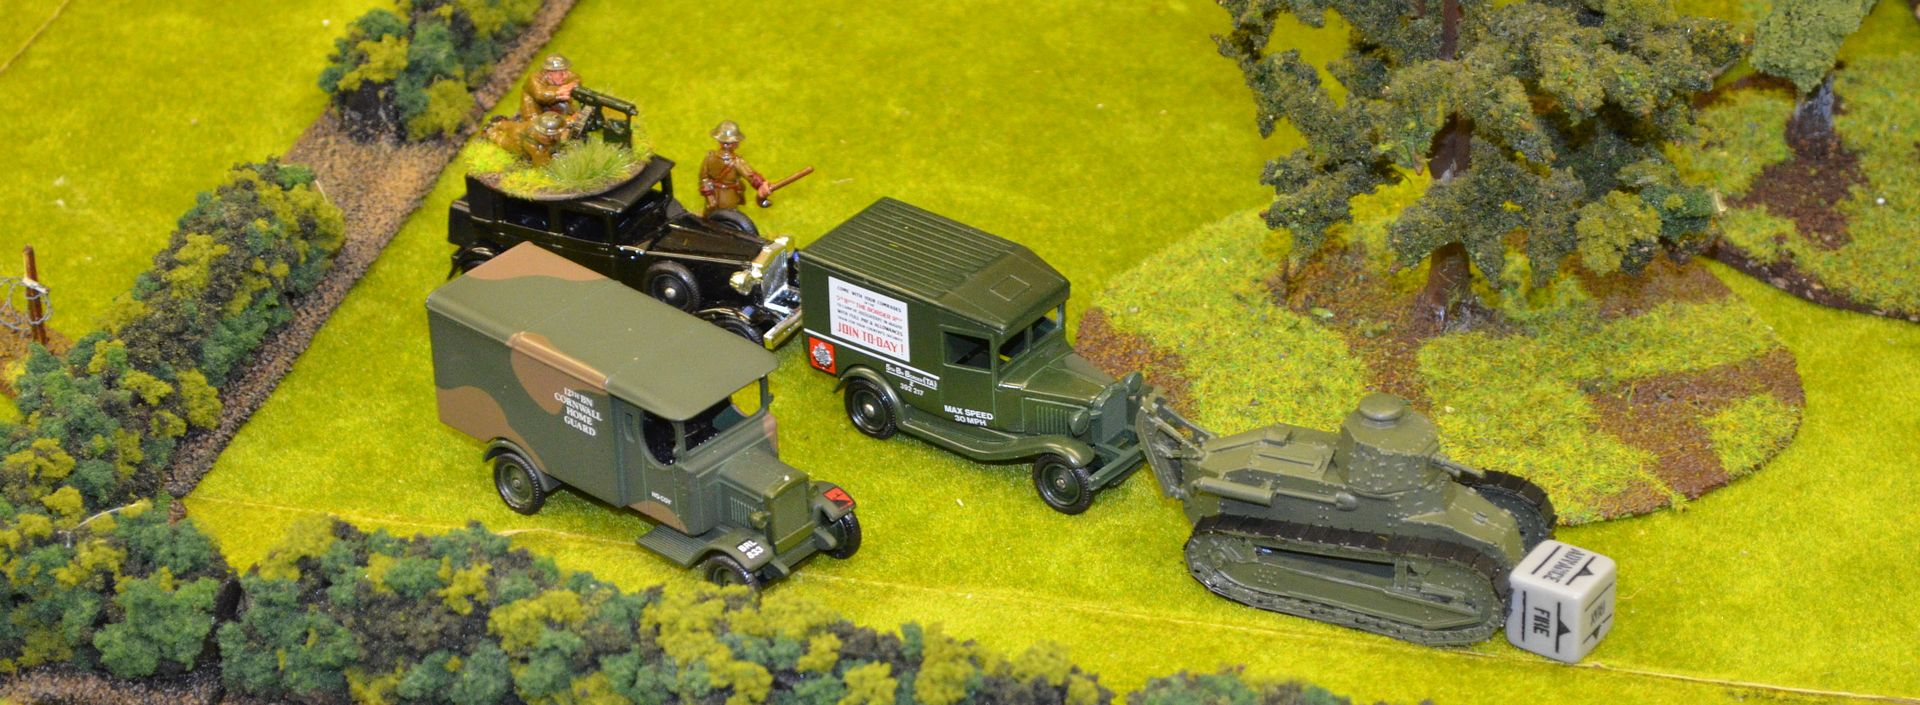
| The League Infantry scoot along the roads in their commandeered transport |
 |
| All hell is let loose as the BUF HMGs in the Pillboxes let rip - first four rounds of fire to no affect - but it soon changed |
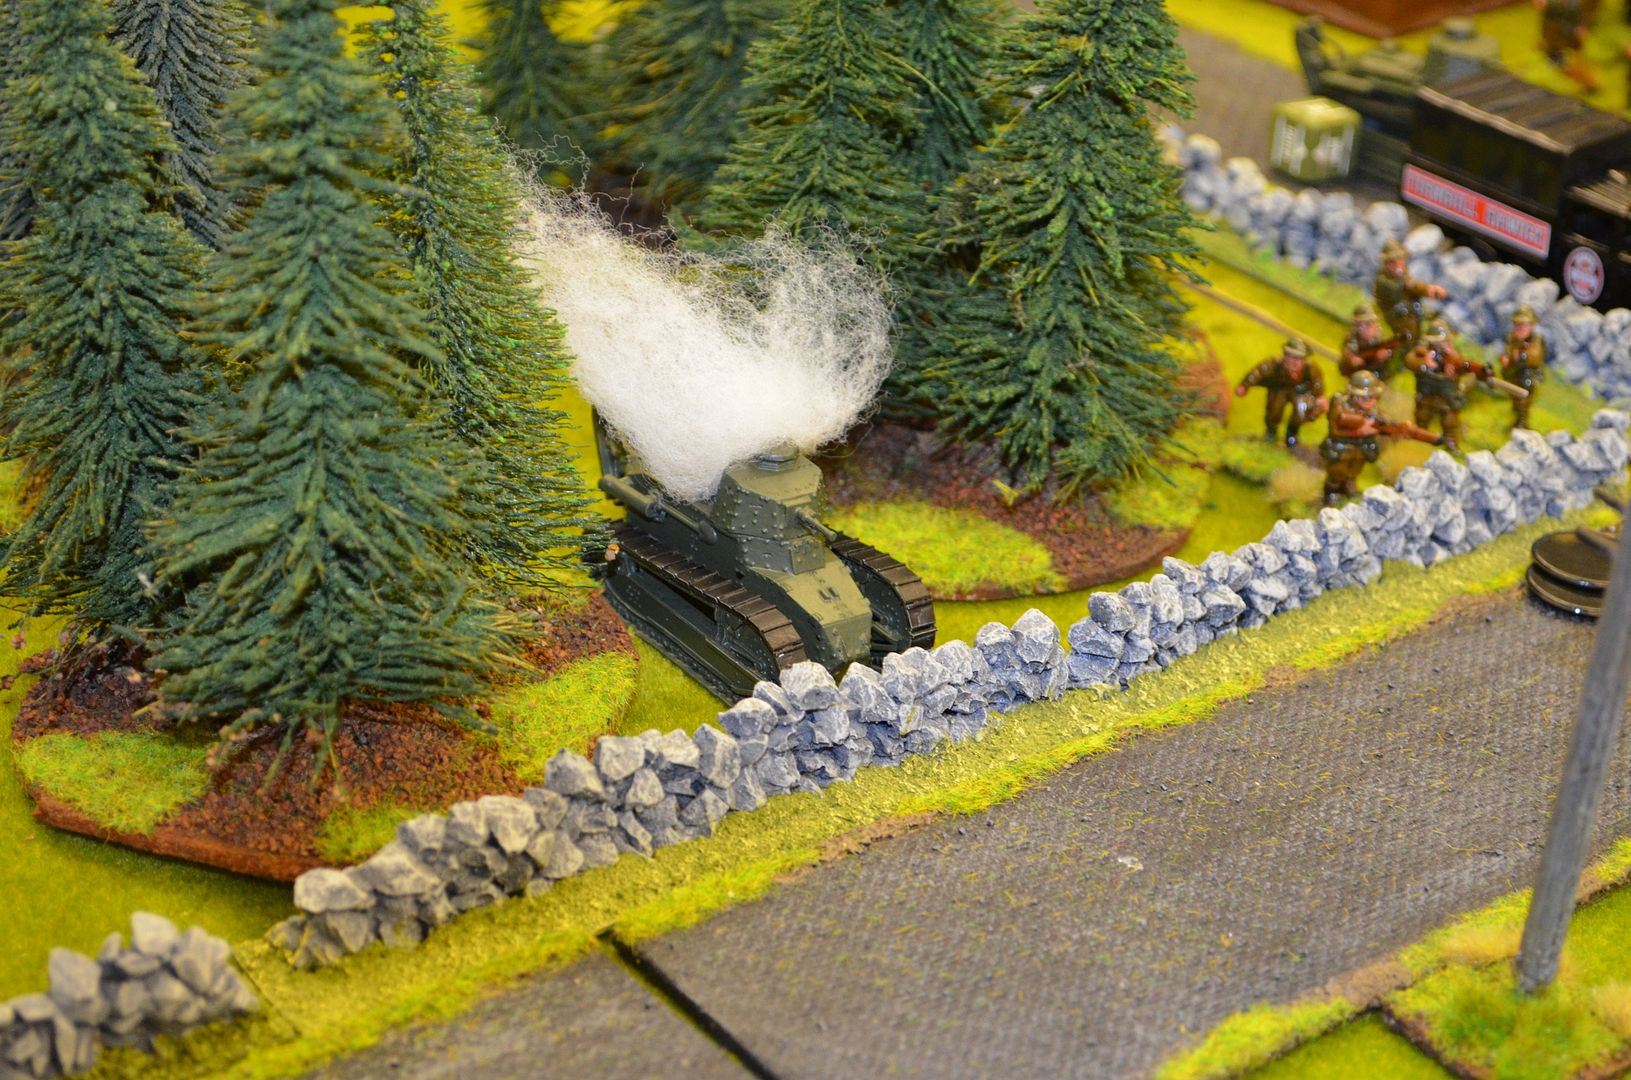 |
| ASA the Leagues armour moved up the AT gun opened fire in Ambush mode - BLAM - first brew of the day ! |
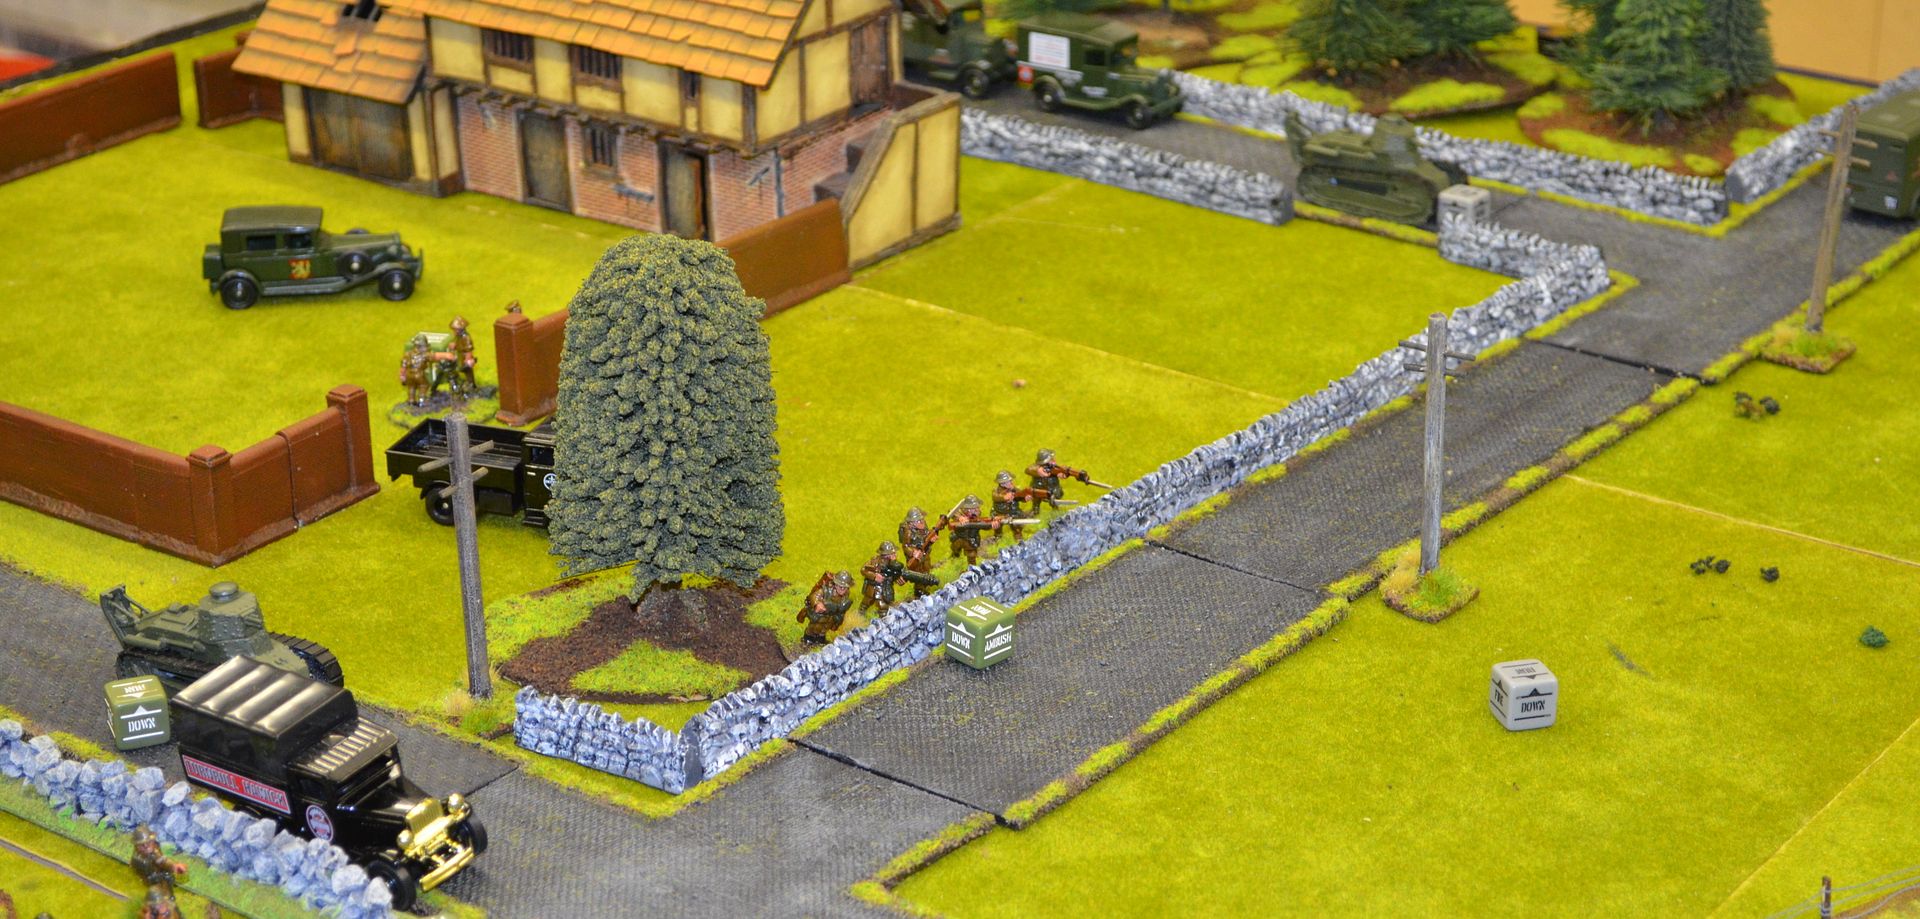 |
| Dismounting from their transport the Infantry take shelter behind the wall and begin to pour fire into the bunker. the mortar (just inside the farmyard...sights in on the bumnker |
 |
| Marks forces arrive on the left hand side and whizz up the road |
 |
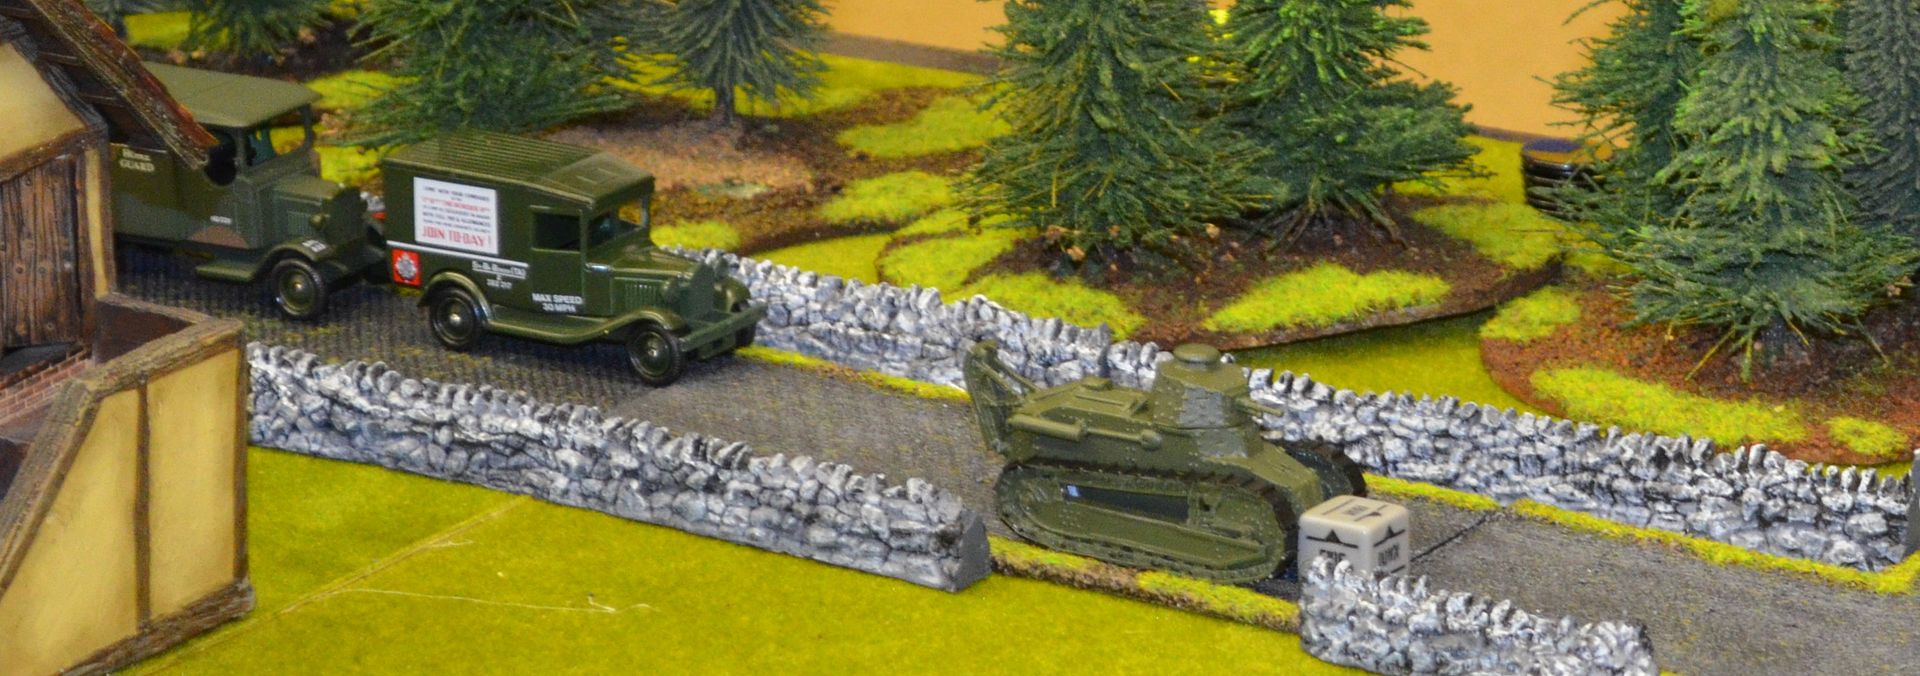
| The tanks soon make their way through the barb wire and into the field beyond |
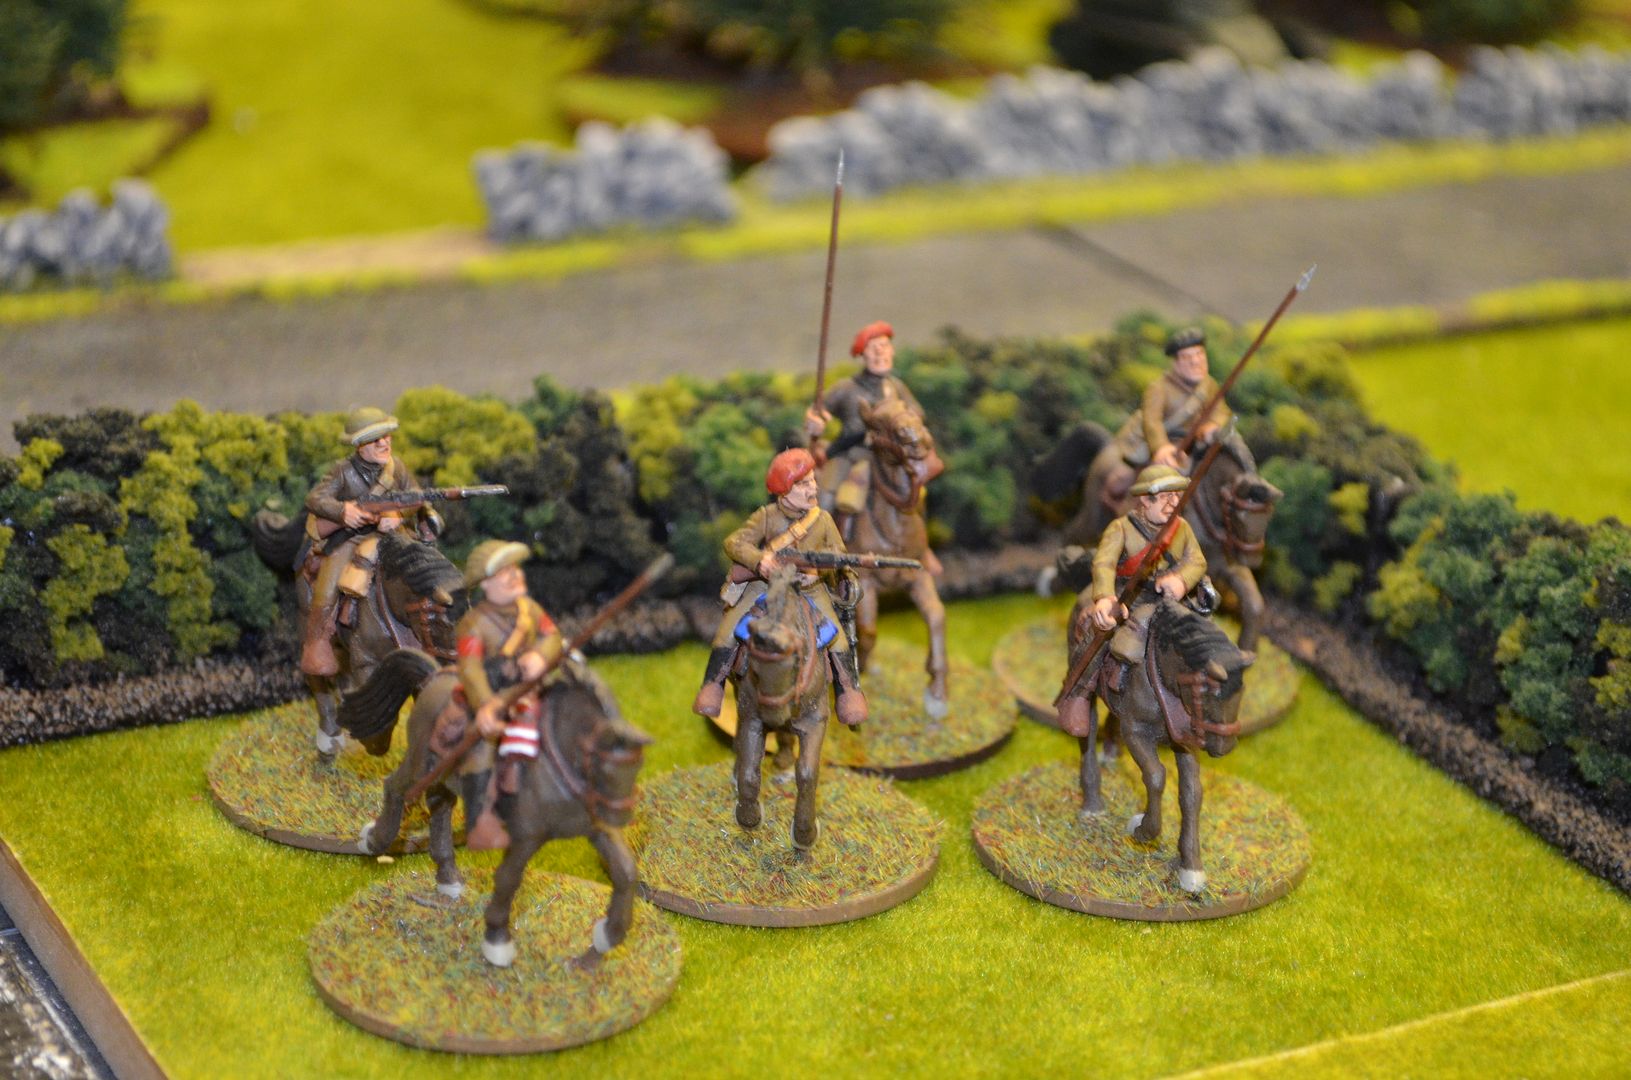 |
| Over beechers brook,,,the valiant six rode on |
 |
| Advancing up the table - where were the defenders... |
 |
| Booo...& Boom the BUF armoured car ambushes the lead tank immobilising the tracks, The crew panicked and fled the vehicle |
 |
| Onward rode the six into a hail of bullets |
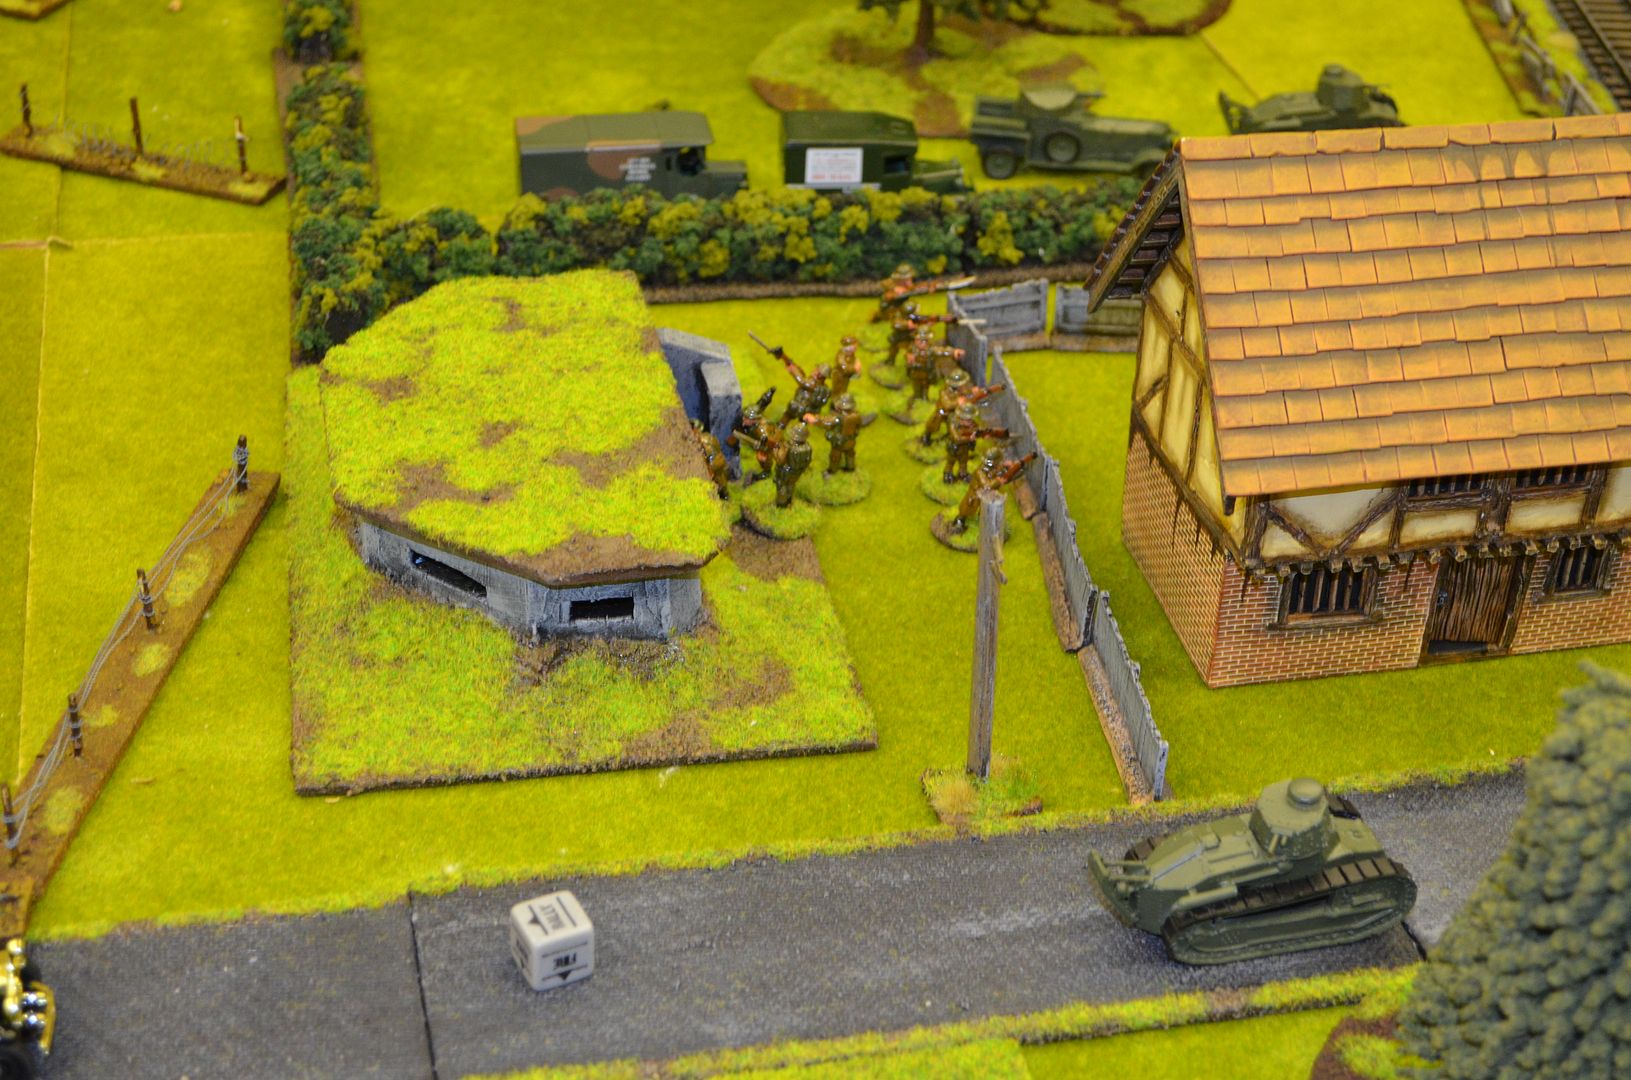 |
| First bunker overrun by league troops |
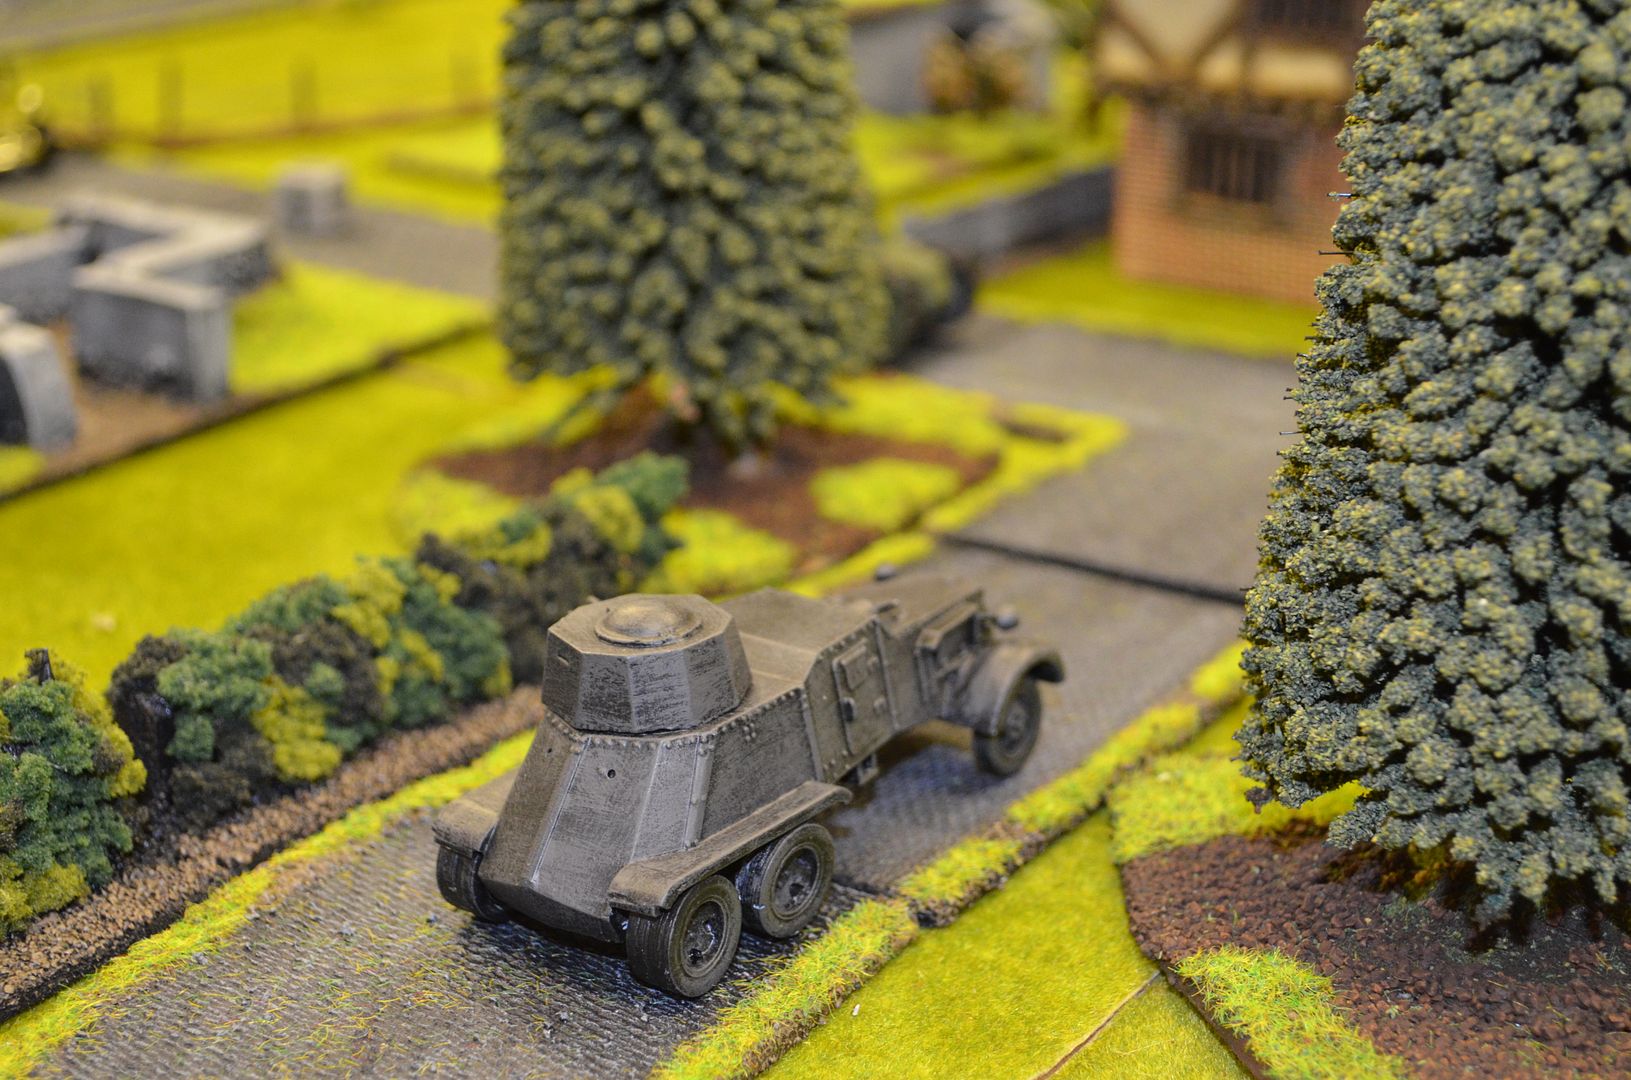 |
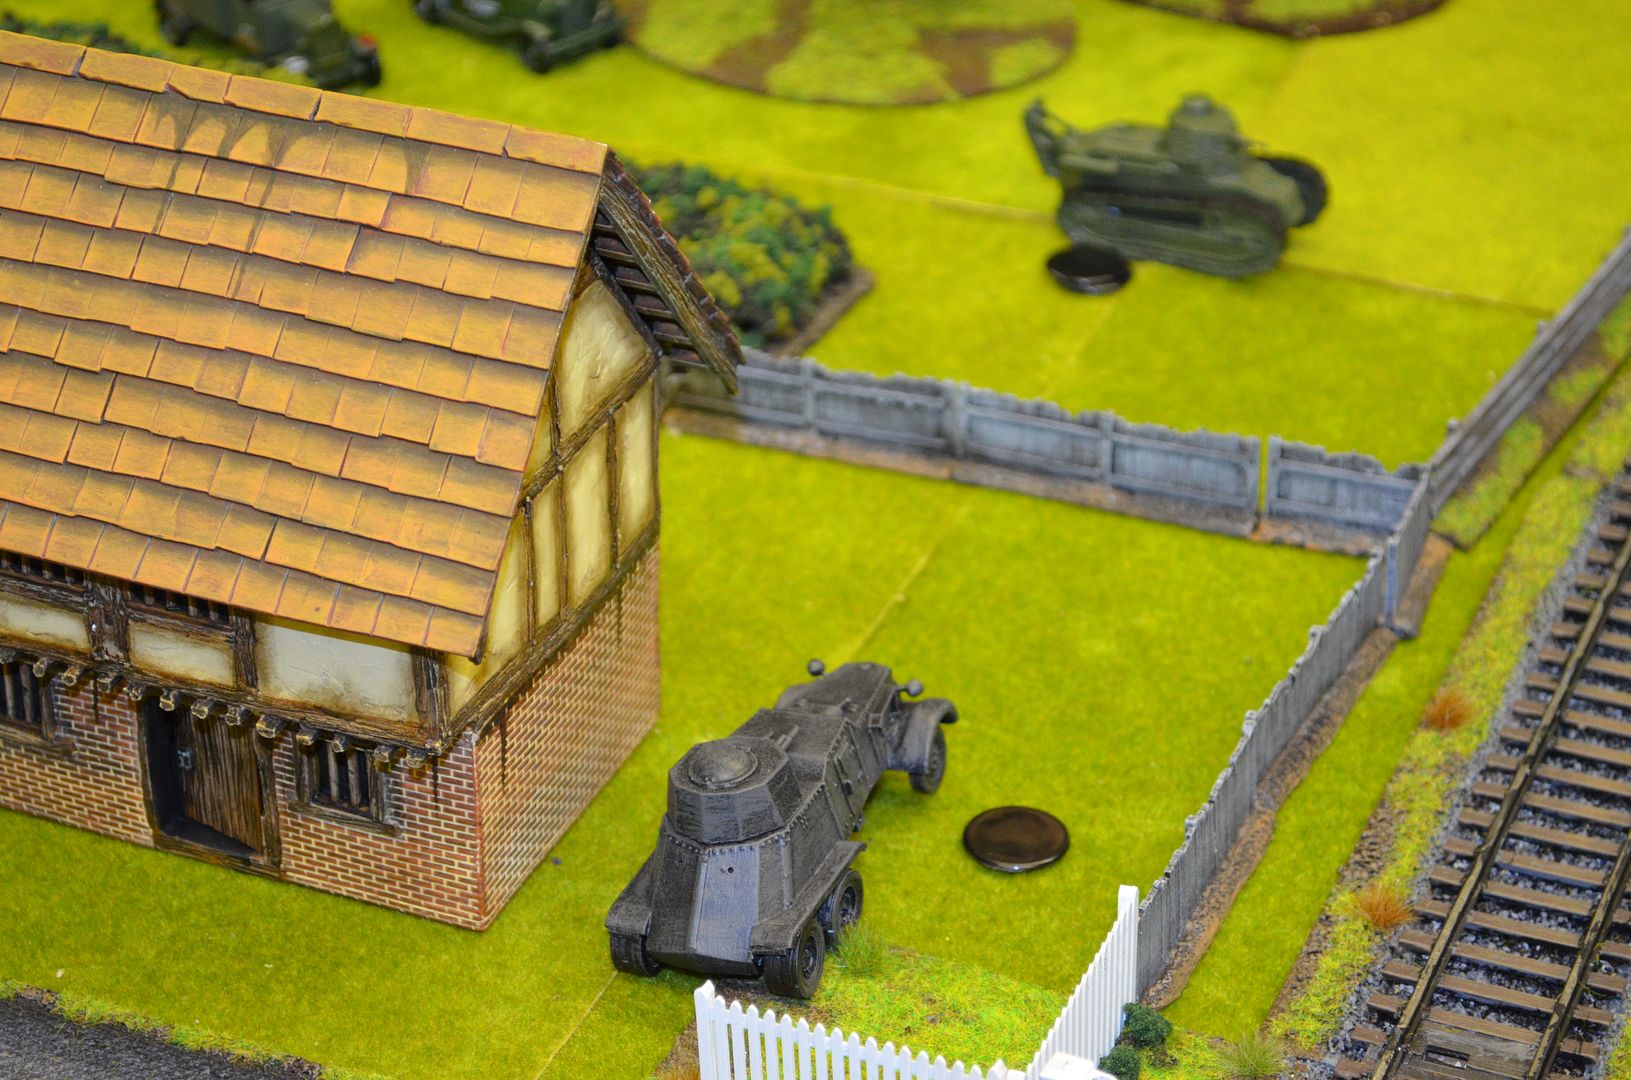
| Time for a sharp getaway for the BUF armour (now known as the stealth car) |
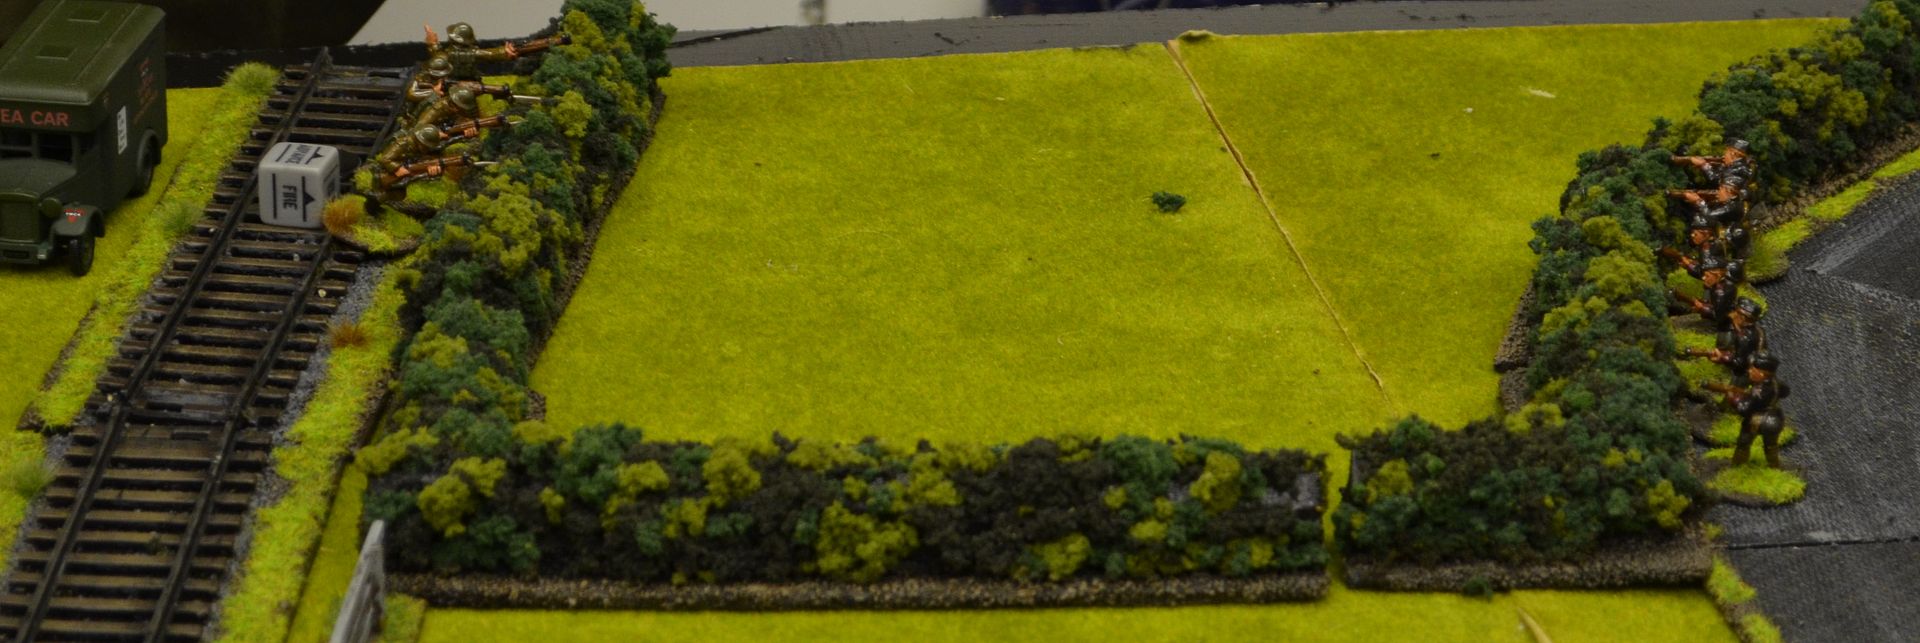 |
| League Infantry engage the right hand flank - a hail of fire from both sides with the BUF victorious |
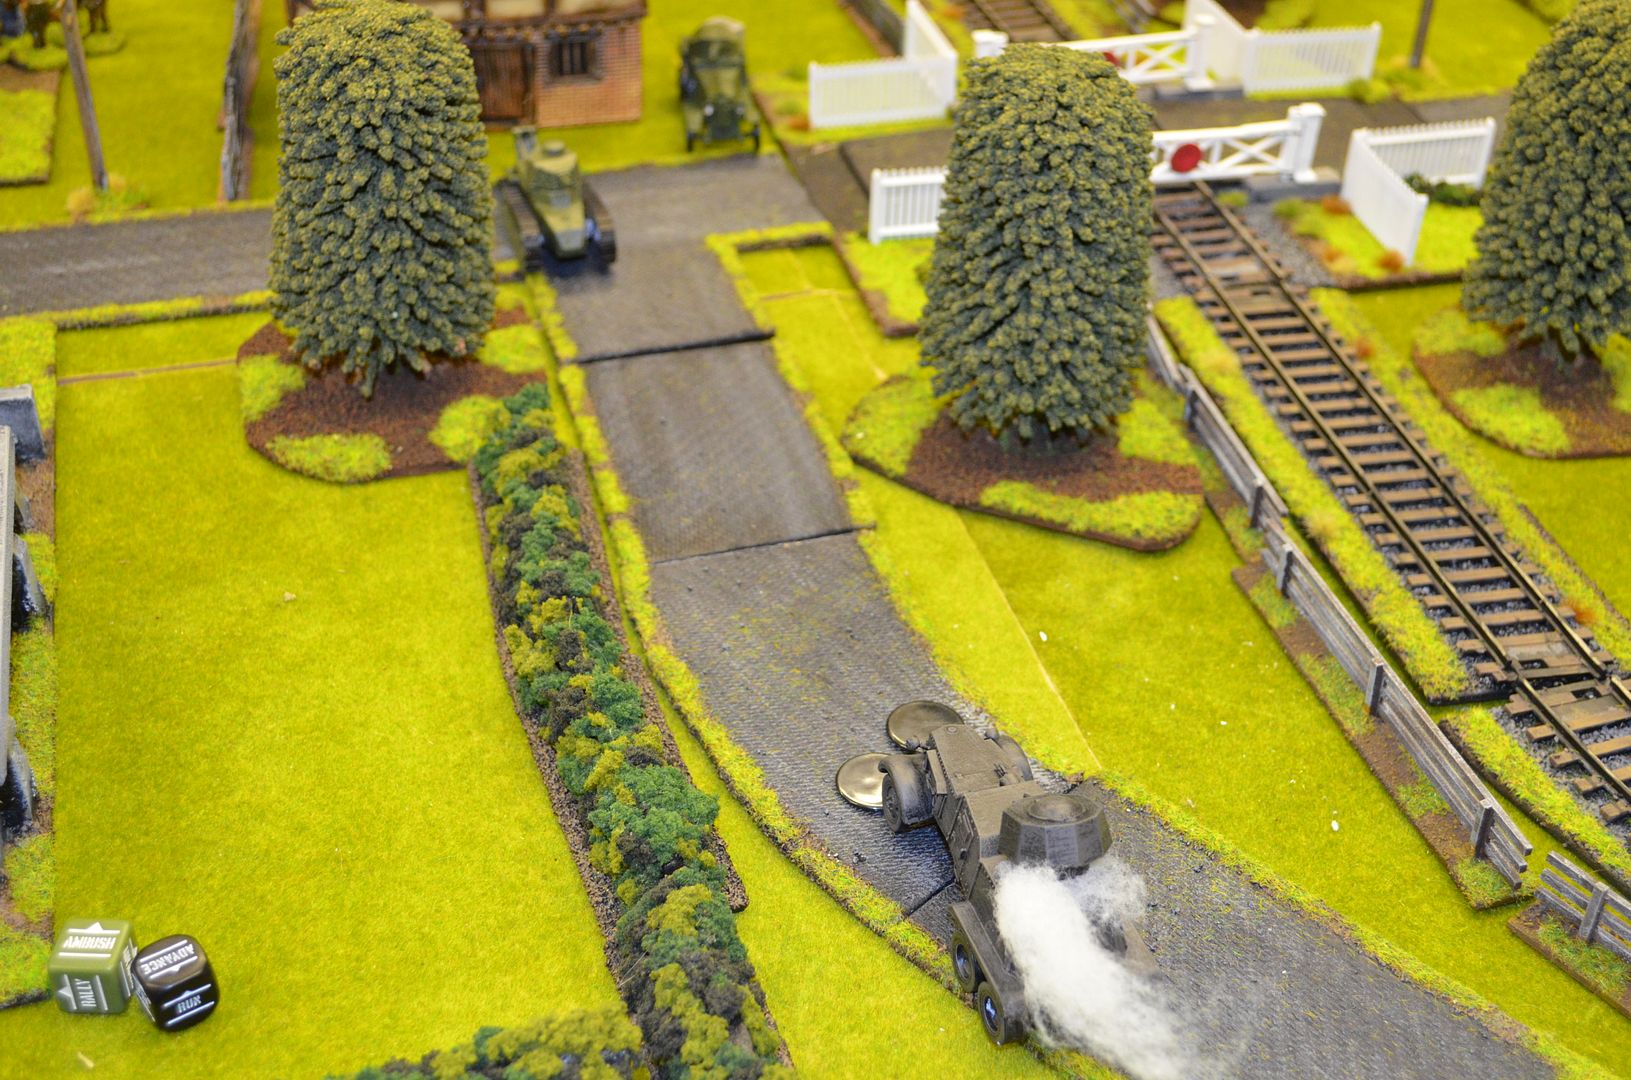 |
| The runaway was not so good as the League tank and armoured car ganged up |
 |
| The final assault on the command bunker |
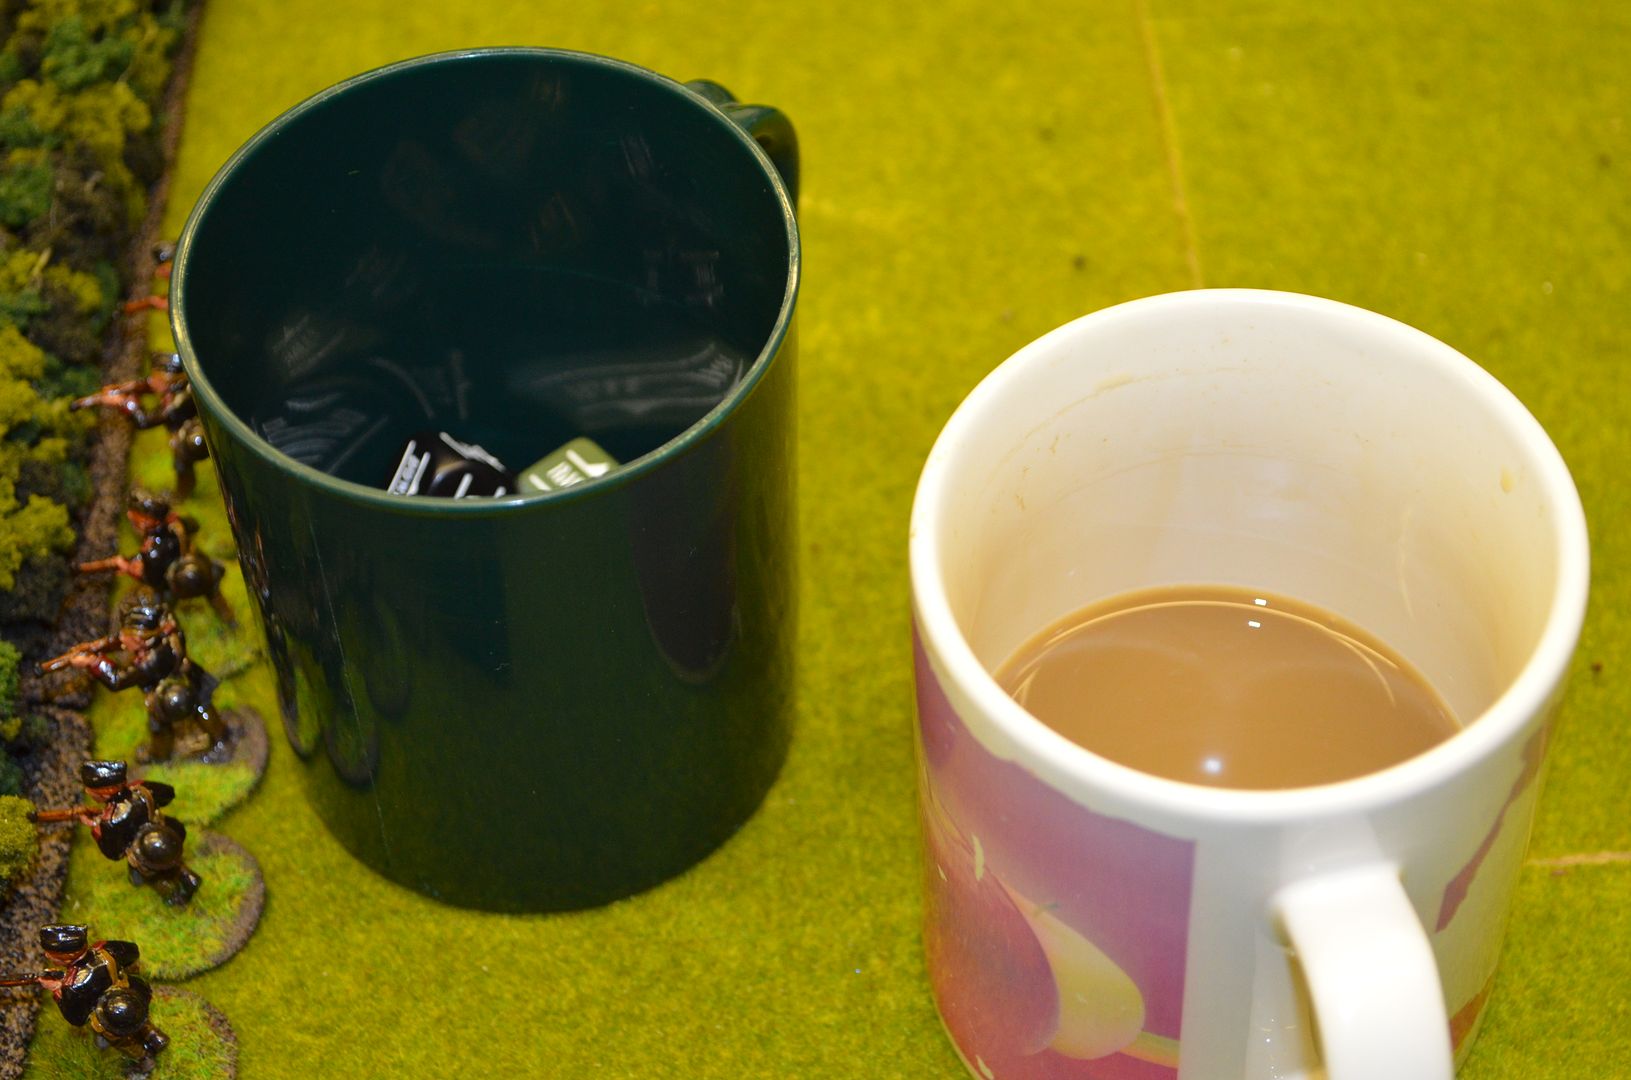 |
| What ever you do don't dip your fingers in the tea to find a dice - I did - TWICE ! |
In summary. The League forces won a hard fight and
casualties were high on both sides.
The tables below show what survived and what didn’t
Grey
|
Green
|
Rolls Royce Armoured Car
|
Machine Gun armed Light Tank - DESTROYED
|
Machine Gun Light Tank IMMOBILISED & CREW PANICKED
|
Light AT Gun armed Tank
|
Rifle Squad + LMG (6 men) + Truck
|
Rifle Squad + LMG (6 men) + Truck DESTROYED
|
Rifle Squad (6 men) + Truck DESTROYED
|
Mounted Rifle Squad (6 men) DESTROYED
|
Rifle Squad (6 men) + Truck
|
Rifle Squad (6 men) + Truck DESTROYED
|
Platoon Command (Officer, Medic + MMG) + Transport
|
Platoon Command (Officer + Medium Mortar)
|
BUF Forces
Armoured Car (HMG) DESTROYED
|
HMG Squad 1
|
HMG Squad 2 DESTROYED
|
AT Gun + 3 crew DESTROYED
|
Rifle Squad (6 men) 3 men killed
|
Rifle Squad (6 men) DESTROYED
|
Command (officer, 3 SMGs, Medic) SURRENDERED
|
Sounds like a good game. Love the glorious terrain, going to have to try and match it.
ReplyDeleteCracking report there and it was good to see the BUF get a licking.. I find this with Bolt Action that there is a high casualty rate
ReplyDeleteLooks and sounds great
ReplyDeleteThis comment has been removed by the author.
ReplyDeleteFine looking game once more!
ReplyDeleteGreat looking game - I like using two sets of Bolt Action dice when the attacker much outnumbers the defender.
ReplyDeleteBad luck with the tea cup...but an excellent batrep, the terrain is really impressive and the photos great...
ReplyDelete