Good Afternoon everybody
As of today the Shed Wars blog achieved half a million hits !
Since its beginning four and a half years ago in December 2011 I have been proud to share my wargaming passion with the rest of the world. Its been great fun and never in my wildest dreams did I expect to achieve this magical number.
I can only thank each and everyone of my followers, visitors and above all those that have visited the 'Shed' for giving me the inspiration to continue. As always I'll publish the stats in my end of year report.
What I can say is that the content I have created across the last few years over a number of genres and projects continues to draw attention and in part it is this 'library' that is driving these numbers of over 15k hits per month.
If you have been following regularly you will know that I am currently reconfiguring my gaming space - the Shed - to create more space for games, terrain building and new projects. Here's hoping that as I move to the next milestone of 1 million you will all continue to join me on my adventures.
Thank you
Eric the Shed
Monday, 25 July 2016
The Shed Extension - part 9
Morning Folks
Its Monday morning and I am still exhausted. I spent all day yesterday on the shed extension - 14 hours straight but I think that porogress has been significant.
The inside is now all clad and insulated.
The walls and ceilings have all been painted
The lighting is up but not connected
......and most importantly the cut through has taken place...albeit not in the place I intended. More on this in a minute.
If you want to go back to the previous post on this build head here...
http://shedwars.blogspot.co.uk/2016/07/the-shed-extension-part-8.html
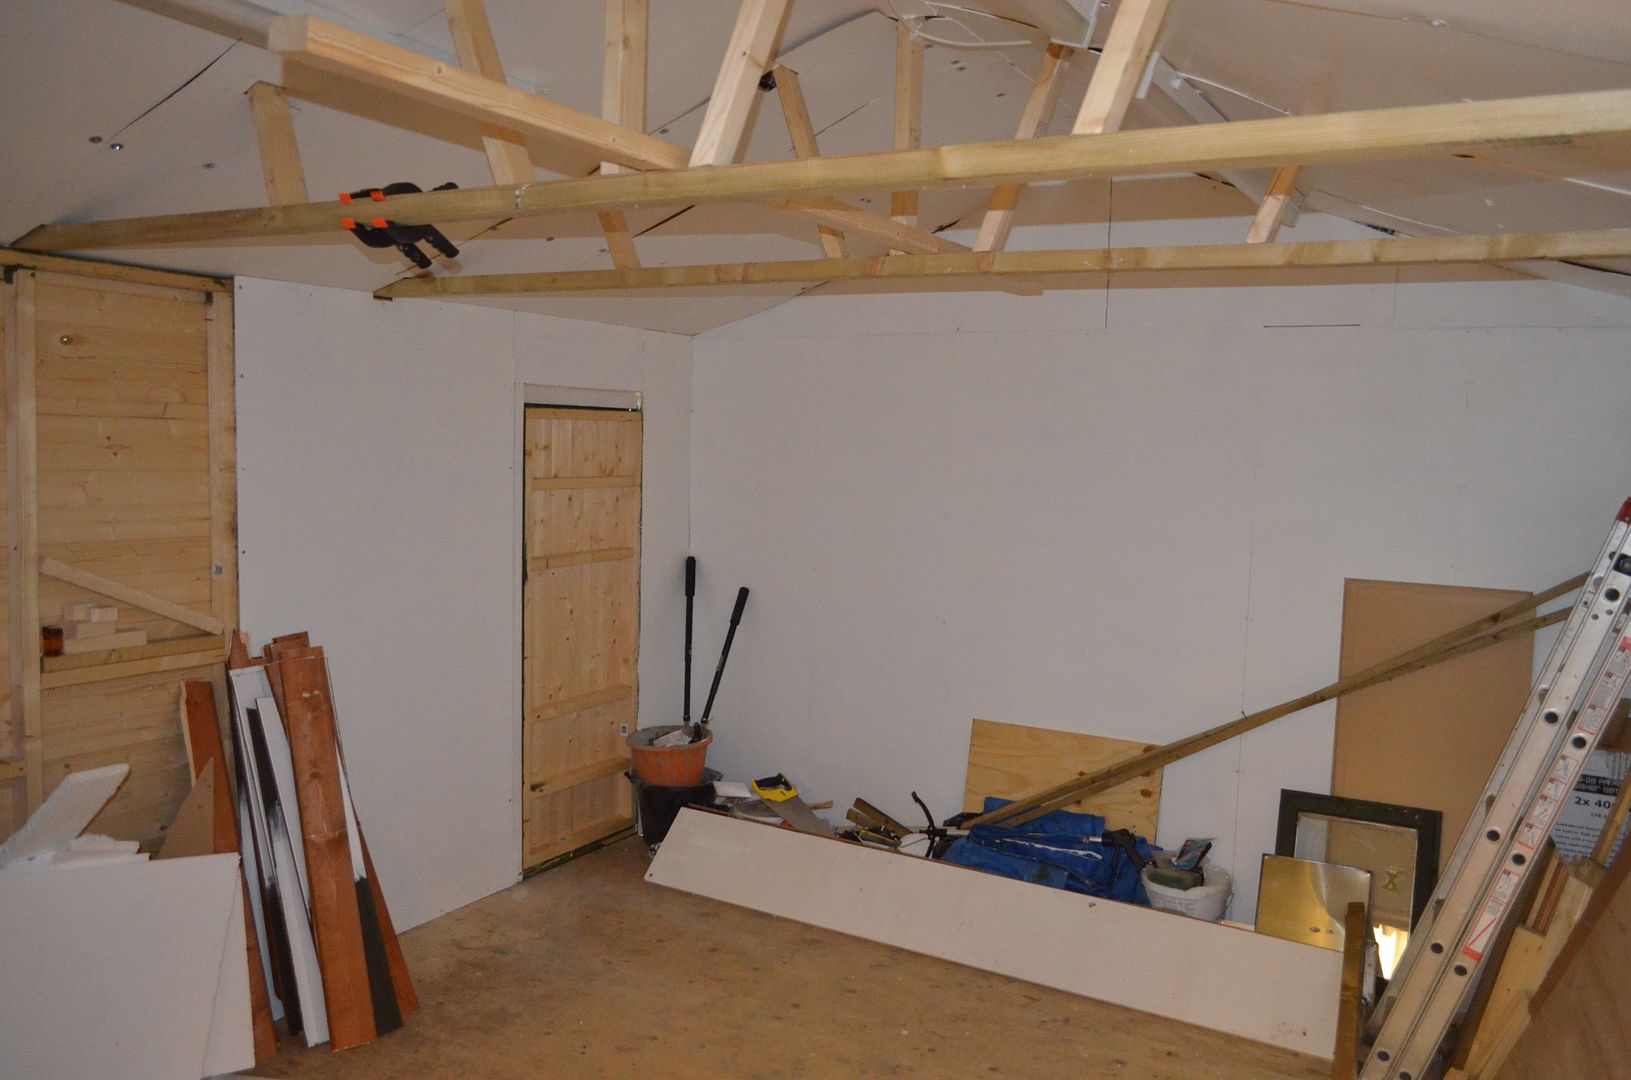
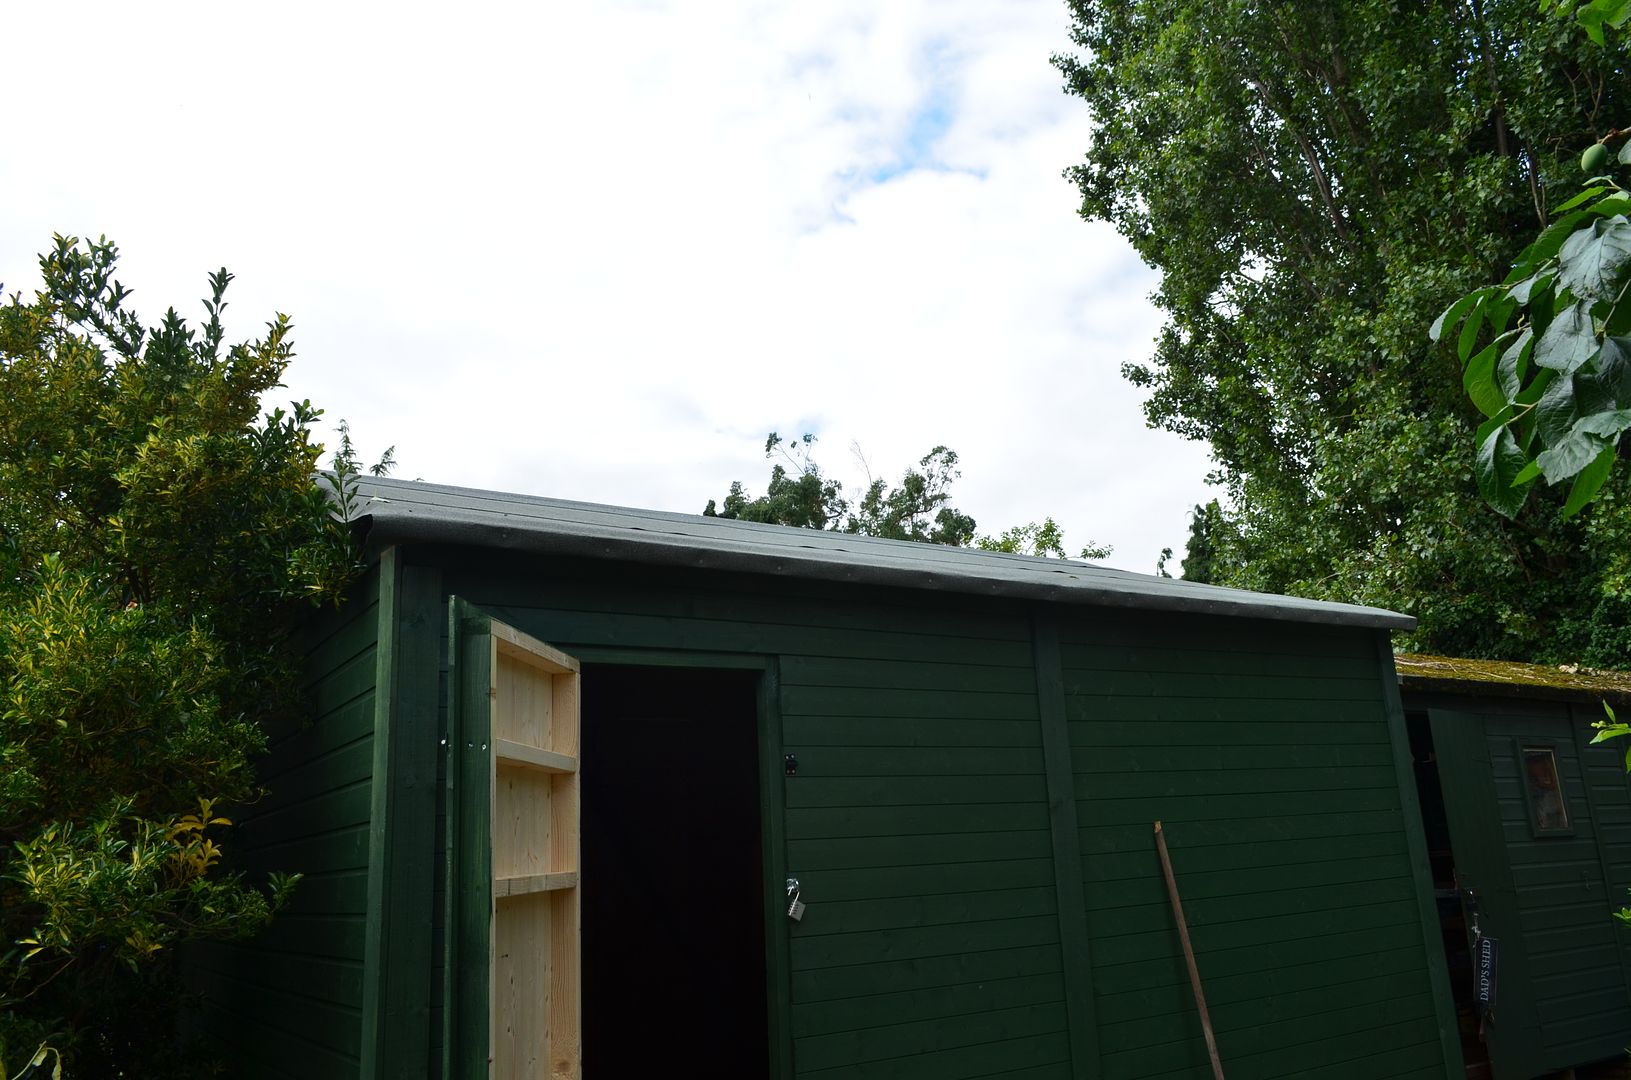
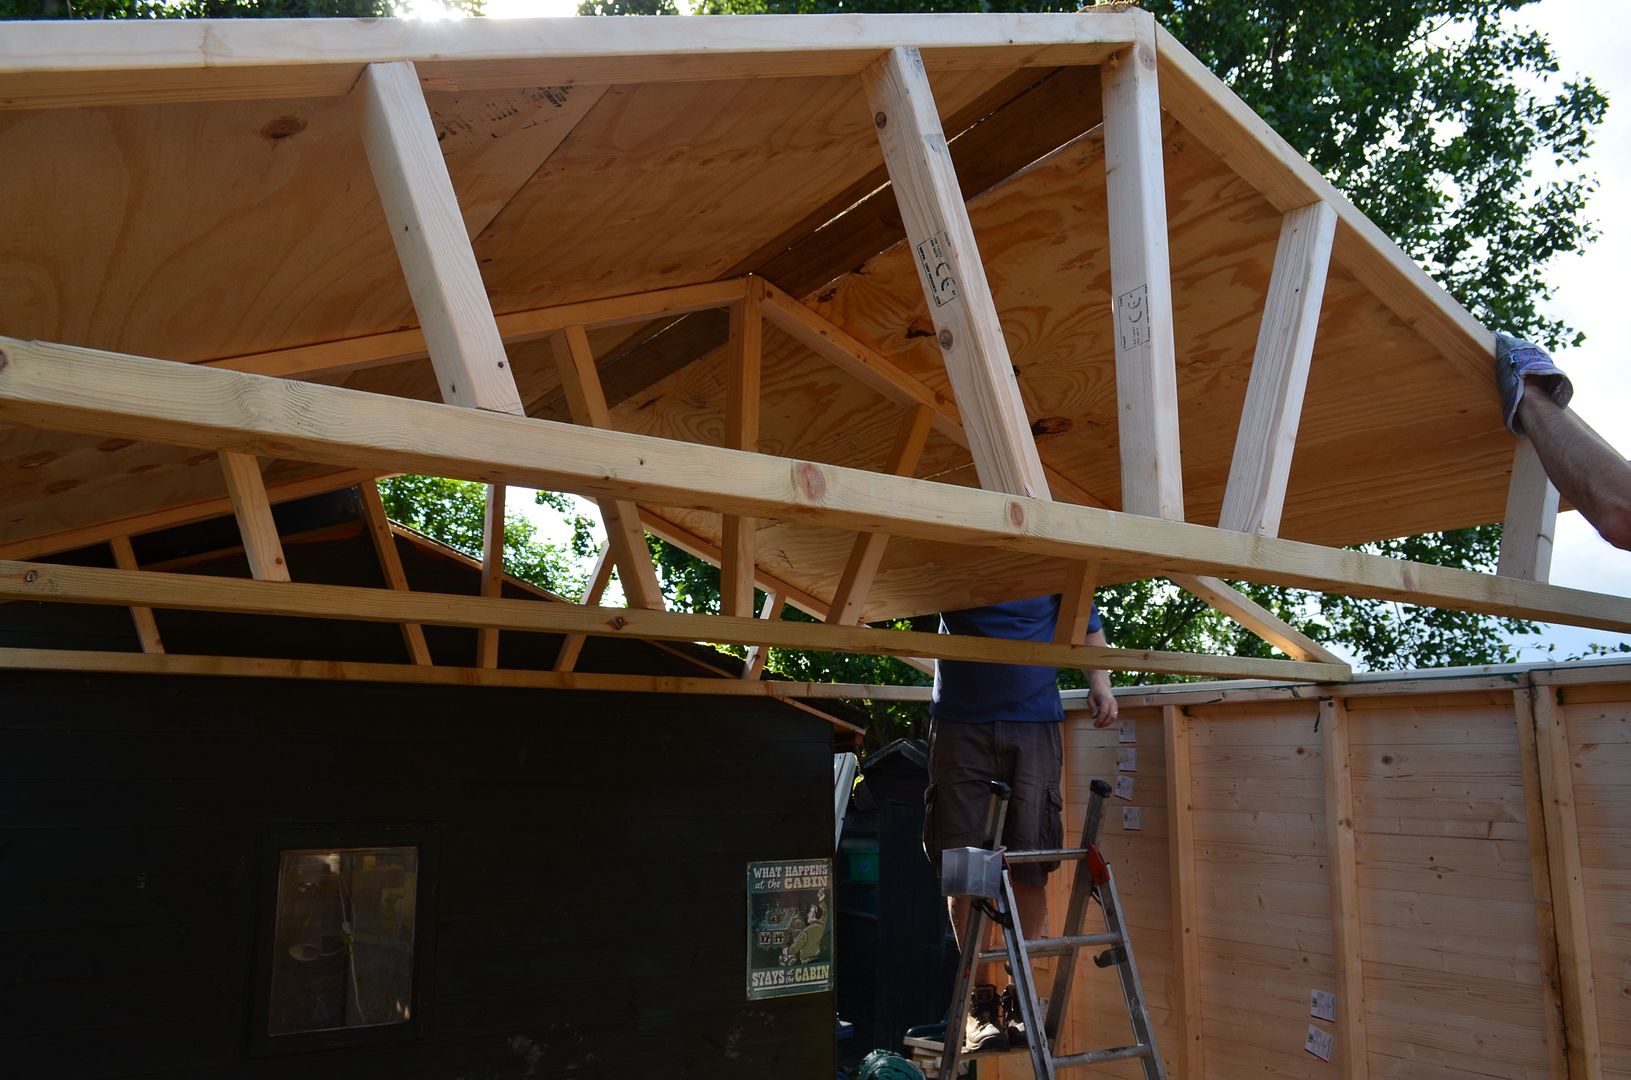
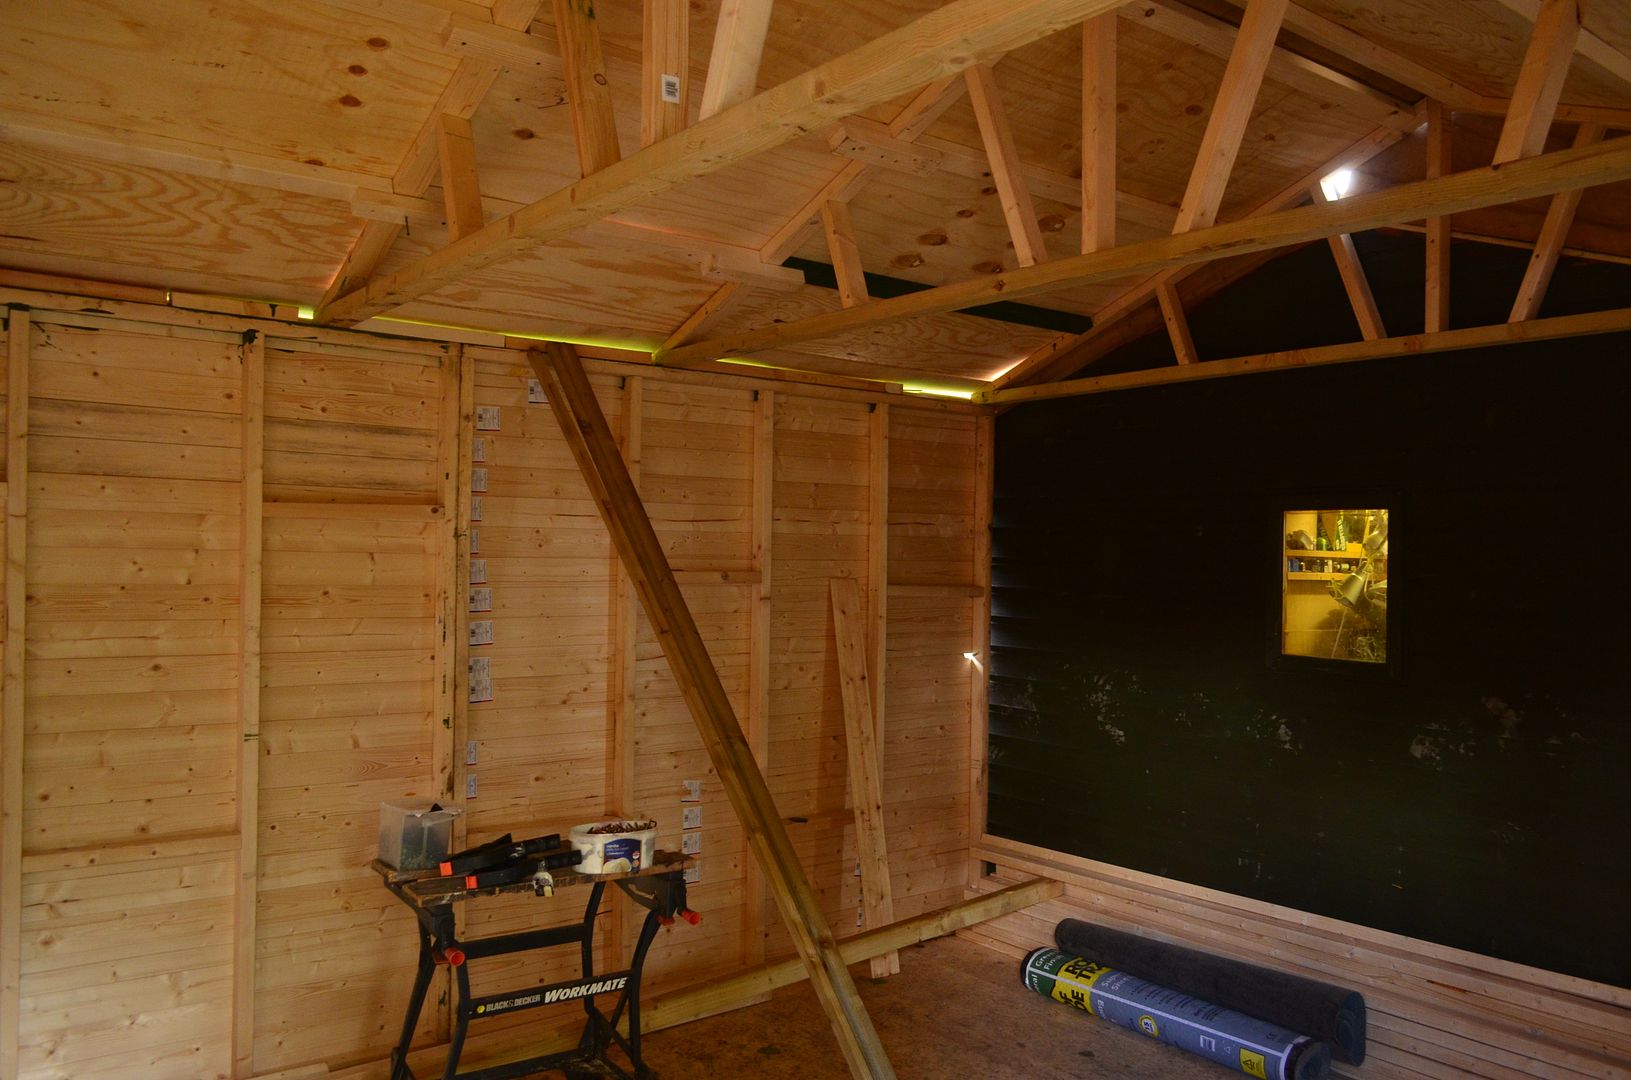
As you can see in the above picture the new cabin is looking clean and white. In both this and the photo below the flourescent tube lights have been installed with the cabling attached. This will be connected probably next weekend
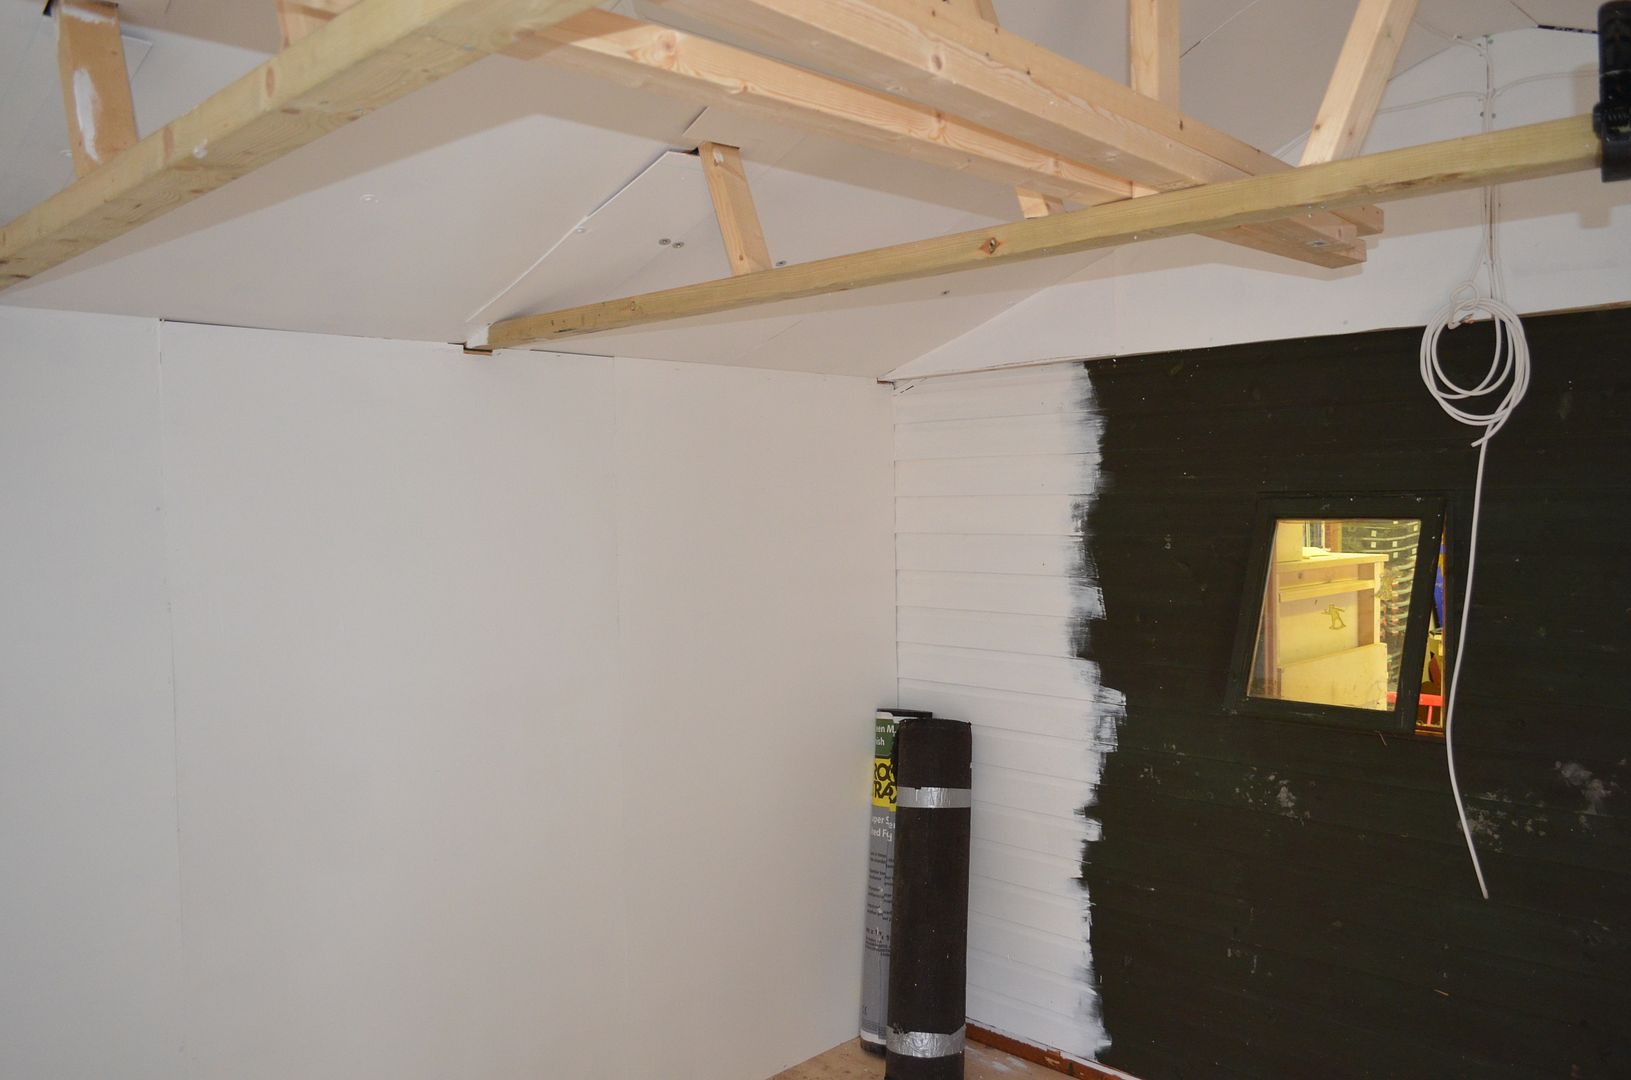
In the photo above you can see where I was intending to cut through. The green painted area. The window will be reclaimed to go on the front of the new shed.This area would need to be supported with extra pillars but on this side of the wall we are ready to go.
However the either side had a very large shelving rack which needed to come down. Clearing this took over 30 minutes and the only place all this lot could be stored was on the table..
With the shelves down deconstruction could begin - cant believe that the crap on the table squeezed into this area.

Once the shelving unit was down I ripped off the hardboard facing and was confronted by the issue that the central roof beam in the middle shed was supported by the two uprights in the middle of the wall. My plan had taken a change of direction.
You can see this dilemma in the picture below. You can also see that the entry between the two sheds now lies to the right rather than the centre. The window has been removed and this space will be filled.
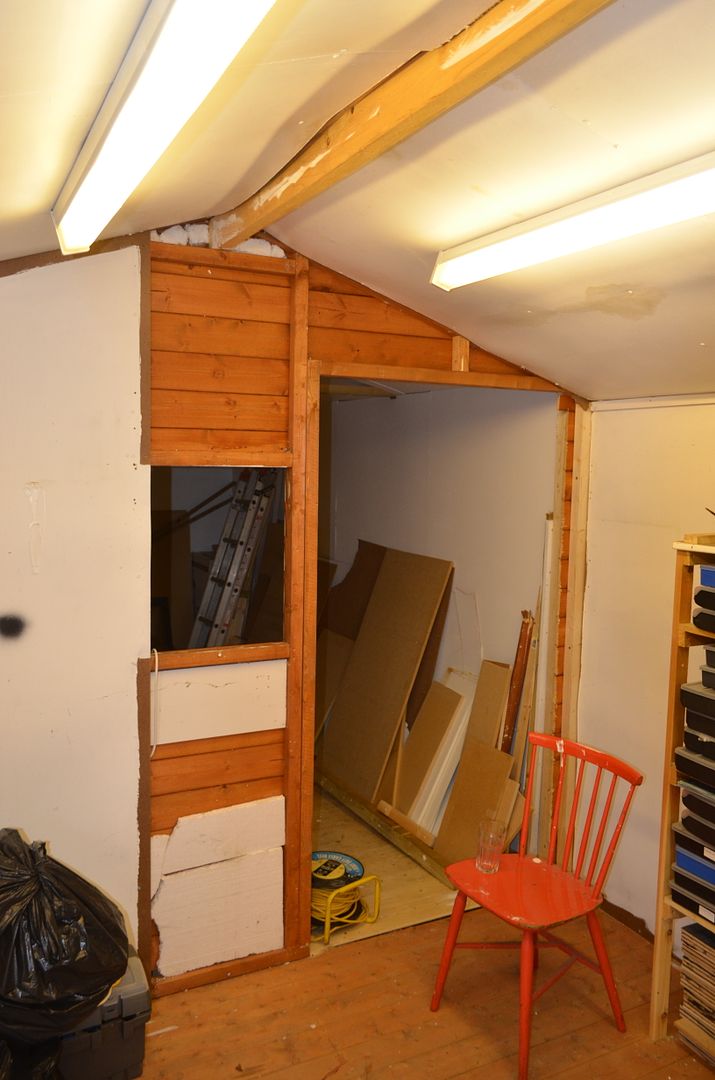
Cutting through was relatively straight forward with a jig saw. There are still some bits needed to be done with framing but otherwise the jobs a good un...
Next up building a SHED WITHIN THE SHED..or where I lose some of this space to Mrs Shed...
part 10 can be found here
http://shedwars.blogspot.co.uk/2016/08/the-shed-extension-part-10.html
Its Monday morning and I am still exhausted. I spent all day yesterday on the shed extension - 14 hours straight but I think that porogress has been significant.
The inside is now all clad and insulated.
The walls and ceilings have all been painted
The lighting is up but not connected
......and most importantly the cut through has taken place...albeit not in the place I intended. More on this in a minute.
If you want to go back to the previous post on this build head here...
http://shedwars.blogspot.co.uk/2016/07/the-shed-extension-part-8.html

As you can see in the above picture the new cabin is looking clean and white. In both this and the photo below the flourescent tube lights have been installed with the cabling attached. This will be connected probably next weekend

In the photo above you can see where I was intending to cut through. The green painted area. The window will be reclaimed to go on the front of the new shed.This area would need to be supported with extra pillars but on this side of the wall we are ready to go.
However the either side had a very large shelving rack which needed to come down. Clearing this took over 30 minutes and the only place all this lot could be stored was on the table..
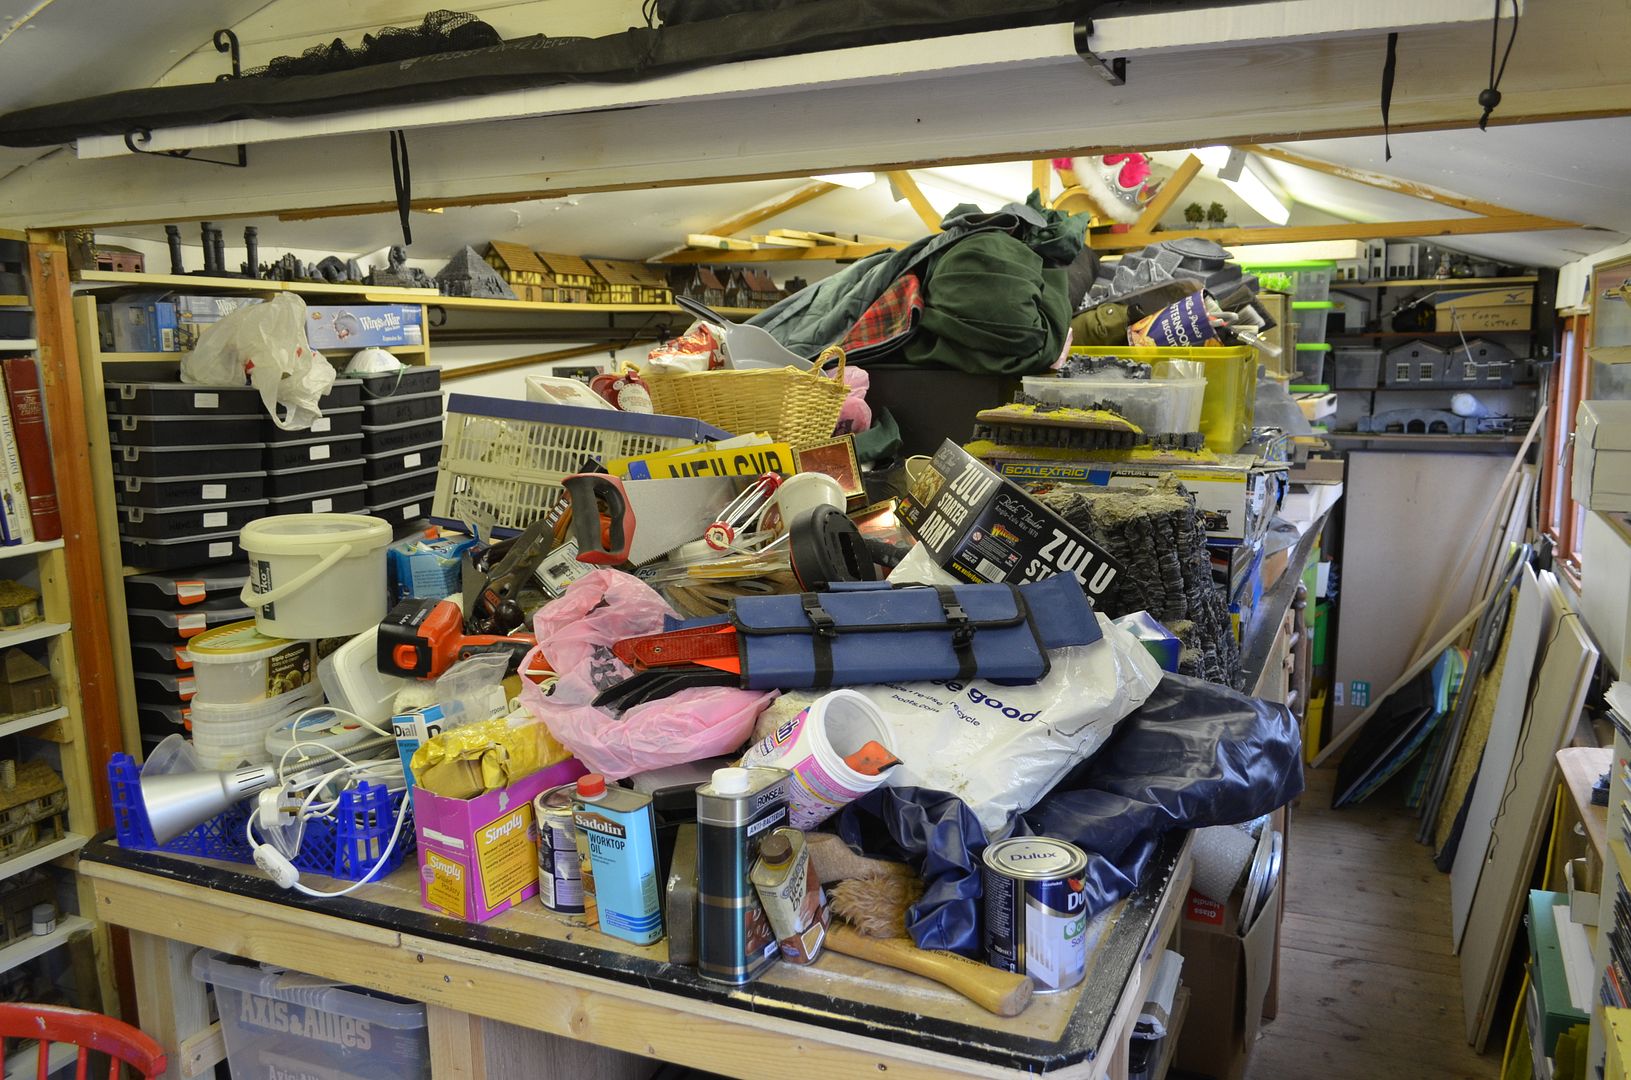 |
| How much stuff ??? |

Once the shelving unit was down I ripped off the hardboard facing and was confronted by the issue that the central roof beam in the middle shed was supported by the two uprights in the middle of the wall. My plan had taken a change of direction.
You can see this dilemma in the picture below. You can also see that the entry between the two sheds now lies to the right rather than the centre. The window has been removed and this space will be filled.

Cutting through was relatively straight forward with a jig saw. There are still some bits needed to be done with framing but otherwise the jobs a good un...
Next up building a SHED WITHIN THE SHED..or where I lose some of this space to Mrs Shed...
part 10 can be found here
http://shedwars.blogspot.co.uk/2016/08/the-shed-extension-part-10.html
Friday, 22 July 2016
Colonial Wars - Zulu part 4
Hi Folks
In my last update I mentioned that the Zulu Army was going
to be 400+ figures strong and that to get to this number I needed another box
of the Warlord Games starter sets.
part 3 here
http://shedwars.blogspot.co.uk/2016/07/the-colonial-wars-zulu-part-3.html
part 3 here
http://shedwars.blogspot.co.uk/2016/07/the-colonial-wars-zulu-part-3.html
This was ordered off ebay for the princely sum of £59.00 and
two days later it has arrived. I was surprised to see that I had bought from
Caliver so well done folks for your great service.
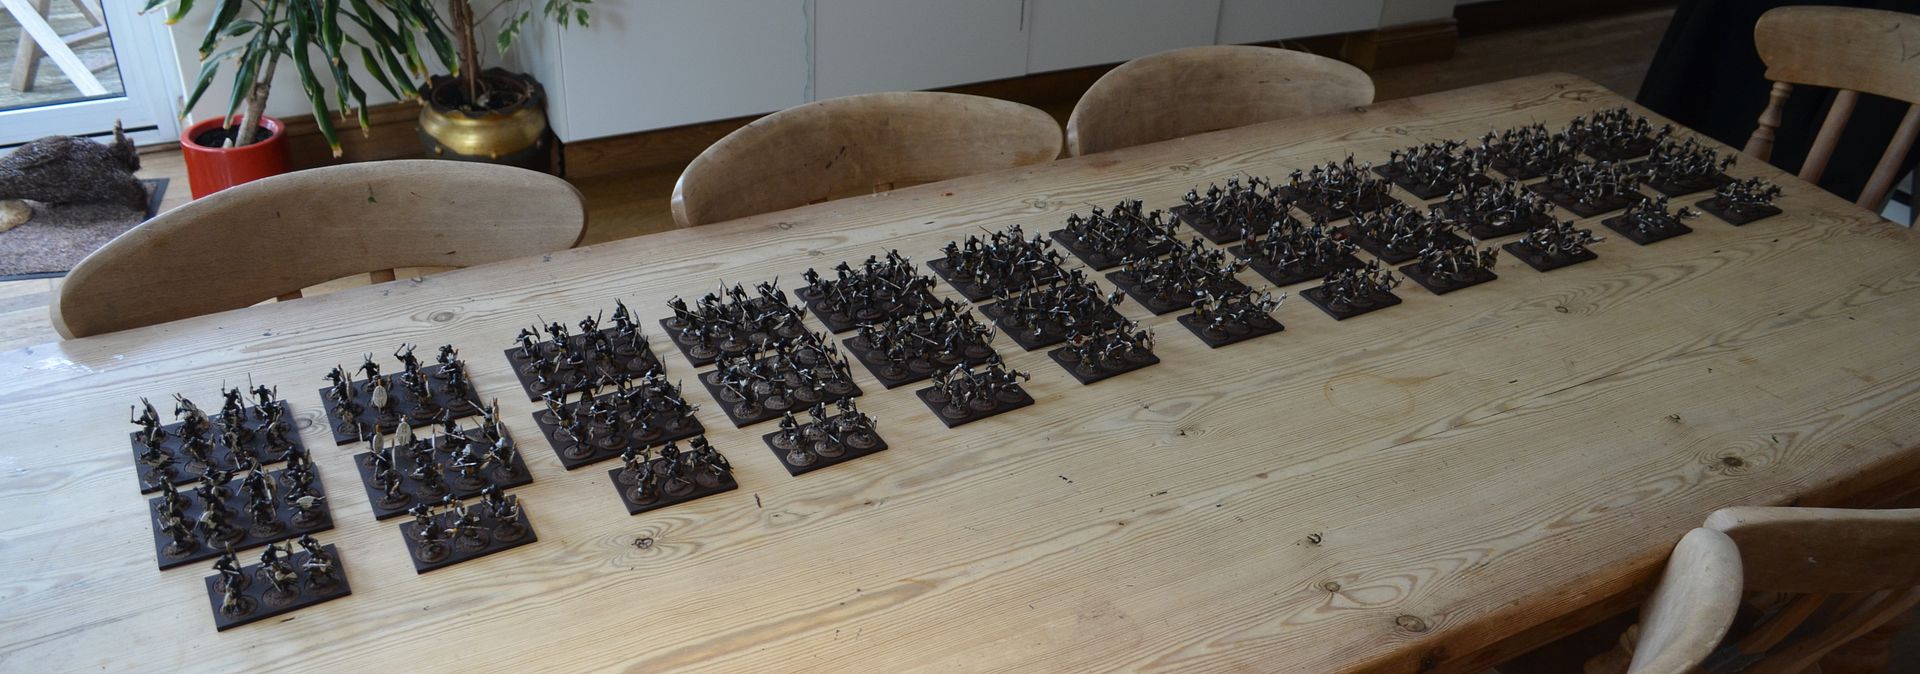
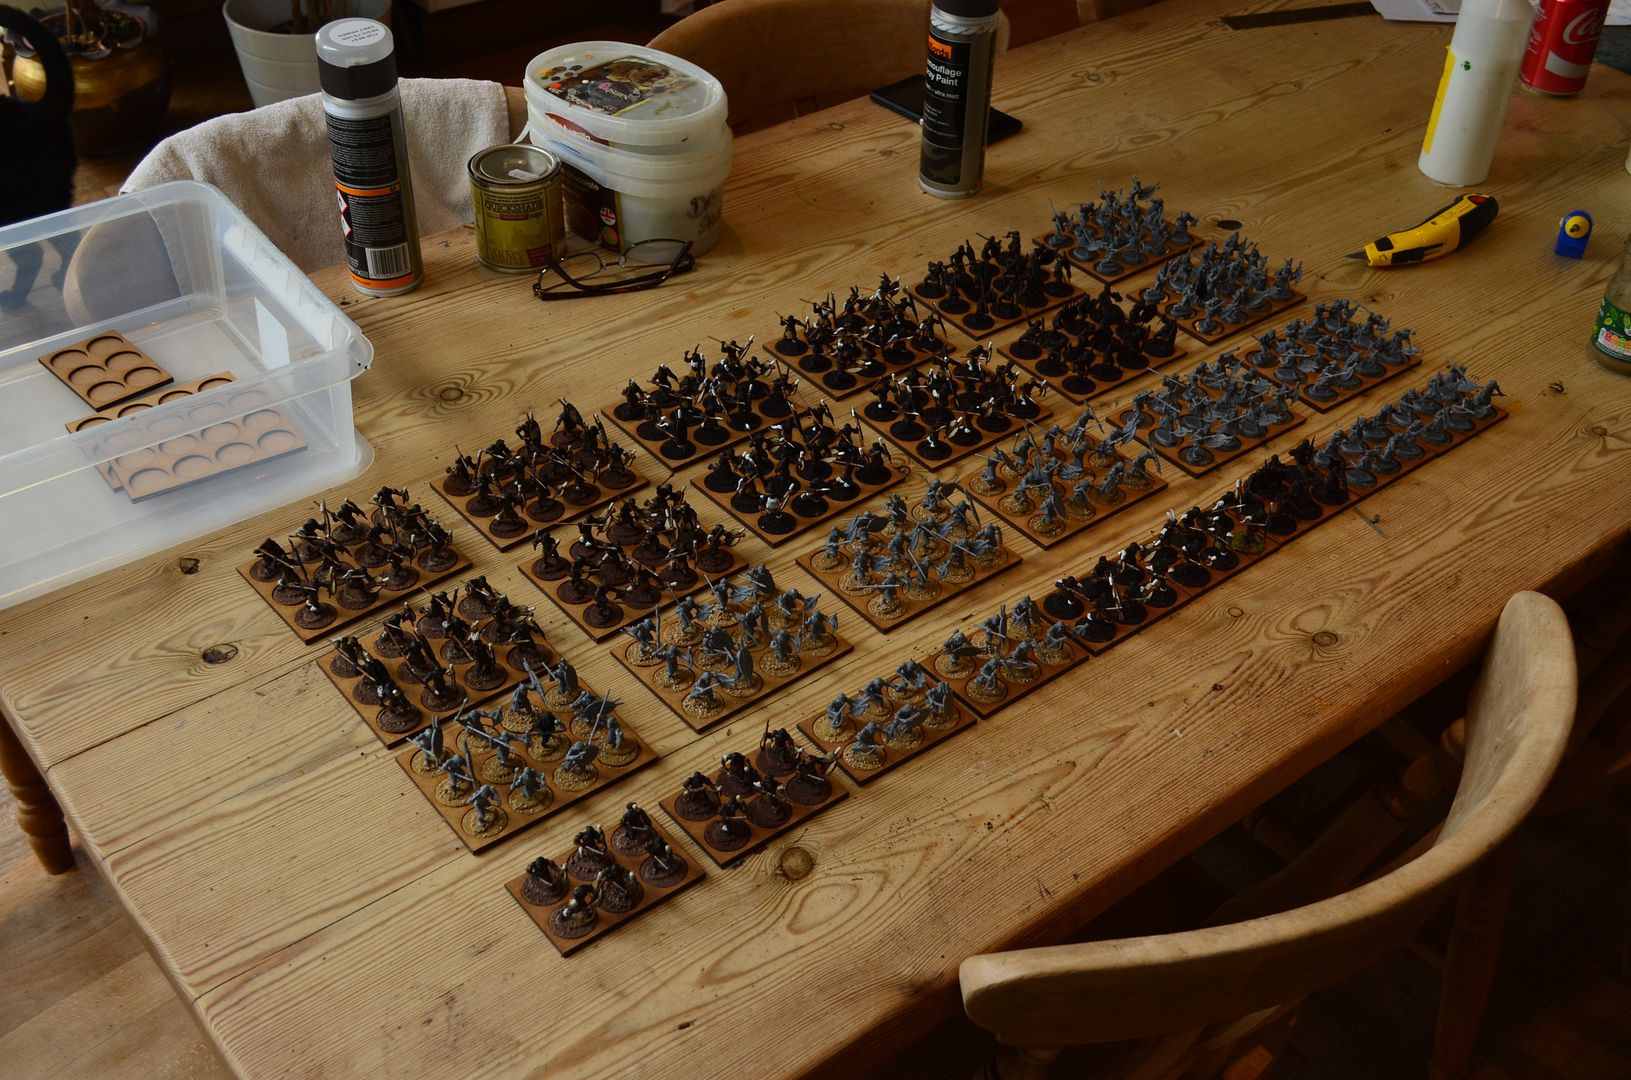
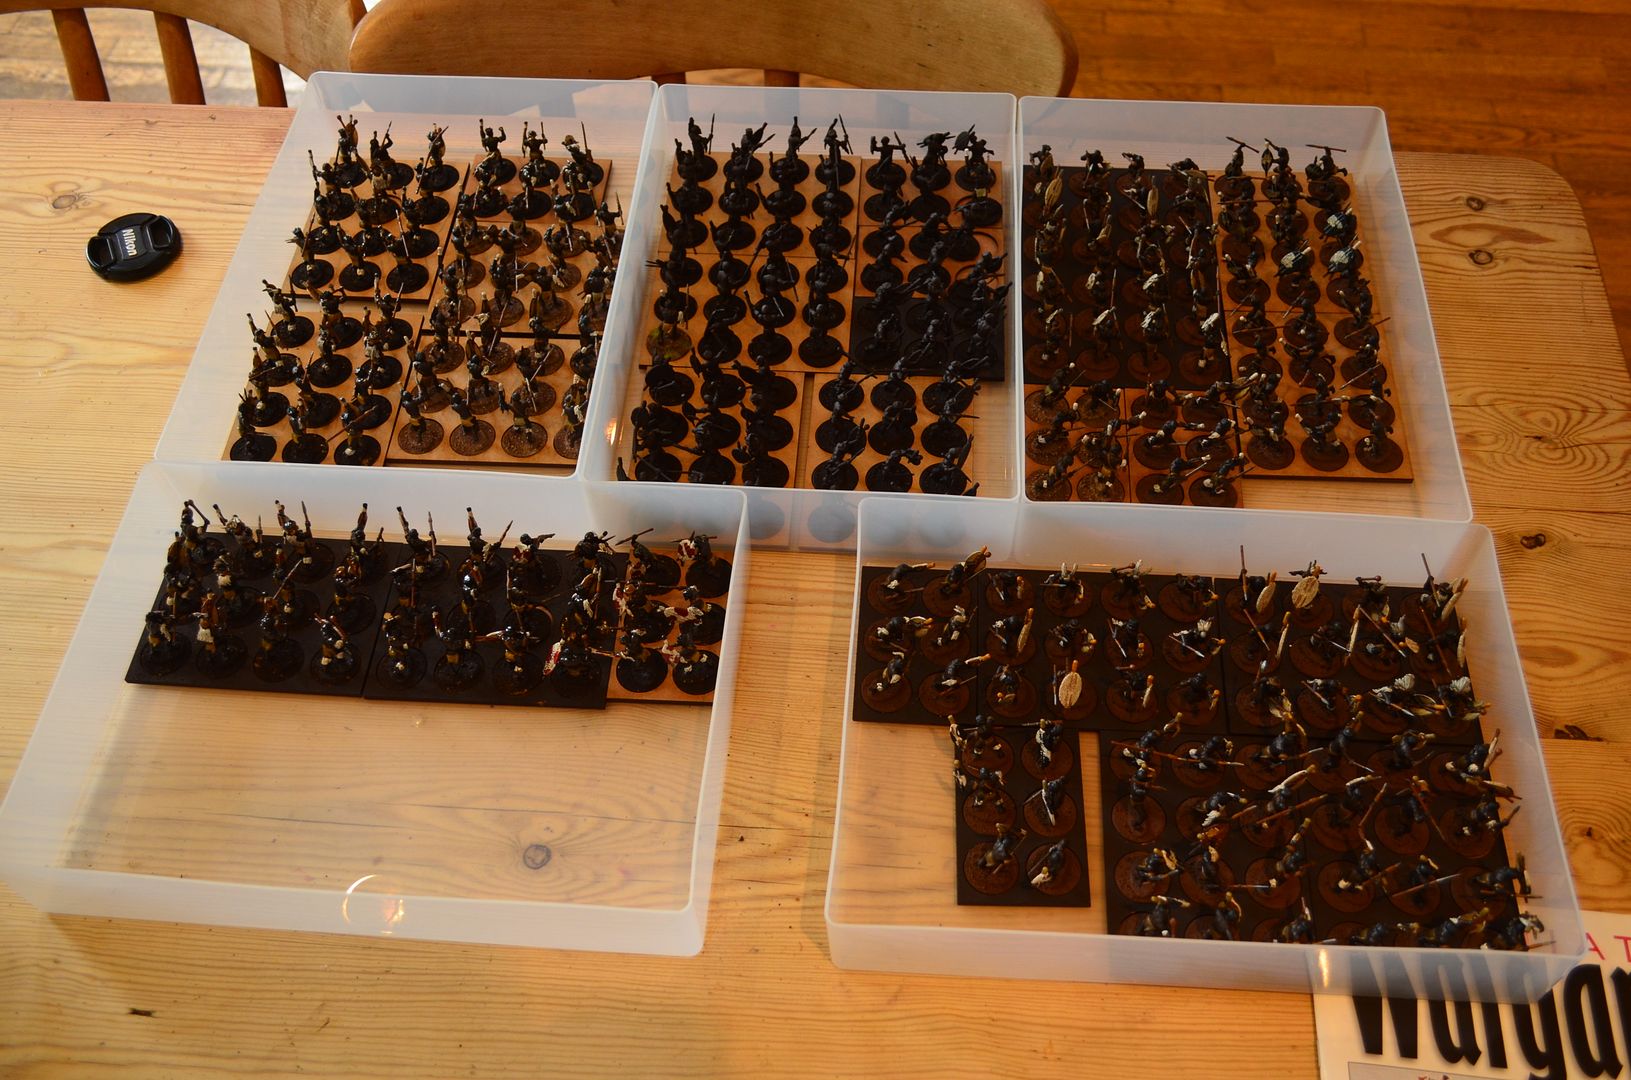
So since I posted last these additions have been assembled, the bases have been gritted and I can now proudly report that so far 360 Zulu Warriors have been painted ! Yes that is right 360 Zulus have been painted, dipped and varnished. Its about time I showed you the full force.
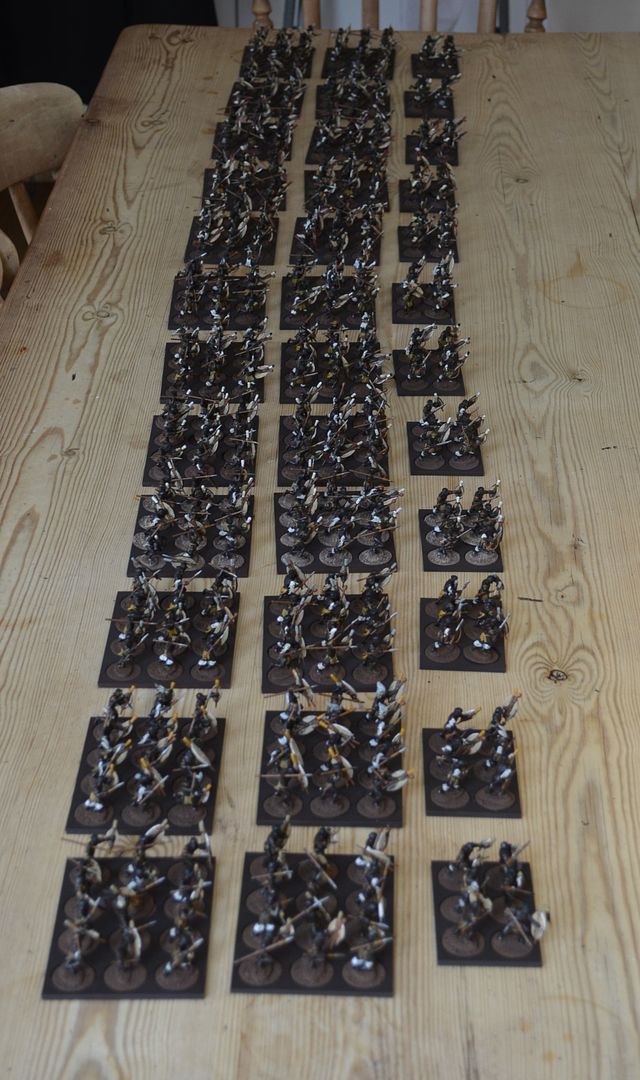 |
| 12 Regiments stretches the best part of 6 feet |
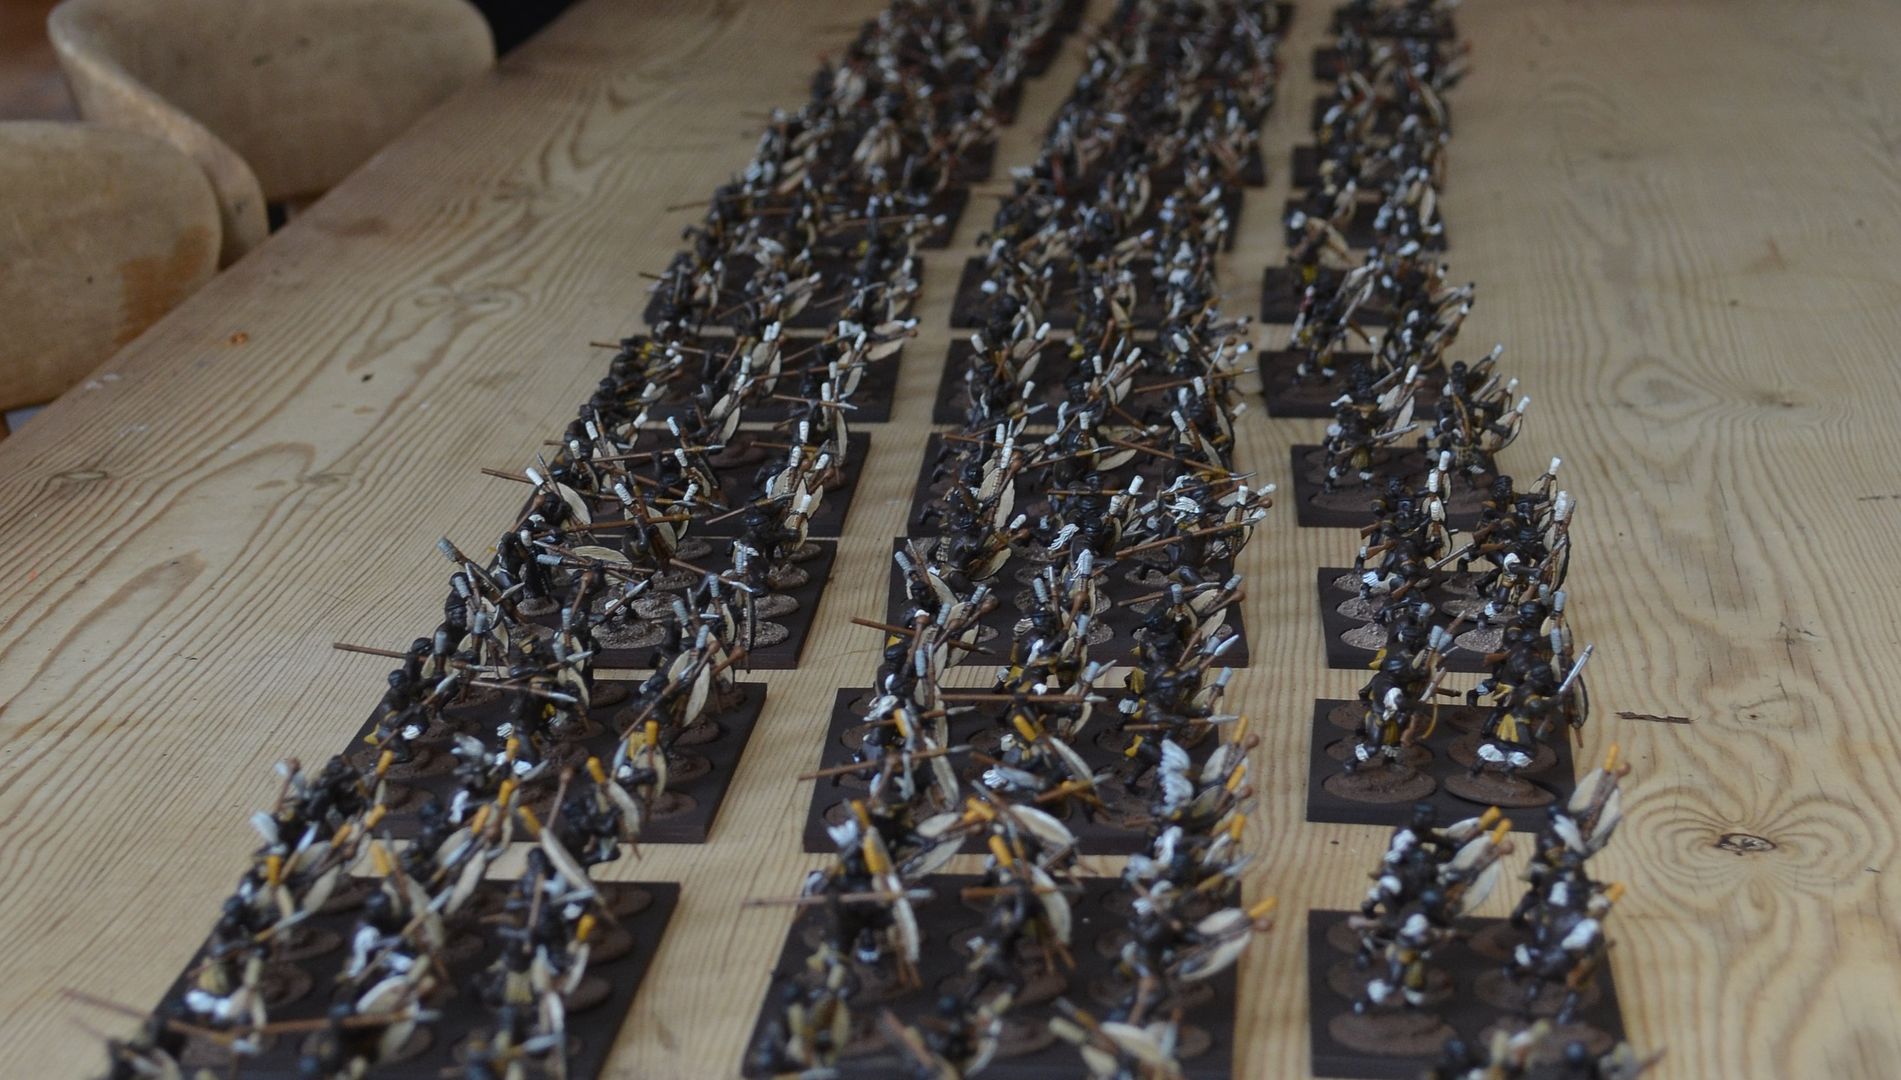 |
| 100's of them.... |
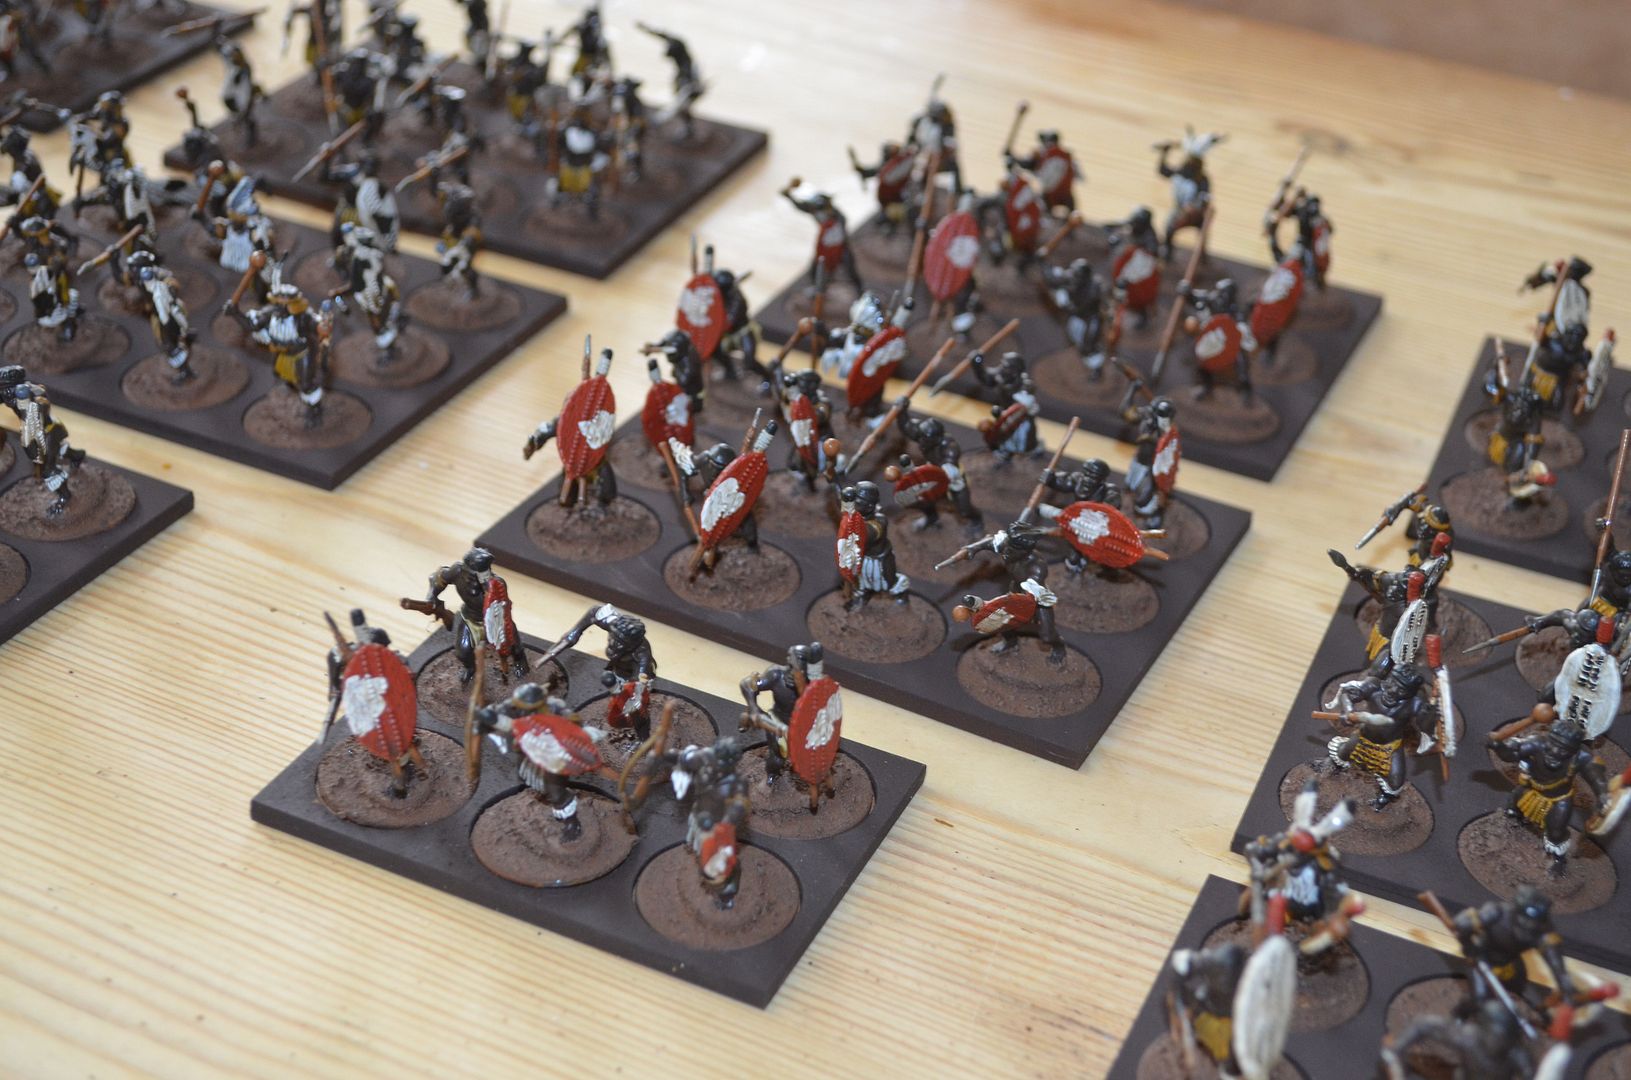 |
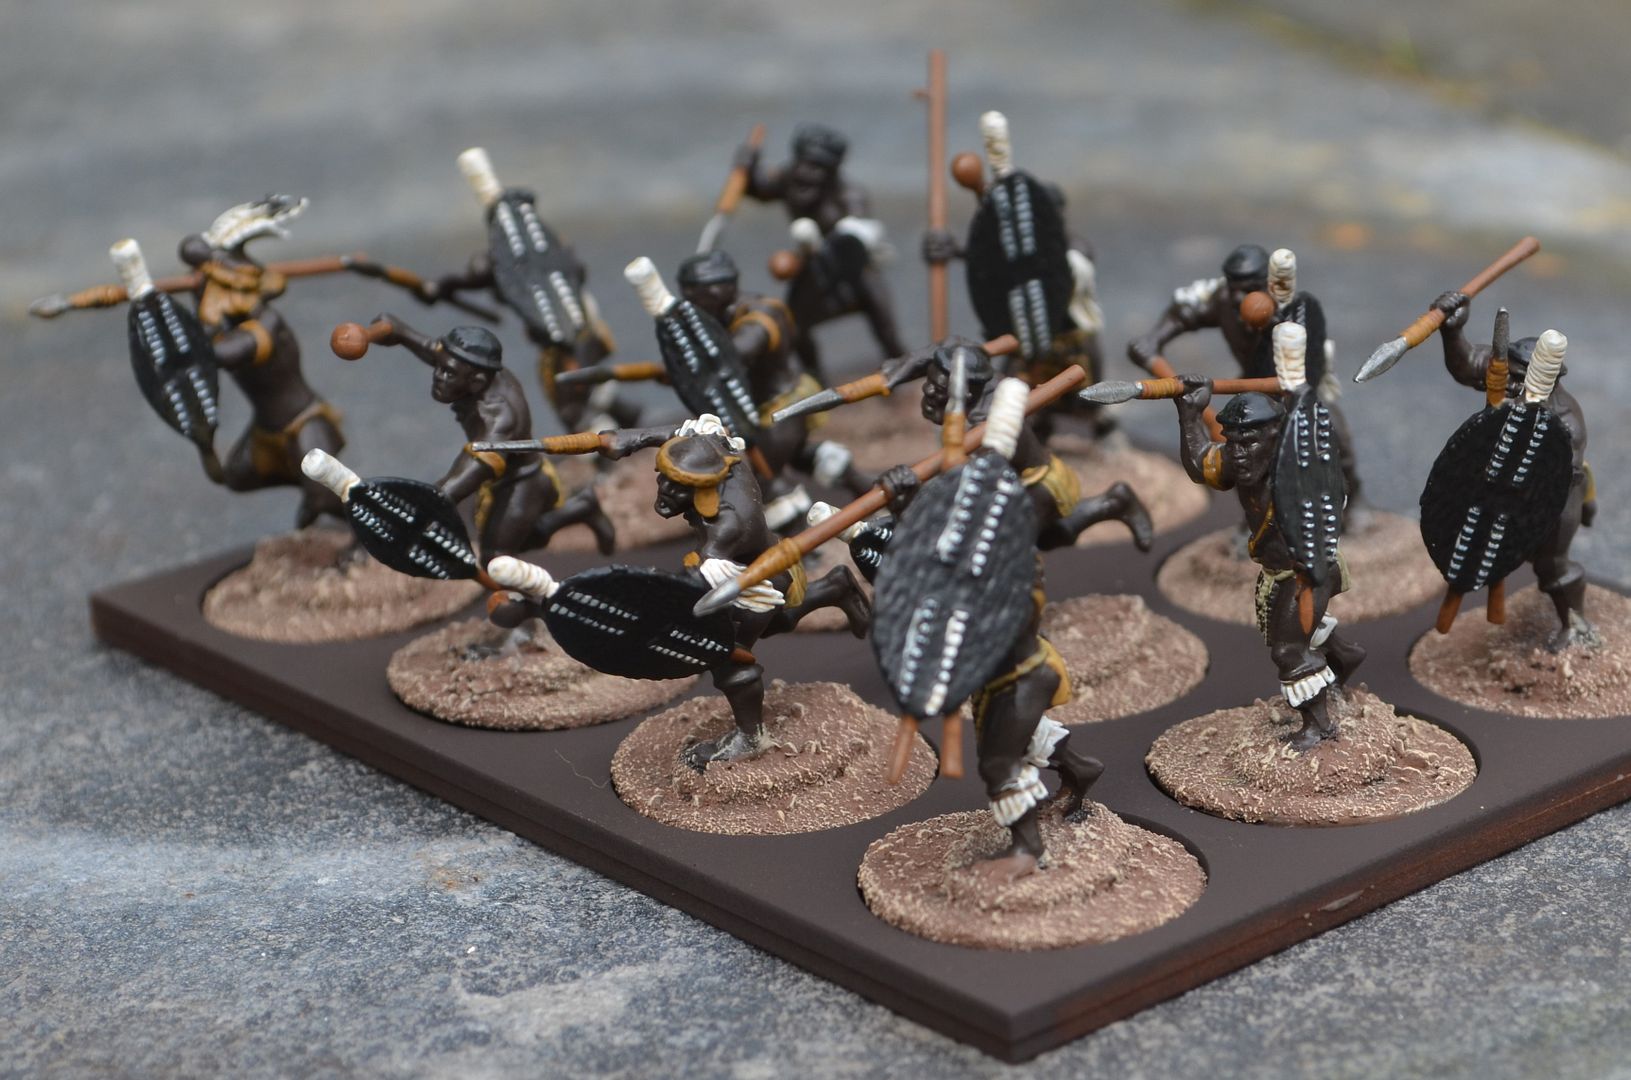
| Different Shield for each unit |
As you can see from the pictures below of the first unit I painted they are not brilliant but en masse they look fantastic. Each regiment (30 figures) has a different shield facing.
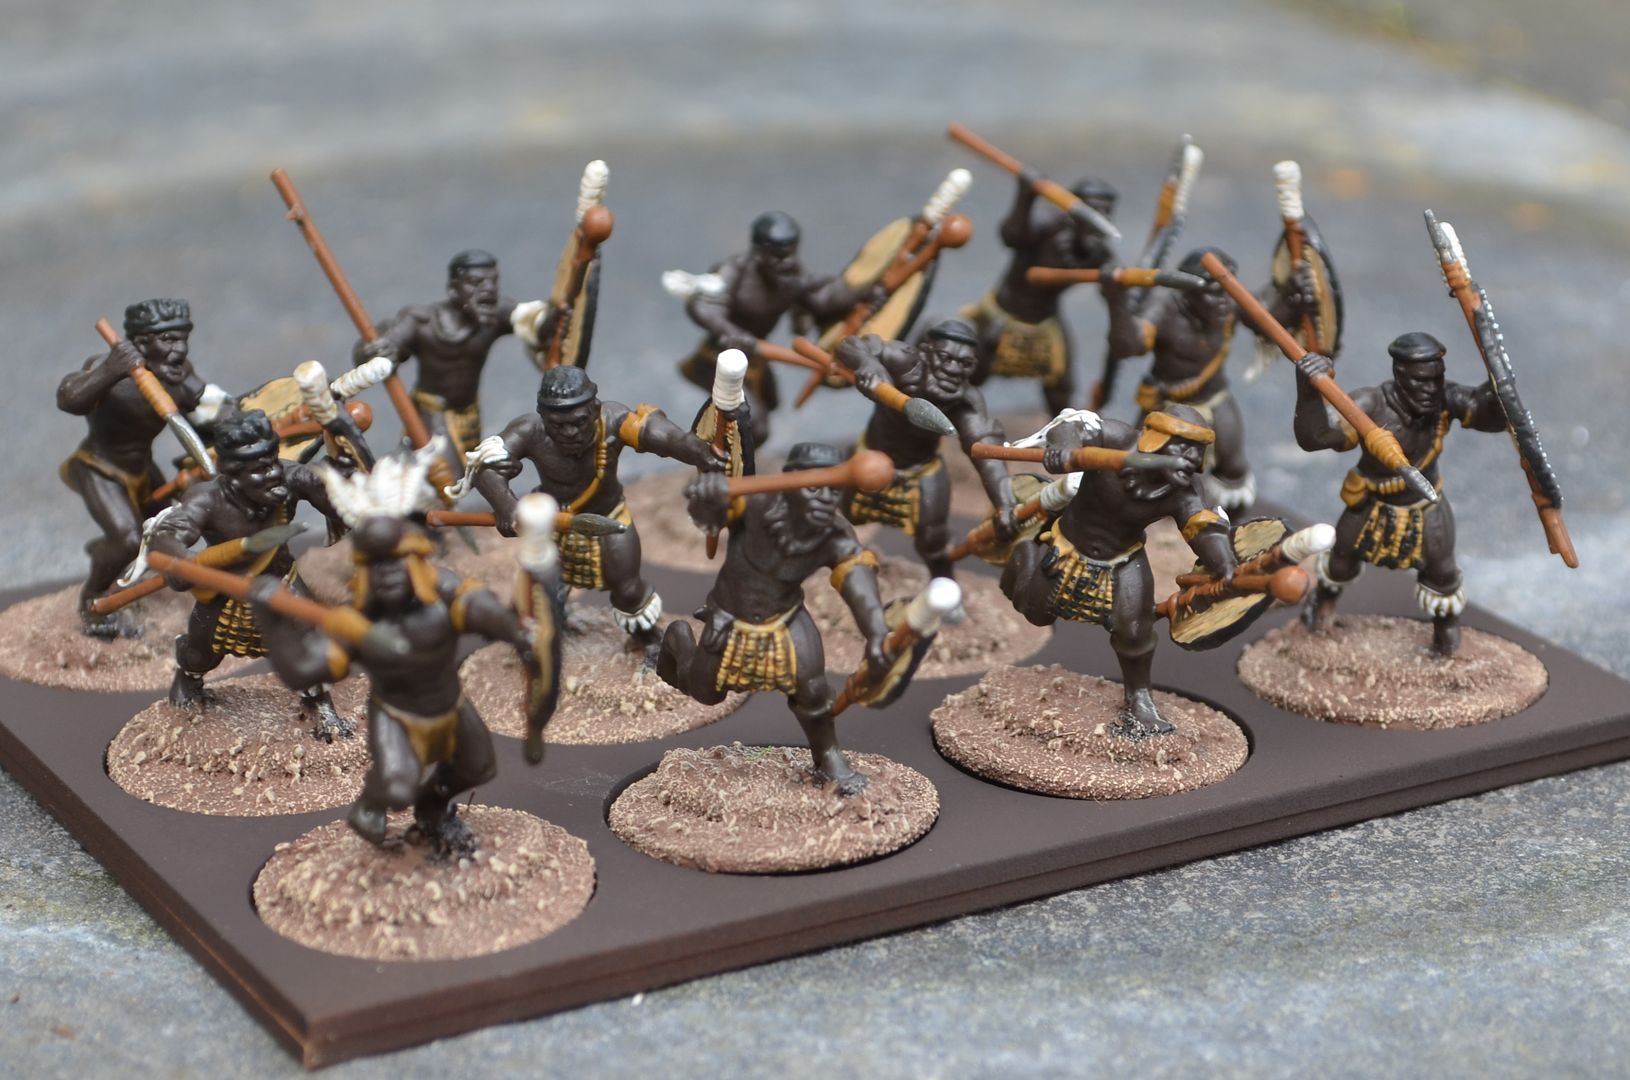 |
| Not the best paint job but they will do |
Over the next few days I'll finish painting up my ceremonial unit (the guys call have headresses) and paint up the Indunas (Leaders) which were sourced from Black Tree Designs and the freebies that came with the big Zulu War Army boxes. These will all be mounted on 80mm discs from Warbases.
 |
| Ceremonial Unit in Progress |
Once these are finished I'll focus on the bases and movement trays...
As of today the 360 Zulus you can see has taken just under 4 weeks to complete - who says a horde can't be rapidly produced.
As of today the 360 Zulus you can see has taken just under 4 weeks to complete - who says a horde can't be rapidly produced.
More soon
Pat 5 - The finished Zulu Army here
http://shedwars.blogspot.co.uk/2016/08/colonial-wars-zulu-army-finished.html
Monday, 18 July 2016
The Shed Extension part 8
Hi Folks
This weekend saw a little bit more progress on the shed extension. Its now time to insulate the building !
previous update here
http://shedwars.blogspot.co.uk/2016/07/the-shed-extension-part-7.html
A quick trip down to B&Q to purchase large sheets of polystyrene and 7 sheets of hardboard to clad the inside of the roof.
Not surprisingly 4ft x 8ft sheets of hardboad and polystyrene are not going to go into the back of my wifes XC90 so I took advantage of the cutting service in the store to get all the boards cut to the desired length. I kept all the off cuts as these will be useful for future terrain builds.
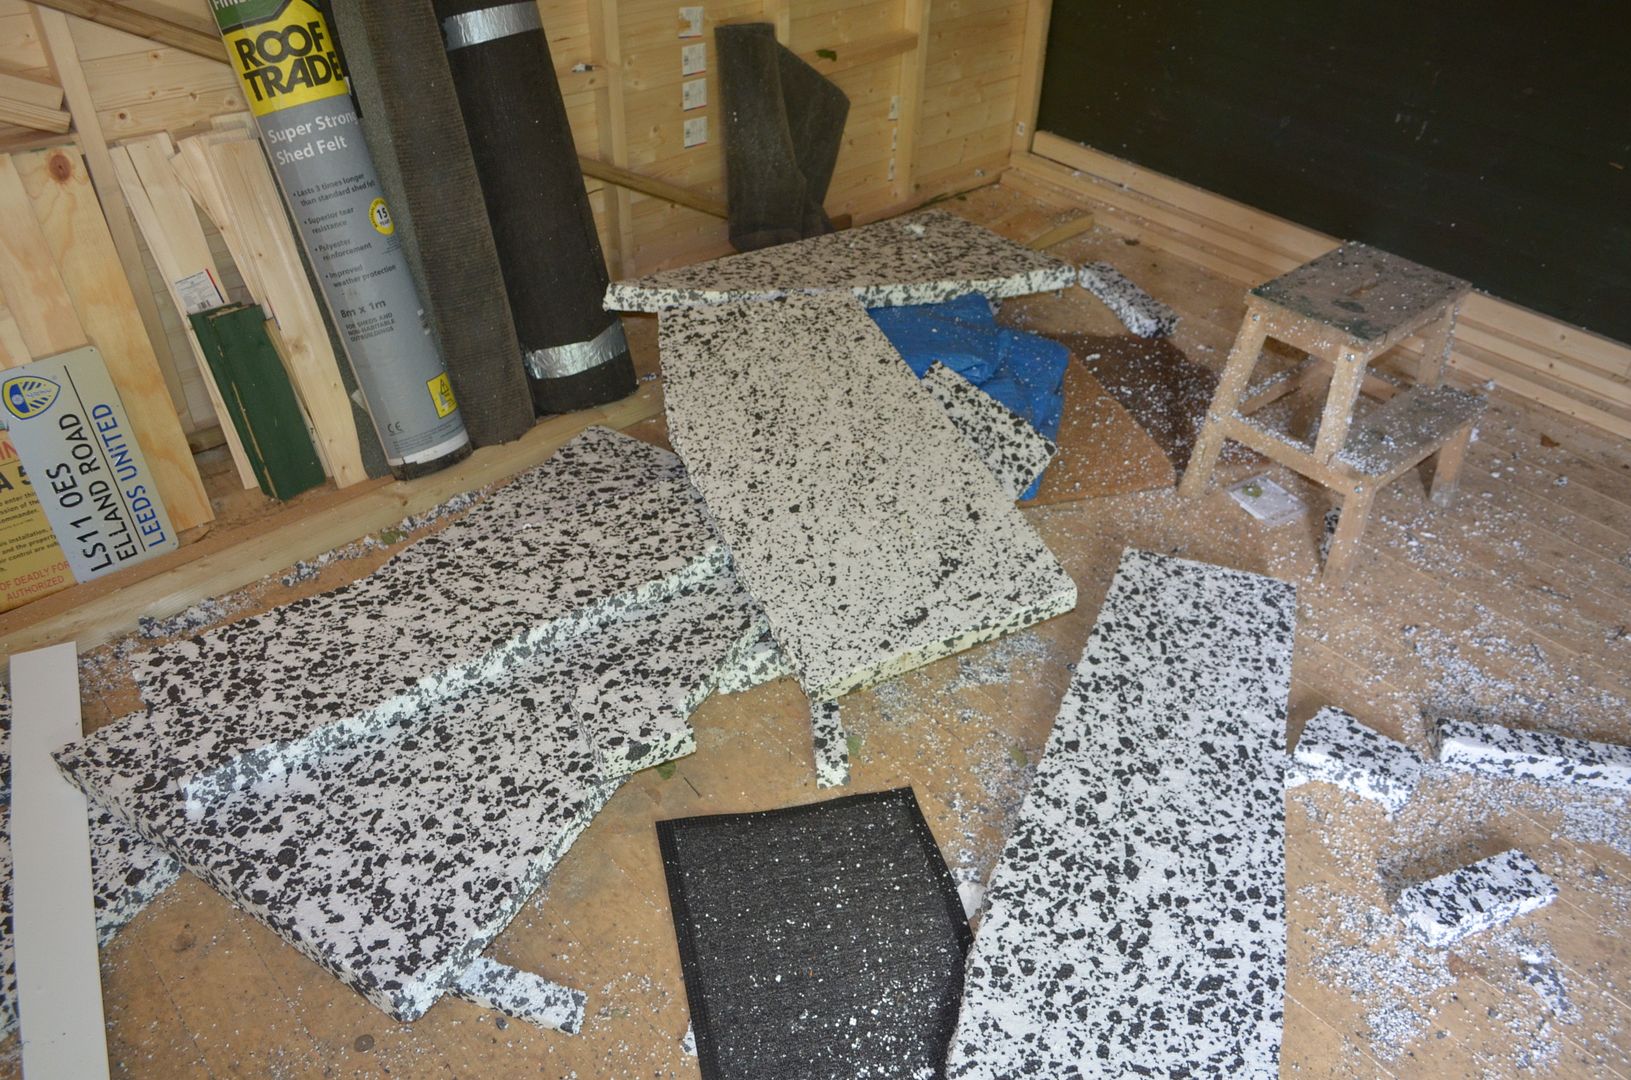
The polystyrene had to be broken up in to pieces just to fit them into the car.
The roof as you see in the picture above has had the poly stuff forced into the rafters. Its 4.5cm thick so should provide plenty of insulation in the winter.
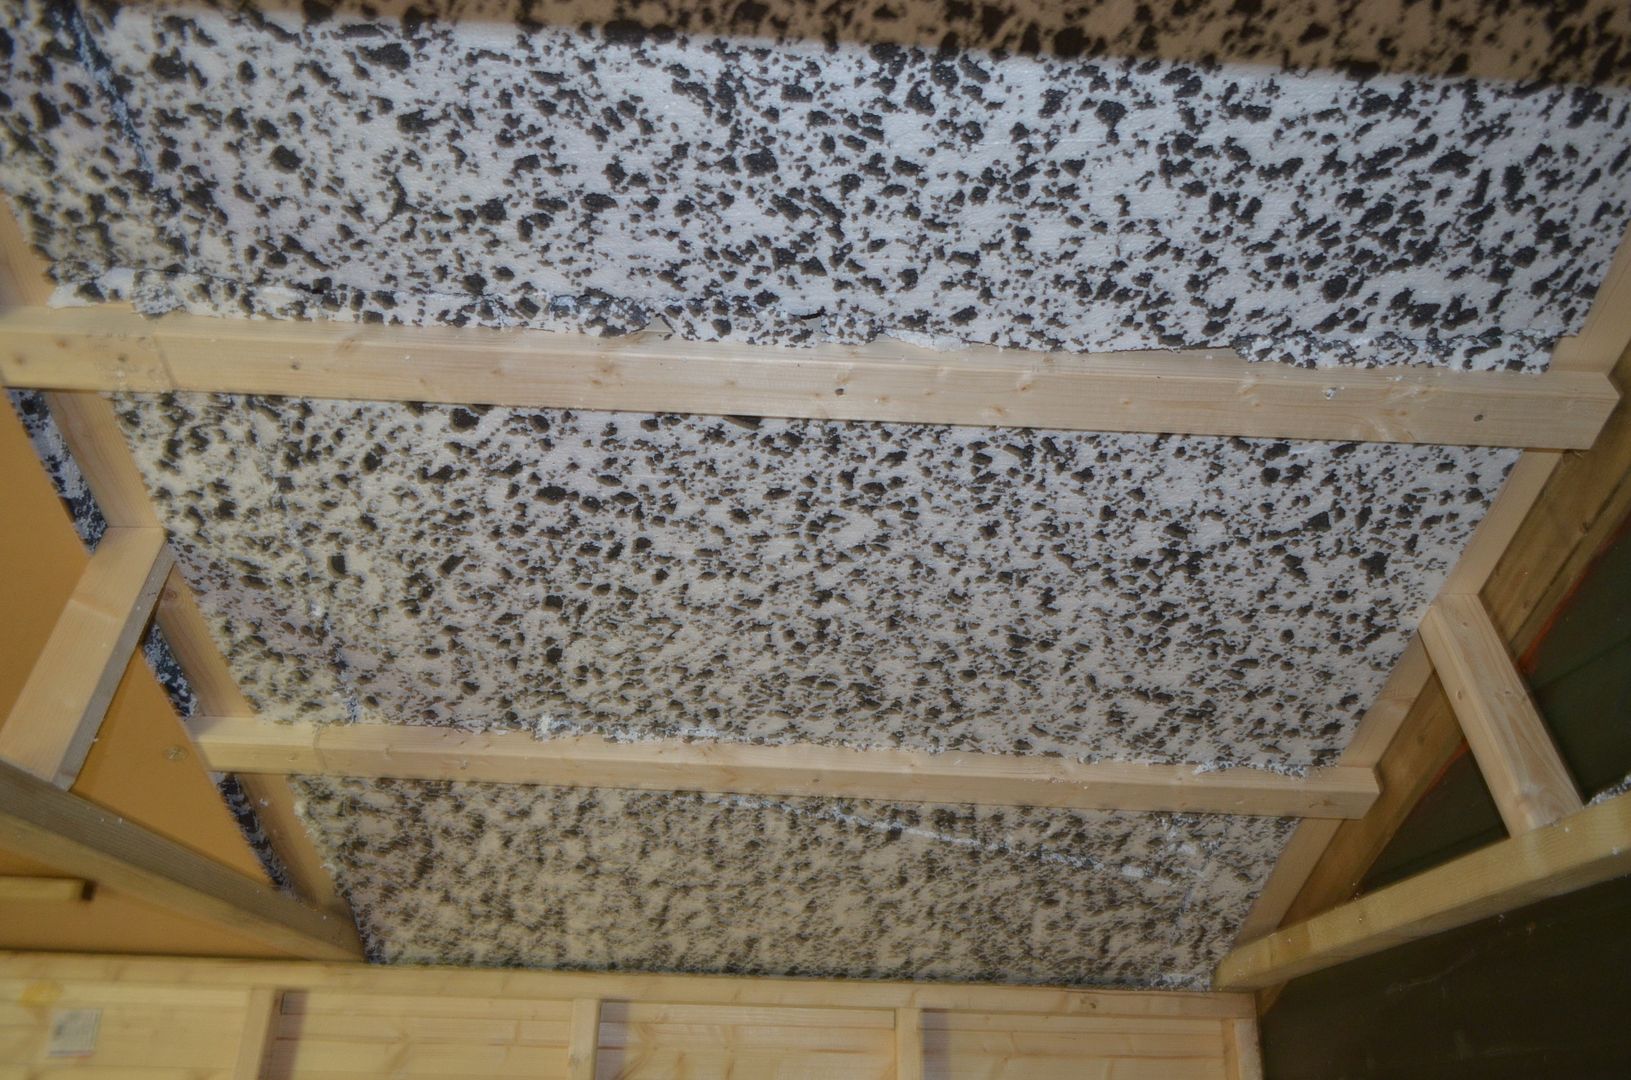
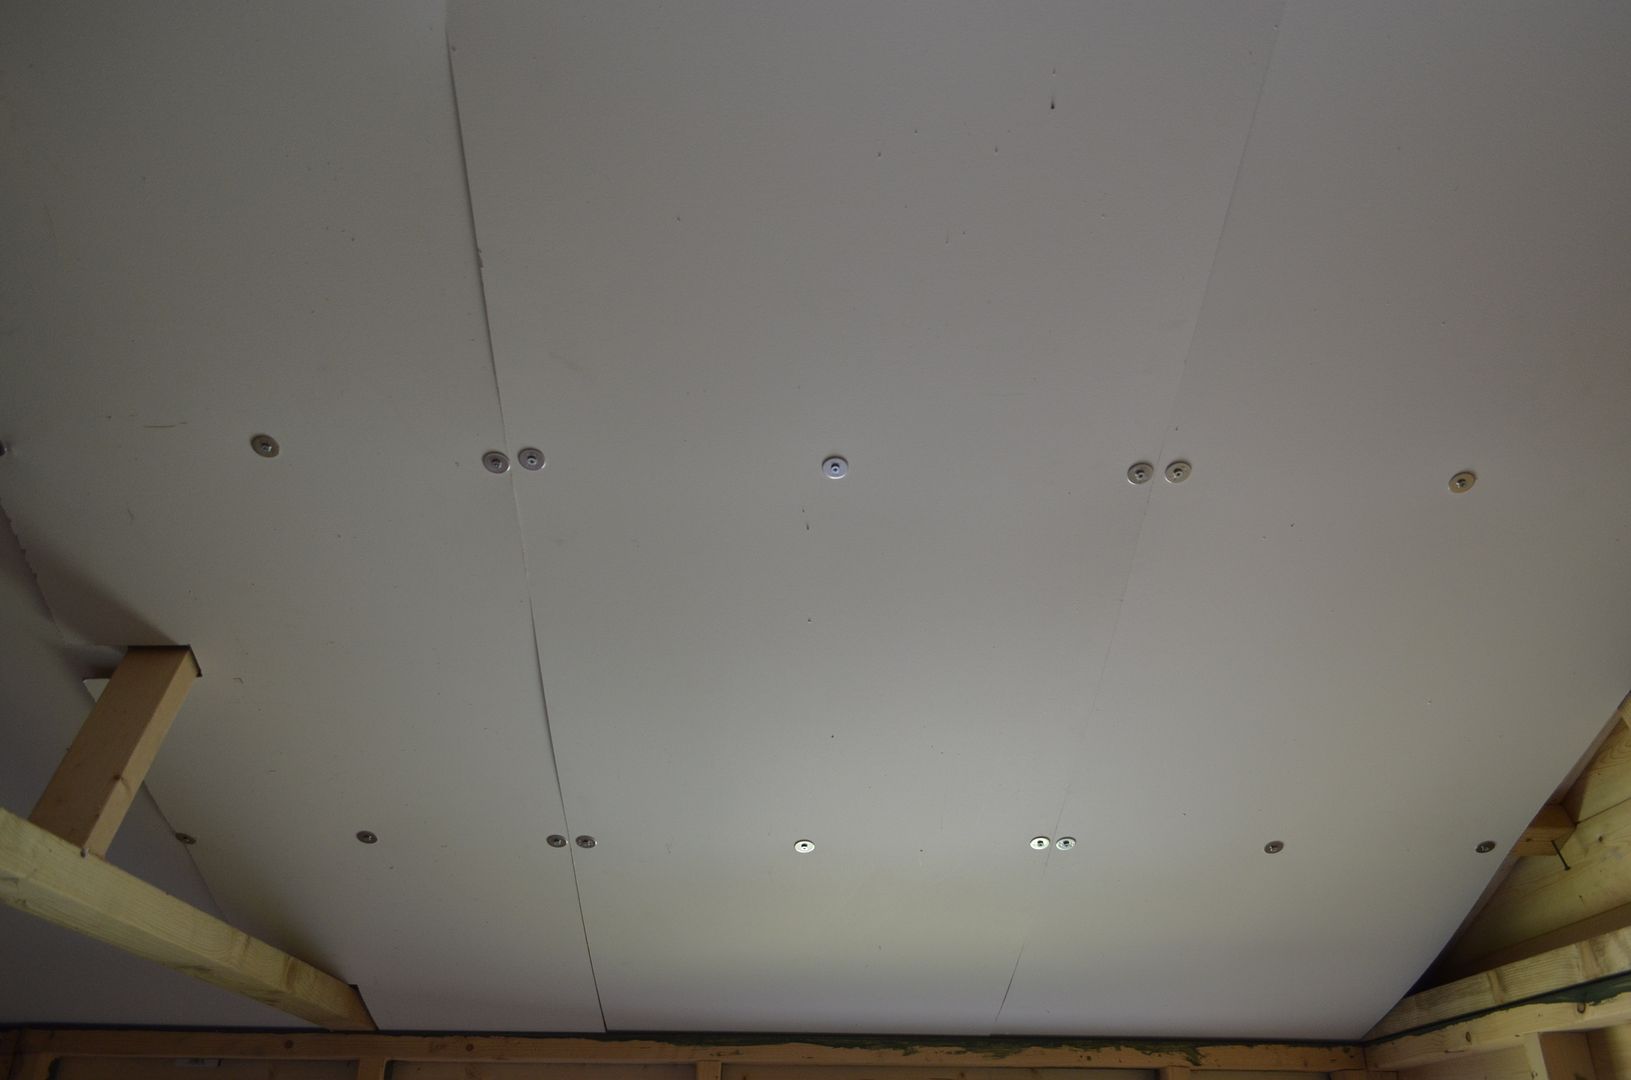
Over the poly I added the hardboards. These were fixed with standard screws and I used some of my 25mm washers to give the fixings greater strength. Having put up two boards I realised that it would be more practical to paint the others outside before fixing. Hence why some are white and some are brown. Eventually all the roof and walls inside the shed will be white.
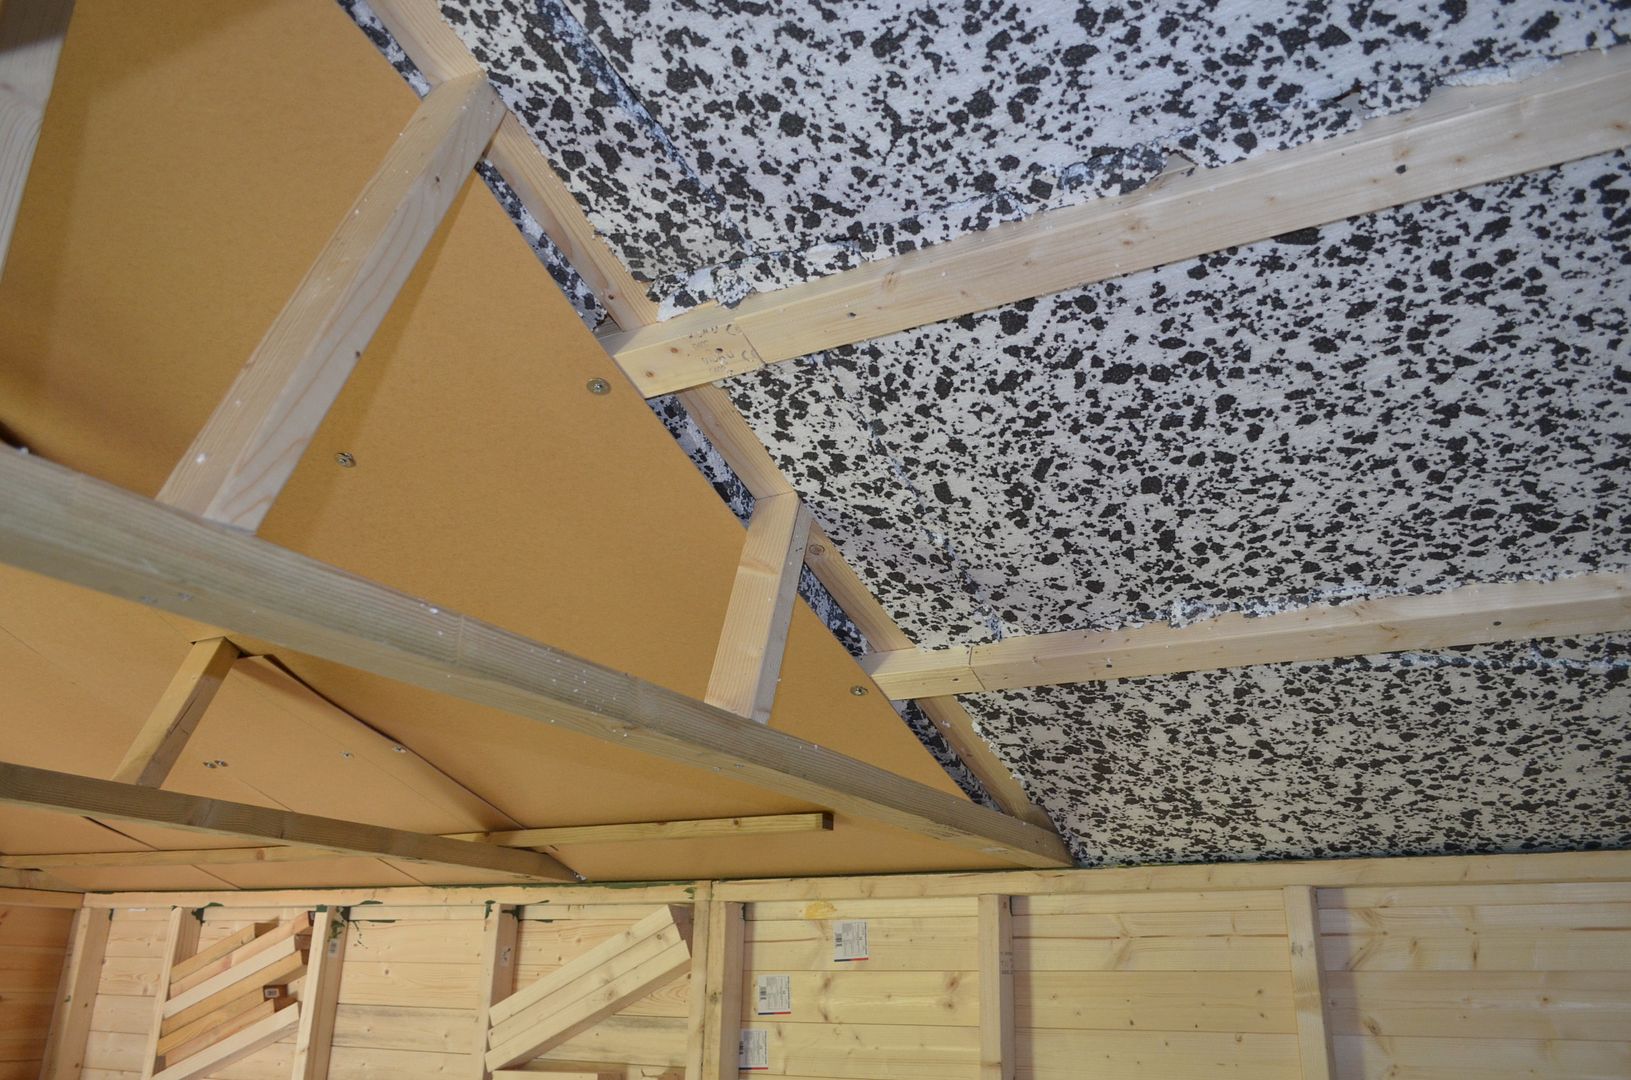
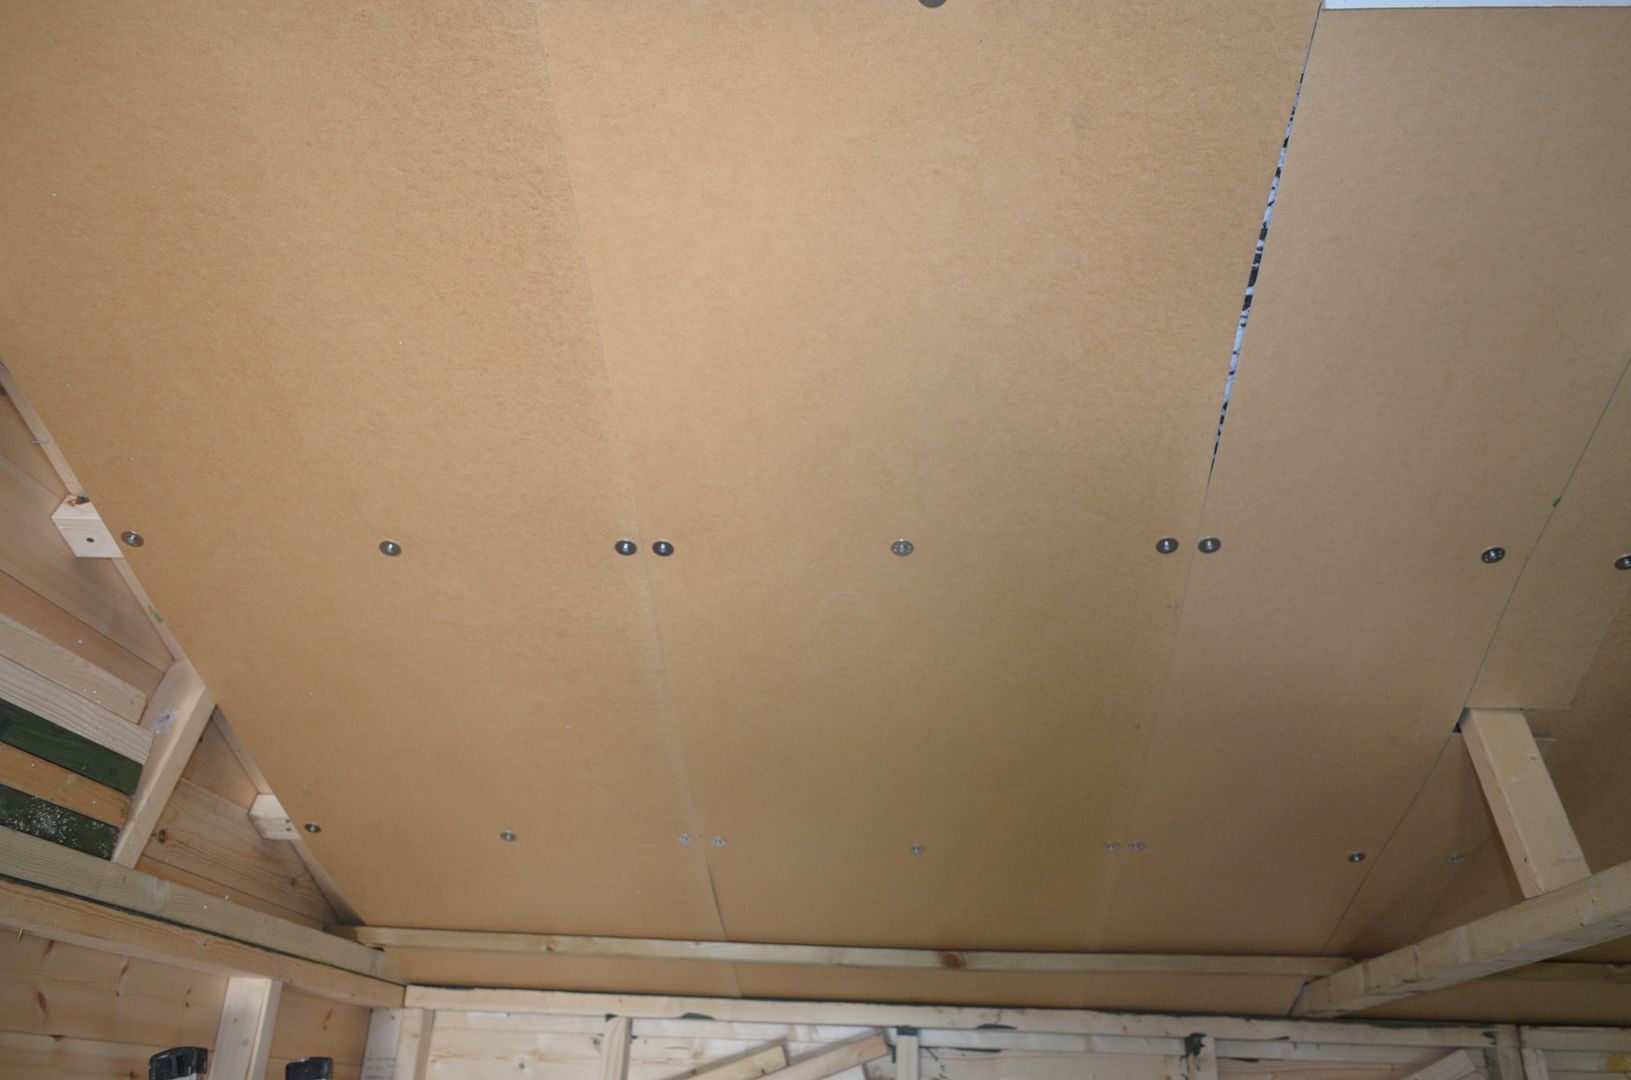
Some unpainted and painted boards....
AS you can see from the picture below the cabin is now full of white polystyrene beads.
By the end of this week I should have the ceiling completely finished. Ill then start on the walls.
More soon
part 9 can be found here
http://shedwars.blogspot.co.uk/2016/07/the-shed-extension-part-9.html
This weekend saw a little bit more progress on the shed extension. Its now time to insulate the building !
previous update here
http://shedwars.blogspot.co.uk/2016/07/the-shed-extension-part-7.html
A quick trip down to B&Q to purchase large sheets of polystyrene and 7 sheets of hardboard to clad the inside of the roof.
Not surprisingly 4ft x 8ft sheets of hardboad and polystyrene are not going to go into the back of my wifes XC90 so I took advantage of the cutting service in the store to get all the boards cut to the desired length. I kept all the off cuts as these will be useful for future terrain builds.
The polystyrene had to be broken up in to pieces just to fit them into the car.
The roof as you see in the picture above has had the poly stuff forced into the rafters. Its 4.5cm thick so should provide plenty of insulation in the winter.

Over the poly I added the hardboards. These were fixed with standard screws and I used some of my 25mm washers to give the fixings greater strength. Having put up two boards I realised that it would be more practical to paint the others outside before fixing. Hence why some are white and some are brown. Eventually all the roof and walls inside the shed will be white.


Some unpainted and painted boards....

AS you can see from the picture below the cabin is now full of white polystyrene beads.

By the end of this week I should have the ceiling completely finished. Ill then start on the walls.
More soon
part 9 can be found here
http://shedwars.blogspot.co.uk/2016/07/the-shed-extension-part-9.html
Friday, 15 July 2016
ECW Battle of Densham Common
Monday night saw the return of the ECW Black Powder period to the Shed. Amidst the chaos of the my Shed extension build Mark and I managed to play out a very interesting encounter between the Royalists (Mark) and the early war Parliamentarians.
I am sure that I have mentioned this in previous posts that I have agreed not to use the stats for the Parliamentarian New Model Army until next year.
Once again we used the card deck to determine the composition of the sides. Each side drew 21 units and could use a general and a upto four officers.
The Royalists under the command of Hopton fielded
3 Pikes
6 Musketeers
1 Commanded Shotte
1 Dragoon
1 Harquebusiers
1 Currassiers
4 Regular Cavalry
4 Artillery Pieces
Facing them were the Parliamentarians commanded by Waller who had at his disposal
6 Pike
3 Musketeers
1 Commanded Shotte
2 Dragoons
1 Currassier
2 Regular Cavalry
2 Harquebusiers
4 Artillery Pieces

A great game and the tide is turning for Parliament...
Until next time
I am sure that I have mentioned this in previous posts that I have agreed not to use the stats for the Parliamentarian New Model Army until next year.
Once again we used the card deck to determine the composition of the sides. Each side drew 21 units and could use a general and a upto four officers.
The Royalists under the command of Hopton fielded
3 Pikes
6 Musketeers
1 Commanded Shotte
1 Dragoon
1 Harquebusiers
1 Currassiers
4 Regular Cavalry
4 Artillery Pieces
Facing them were the Parliamentarians commanded by Waller who had at his disposal
6 Pike
3 Musketeers
1 Commanded Shotte
2 Dragoons
1 Currassier
2 Regular Cavalry
2 Harquebusiers
4 Artillery Pieces
Before I kick off the battle report I should state that the
title of this battle is entirely fictitious. The fact that each of us drew
Waller and Hopton as our Generals was entirely by luck . (If ECE is not your
bag and you are reading this these two Generals were adversaries in the South
& West of England.
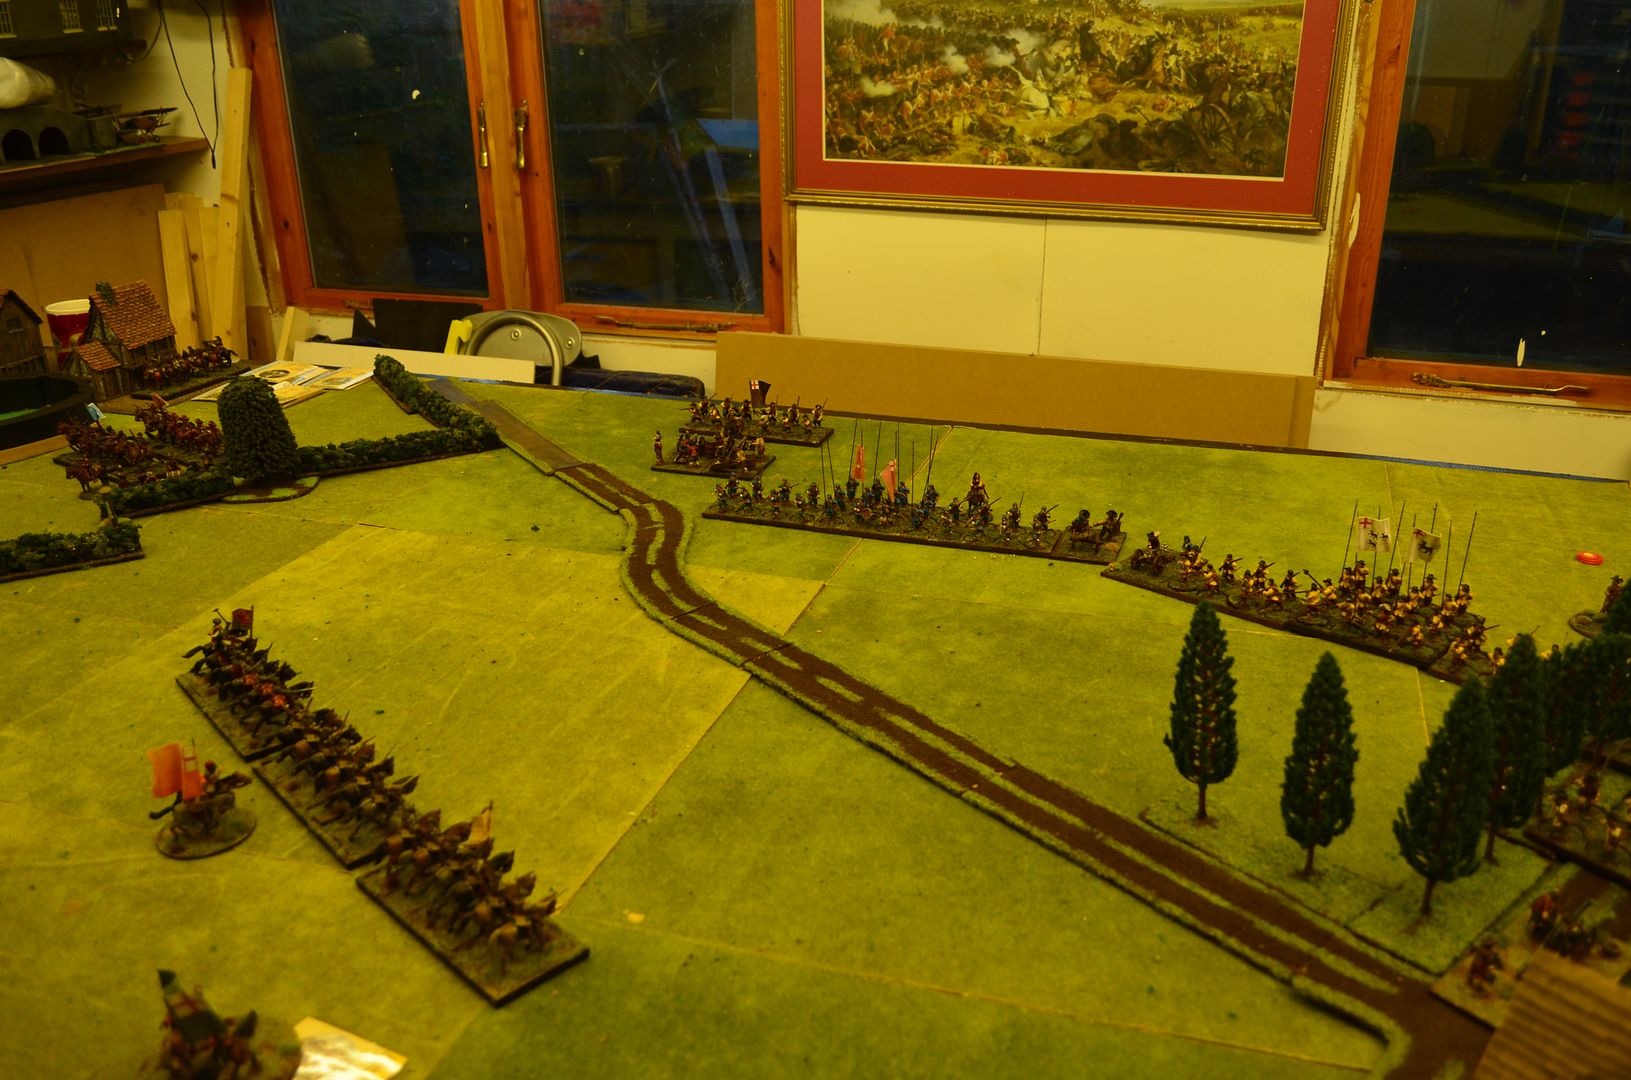
Both Mark and I were fairly conventional in the disposition
of our forces – cavalry on the wings and infantry in the centre.
The two wooded areas and the village of Densham (top
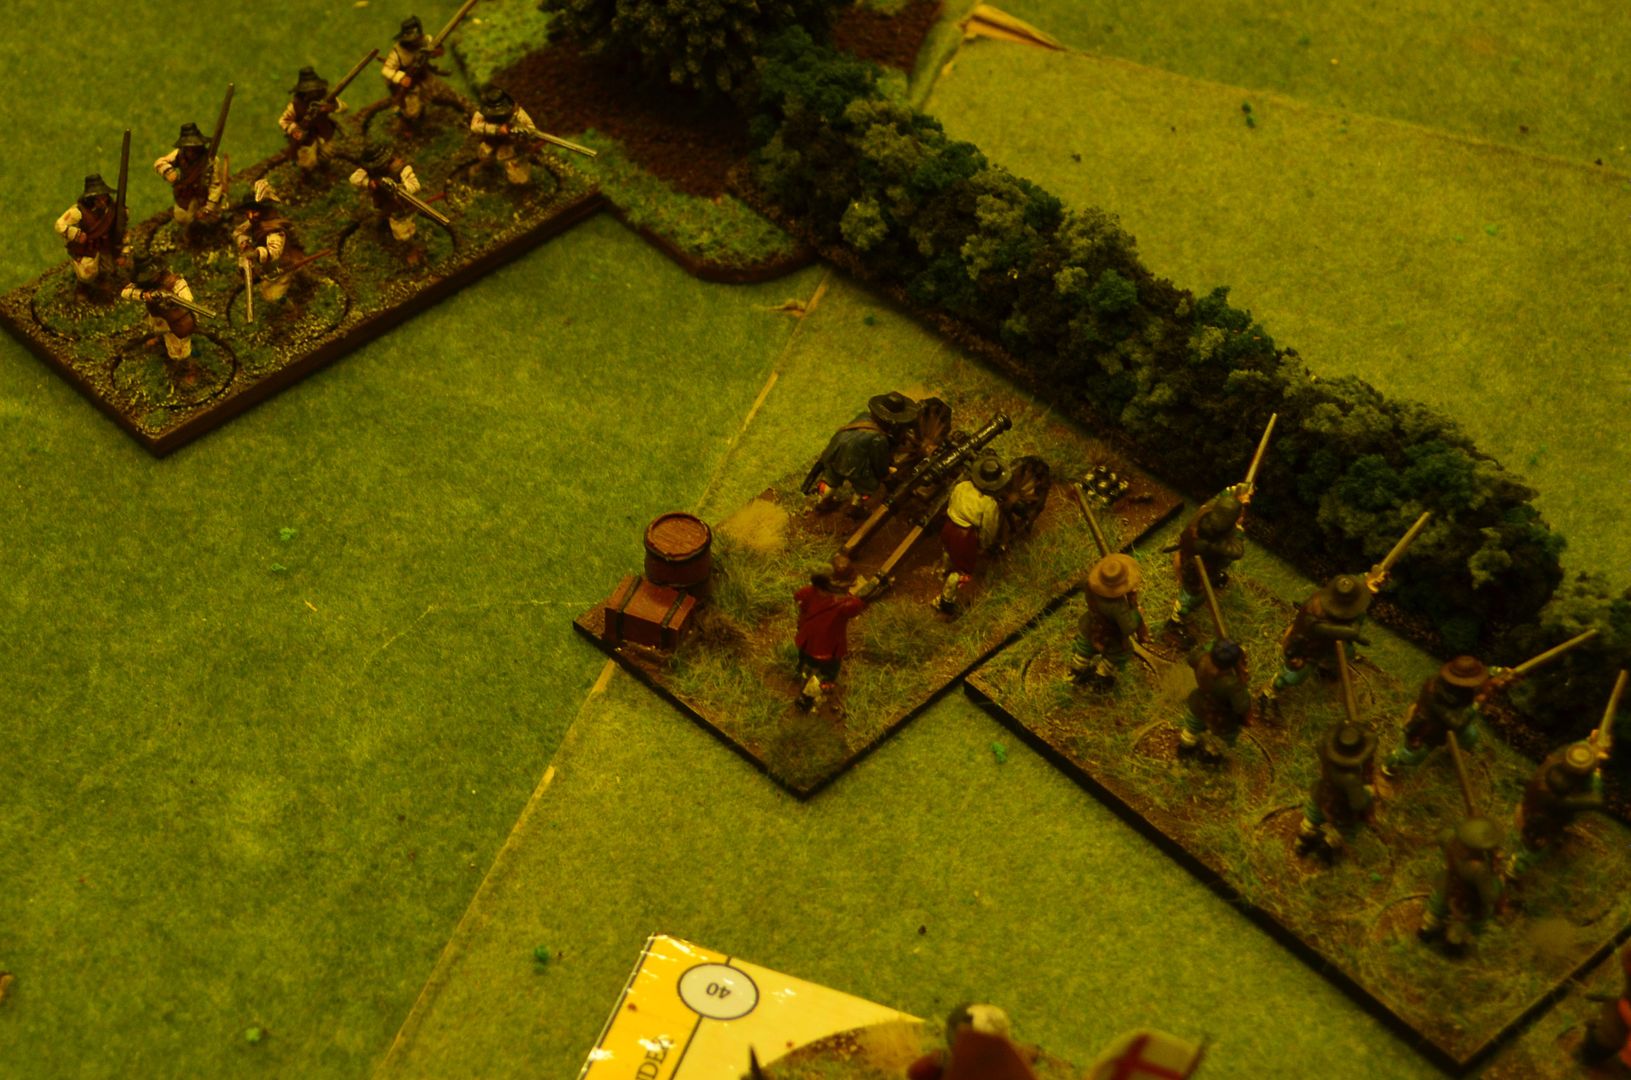
right in picture) were treated as completely impassable to all. The Farm
buildings in the centre of the common would count as hard cover as per rules
and our house rules on hedges requires a few short points.
1.
Only infantry can benefit from light cover in
the hedges
2.
Only Infantry manning the hedge (ie in base to
base contact get this benefit
3.
Hedges subtract six inches from a standard move
(both infantry and cavalry)
4.
Units may charge against defenders on hedges
provided they have sufficient move (ie 6 inches)
5.
Attackers lose the charge bonus when they attack
over the hedge
 |
| Densham Common - the village is top right, farm to left centre |
 |
| Royalist Centre |

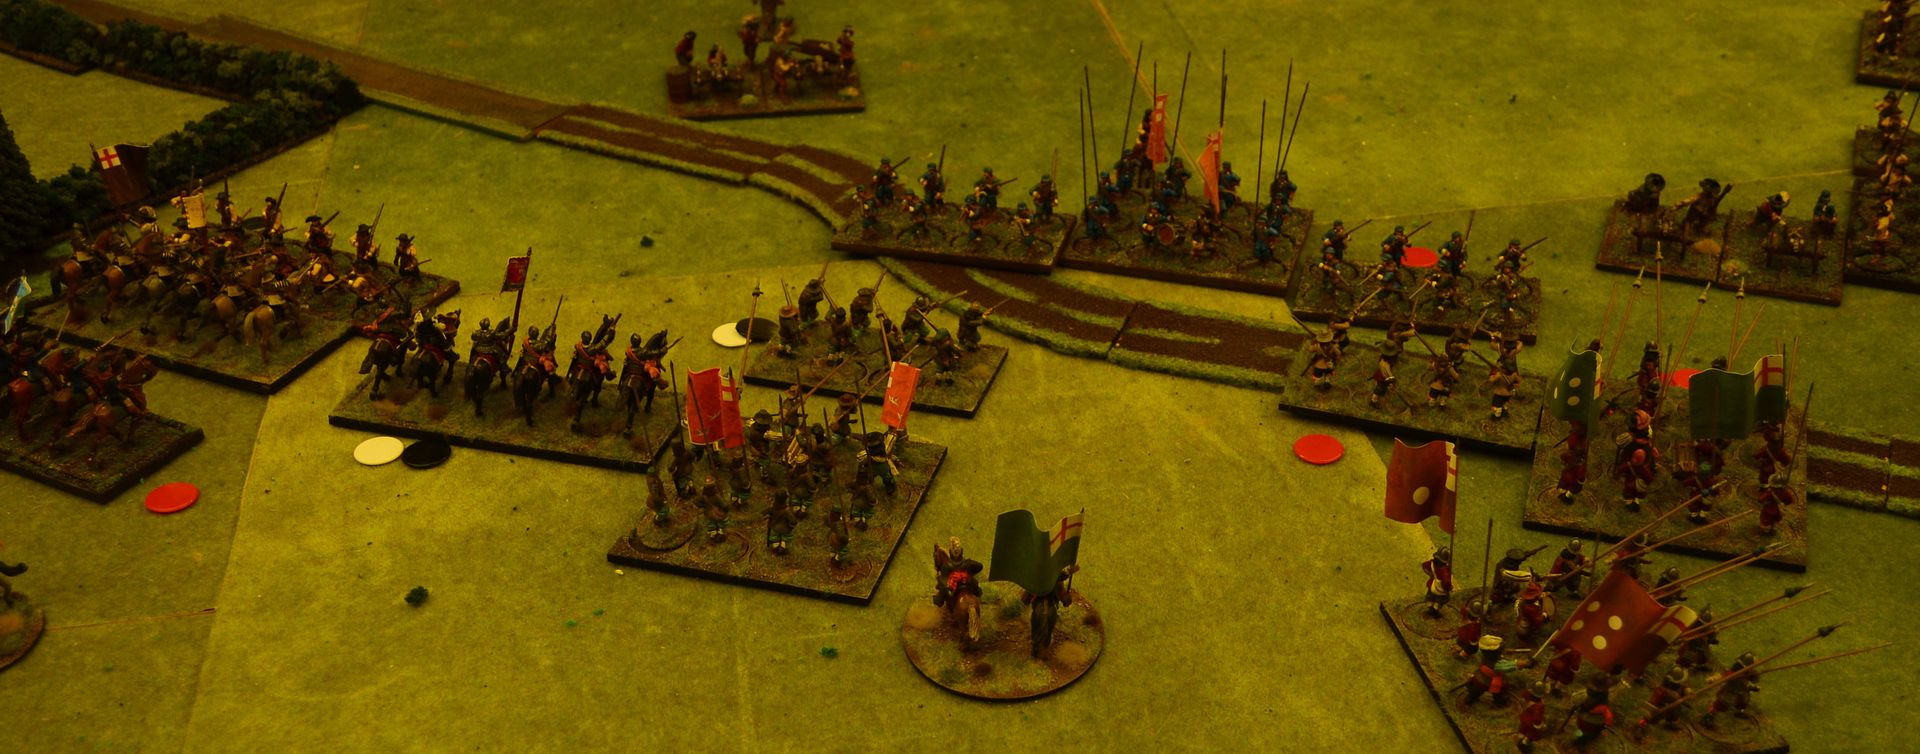
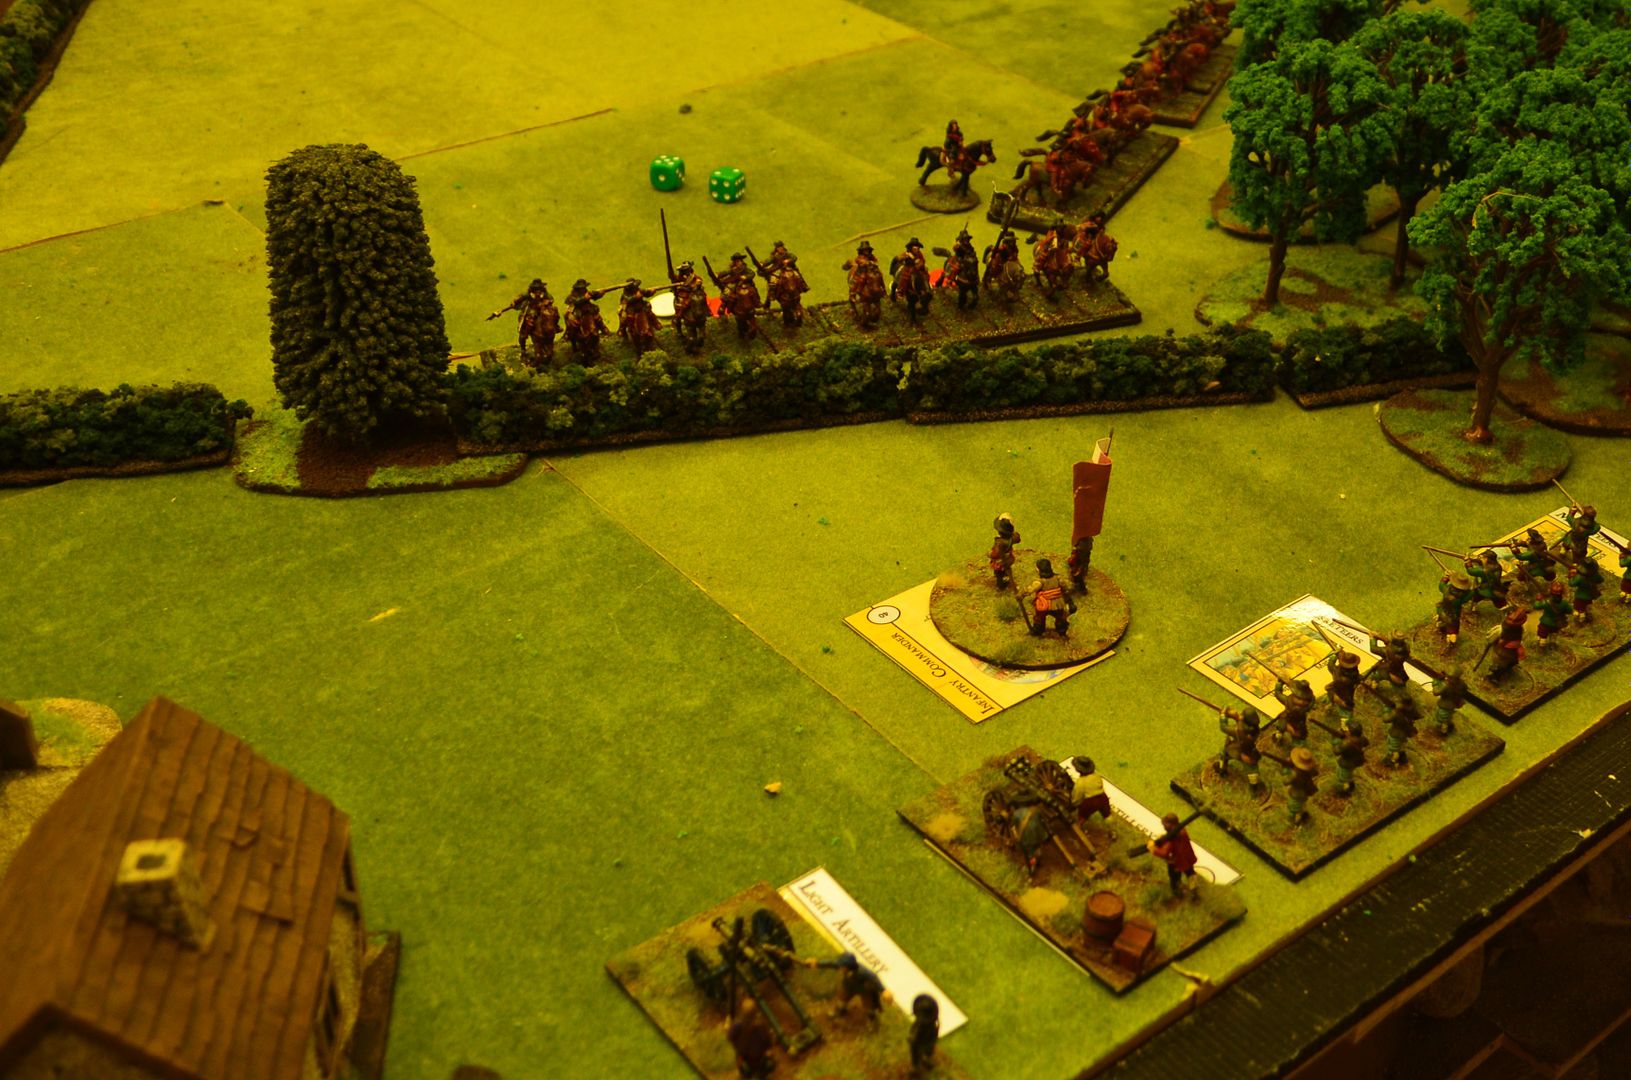
The game kicked off with Mark (Royalists) seizing initiative. His first order was to launch his left wing cavalry against my right centre (the gap between the woods and the farm). This area albeit covered by a hedgerow were to have two light guns and some musketeers in defence. However given my forces had only just marched onto the table they had not taken up defensive positions on the hedge.
Mark rolled a 4 (thus his forces could make three moves) and his cavalry traversed the table and stood waiting on the hedge line. In one stunning move my position was threatened.

He subsequently went onto mover his other cavalry wing and dragoons up on his right hand side.
.
 |
| Parliament Centre with Cavalry Screen |
 |
| Not a lot happened in the centre |
 |
| Rebel forces await the horses.... |
My priority was to defend this small key defensive area – failing to halt his cavalry on the hedge line would threaten my tightly packed pike infested centre. I rolled my orders – failed. The troops just stood there and gawked. Indeed the whole of my army just stood motionless as every order failed to materialise. I was looking at disaster in turn two.
With the initiative passing over to the Kings Forces Mark moved up one brigade in the centre to threaten the farm and the road. Lining his infantry against the hedgerow to defend against any of my cavalry that might move across his left flank. Chance would be a fine thing – they hadn’t moved. He then turned his attention to the cavalry attack. He rolled the dice – a 12 – a blunder. His cavalry were forced to move to the left. They had to shuffle round the woods. I could not believe my luck !
My turn. Thankfully my troops that I expected to get routed moved !. Rather bravely they marched up to the hedge line and poured fire into the blundered cavalry. Fortune favoured these brave rebels as one after the other the Royalist mounted troops took casualties and disorder. This ensured they wouldn’t charge next turn.
 |
| The brave rebel gun in the lane |
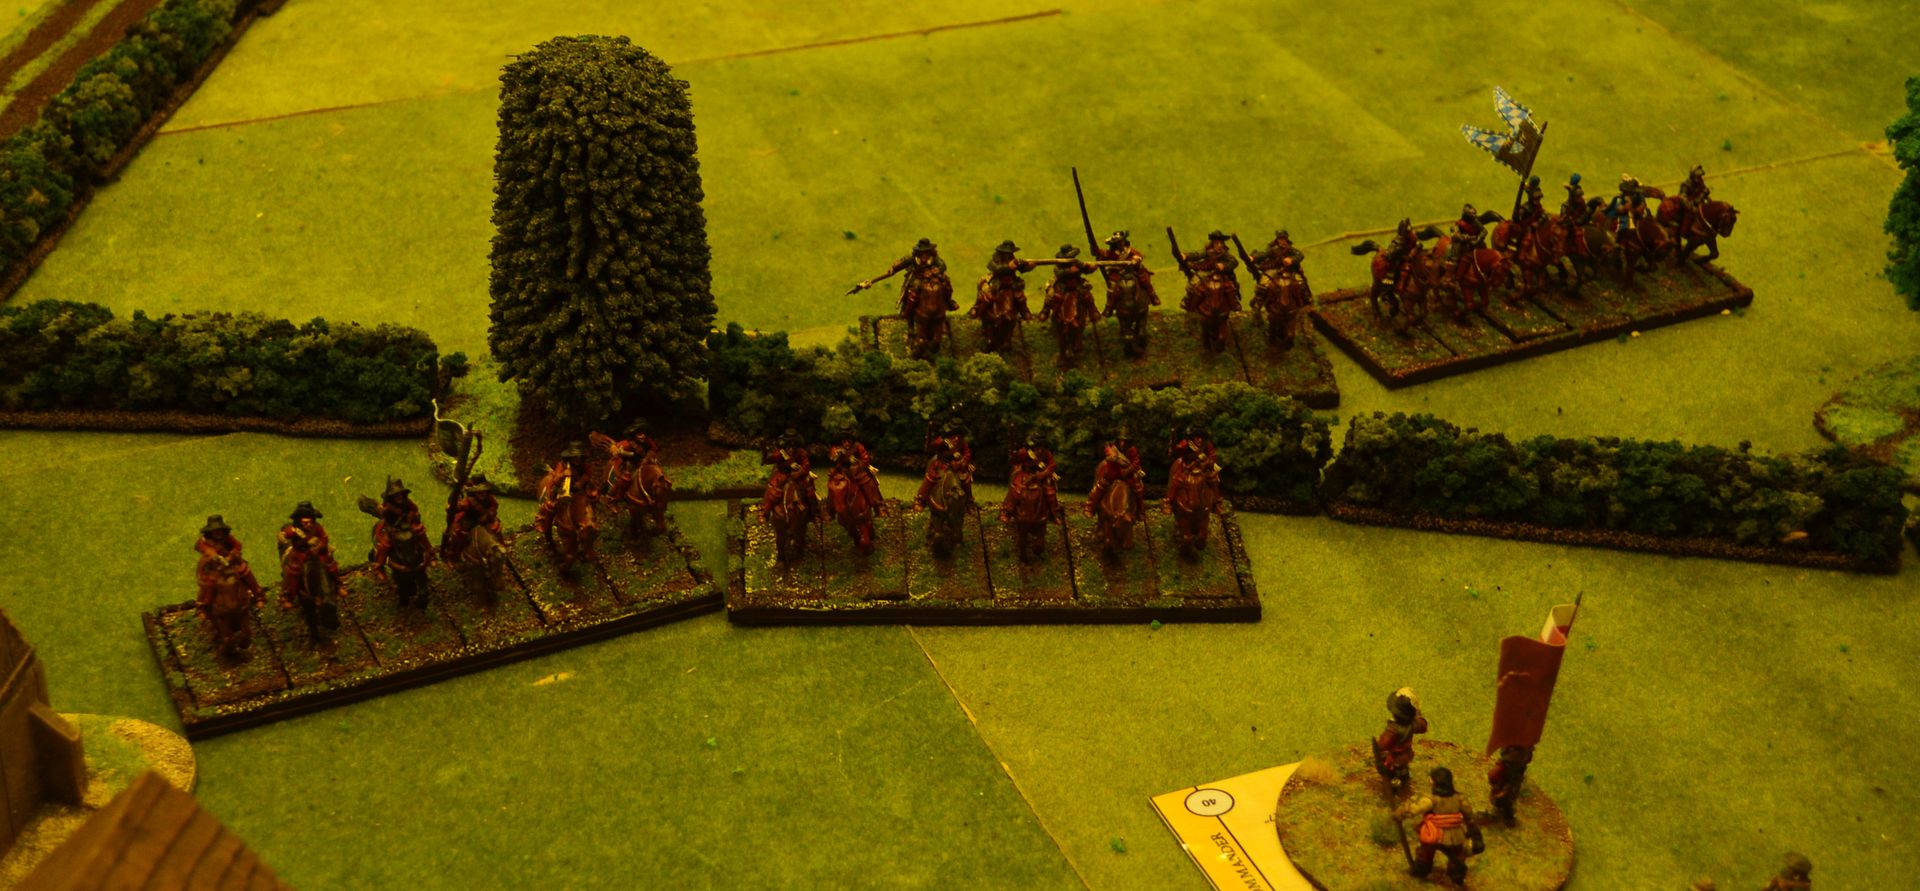
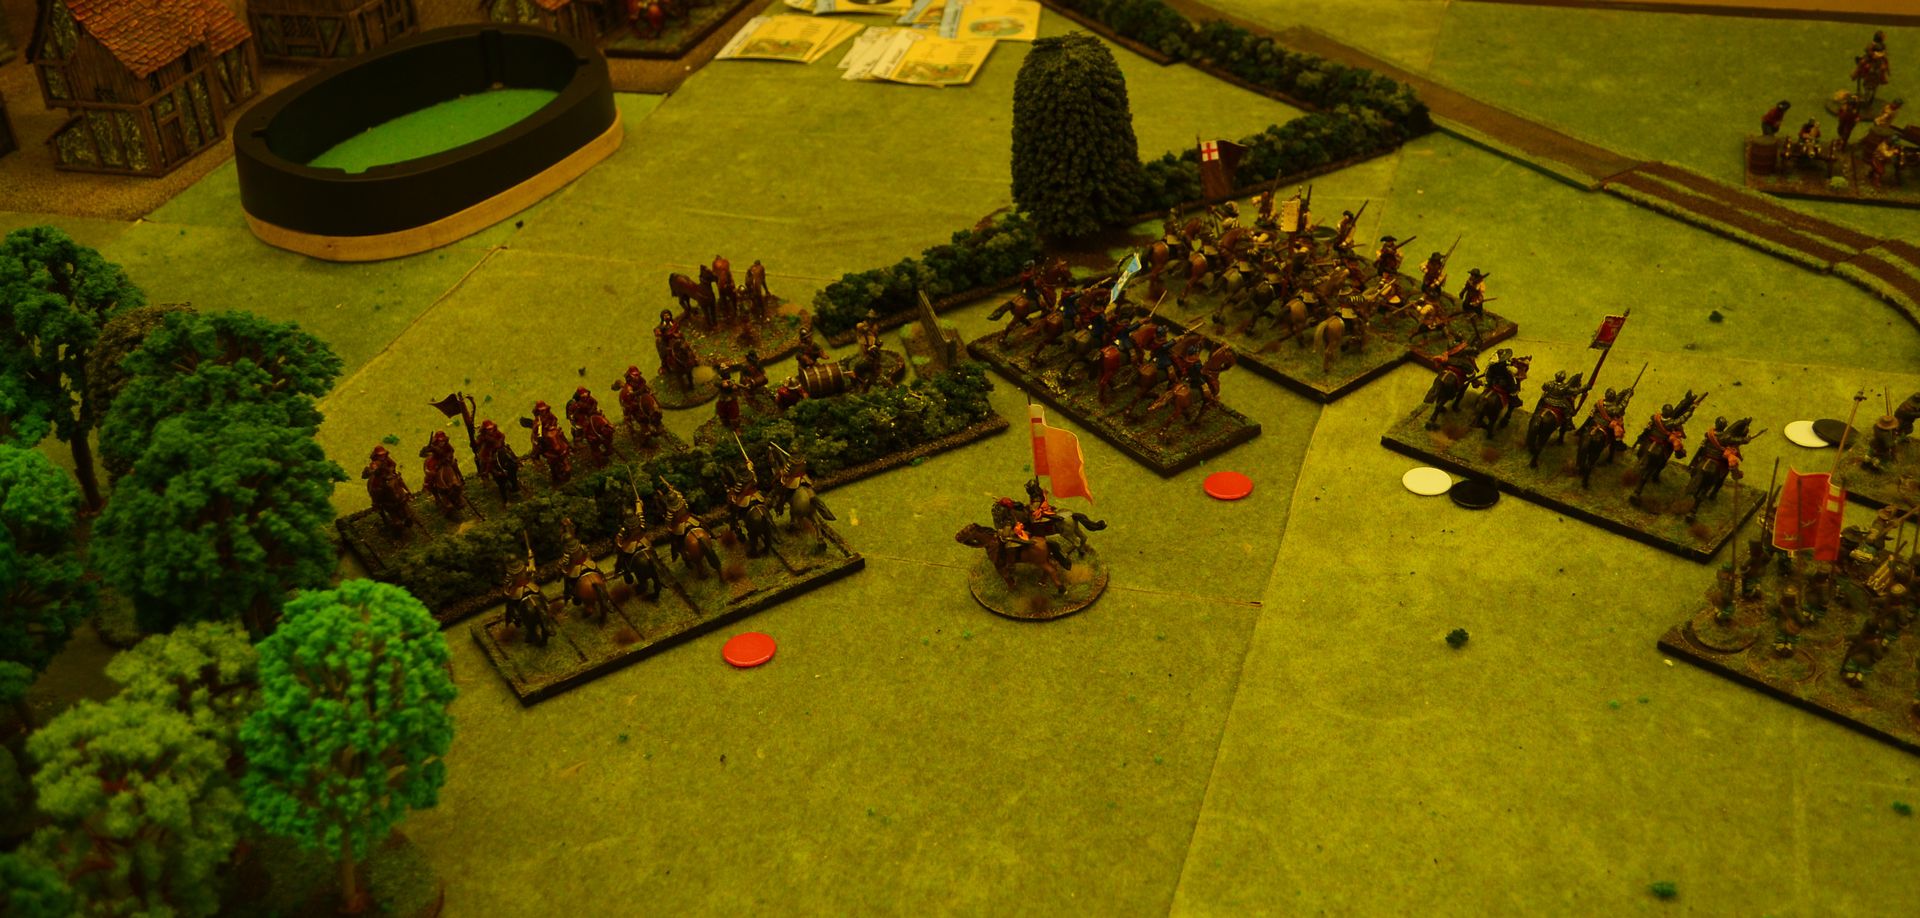
Mean whilst my right-wing cavalry and dragoons also moved from their starting position. Manoeuvring towards the cavalry now shuffling away from the defending infantry. As for my centre and left wing cavalry they still refused to budge. On a final note Waller, my general, managed to persuade a light gun to advance up the farmyard road and pour fire into the white jacketed infantry up the lane. A hail of shot and balls severely damaged the unit.
Incensed by this single gun Marks forces marched up the road to assault the gun. Their orders taking them within three inches and no further. By now the Cavalry who had blundered the previous turn could engage with my Parliamentarian right wing. A strong Royalist Cuirassier unit charged into the waiting Rebel horse. Severe damage was inflicted on both sides with both units shaken but neither side broke in the ensuing draw. The combat dice were favouring Parliament. The rest of the Royalist force formed a defensive line across the centre waiting for the Parliament infantry to advance.
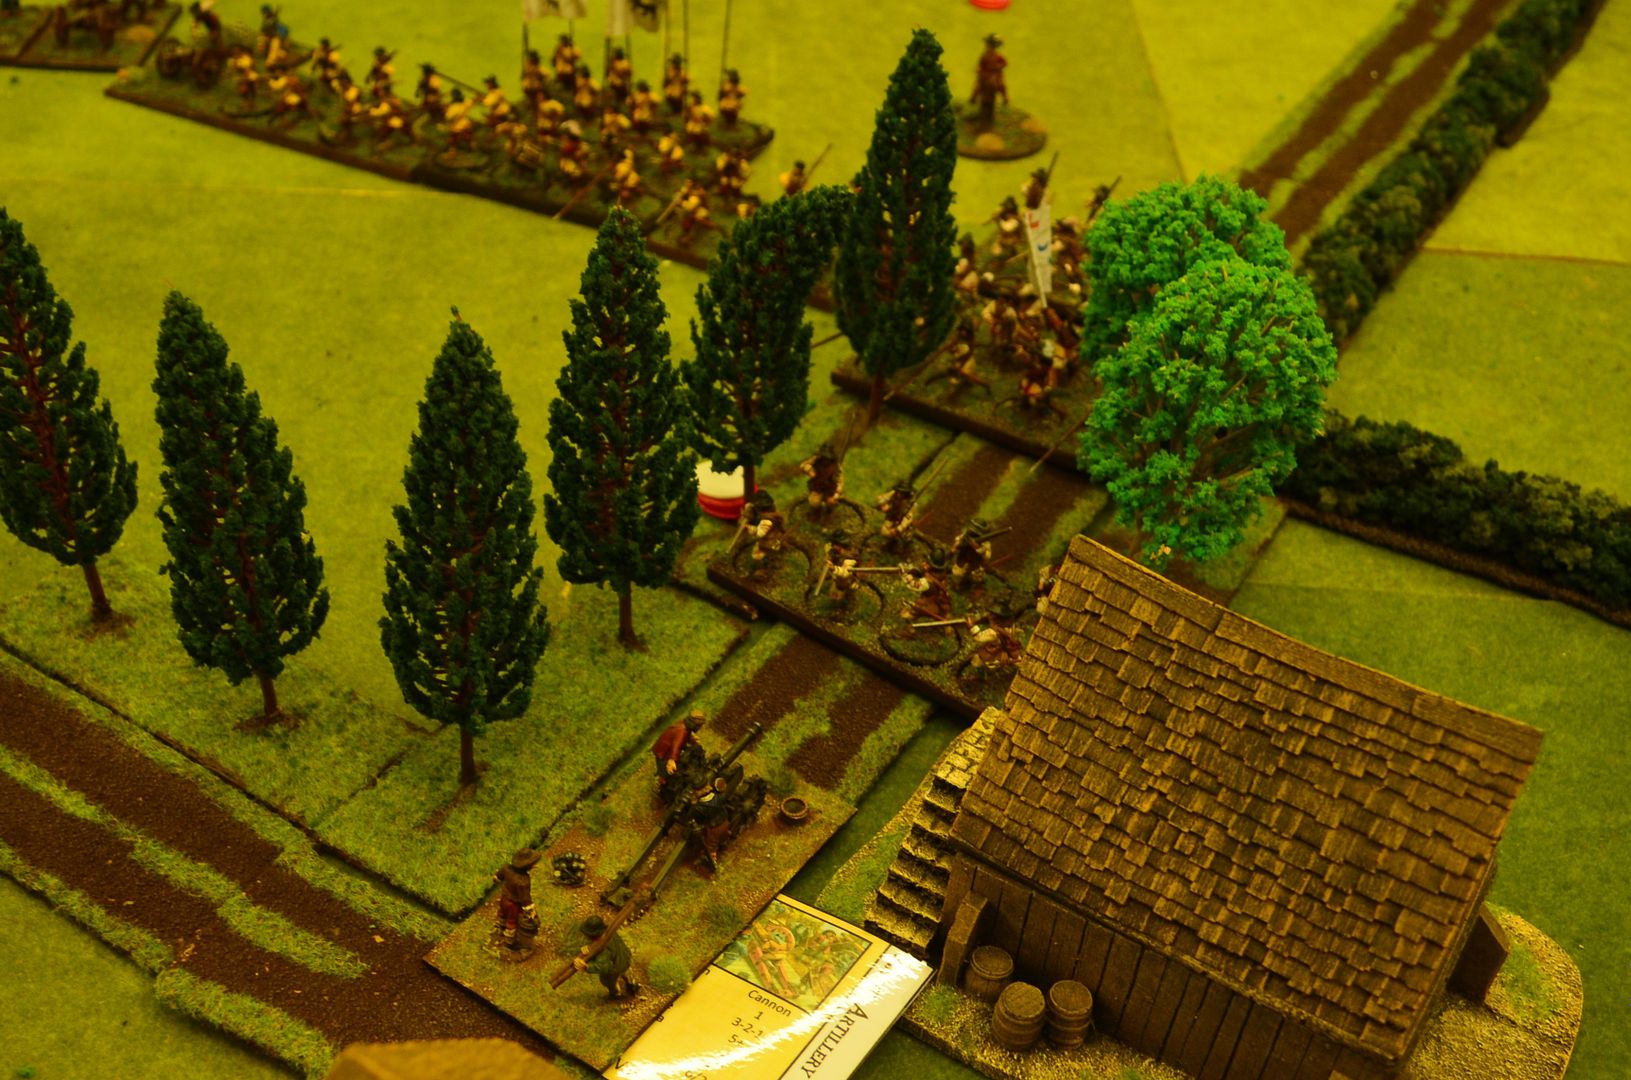
Which they did…a full six inches. Battle in the centre was yet to come in to play. Our Artillery danced with each other to little or no affect. Elsewhere my light gun opened up on the infantry in the lane and with three sixes they decimated the advancing musketeers causing the white coats to run from the field.
My infantry in the hedgerows continued to fire into the cavalry. Again the short range proved telling with more cavalier casualties and disorders a plenty. Finally my right wing cavalry charged into the shaken Cuirassiers – the fight again being close but supporting Dragoons tipped the balance into the favour of Parliament. The Royalist Cavalry Brigade on the left wing were shattered and had to retreat.
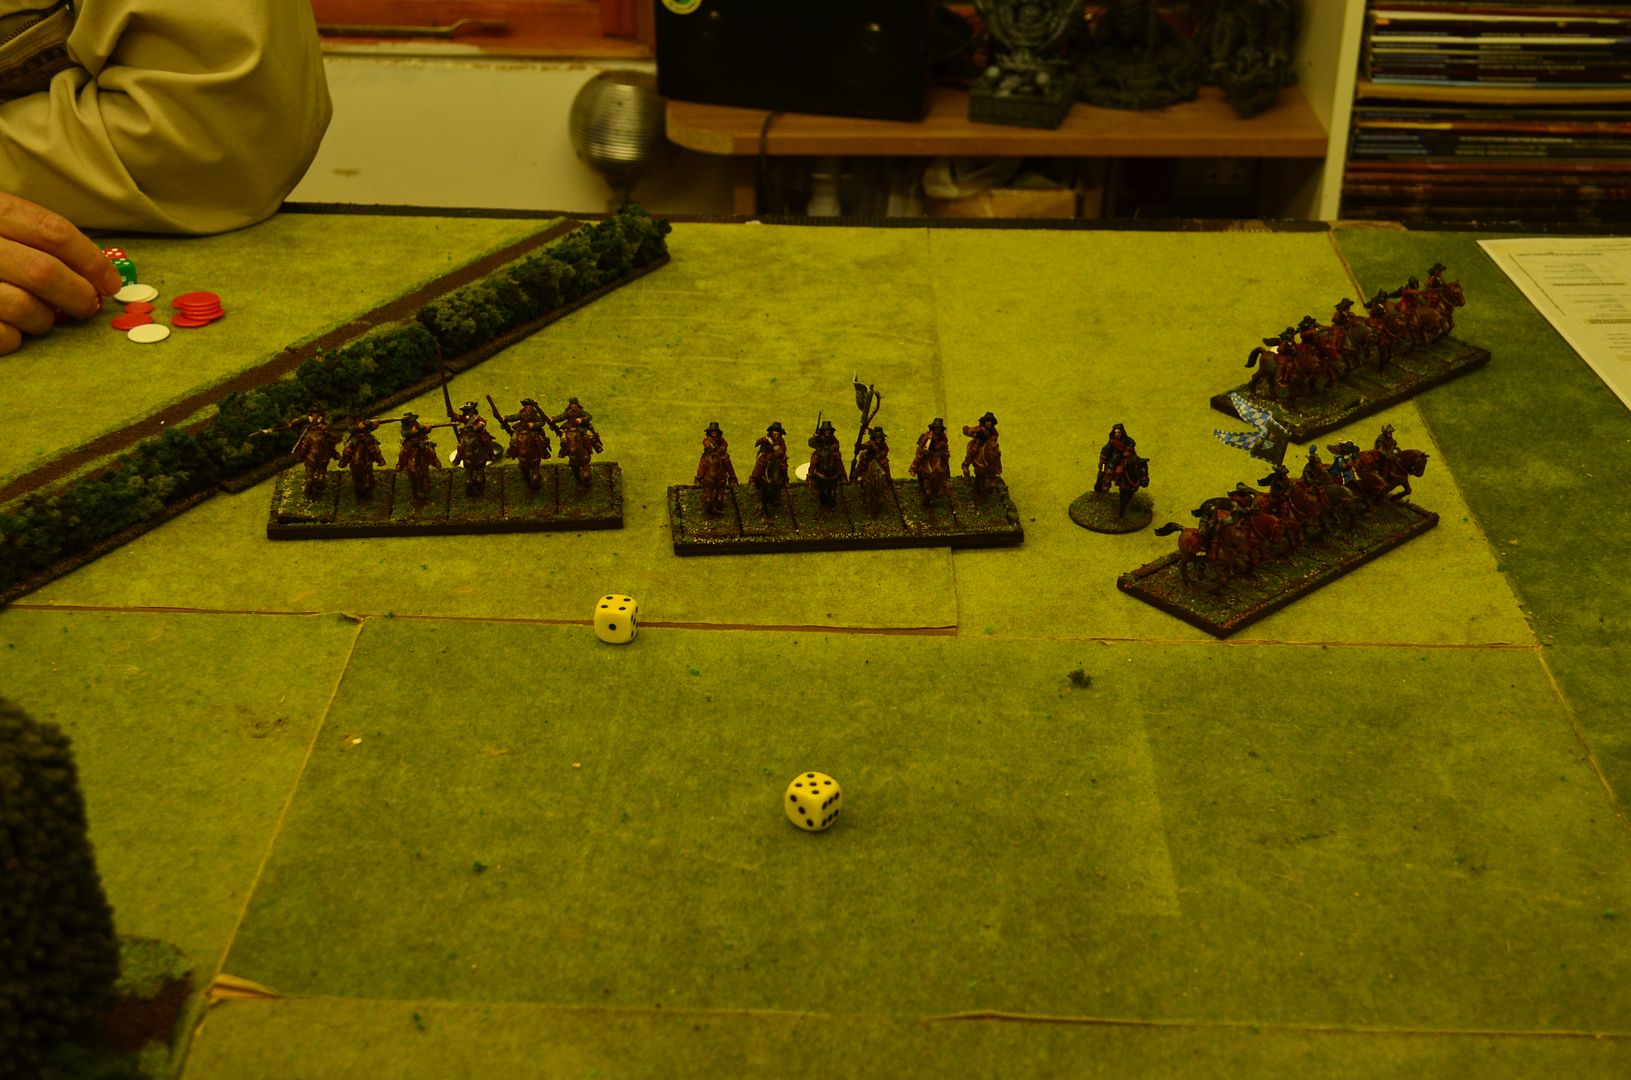 |
| The shattered Royalist cavalry |
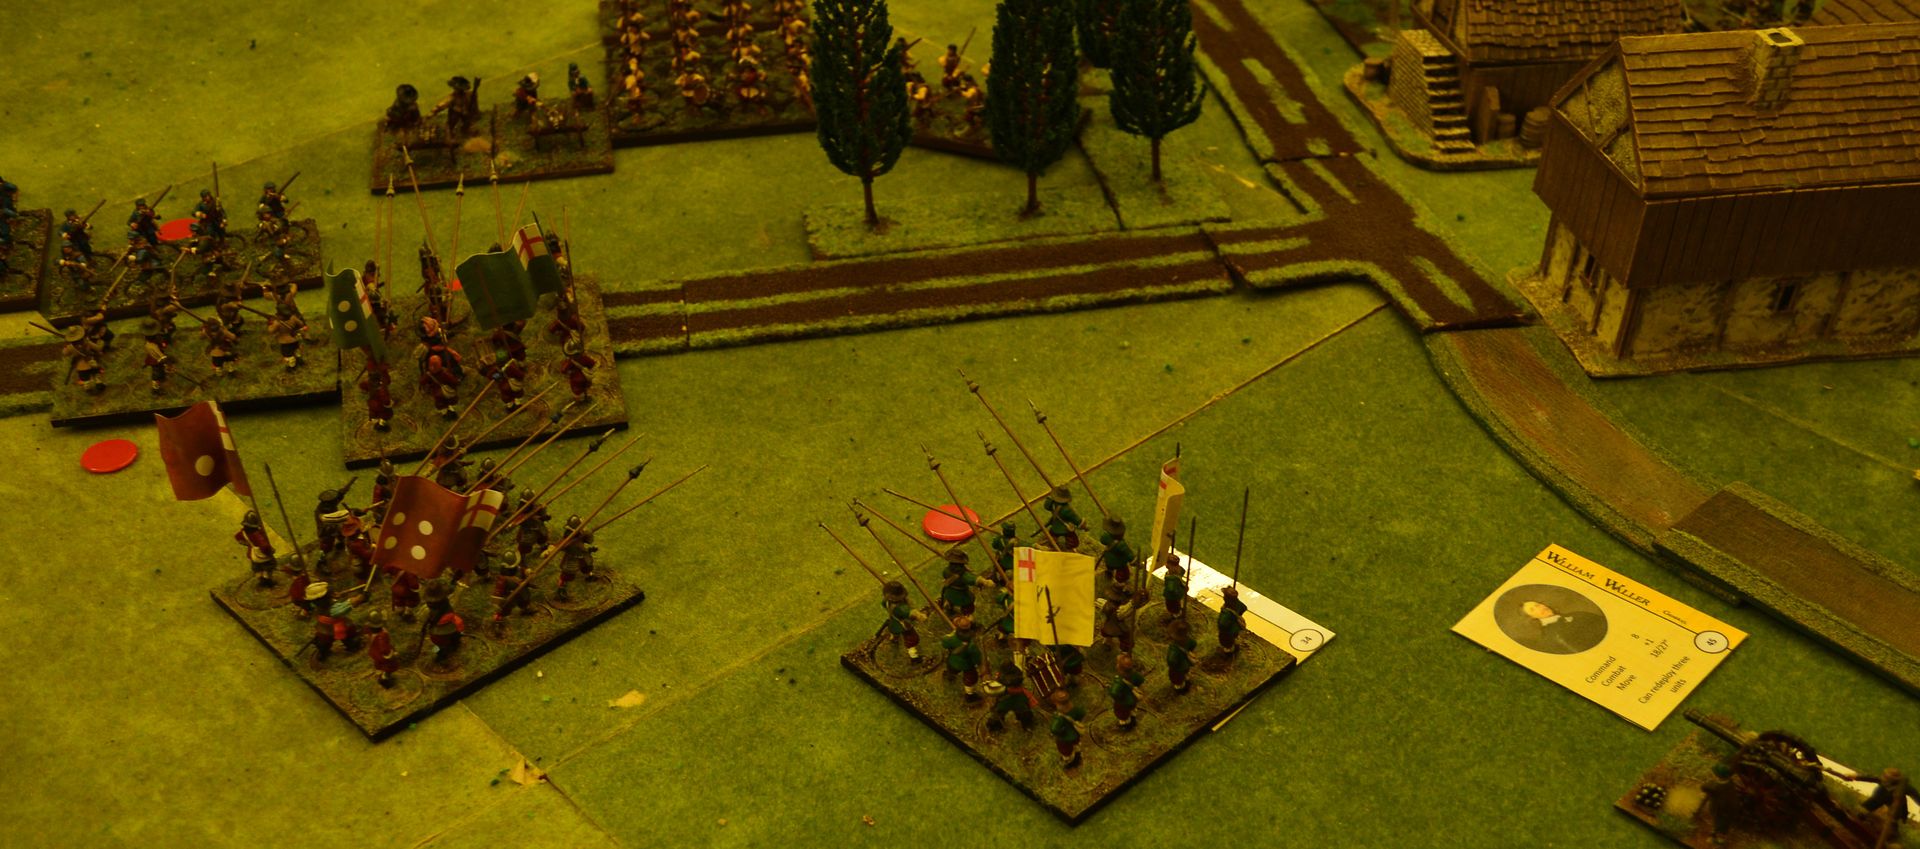
Cursing his poor fortune Mark threw more troops into the lane – his pikes advancing on the gun that had wrought so much damage on their supporting musketeers. As the pikes closed with gun they drew closing fire of canister and before they even hit the gun they had lost three more casualties and were in a state of disorder. Their charge was ineffective and the gun had at least one more round of pounding fire into the pike block. He was however to get one unit of musketeers through the farm and into the defended Rebels causing such a heavy toll on his horse. These managed to take out one artillery piece before drawing the ire of its friends. This unit to soon disappeared.
 |
| Royalist forces attack the rebels |
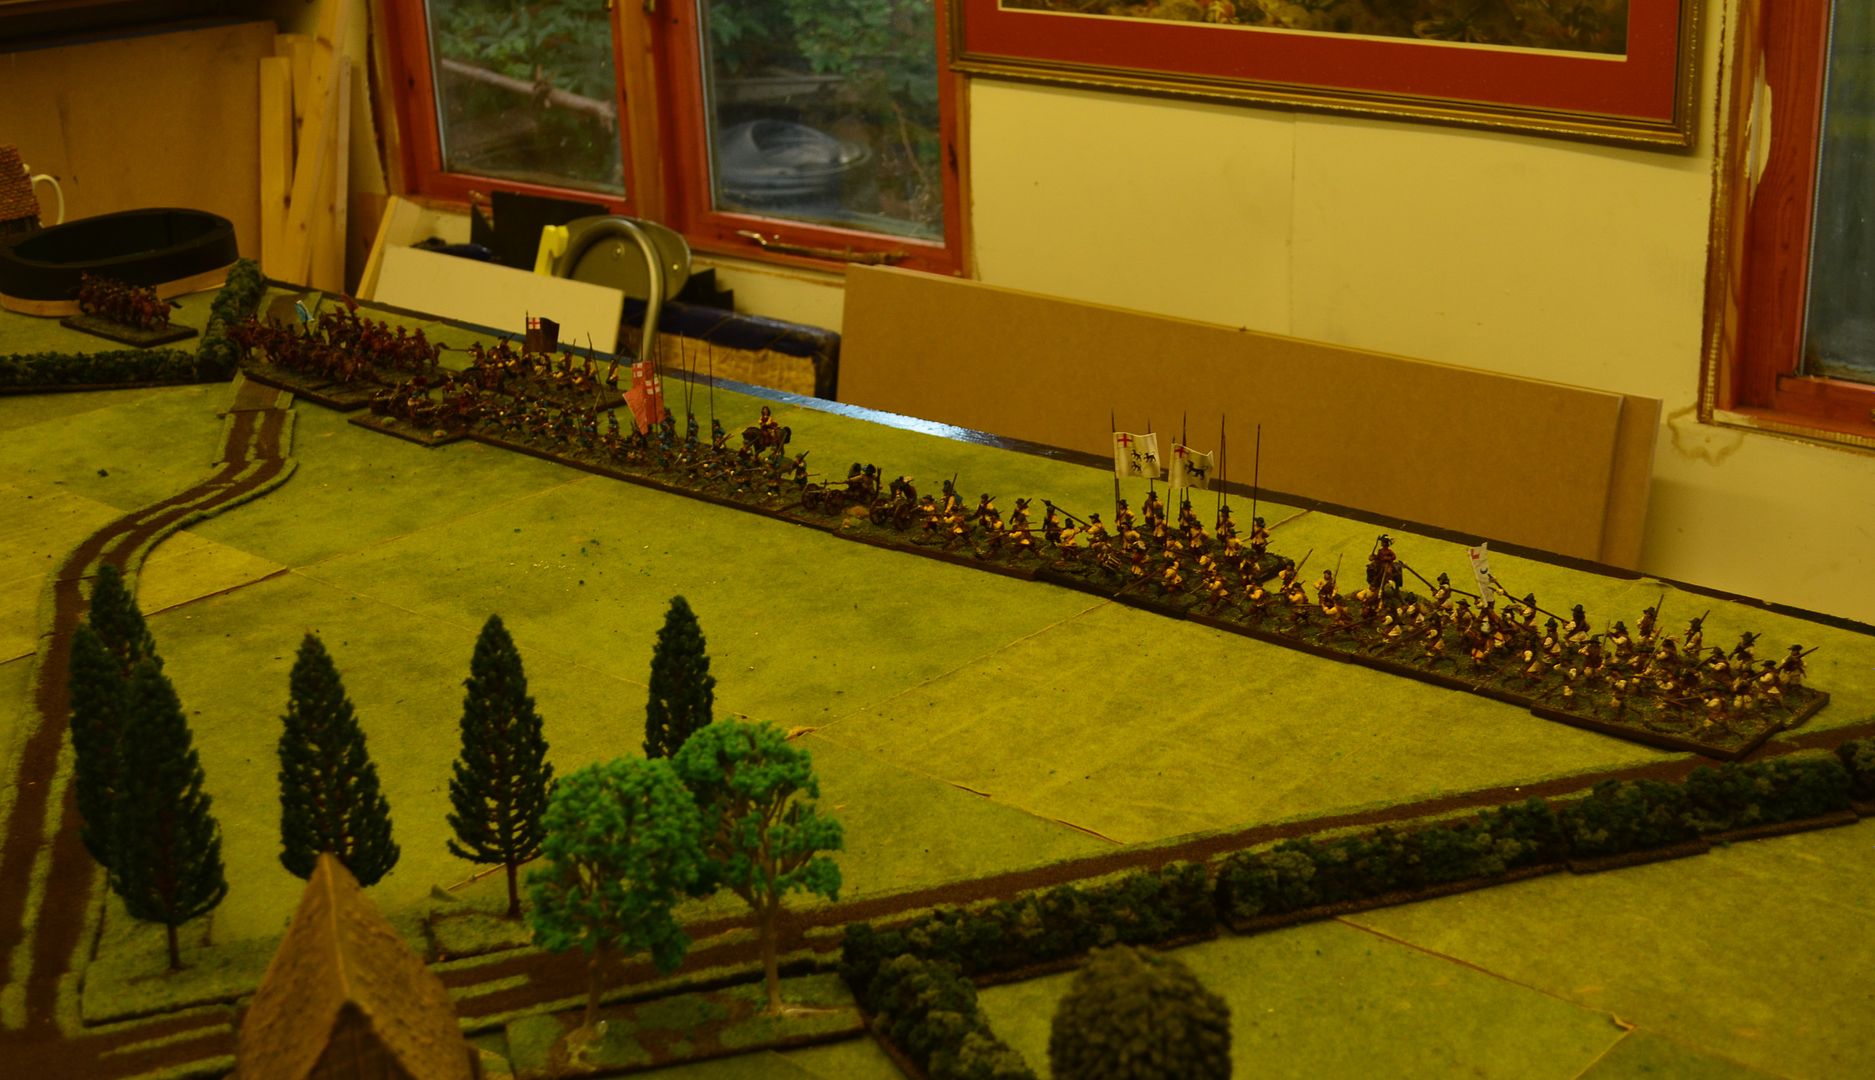
As the Royalist were reeling the next turn finally saw my six Pike Battalions advance in the centre with the left wing horse. My cavalry drew fire from the rightwing of the Royalists and saw little or no action for the rest of the game. However they remained intact and posed a real threat to the diminishing Royalist forces. A
 |
| The Parliament Pikes advance |


s the Pikes in the centre collided early wins were scored by Hoptons stubborn troops, but it was all too late. The evening was closing in (as were the Parliamentarian forces) and we decided that the outcome was an inevitable Parliamentarian victory

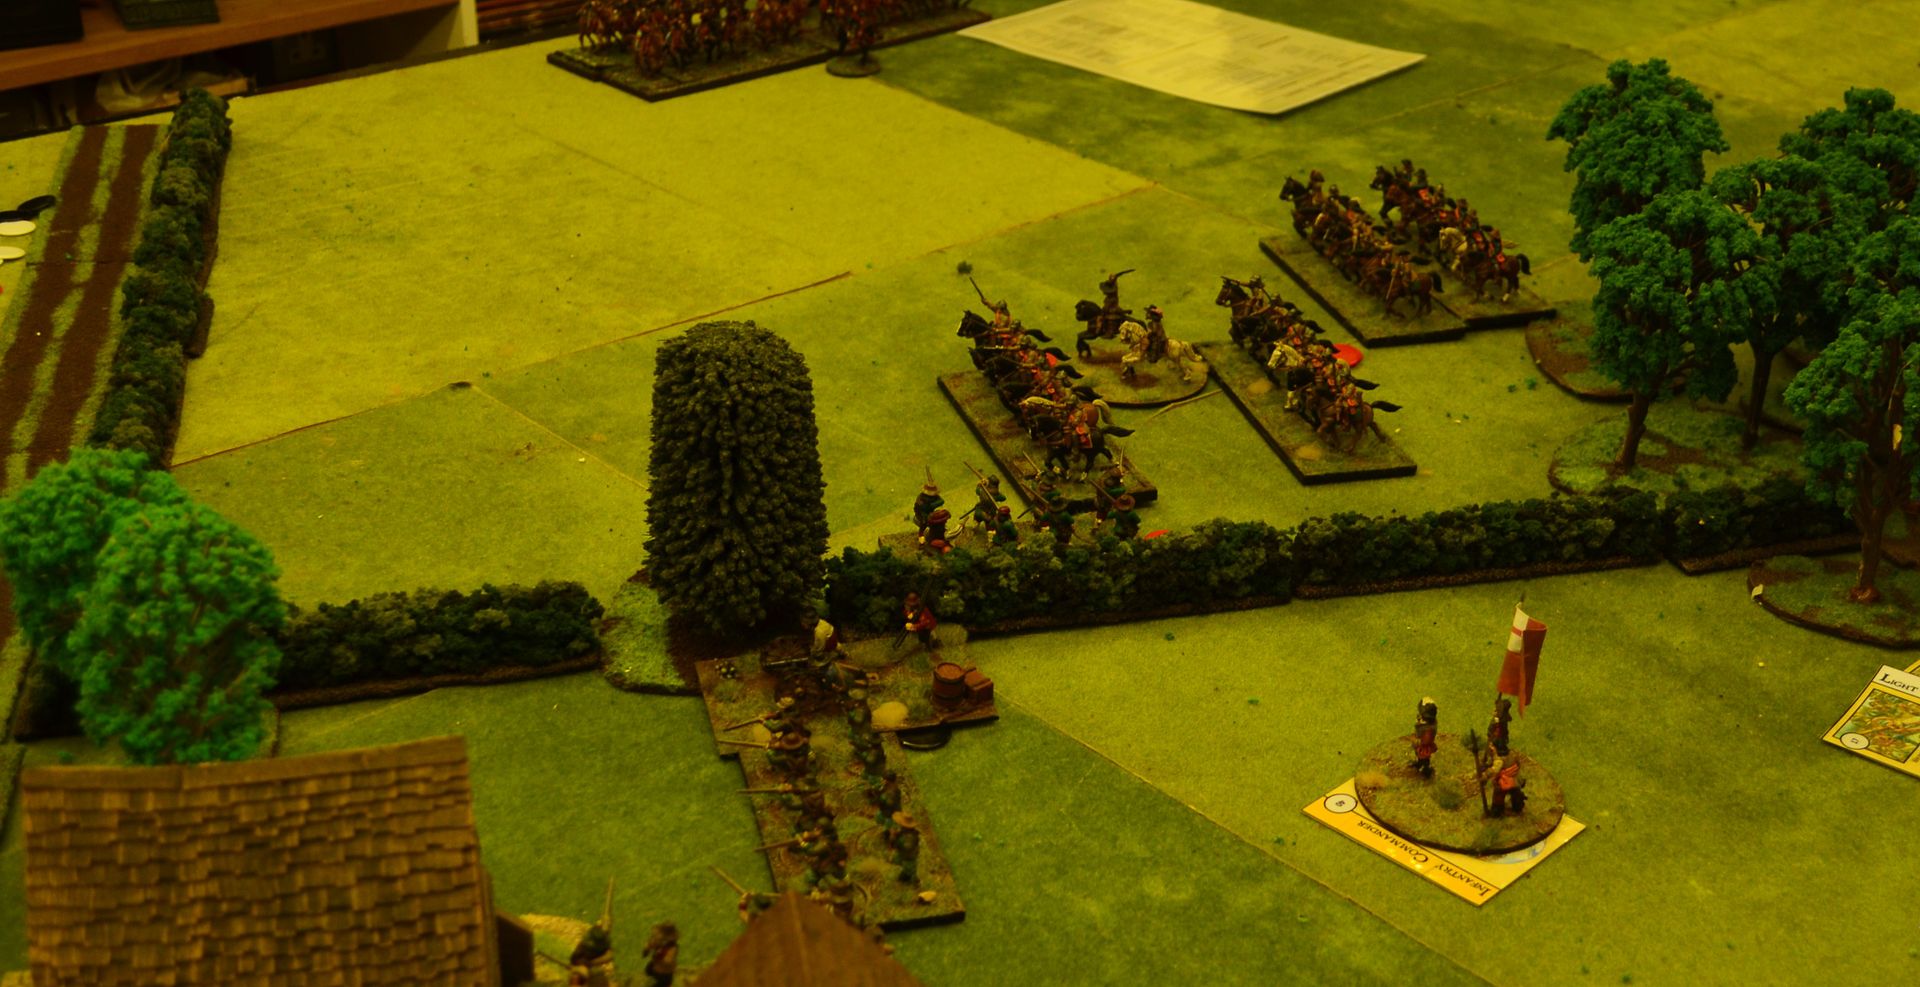 |
| Parliamentarian Cavalry swing across the right wing |
A great game and the tide is turning for Parliament...
Until next time
Wednesday, 13 July 2016
The Colonial Wars - Zulu part 3
Just a simple post this time and a quick update on the progress I have been making with my colonial wars project.
When I left you last I mentioned that I had acquired a box
of the wargames factory plastic Zulus. This box contains 30 multipart Zulus.
Unlike the Warlord Games set this comes with five different bodies (WG has 4),
heads, arms and weapons. Interestingly all the hands are open allowing the user
to determine which weapon the figure will be using. In a sense this box gives
more versatility than the WG box.
The figures themselves stand virtually the same height and
body proportions between the two are ok. Indeed the two sets combine well to
create variety within your Zulu army. Unfortunately mixing the pieces from the types of two boxes is not
possible without significant modification and given I am building hundreds of
these guys it’s something I am unlikely to do.
As regards to the building I can now confirm that all 270
Zulus in my possession are now constructed and a very large number are painted. These are all based on washers and
the basing (sand and grit) has been added.
As you can see from the picture below that’s a lot of Zulus
! These have all been mounted in the excellent movement trays from warbases. As
a rule I have used two types of trays 6’s and 12’s. This allows me to configure
regiments in multiples of six and if necessary use the smaller trays to
represent skirmish units.

Since the above picture was taken I can confirm that 200 are now painted and the rest have all been primed dark brown with the Halfords camo paint.
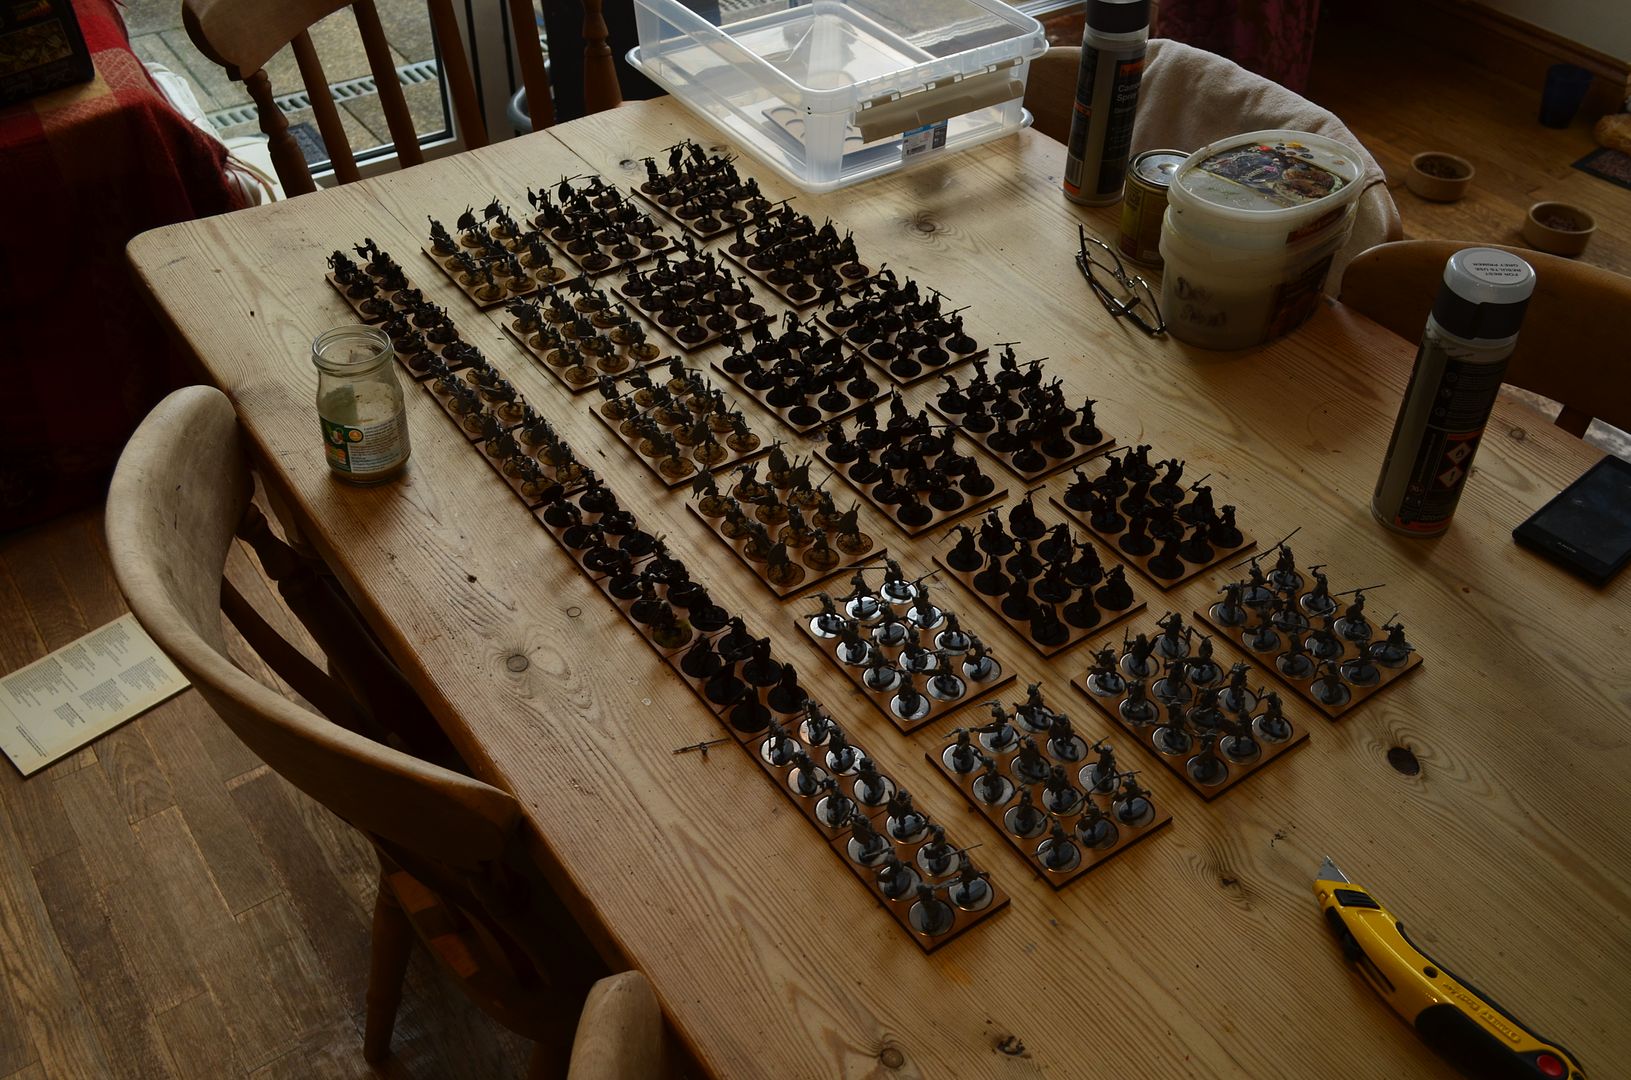 |
| 270 Zulus in various stages of painting |
At present I am painting each warband as a group of thirty - this includes six rifle/musket armed troops.
One of the things we found by basing the ECW troops
this way was that vast amounts of troops can be moved swiftly across the table
but also cleared away quickly.
I have decided that the final volume of Zulus will probably
count out around 400 so one more box of the Zulu Starter army from WG should be
sufficient for my needs. This was ordered last night on ebay for £58. Total spend on the Zulus is now running at £200 so about 50p per figure
In time I'll select some of the plastic ones and purchase a few metals to create the Indunas (Bosses). These will be mounted in much the same way that I did my ECW commanders on round bases.
In time I'll select some of the plastic ones and purchase a few metals to create the Indunas (Bosses). These will be mounted in much the same way that I did my ECW commanders on round bases.
So 400 Zulus to paint is no easy task…however with the matt
brown spray option I have been able to churn out a total of 200+ Zulus painted
very quickly inside two weeks. Each figure has typically 7 colours added to the base – wooden
hafts on spears, sand for shield inside, gun metal for spear heads, white for
the shield pompom and arm/leg hairy decorations, a variety of browns and
yellows for loin cloths, black for the hair and the appropriate colour for the
shield. I have been painting these in blocks of 30. This is a manageable number
in an evening’s painting session and on the current run rate the end of September to complete this army looks achievable..
 |
| Finished Zulus - all the bases will be done at the same time along with the movement trays - apologies not the best picture |
Once the base colours have gone on the figure is painted
with Army Painter Strong Tone Dip and left for 24 hours. Following this the
figure is then painted with a matt varnish.
The final job is then to paint the base, I have been using a
chocolate colour from a Homebase tester pot and then dry brushed over with a
sand colour. Only when all this is done is static grass added to the base. I
was concerned that the matt brown was too dark however once the base is
finished it does lighten up the figure.
Zulu army shields come in a variety of colours and were used
to denote each regiment by experience. Shields that were solid black reflected
an inexperienced unit whereas all white shields were issued by the king to the
most elite regiments. Between these two extremes the greater the amount of
white on the shield better reflected the quality of the unit. For the purposes
of my army I’ll be painting my troops up in equal thirds – all black, all white
and the mixed pattern. I also read somewhere that some units were issued with
red hide shields. I’ll probably add a couple of dozen of these as well.
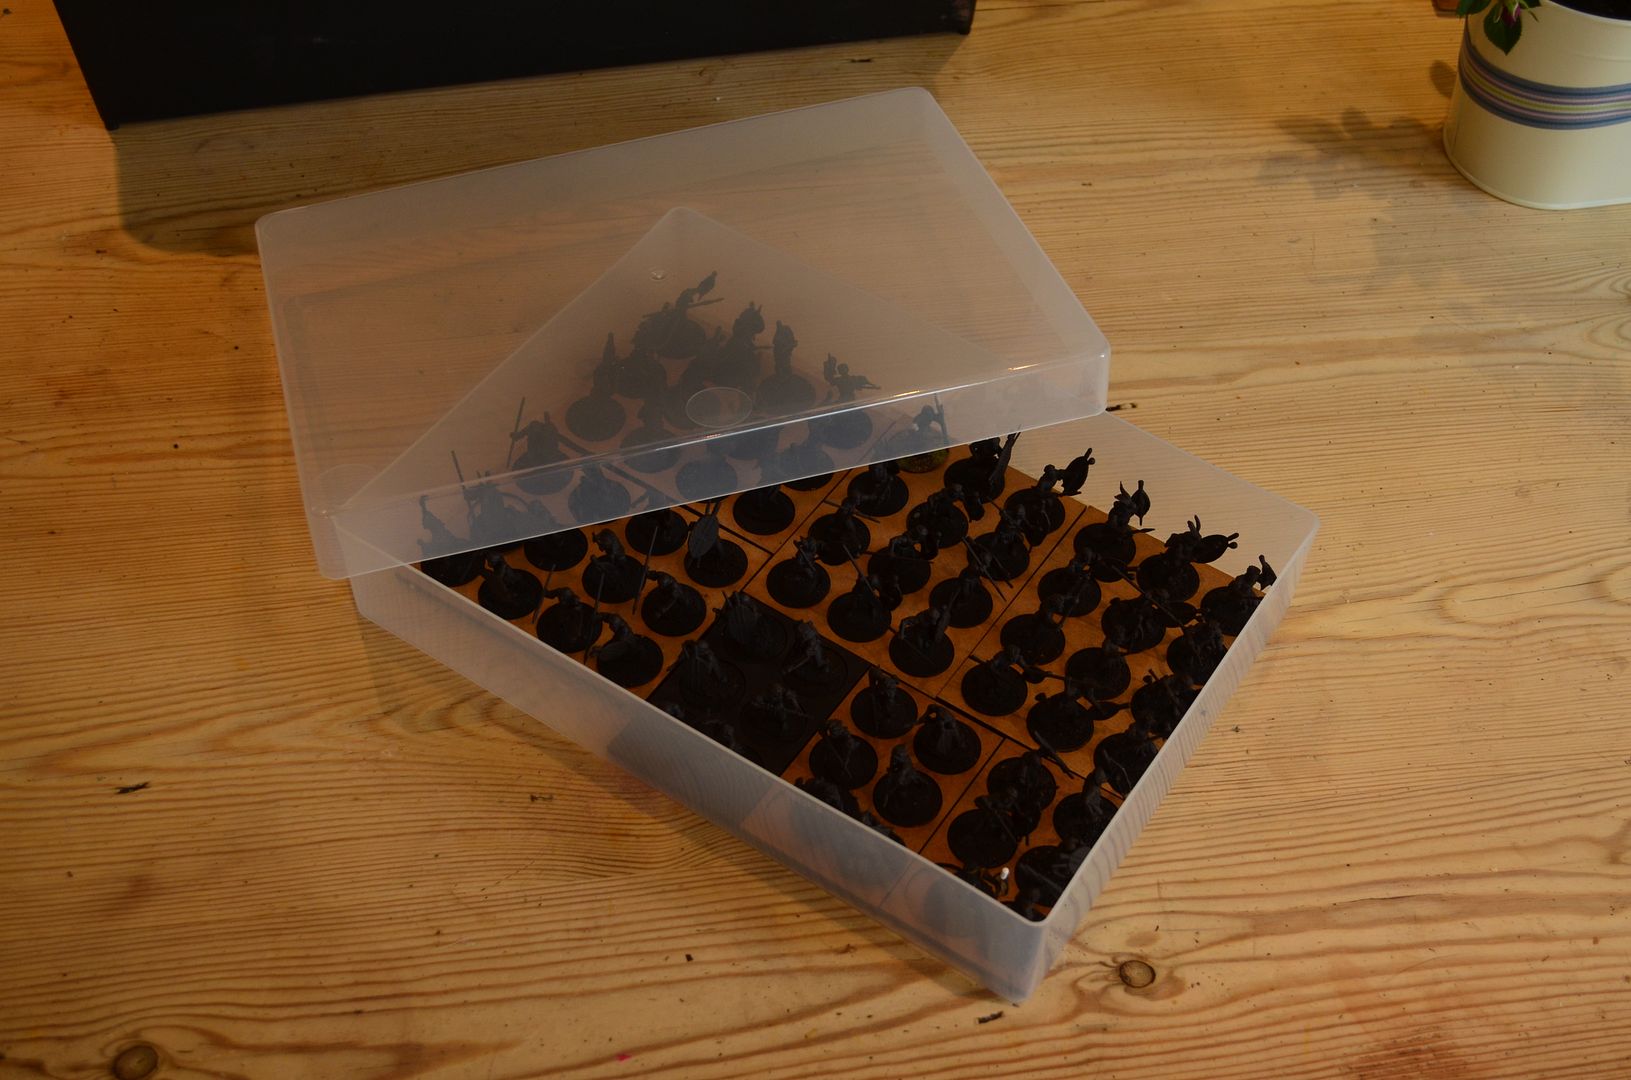 |
| A4 Box with lid |
 |
| 270 Zulus don't take up a lot of room |
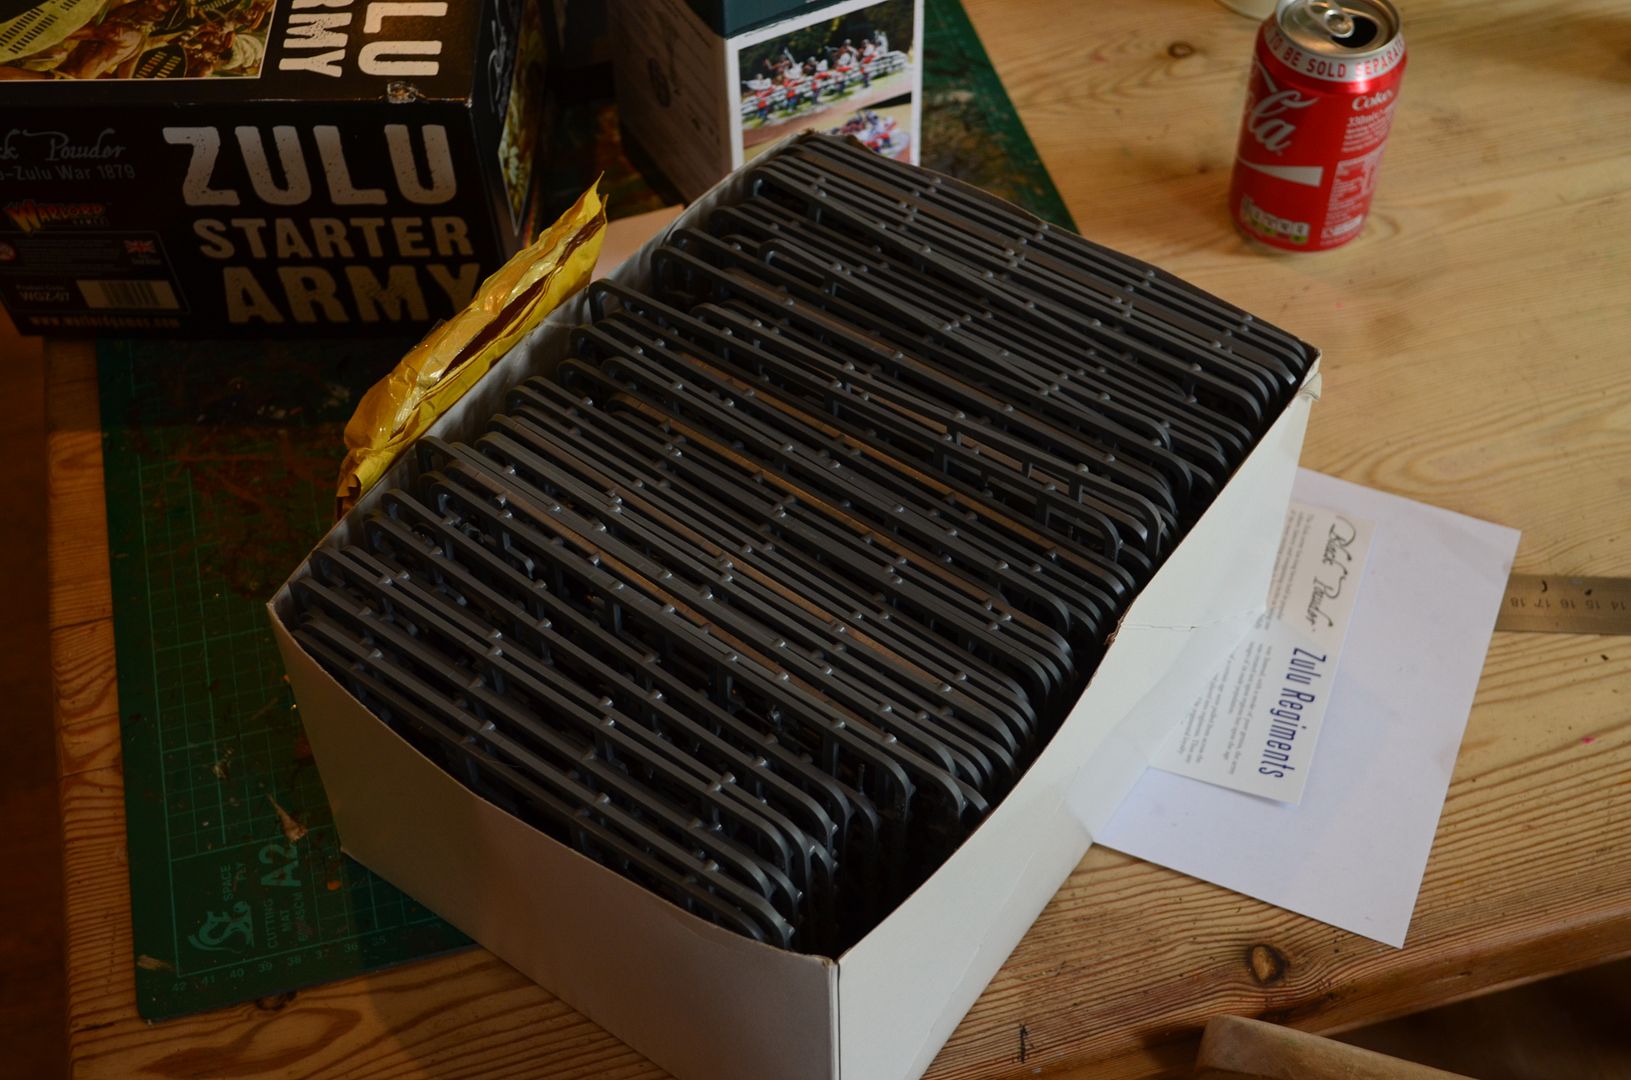 |
| Box of sprues - add a comment if you have an idea what could be done with these please |
Tuesday, 12 July 2016
The Shed Extension part 7
The previous part of this journey can be found here
http://shedwars.blogspot.co.uk/2016/07/the-shed-extension-part-6.html
Just a small update with regards to the progress on the new shed extension. This weekend was focussed on getting the building weatherproofed and included...
1. completing the felt roofing - done (and no I did not fall off the roof)
2. Filling in the space where the two sheds meet - done
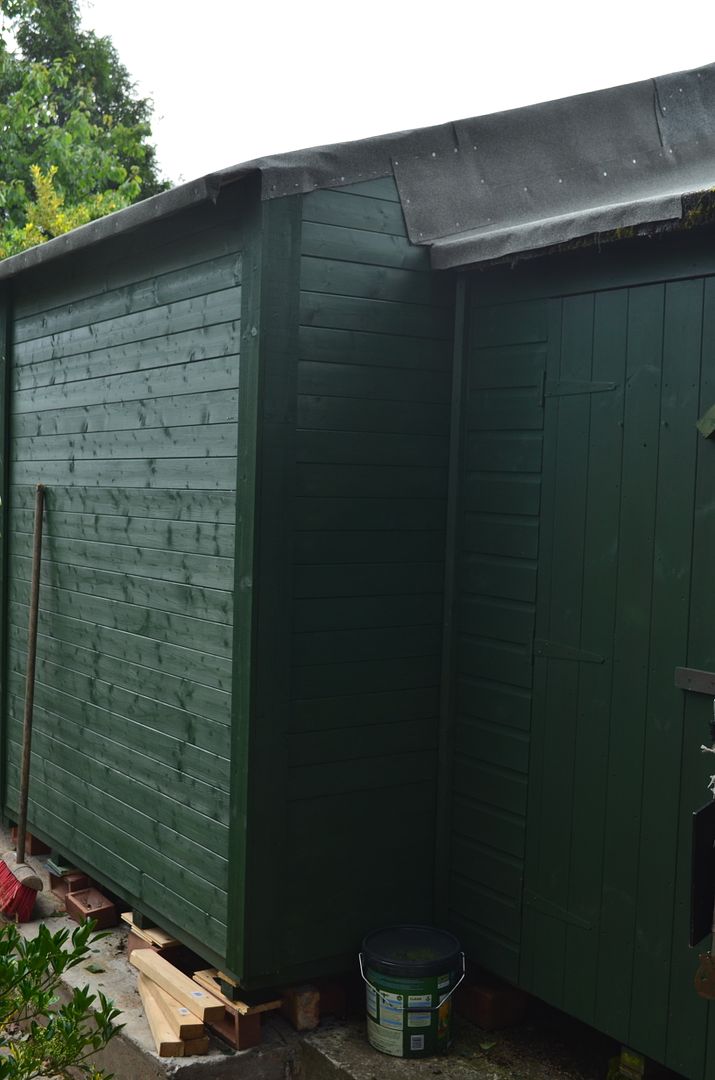
3. Building the door and hanging this - done
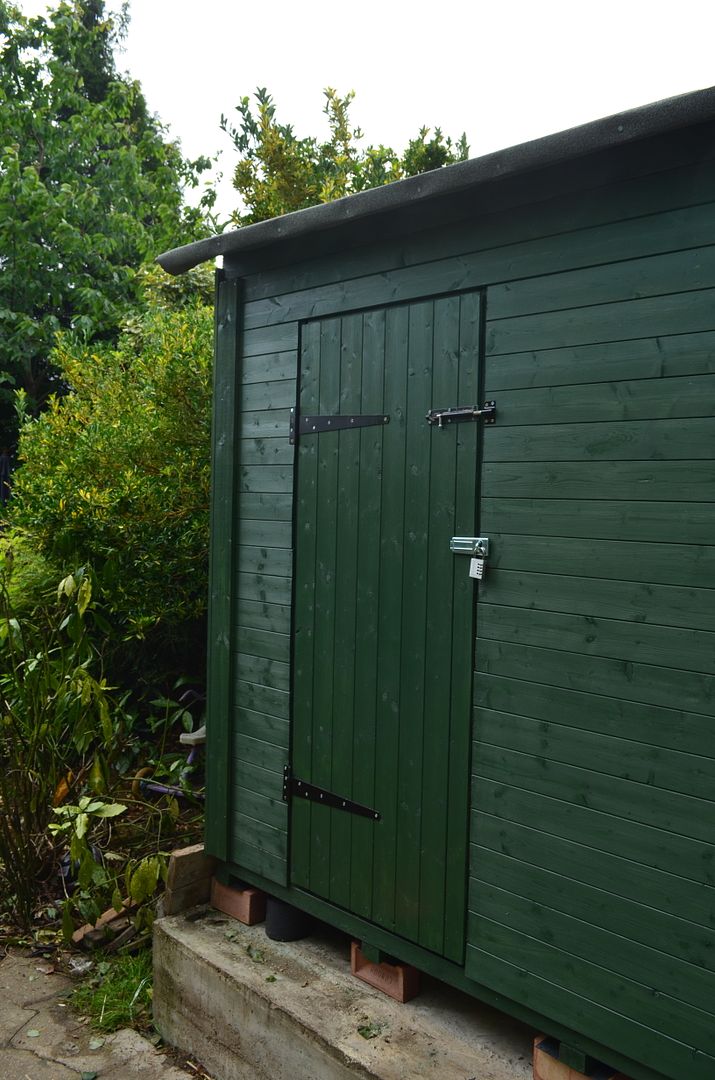
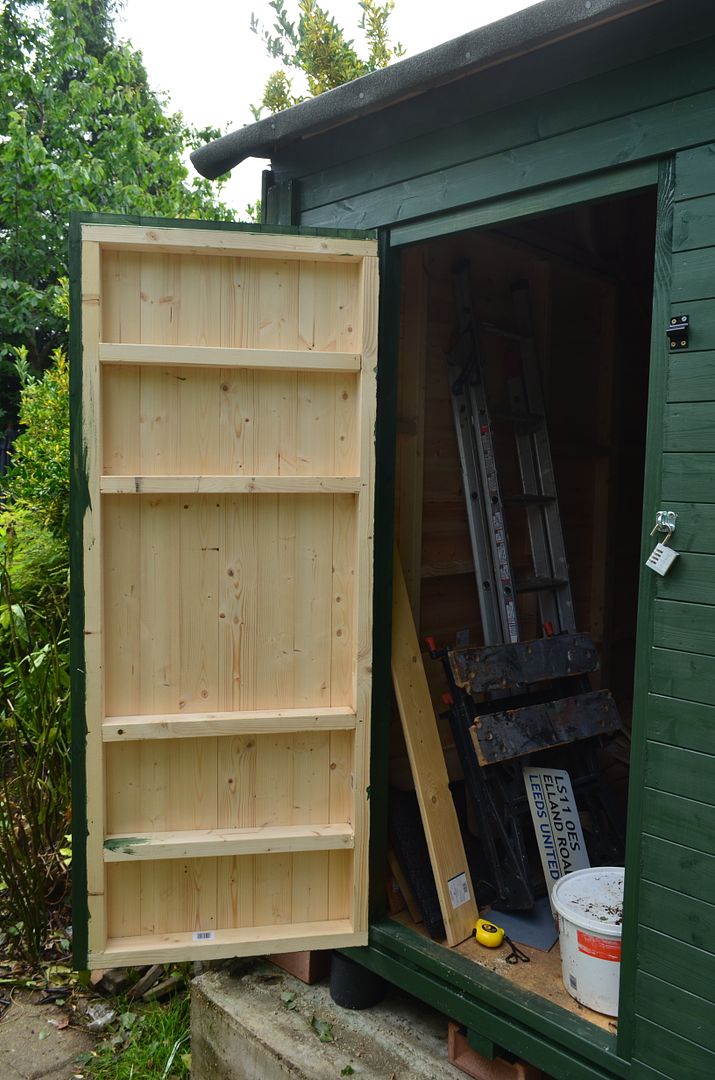
and whilst the paint pot was out I decided to paint the old shed so in what in keeping with the new
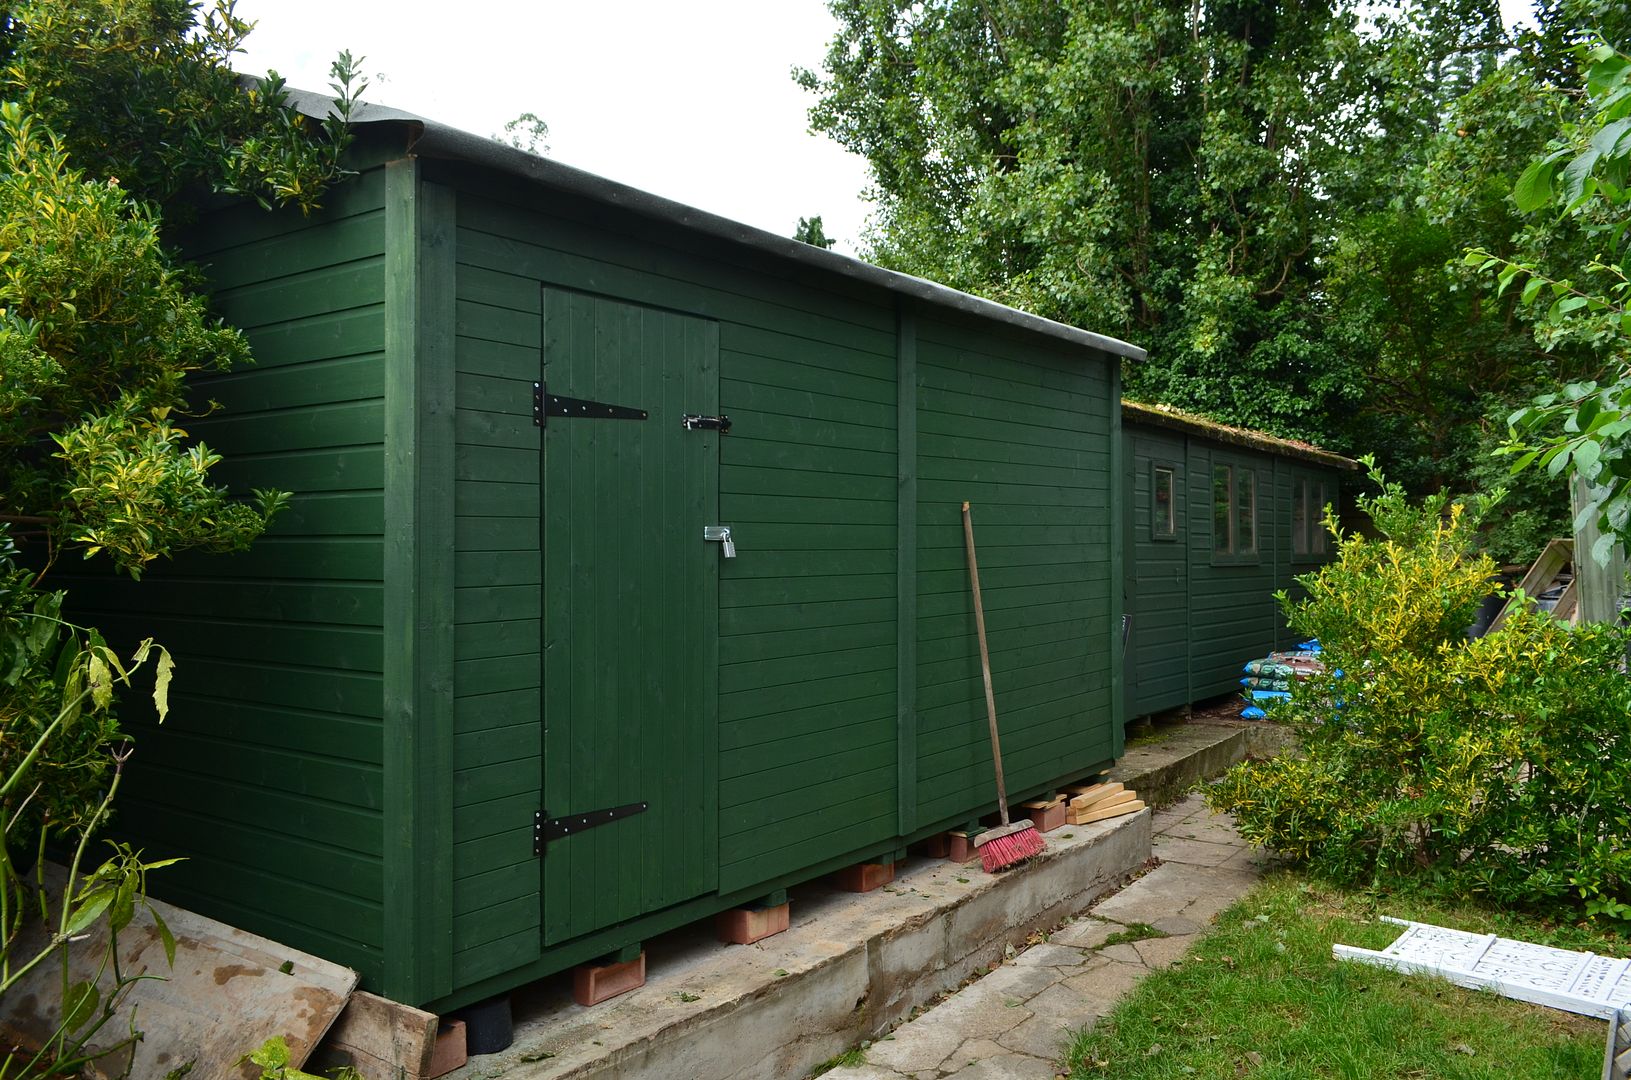
The 'new' extended shed now runs a total of 39 feet in length.
Up next will be to insulate the building and sort out the electrics
part 8 here
http://shedwars.blogspot.co.uk/2016/07/the-shed-extension-part-8.html
More to come soon...
http://shedwars.blogspot.co.uk/2016/07/the-shed-extension-part-6.html
Just a small update with regards to the progress on the new shed extension. This weekend was focussed on getting the building weatherproofed and included...
1. completing the felt roofing - done (and no I did not fall off the roof)

2. Filling in the space where the two sheds meet - done

3. Building the door and hanging this - done


and whilst the paint pot was out I decided to paint the old shed so in what in keeping with the new

The 'new' extended shed now runs a total of 39 feet in length.
Up next will be to insulate the building and sort out the electrics
part 8 here
http://shedwars.blogspot.co.uk/2016/07/the-shed-extension-part-8.html
More to come soon...
Sunday, 3 July 2016
The Shed Extension part 6
Hi Folks
Exciting news today. The erection of the shed has taken place !
Previous part here...
http://shedwars.blogspot.co.uk/2016/06/the-shed-extension-part-5.html
This has been a very busy weekend which started on Friday evening. It was imperative to get the floorboards down on friday so once my trusty wargaming chums came round we could get the walls and roof up.
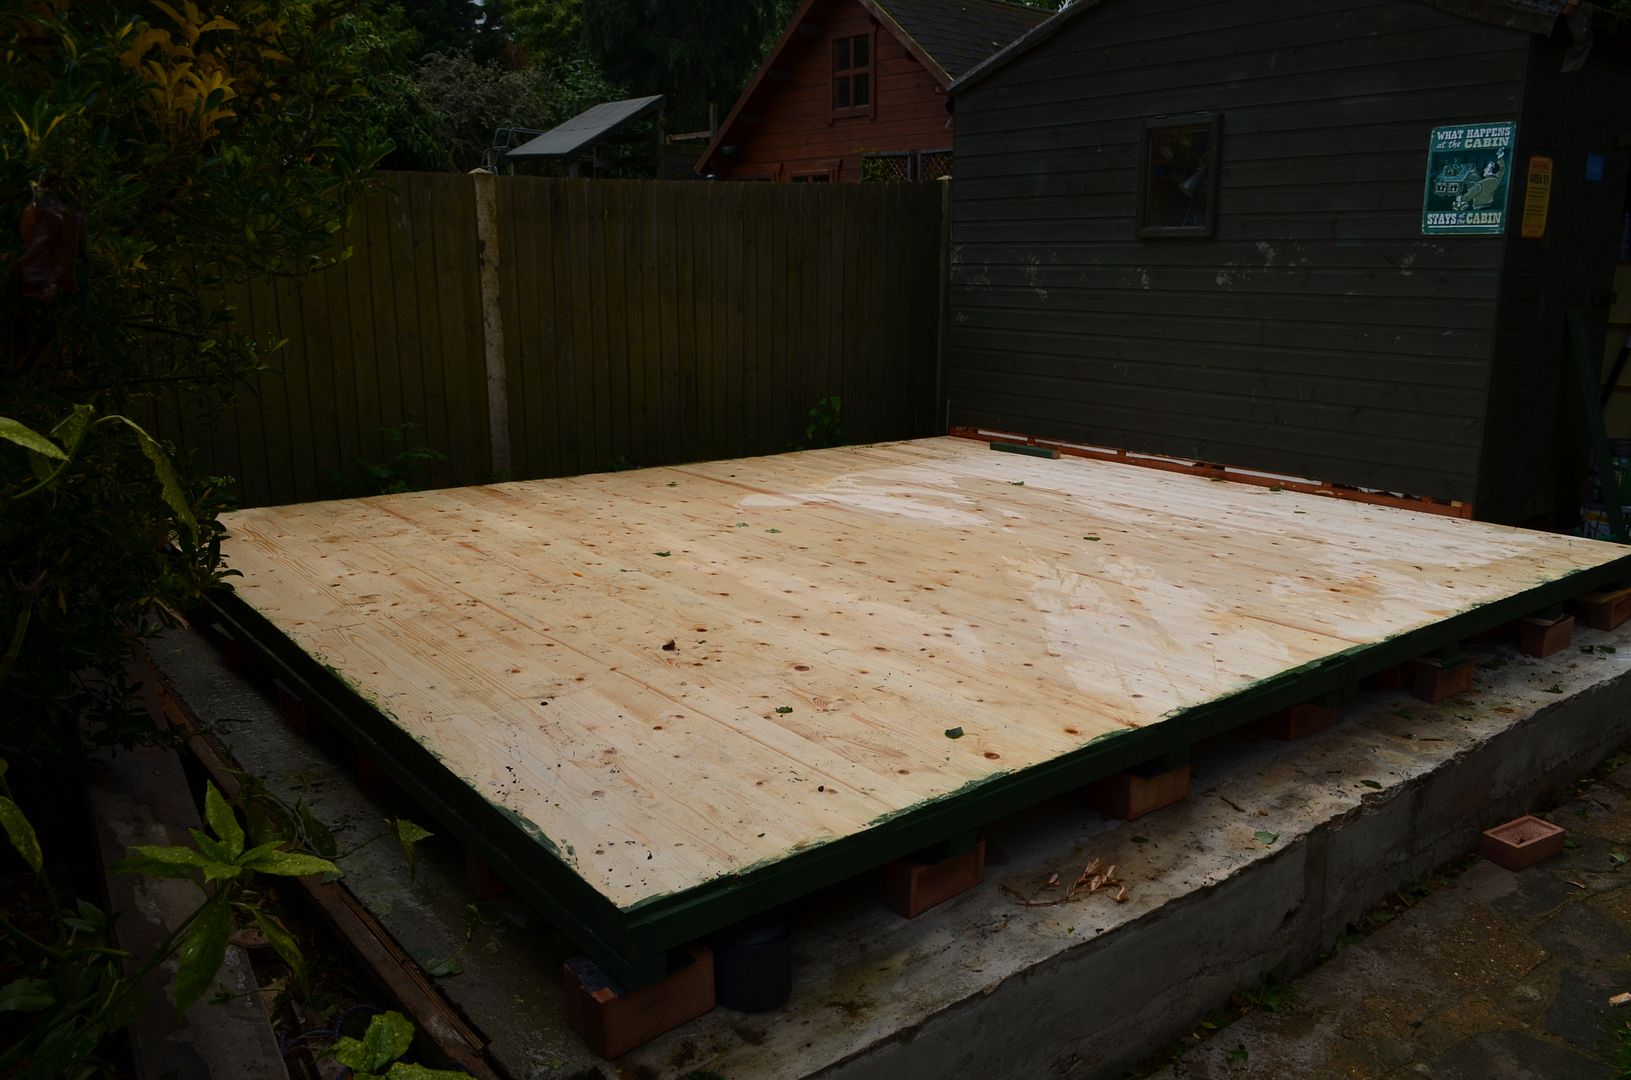
So in between rain squalls (a sad feature of saturday as well) the tongue and groove deck went down,. It looked great and was very solid.
Saturday arrived - too many jobs to do...
1. Take daughter to Heathrow so she can go gallivanting round the Bahamas for two weeks
2. Do the weekend shopping anfd food for saturday night (Mrs Shed wont go into supermarkets)
3. Mow the lawn
4. Clear the rest of the garden (it is still suffering from the 60 vodka swilling adolescents at my sons 16th birthday party)
5 buy final shed supplies from B&Q
2pm - my band of happy helpers arrived - A big thank you to Charley, Rolf, John and Mark.Without there help I would not have been able to get this thing up.
The following photos are some of the build shots and construction details
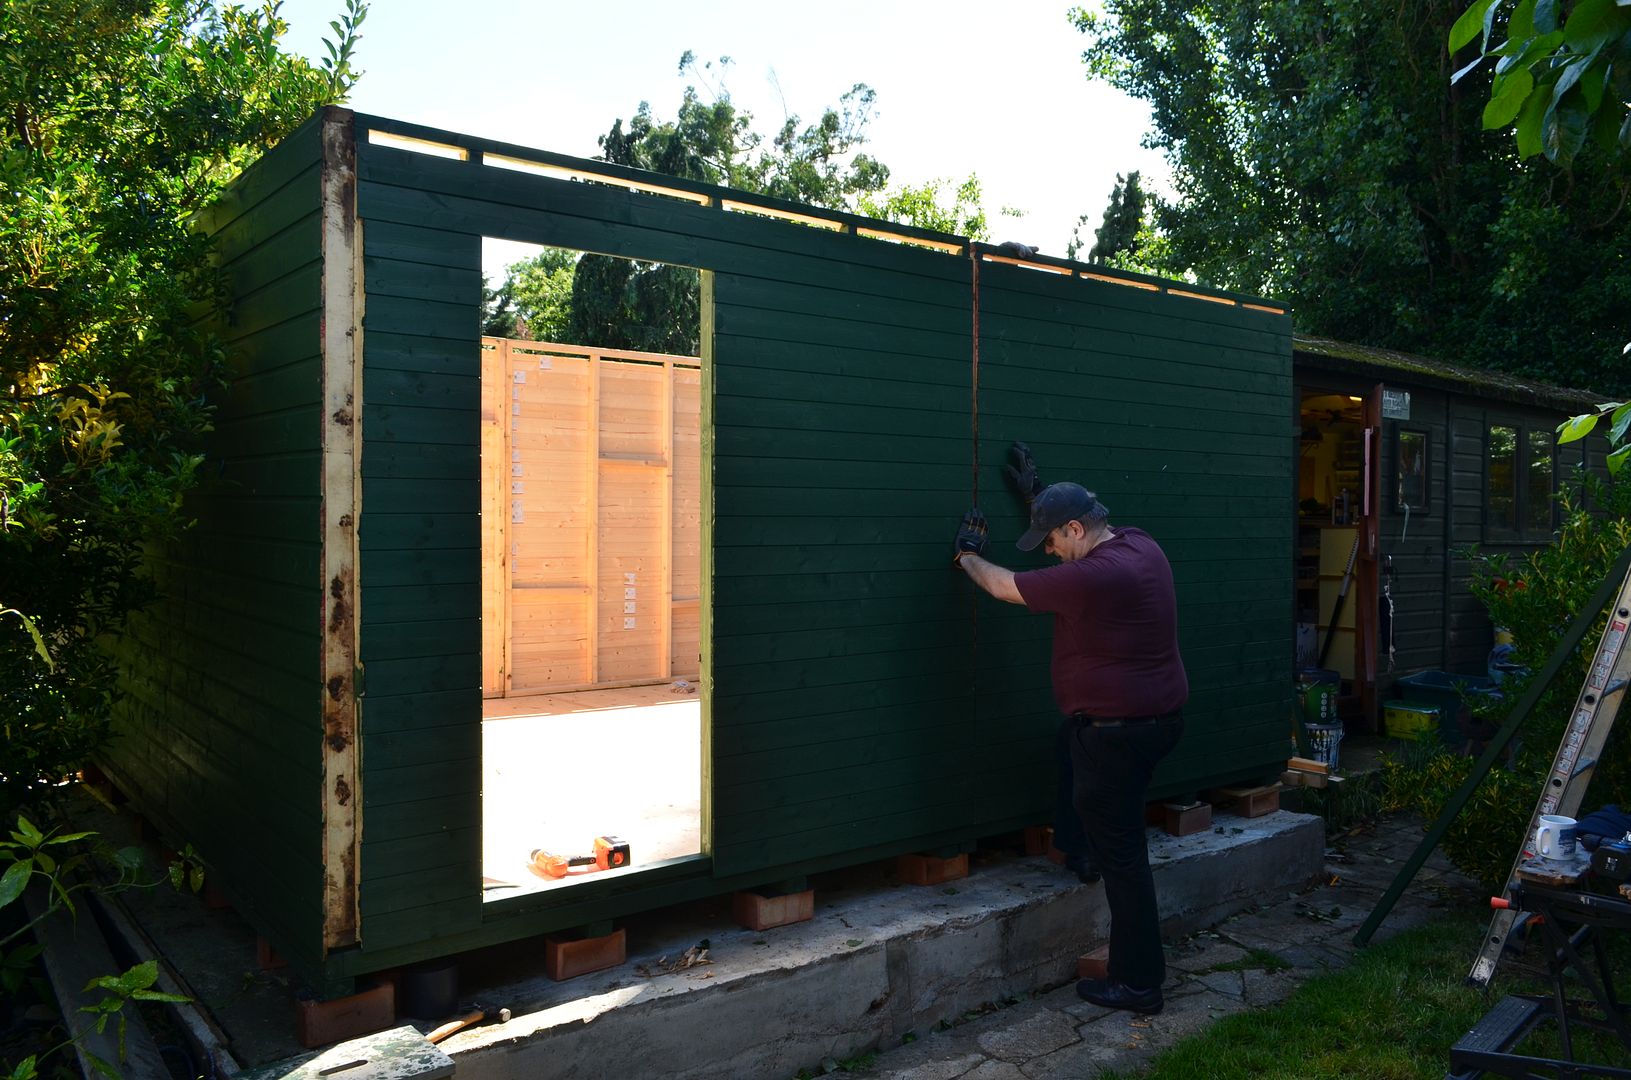

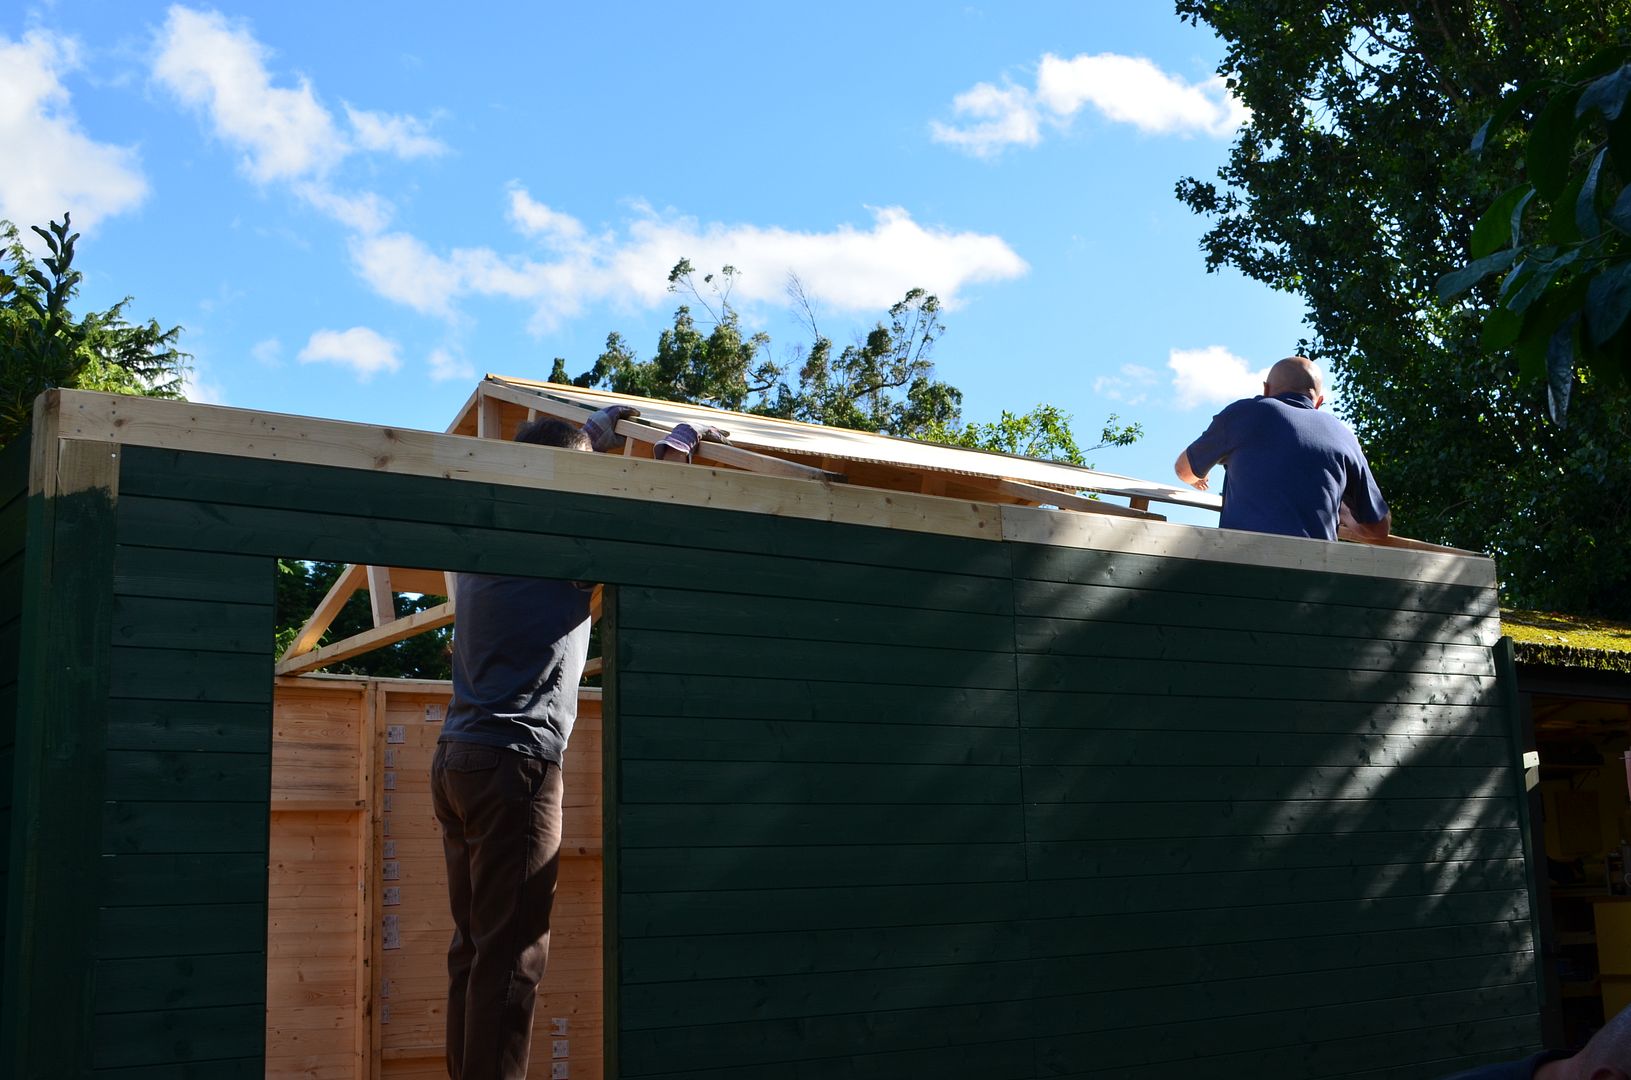
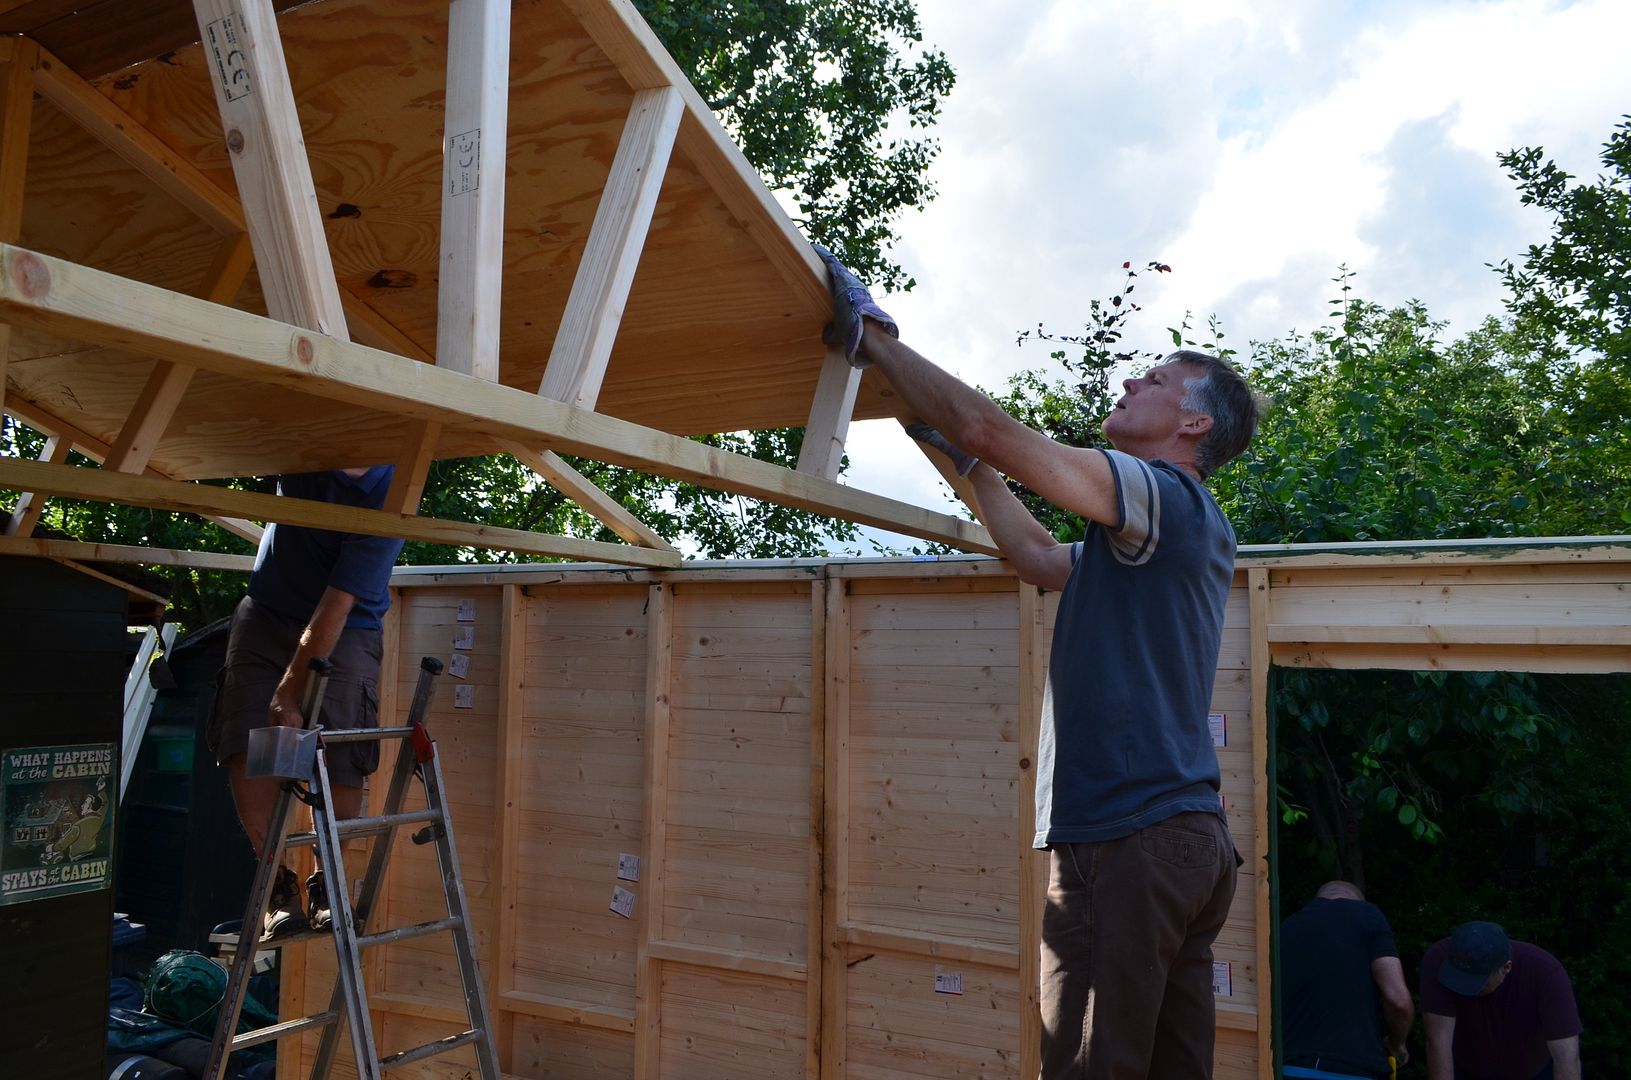

By the end of Saturday the walls were up and the roof was part finished. At 6pm we knocked it on the head for the beers and bbq.....
Sunday morning - nursing a small hangover but the new shed calls
Priority was to strengthen the roof and get the felt down. This time I was working alone (Shedson was around to hold the ladder) and progress was slow. Around 3pm I not only smashed up my finger but almost fell off the roof. I decided I was too tired to carry on and cleared up.
Fingers crossed the weather will be kind to me over the next couple of evenings and i'll get the building weatherproofed.
The shed is bigger than imagined - a great deal taller than the old one and appears to be very strong.
Once its all weatherproofed up I'll cut through into the old building....
More later
Part 7 can be found here
http://shedwars.blogspot.co.uk/2016/07/the-shed-extension-part-7.html
Subscribe to:
Posts (Atom)