A relatively simple build up this time. Inspired by the foam
cutting tool for my railway embankments I decided to turn my attention to a
really big bridge to span my big rivers. I’d already built a wooden bridge but
this would be something more permanent.
Construction started off with the base board. This would be
16cm wide and about 48 cm long – it is going to be big. Measuring out the width
of the river I decided the bridge would have three arches. Apologies now but I
forgot to take photos of this stage but I think from the following photos you
can see how this has developed.
The design of the bridge is free style and the main element
is built from three pieces of foam – a pink foam inner and two side panels of 8mm
blue foam. Prior to cutting I drew out the design on the pink foam and cut out
the outline of the bridge (but not the arches). The road elevation is quite
steep but I wanted to give this bridge some height so a compromise on the run
up was achieved. The angle is about 35 degrees. With the bridge base cut I then
placed this on one of the blue sheets centred in the middle. The arches were
drawn up onto the blue board along with the height of the wall.
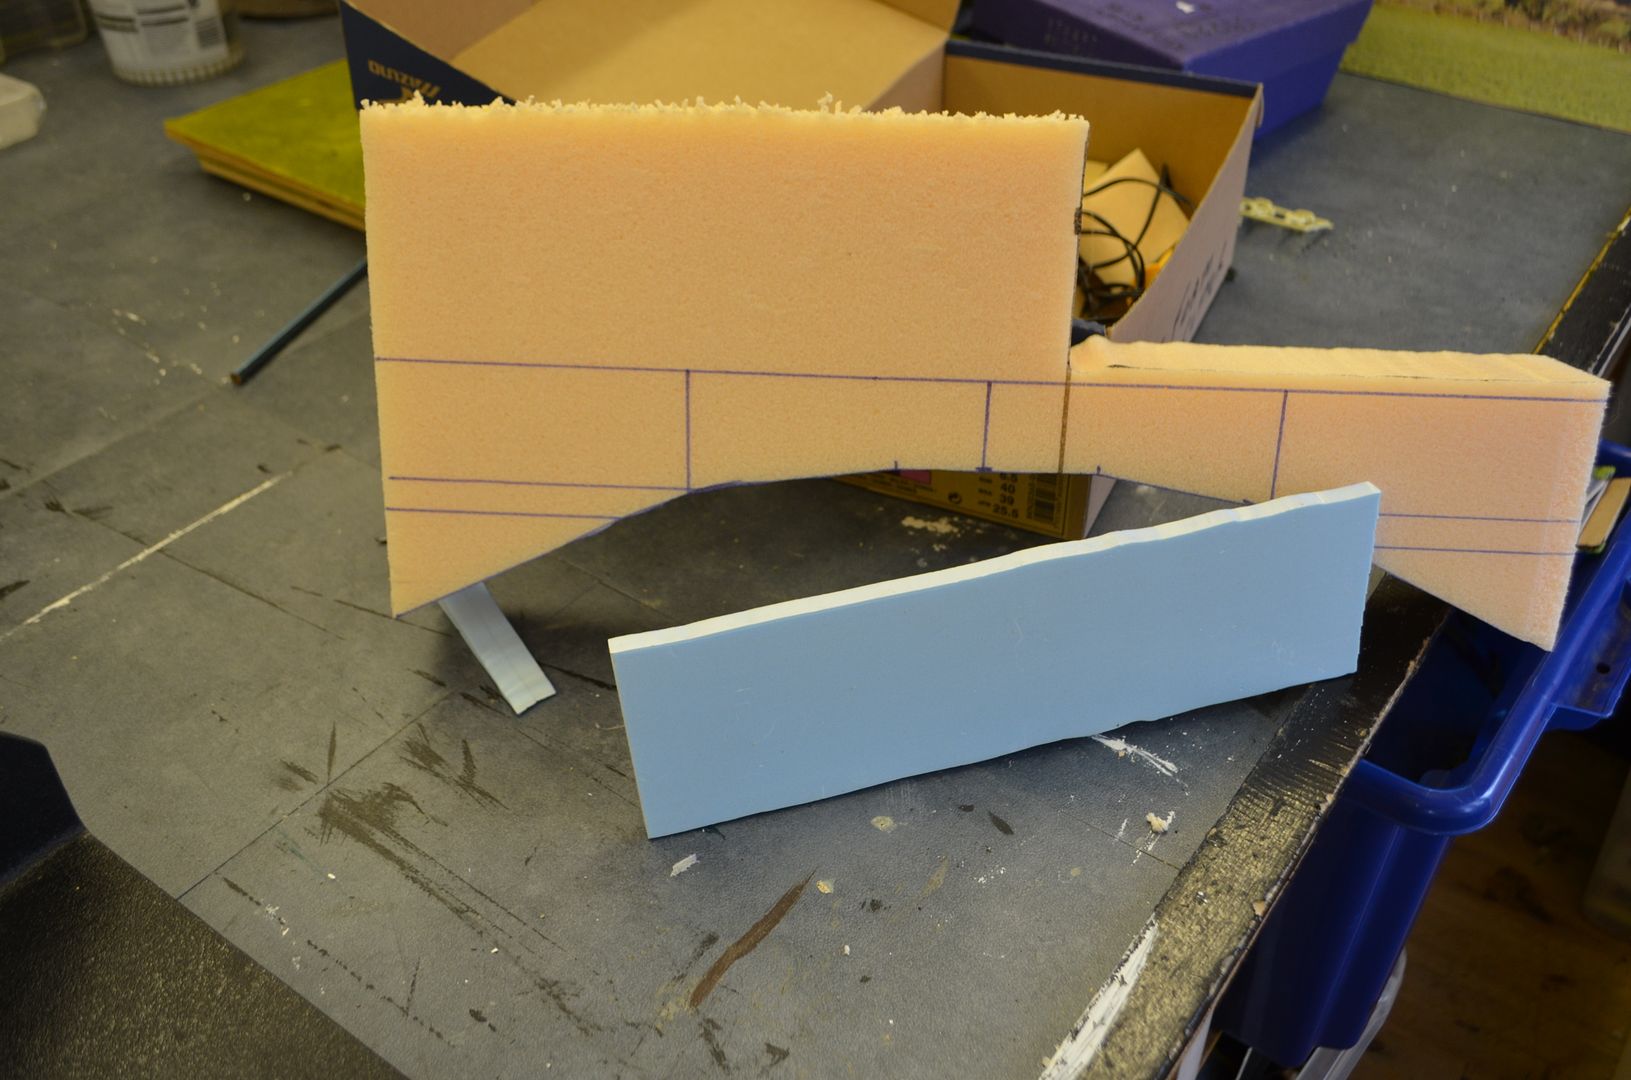 |
| Blue & Pink Foam |
I then clamped all three sections together and using the
foam cutter jig cut these away. You can see how I clamped these together – a
bbq skewer driven through the three sections in the space where the arch will
be.
 |
| The cut outs from the arches sitting on my foam cutter - you can see the bbq skewer holding pins |
With the three pieces cut I turned my attention to the stone
work that would be on show – both inside and outside of the bridge walls. I
firstly drew a line following the line of the bridge about 5mm from the edge.
Then using a pencil I ‘etched’ in upright stones. With this complete I then
etched in the stone facing pattern – nothing to fancy a series of horizontal
and vertical lines – blue foam has just the right density for this and when
painted up looks the business.
 |
| Etched Stone work - just a pencil used |
The bridge still looked a little fragile so to bolster the
appearance of strength I cut 4 pillars from more blue foam and again etched in
the stone work.
These pieces were all then glued together using pva and left
overnight to dry.

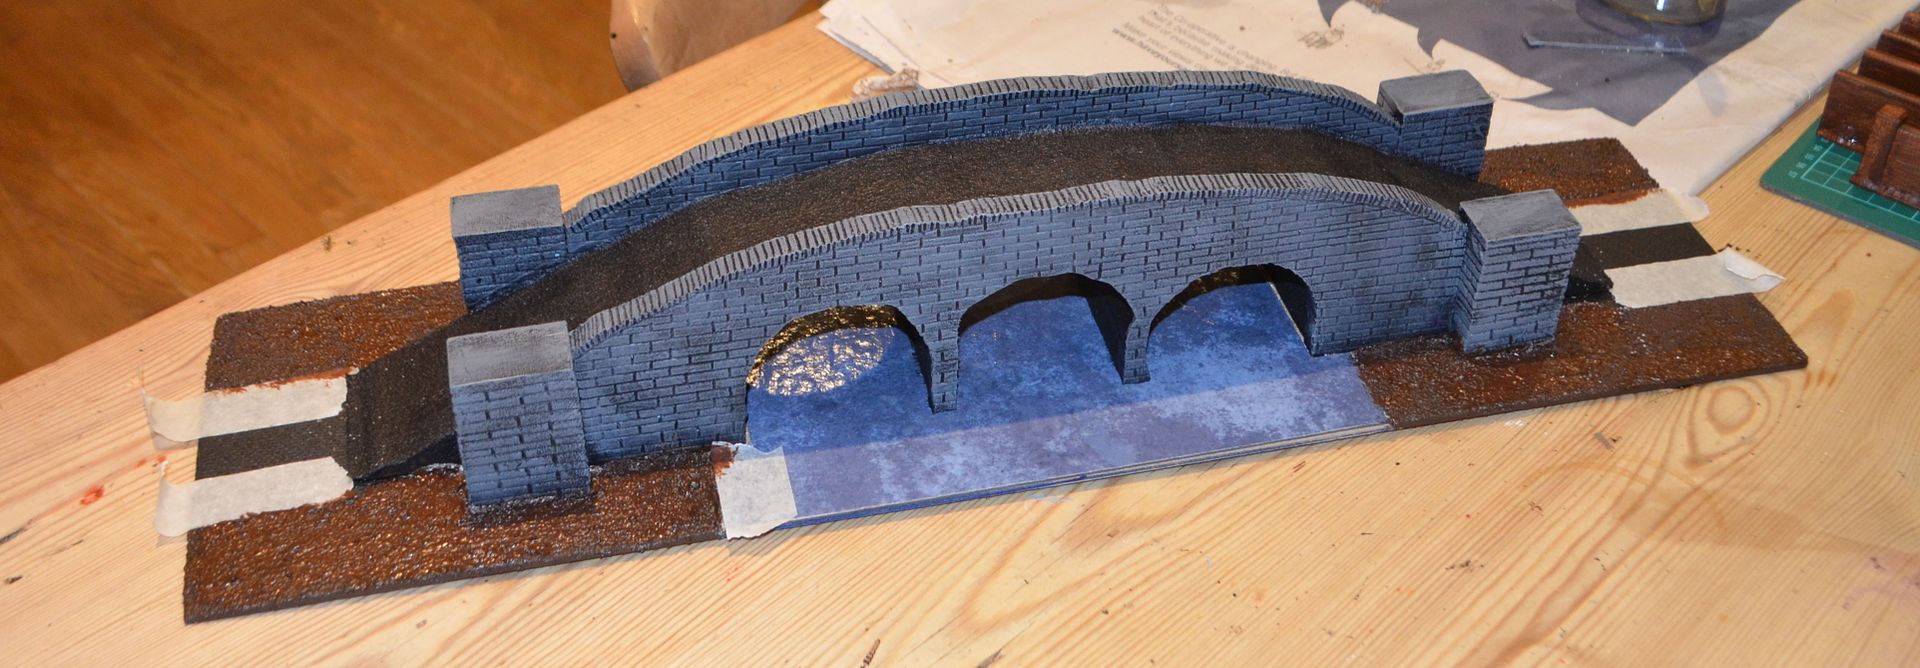
Next up I gave the outside of the bridge its first coating
of black acrylic paint. Once dry I turned my attention to the road surface. Again a coat of PVA followed by a sprinkling of sand.


For the river a sheet of Oxford Blue
Vinyl floor tile was cut to fit the hardboard base. I lined up the bridge on
top of this and cut out the edge where the bridge and river butt up together.
Because the central arches will sit on the tiles I had to trim these to the
height of the vinyl so everything was sitting flush.
The bridge was then fixed to the board using pva glue secured with bbq skewer pins driven up from the underside. I do this with all my terrain as it really does strengthen the overall piece.
The bridge was then fixed to the board using pva glue secured with bbq skewer pins driven up from the underside. I do this with all my terrain as it really does strengthen the overall piece.

I masked off the road sections and then covered the
remaining base board with ballast right up to the river banks. This was then
painted dark brown with a lighter highlight.

Returning to the bridge I finished off the black base coat
and then processed to lighten the stone work with three successive dry brushes
of lighter grey, this helps to tie it into the castle and other stone features
on the table.
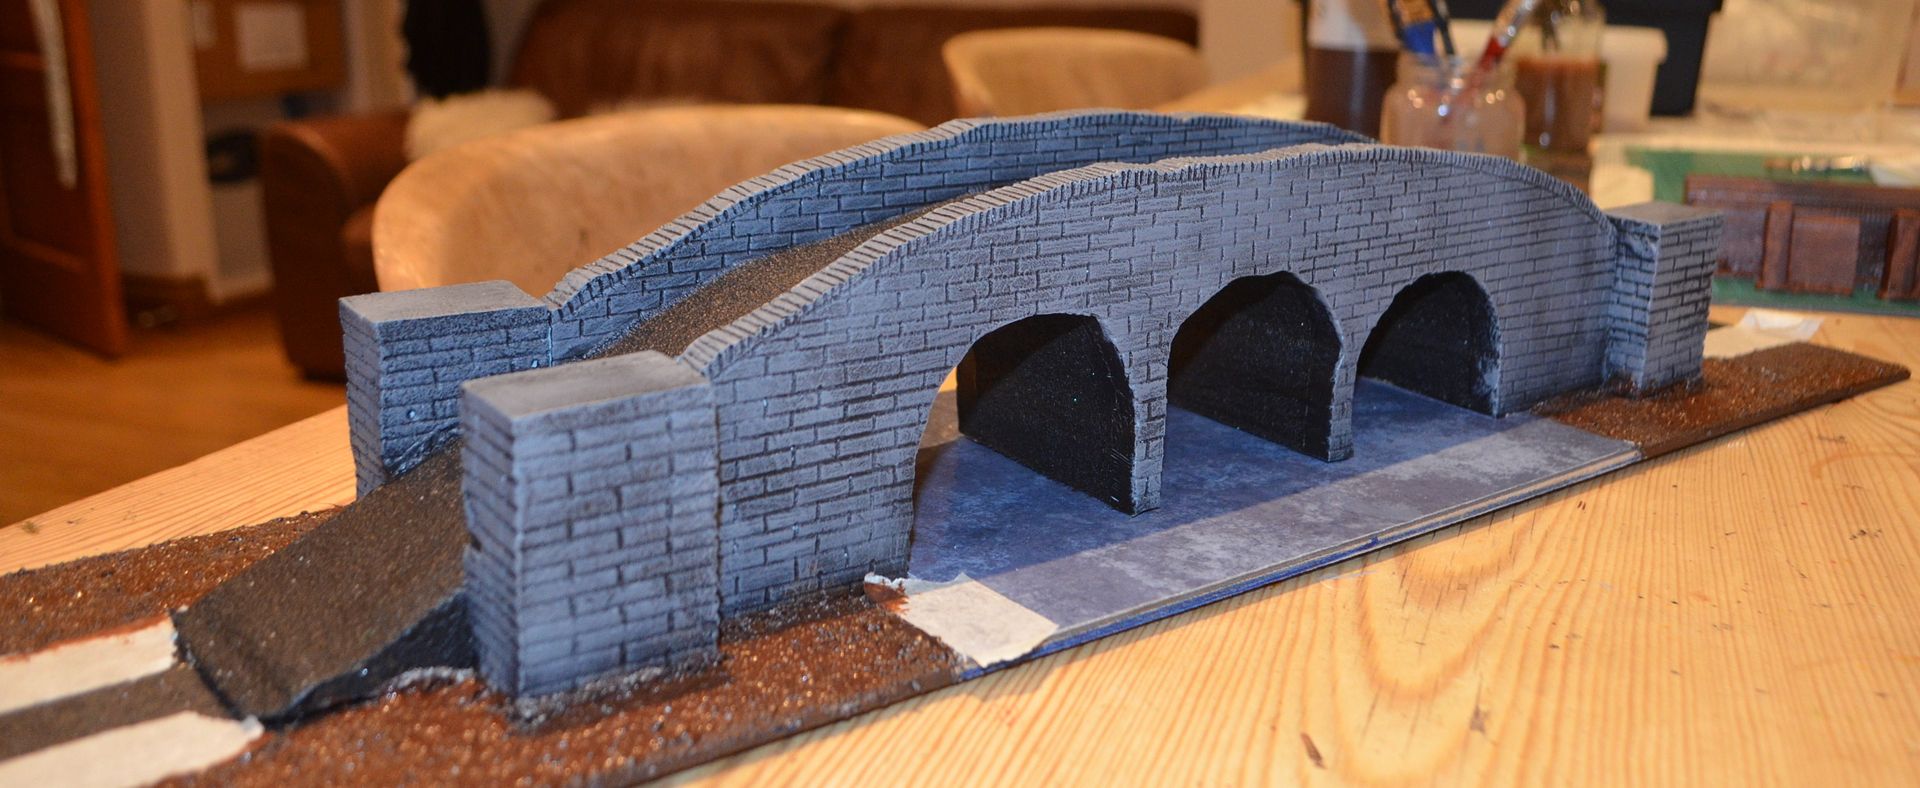
To finish off the ground cover in the form of static grass
and clump foliage was added.
This was not a massive build and was completed in about 6
hours (ignoring drying time) – cost of materials was negligible as I had all
the foam sitting around in a scrap box left over from other projects.
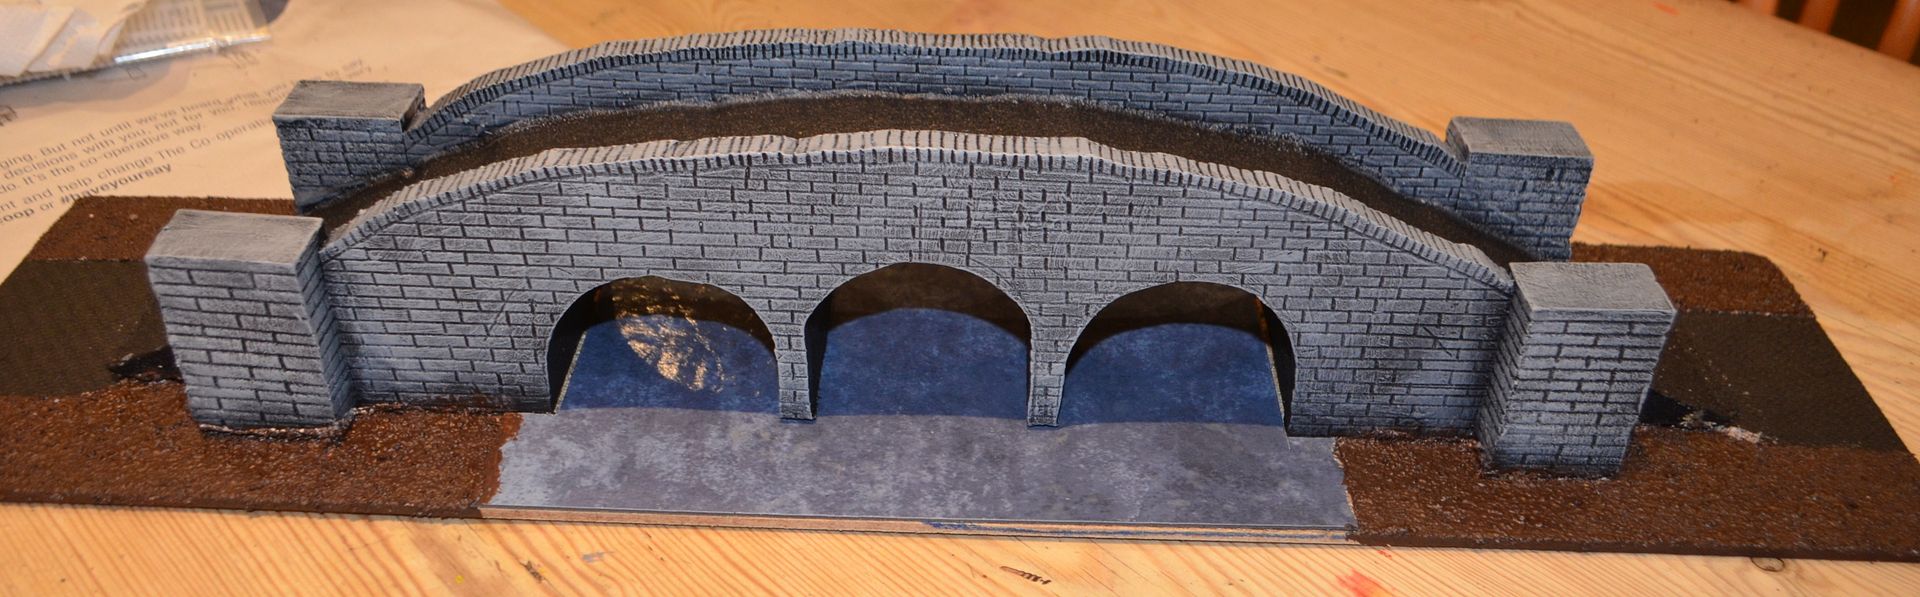
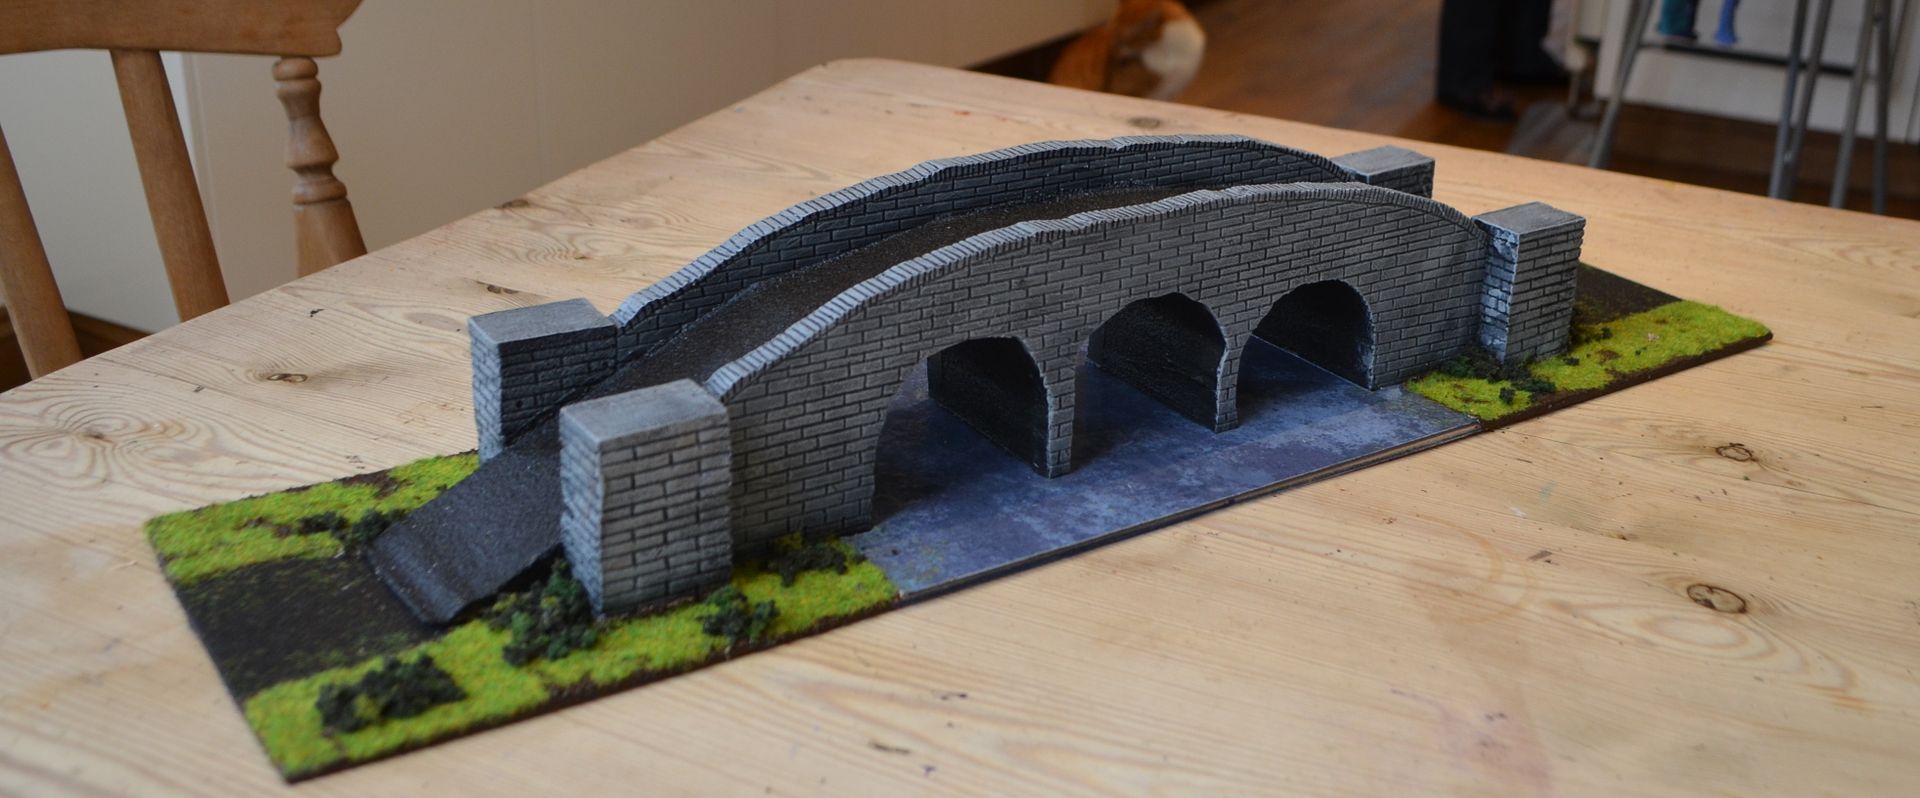
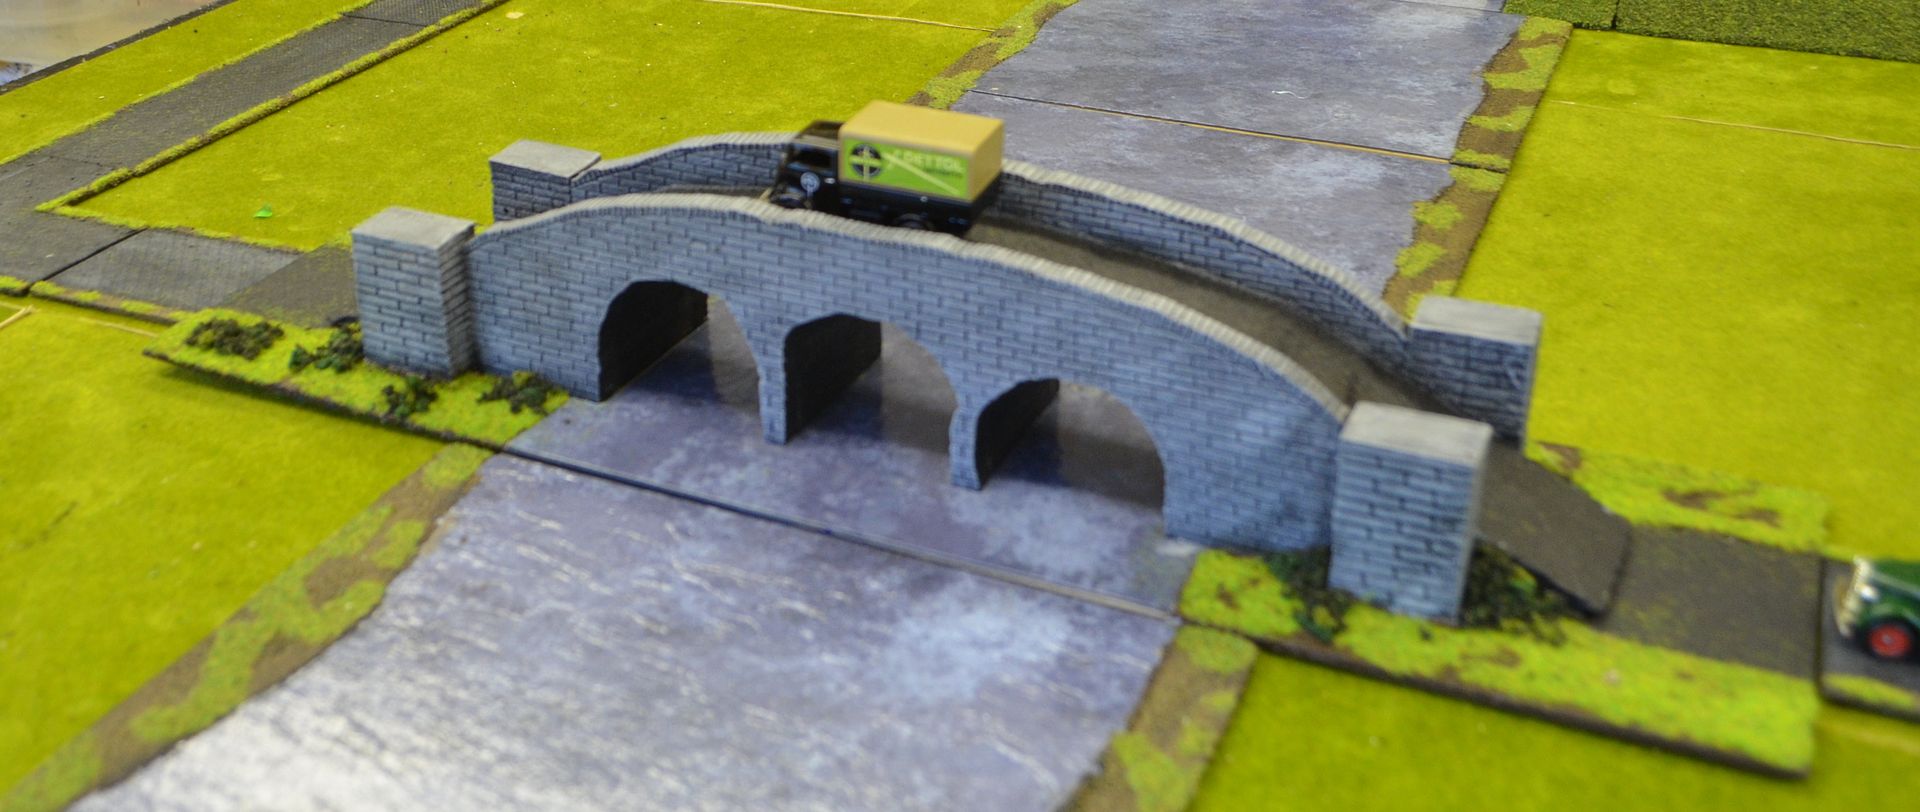
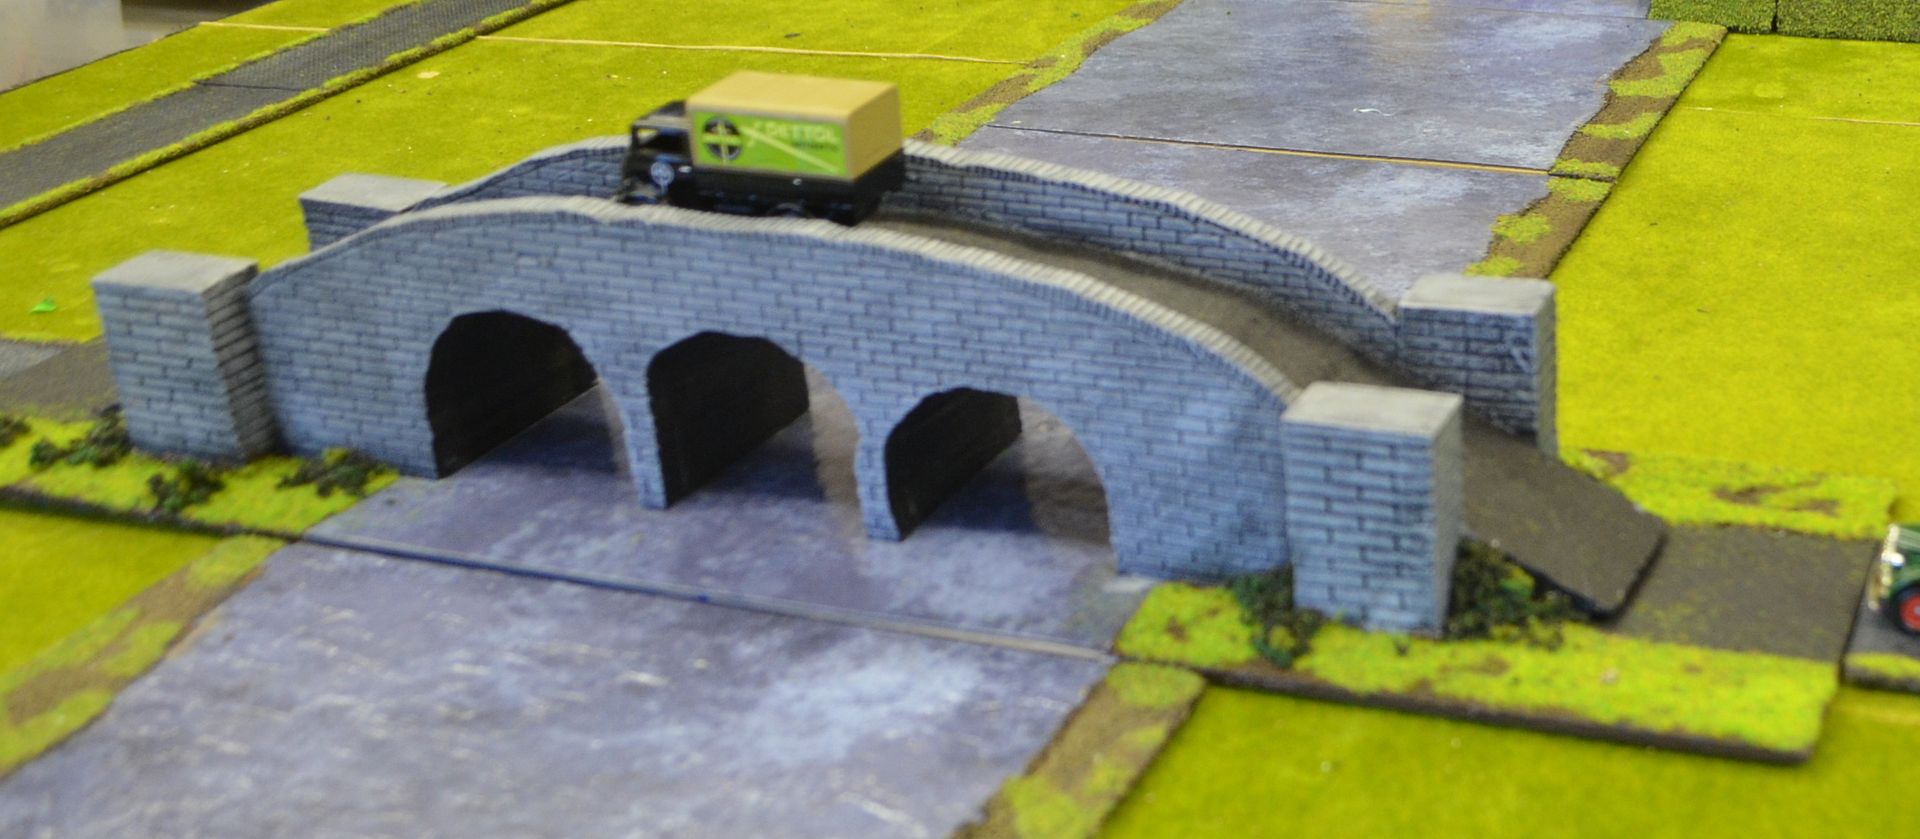
Hers a couple of shots with the bridge with the river

Until next time
Nice addition to the terrain stockpile!
ReplyDeleteVery very nice modelling!
ReplyDeleteWell you made that look ridiculously simple! Great job.
ReplyDeleteBig and impressive - a great bit of scenery.
ReplyDeleteFantastic work! Really inspiring stuff!! I noticed Axis and allies 1914, how does it play?
ReplyDeleteHi there Axis & Allies 1914 best purchase of Xmas - game is great - we've played 6 times and every game has been slightly different - it is very balanced with either side capable of winning.
DeleteBest game of the Axis & Allies stable in my opinion
Cool, I have been thinking about getting a copy myself, but wondered how close to the WW2 version (which I love) it was, thanks! Terrific bridge!
DeleteFantastic! I might have to make a Roman bridge based on your plan. Thanks for sharing.
ReplyDeleteGood stuff, that. I need to make something similar. Appreciate the inspiration and the DIY lesson.
ReplyDeleteGreat stuff. Nice to see an in scale bridge and river for once instead of the compressed version most of us go for to maximise table space.
ReplyDeleteVery nice bridge, you make it look so easy.
ReplyDelete