If you missed the write up of Isandlwana head here
http://shedwars.blogspot.co.uk/2017/01/zulu-sunday-28mm-isandlwana-wargame.html
For this game we switched the sides around - there would be three fighting as the British Defenders (James, Alastair & Legatus) whilst Mark and I would command the Zulus.
Again we used the Black Powder ruleset and inspiration was drawn from the Black Powder Zulu supplement. I was keen to make this a much more tactical game than the earlier battle with both the Zulus and British able to determine how the various assaults would play out.
The first part of this post very much deals with the set up of the game and the various rules that would come into play...
Read on...
 |
| All quiet at Rorkes Drift |
The timetable
The battle at Rorkes Drift was fought from 4.30pm on the 22nd January until 04.00am the following day. The defence fought continuously for approximately 12 hours. During this time there were a number of assaults made by the Zulus. Our game will focus on this timetable.
Having checked the internet I can
see that sunset in this part of the world in January is around 7.45pm with dusk
about 30 minutes later.
Sunrise
|
05.43
|
Sunset
|
19.43
|
Day Length
|
13.59
|
Dawn
|
05.18
|
Dusk
|
20.08
|
Location: Helpmekaar – 11th
Jan 2017
Reports from the battle suggest
that once night fell it was inky black and the only aid to vision came from the
burning hospital. Had this building not have been fired I suspect that battle
may not have even raged on into the night hours because surely the Zulus would
have been as hampered by the lack of light as the British. I have also read
that the Zulus did not particularly like to fight at night time.
In other words one of the
buildings in our game will go up in flames for the battle to continue past
nightfall .
So as part of the game we needed to
consider the timings. The reports suggest that the Mission was under constant
assault throughout the evening and it wasn’t until 4 am in the morning that the
attacks finally petered out.
This effectively is 12 hours of
constant fighting. I think we can assume that the assaults would have been
frenetic fast paced affairs but between assaults there would have been moments
of uneasy calm.
We can be certain that the defenders would have been under constant sniper fire (albeit ineffective)
We can be certain that the defenders would have been under constant sniper fire (albeit ineffective)
NB: All the accounts I have read so far seen to suggest that the vast
majority of British Casualties (ie KIA) came from Zulu shooting NOT melee wounds
– again this has to be considered in the game .
I therefore decided to break the game into 12 phases. With each phase either a moment of calm or an assault. As the attacker the Zulu player will determine how these phases play.
The game will start with phase 1 which will be the first assault. Thereafter the zulu player can initiate a second assault in phase 2 or use this time to ready his troops (rally, position for attack, etc) – He may only make a maximum of 6 assaults during the game or fewer if troops are no longer available. Two assault phases must be followed by one passive phase.
These Phases will be known as Assault phases or Passive Phases
An Assault Phase will be played out like turns in the rules – there is no limit to the number of turns in any given assault phase.
Each Passive Phase will play like
this…
Action
|
Player
|
1
|
Zulu player declares end of assault phase and
advances clock 30 minutes
|
2
|
British player rallies any shaken units
British Disordered units no longer disordered
|
3
|
British player deploys forces –
·
Defence (site troops in new location)
· Allocate forces to building Defences - 6" of defences or half redoubt can be built by allocating two British units to defence building
|
4
|
Zulu Player rallies any shaken units
|
5
|
Zulu Player determines if any Regiments are
broken and then removes from play
|
6
|
Zulu player determines next starting points of
attack – and moves appropriate units
|
7
|
Zulu player initiates sniper fire – British Units
may respond with those on defensive duty and facing sniper units
|
8
|
Zulu player initiates next phase either declaring
as an assault phase or another passive phase
|
Daytime versus Night time
Sadly the Black Powder ruleset
does not feature rules for night time engagements so I have developed my own.
Phase
|
Time Starts
|
Light Conditions
|
Effects
|
1
|
16.30
|
Normal
|
No in-game effects
|
2
|
17.30
|
||
3
|
18.30
|
||
4
|
19.30
|
Sunset/Dusk
|
Shooting ranges unaffected but -1 to hit at long range
|
5
|
20.30
|
Night
|
Restricted to 12”
And Minus 1 to hit at all ranges….
unless illuminated by fire
All commanders rolls at -1
|
6
|
21.30
|
||
7
|
22.30
|
||
8
|
23.30
|
||
9
|
00.30
|
||
10
|
01.30
|
||
11
|
02.30
|
||
12
|
03.30
|
·
Any building set fire will illuminate an area 12
inches from its edge. This will be denoted by a line of cotton. Shooting into
an illuminated area carries no penalties.
Ranges: Just a quick note on ranges - all firearms in this game have unlimited range however once the measure goes past 18" tonly a natural 6 hits. This reflects the cover and distances that sniper fire (on both sides) had in the battle.
Winning Conditions
Winning Conditions
If the Drift is still defended by
the end of turn 12 the British players has won. If during these 12 phases the
British defence is routed the Zulu players have won.
Zulu Forces
I have decided to use the Black
Powder ruleset for this game and as mentioned I am going to use the scenario as laid out in
the Zulu supplement as a base.
Now having read through this
several times I have come to the opinion that this book was rushed and somewhat
incomplete. For example - no mention is
given to the size of the Zulu units or how often they can attack. The book
lists the Zulus as having four regiments (tick) each supporting three warbands
(tick) so in total 12 warbands.
These brave natives are attacking
12 British units armed to the teeth in defensive positions – our last few games
of Black Powder suggest the attacker must have at least a 3-1 advantage to have
any chance of winning.
I therefore am looking for the Zulus to have around 36 or more Warbands (although they will not all be able to attack simultaneously.
I therefore am looking for the Zulus to have around 36 or more Warbands (although they will not all be able to attack simultaneously.
So with this in mind the Zulus (clearly outnumbering the British in real life by 20/1) will be afforded many more units to attack with.
However these units will not all be available straight away. Reports suggest that the attacks on Rorkes Drift were led by the INdluyengwe regiment with the other three following up behind, so our first assault will be led by this regiment in its entirety – thereafter the regiments can be mixed up.
Each of the four regiments listed in the supplement book has between 900 and 1500 warriors. A total of 4900 warriors. Casualty reports from the battle suggest that the Zulus lost 1000 men killed and several hundreds wounded. Conservatively we could state that at least half the forces attacking Rorkes drift were either injured or killed in the battle. This plays well with the Black Powder rules that if half the force is shaken/routed the force can no longer attack (ie loses).
As mentioned in my previous post I discovered that an Impi is just a generic term for an Army/Regiments. Regiments were actually called IButho’s and these were made up of several units called Amaviyo’s. Amaviyos ranged in size from fifty to two hundred men. The Amaviyo will become my standard warband and this scenario will represent 125 warriors.
So using the Black Powder Zulu Supplement listed regiments we can determine that the Zulu force will comprise of 39 warbands.
Regiment Name
|
Number of Warriors
|
Number of Warbands
|
INdluyengwe
|
1000
|
8
|
INdlondlo
|
900
|
7
|
UDloko
|
1500
|
12
|
Uthulwana
|
1500
|
12
|
Each Zulu Regiment will be able
to function normally until it has lost or cannot rally more than half of it’s
warbands. It will be for the Zulu player to determine when best to try to rally
these units and when to retire to maintain the integrity of a unit.
For example the UDloko regiment will have 12 warbands and once 7 of these are either shaken or destroyed the regiment will cease to take part in the battle. The Zulus will have 39 Warbands with which they can assault the Drift.
Units rallied in either of the phases will reduce their number of wounds taken buy one but will always retain one as per rule book instructions
Each Zulu Commander may try to rally a maximum of one warband during a passive phase. Units that fail to rally in one passive phase can be tried again in a subsequent phases. The Zulu player has
four regimental commanders and one overall commander. A regimental commander may only try to rally his own units. The supreme commander can affect any unit.
For example let us presuppose that after the first assault the INdluyengwe retires with a bloody nose – the Regiment has 8 warbands. Of these 1 has been broken and three retire shaken. The Regiment is still operating (ie 4 units remain unaffected) – the regimental commander and supreme commander both successfully rally two of the shaken units in the passive phase. The Regiment now has six units that could be used in a subsequent assault.
Its been often quoted by history
writers that had the Zulus massed for one single assault on the defences they
may well have overcome the defences but rather they attacked piecemeal.
So in this game we need to make sure that the Zulus have sufficient forces for an assault but at the same time limit their numbers. In addition many of the contemporary reports suggest that the Zulus were adept at using groundcover to conceal their approach so therefore I’ll introduce the concept of jump off points for the Zulu attack.
Jump Off Points
There are three Jump off points
for the Zulus to approach from. These vary in distance from the British
defences and afford different levels of cover.
·
A maximum of 10 units can attack from one jump
off point.
·
Warbands from the same regiment must start from
the same jump off point
·
Multiple regiments can come from same jump off
point
·
Units may retreat off table from any jump off
point
Purple stars denote Jump Off
points
Actual
Zulu Attacks

As has been mentioned above the
initial assault will be led by the INdluyengwe regiment. They will start with 8
War bands lead by their own regimental commander (8+). The first assault will come from Jump point A
or B and there will be 8 Feint Cards in the first deck.
Feint Cards
The Zulus have access to 8 Feint cards they may play during an assault phase. Units are placed on the table as if they are real troops but once fired at the zuulu player will turnover the respective card and show whether this is a real unit or not.
Feint Cards
The Zulus have access to 8 Feint cards they may play during an assault phase. Units are placed on the table as if they are real troops but once fired at the zuulu player will turnover the respective card and show whether this is a real unit or not.
Subsequent attacks by the Zulus
will be dealt with as follows: The Zulu commanders will determine how many War bands
are to attack – this can be a maximum of 12 units – These can be a mix of
regiments with units from the same regiment starting from the same jump off
points. The commander of each regiment attacking will always be on table
starting at the jump off point where most of the regiments forces are played.
To disguise how many units are
actually attacking and where the assault come from the Zulu player will select
the war bands from the deck of cards provided (each card denotes the regiment
name and a war band number). Added to the deck will be a number of blank cards
(feint cards) the total number of cards will be 16. These will be placed face
down on the jump off points along with any officers.
Once the Zulu units have been
activated the cards are substituted with figures with the card placed under the warband
This way the British forces will have an idea of where the assault is coming from but not the strength of the attack. Imagine if you will that feint cards are part of the confusion and fog of war.
This way the British forces will have an idea of where the assault is coming from but not the strength of the attack. Imagine if you will that feint cards are part of the confusion and fog of war.
Zulu Morale & Forces
Zulu Morale for each of the first
two assaults is at +1 reflecting the eagerness of the warriors to get into
action having missed the opportunity at Isandlwhana . These must both be made
at daytime.
The Zulu warbands during daytime
will be steady (ie they get to reroll one failed morale check) – this benefit
is lost one night falls.
The Zulu Warbands are
bloodthirsty – each warband once per game get this trait. Once the trait has
been used remove one figure from movement tray to denote it is no longer
bloodthirsty.
All Zulu Units may make one move as
if on initiative if not ordered.
Zulu Commanders – All commanders
are 8+ and offer no melee benefits. The Commander benefit allows Warbands that
arte touching to attack/move simultaneously towards same target.
Zulu retirement from Assault phase
When a Zulu commander announces
he is going to retire the British may have one free shot for each unit that can
see a Zulu unit retiring. Forces retiring are then placed back into the pool.
Zulu Snipers
During the actual battle a number
of Zulus took up sniping positions around the Mission and fired into the
encampment. The Zulu player at the start of each turn must allocate warbands to
this task. Each regiment (ie 4 in total) can provide one unit for sniper duty.
These are placed in the area where they will commence shooting.
They will need 5+ to hit
regardless of range (provided they are in range 18”). A natural 6 will disorder
the British targets.
British units hit in cover
receive +1 to morale saves / +2 in buildings
Zulus Snipers are always -1 to be
hit and count in cover (+2 morale saves)
Burning Buildings
The Zulus may elect to try and
set fire to the thatched roofs of the buildings. A warband must be touching the
building. To set fire in that turn one dice is rolled 5+ a fire is started. The
warband may continue to perform other actions.
Once a building has caught fire we
use the rules as set out in the Blackpowder supplement. If neither building has
caught fire by sunset we assume an errant lamp has been knocked over and that a
fire will break out in 1-2 Storehouse / 3-6 Hospital. Troops inside burning buildings take one hit every turn (during shooting phase) - morale saves applicable with no cover bonus
British Forces
The history suggests that the
drift was finally defended by about 140 men of all ranks and as per the Black
Powder supplement the British will field a total of 12 units (each donated by a
named character).
Each unit effectively represent a
squad of about 10 fighting men. These are based in fours.
In addition the British will have
five characters
Lieutenants Chard & Bromhead,
Commissary Dalton, CSM Bourne and Surgeon Reynolds
Unit cards were prepared for the battle using characters from the film

Unit cards were prepared for the battle using characters from the film

Command
All units may independently
command themselves on 8+ (unlike the Zulus who get a free move the British must
command themselves to move but if successful could move further than 1 movement
distance)
Chard, Bromhead and Dalton have
10+ command values and may add +1 to any units melee if they join the unit.
CSM Bourne acts as a leader (8+)
and adds +2 melee to any unit he joins
Surgeon Reynolds is not a
commander but during passive phases may attempt to remove 1 wound (rally) on
any one unit (8+)/phase
Only Chard, Bromhead and Reynolds
may rally units in the passive phases.
Building Defences
When the Zulus attack at 4.30pm
the defences at Rorkes Drift are not complete. The outer wall has been
constructed but inner walls and the redoubt are yet to be constructed. Units
maybe allocated to defence building with each unit constructing one section per two units allocated per phase however
·
Units being rallied may not construct
·
Units shaken may not construct
·
Units on defensive sniper fire may not construct
·
Units constructing start their turn from the
construction area when the phase completes
Break Tests
The British troops are both
stubborn and steady – they will be able to reroll one failed morale save in the
game and ignore the first break.
Volley/Closing Fire
A British unit may deliver
closing fire to any Zulu unit charging them. This is represented by a fire
round for every move the Zulu unit moves towards them – eg if a Zulu unit
charges a unit with three moves it receives three rounds of volley fire.
So how did our defence of Rorkes Drift play out?
Following a light lunch of Pizza the British huddled over the defences to determine where they would stand. They had no knowledge of where the Zulus would attack or where they might come from. It was clearly very tense.
The First Assault
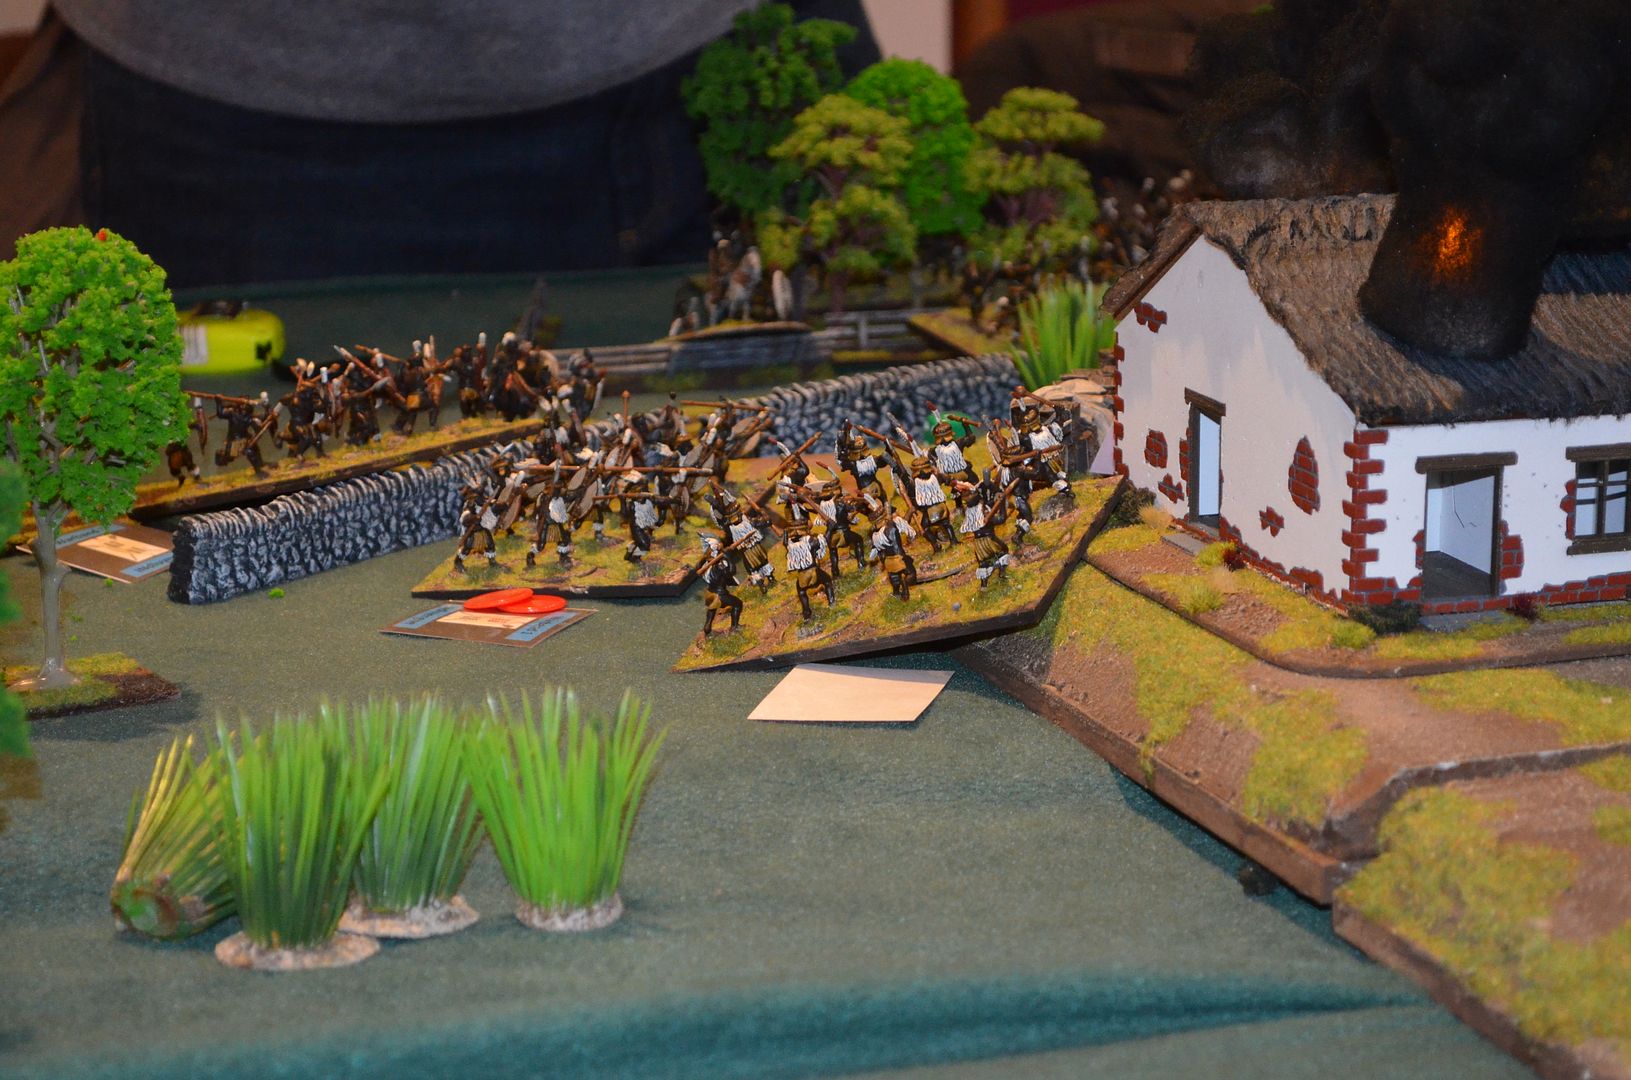
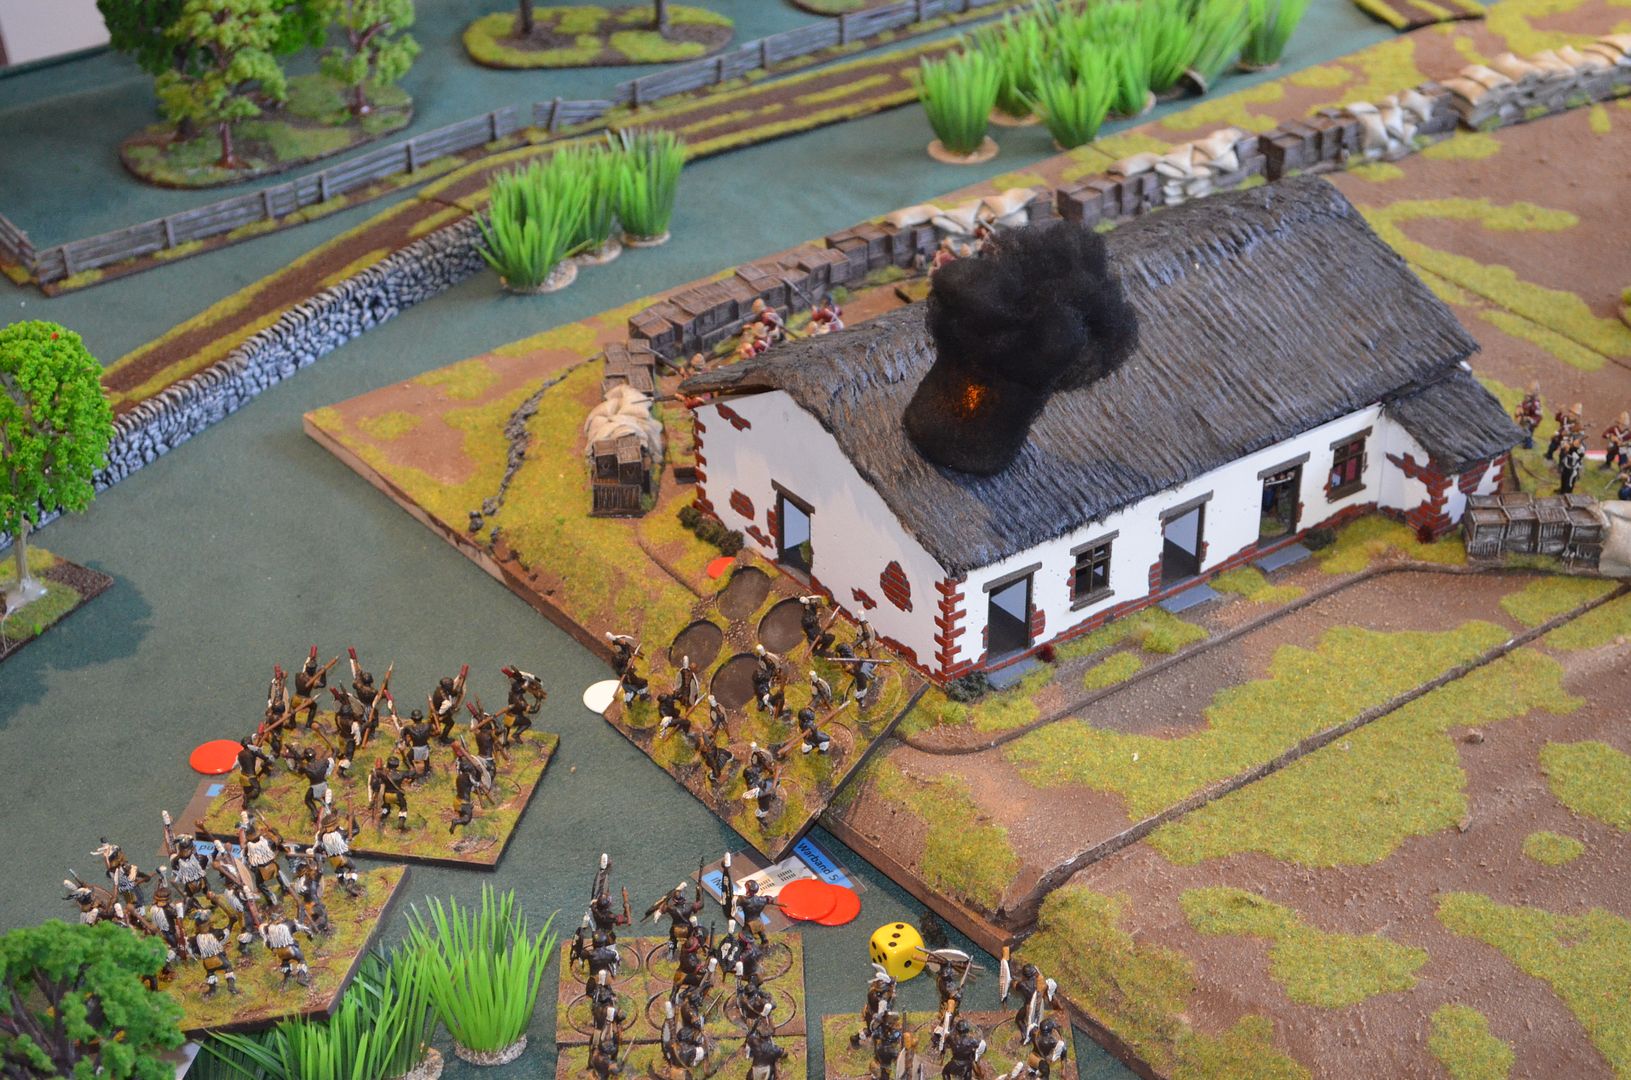
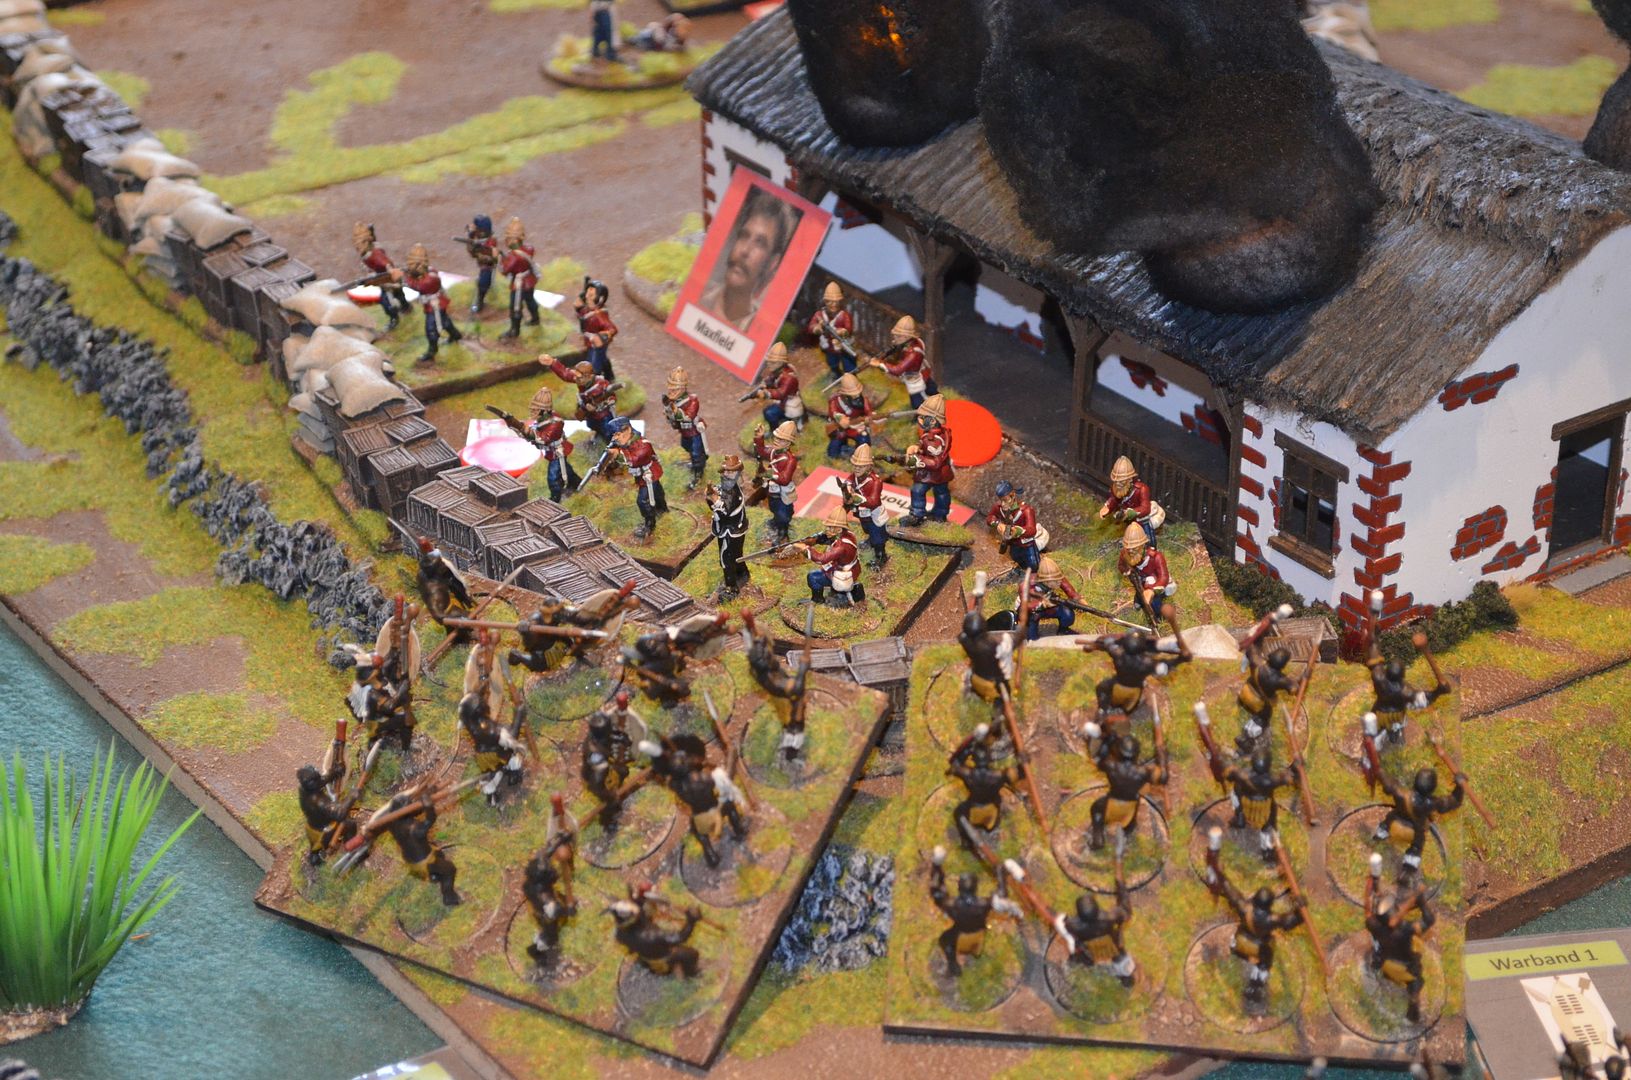
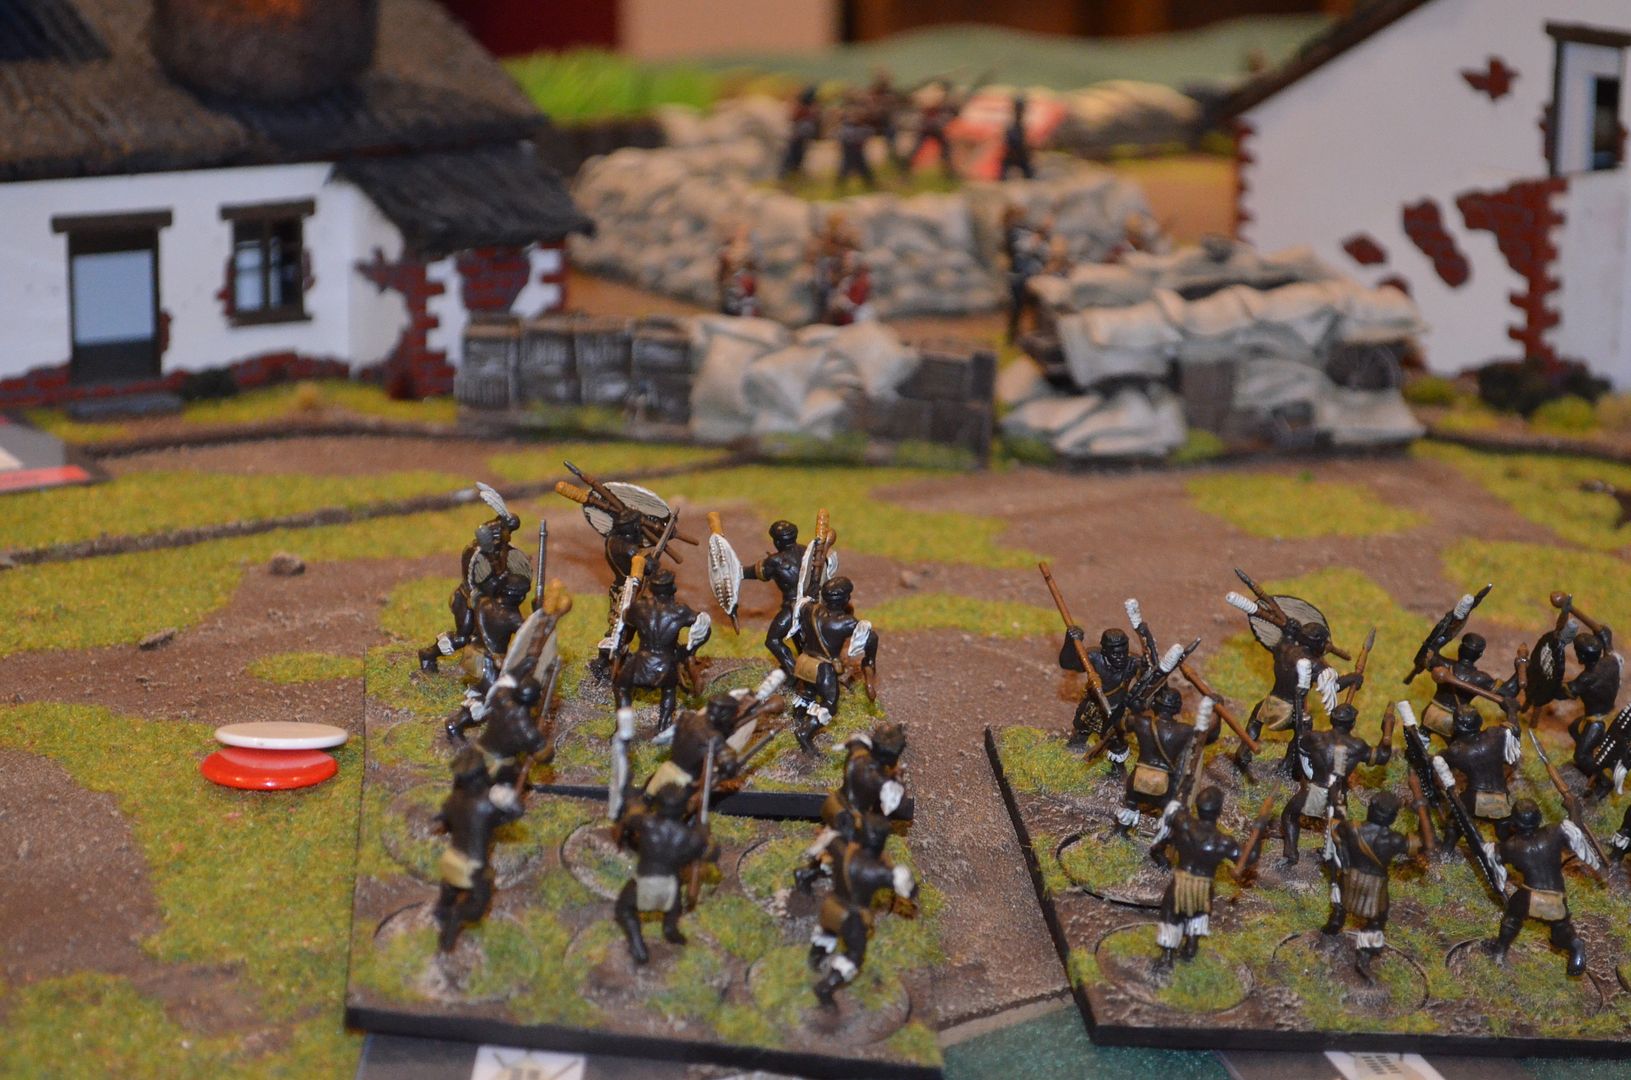
As has been mentioned the first assault was conducted by the INdluyengwe regiment. Because they had 8 warbands the assault could also draw 4 feint cards. We elected that they would come on from the jump point on the Oskarberg terraces and advance on the hospital intent on getting this alight as soon as possible. One unit was placed on sniper duty.
The Zulu sallied forth and were met with furious fire from the Hospital's southern wall and barricades joining the two buildings. Fortunately for the Zulus the assault was screened by feint units and the majority of the regiment reached the hospital.
One unit forced its way in and a vicious melee broke out inside the building. Maxfield the defending unit put up a brave show and held the advancing units. By now the Zulus had set fire to the building and were wrapping around the hospital and assaulting the western edge of the Drift.
The Zulus were being driven back but some casualties were inflicted on the British. With the Zulu regiment in danger of breaking the first assault was called off and everybody inside the drift could take a deep breath. The ramparts had held but it had been nip and tuck.
 |
| The Zulus first assault on the hospital and western edge |
 |
| The First assault |
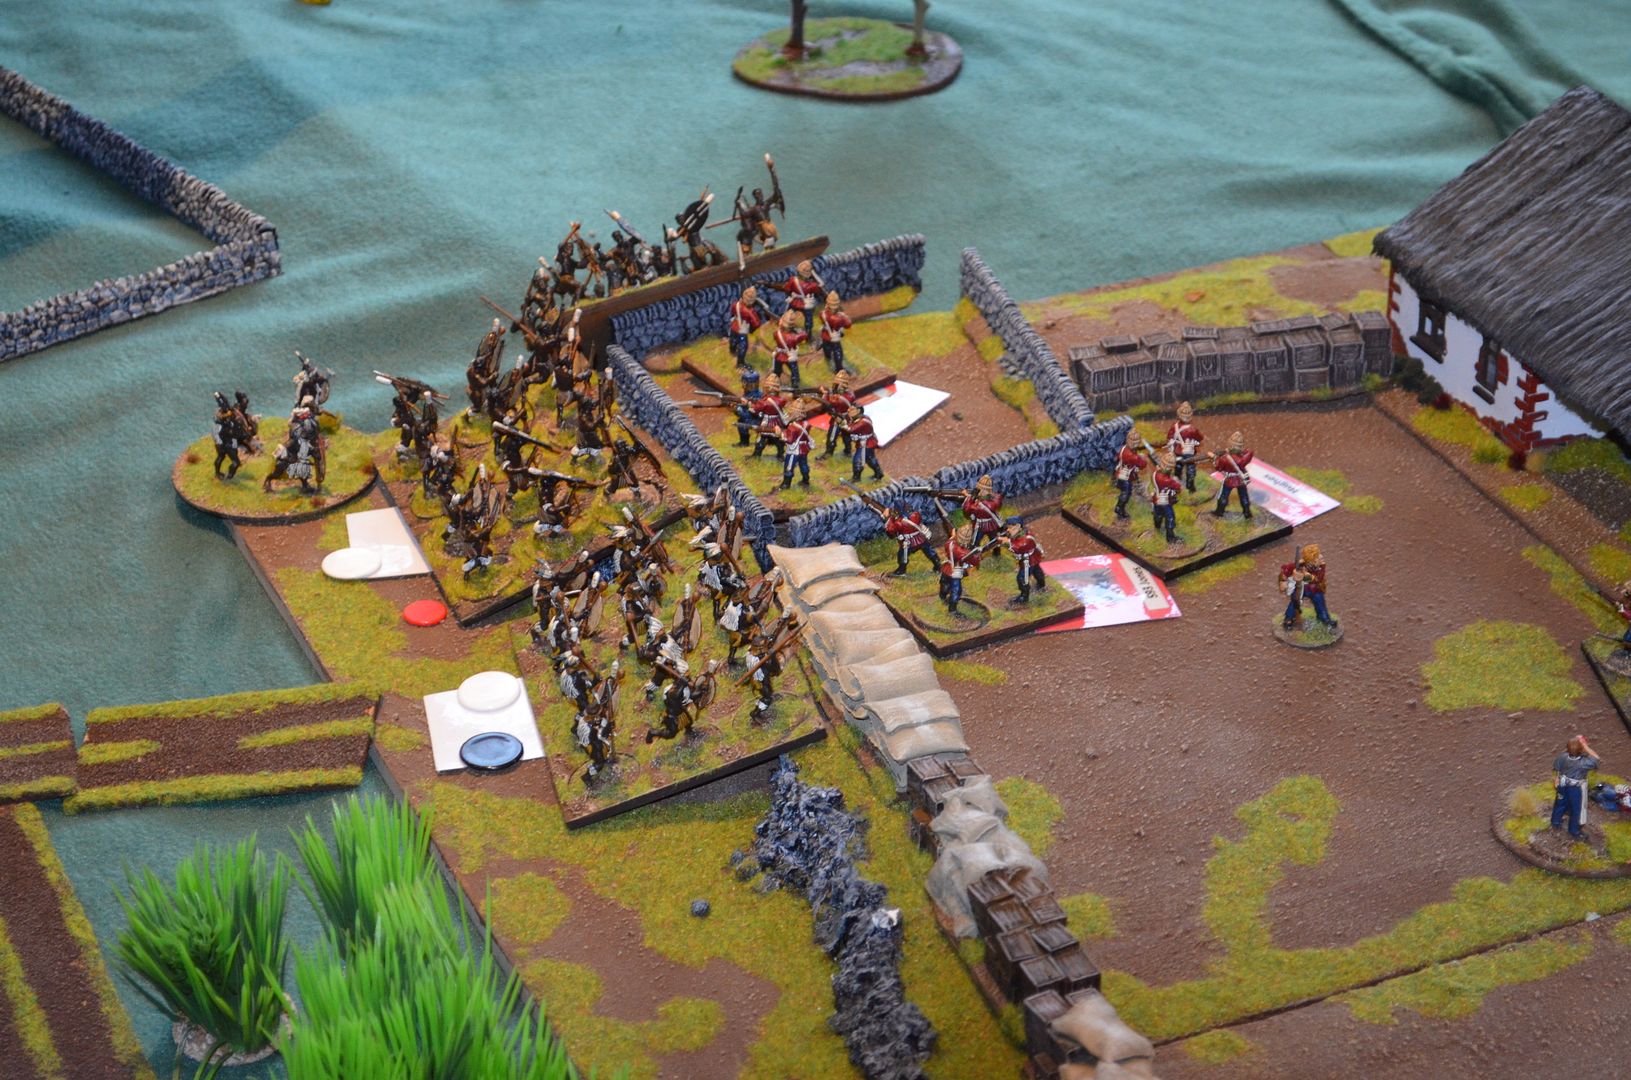
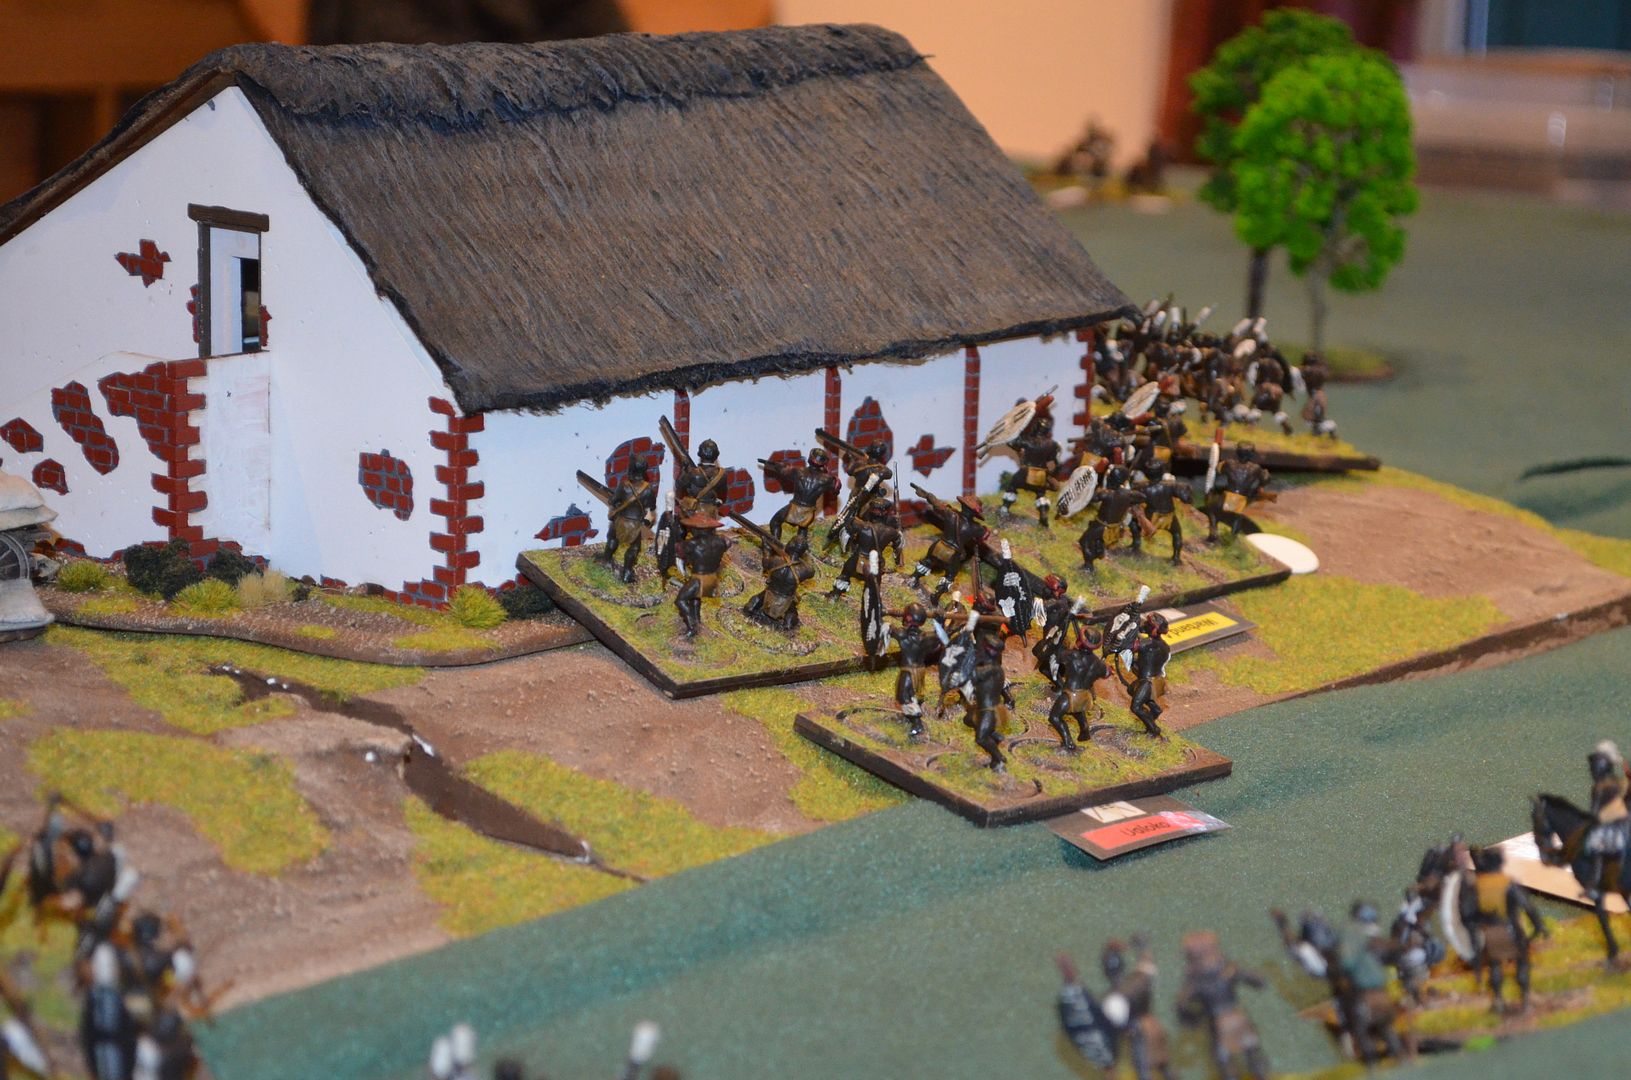
No sooner had the first assaulyt been repulsed the Zulus attacked again. This time 8 fresh regiments swarmed in from the Northern Garden attacking the North West ramparts whilst a further four units & four feints advanced from the Noth east through the stone Kraal.
The Hospital was now fully ablaze driving the defending units out onto the perimeter walls.
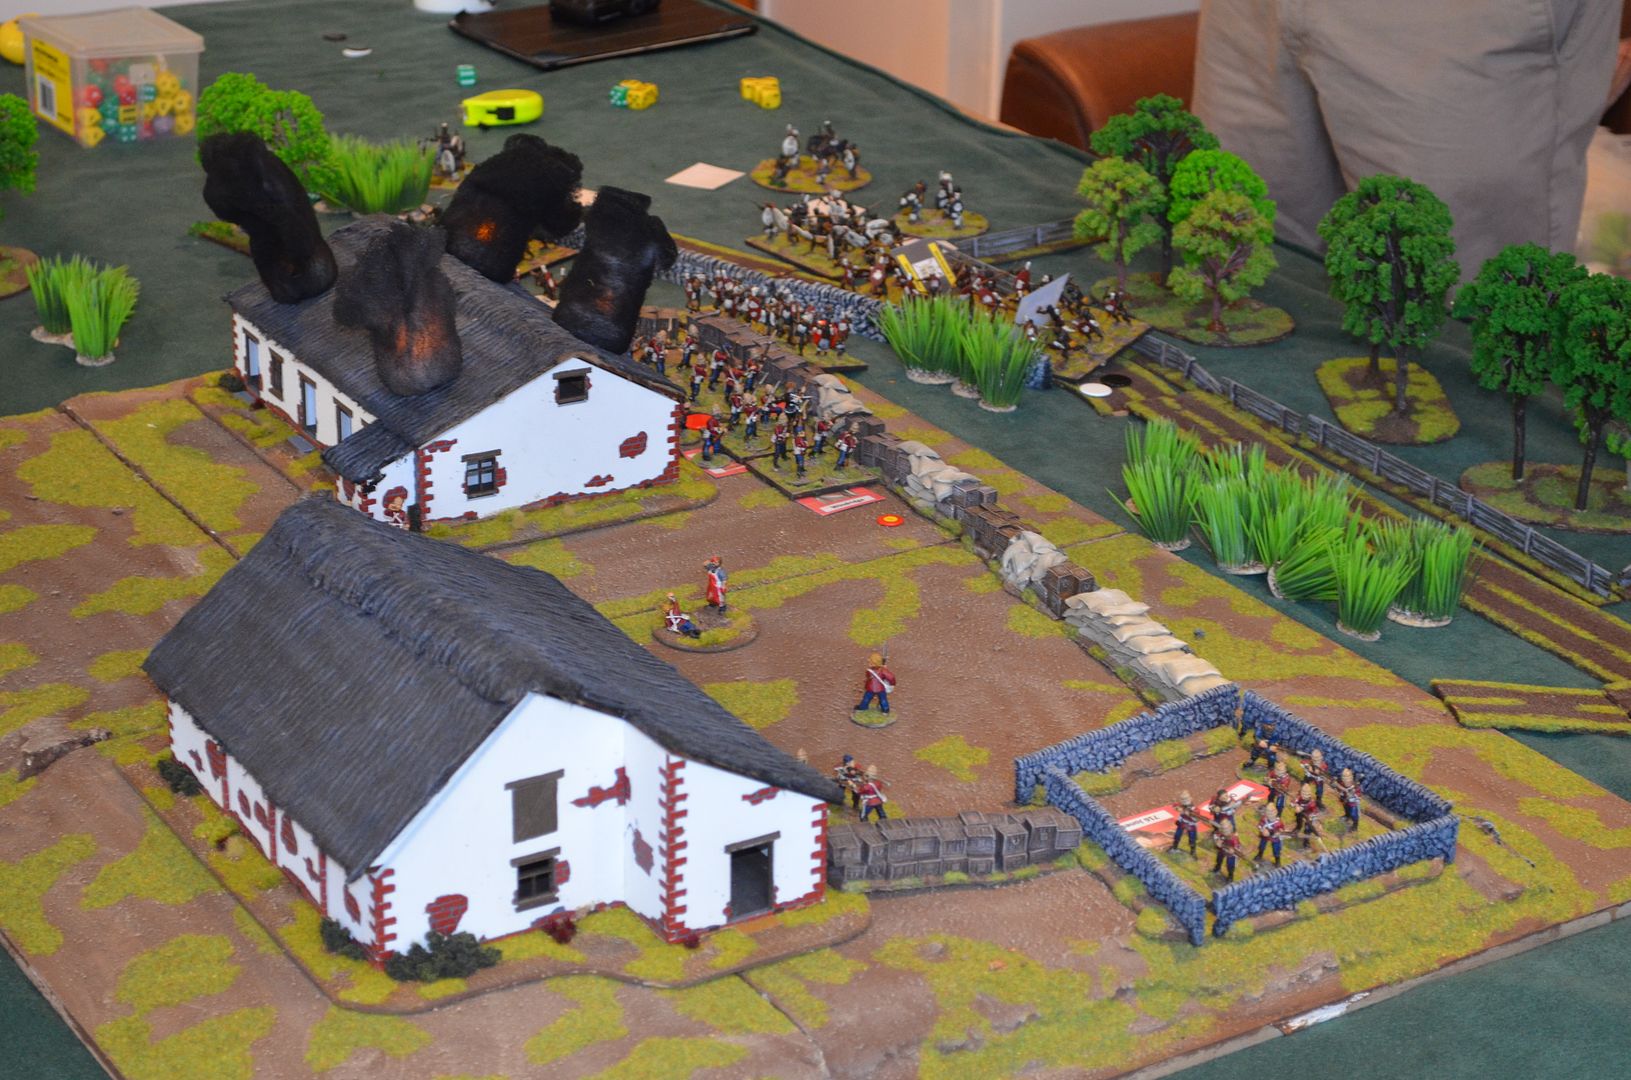
Bouyed on by the victory earlier in the day the bloodthirsty zulus (the +1 morale save was making a real difference)threw their bodies onto the ramparts. The British fire was murderous but they were getting pushed back from the barricades.
With a cry of Usuthu the brave natives swarmed over the ramparts killing Corporal Allen and his squad and infuring several other units. The attack was pressed home but the numbers available to the attackers were dwindling.
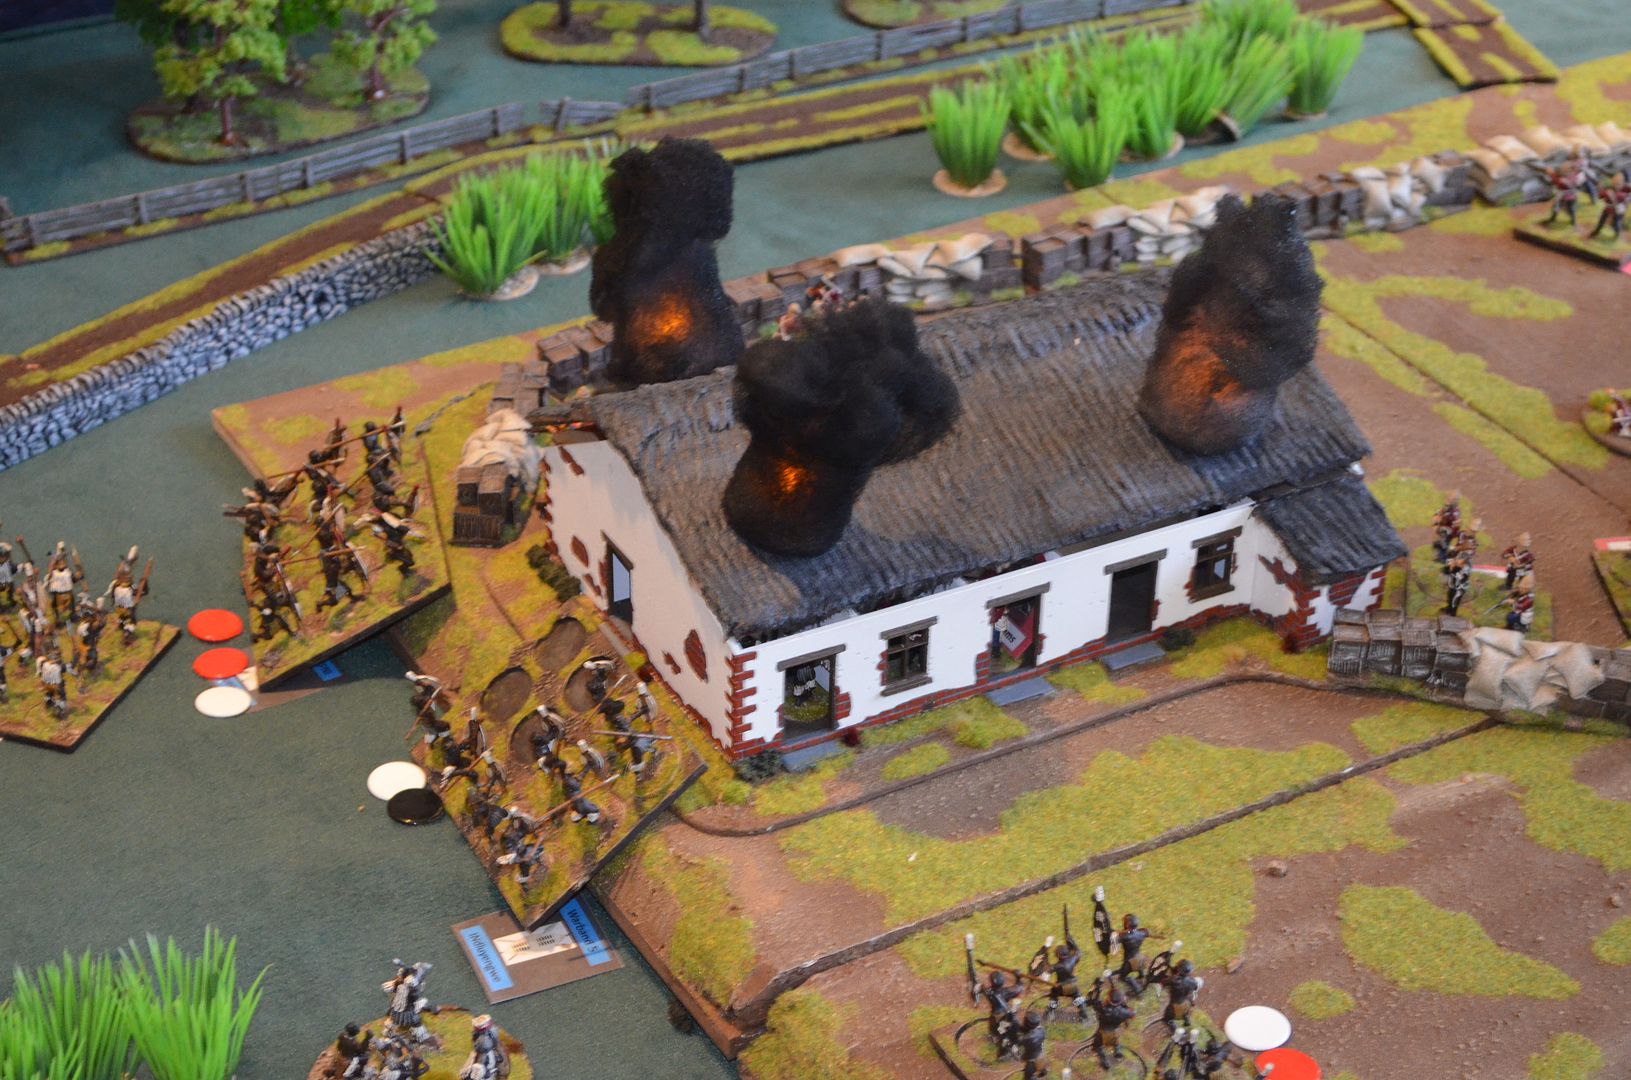
Chard and CSM Bourne lent their support to the gallant defenders. Maxfield having fought valiantly in the hospital was the first to awarded the VC for his heroics holding back two units of Zulus on the ramparts.
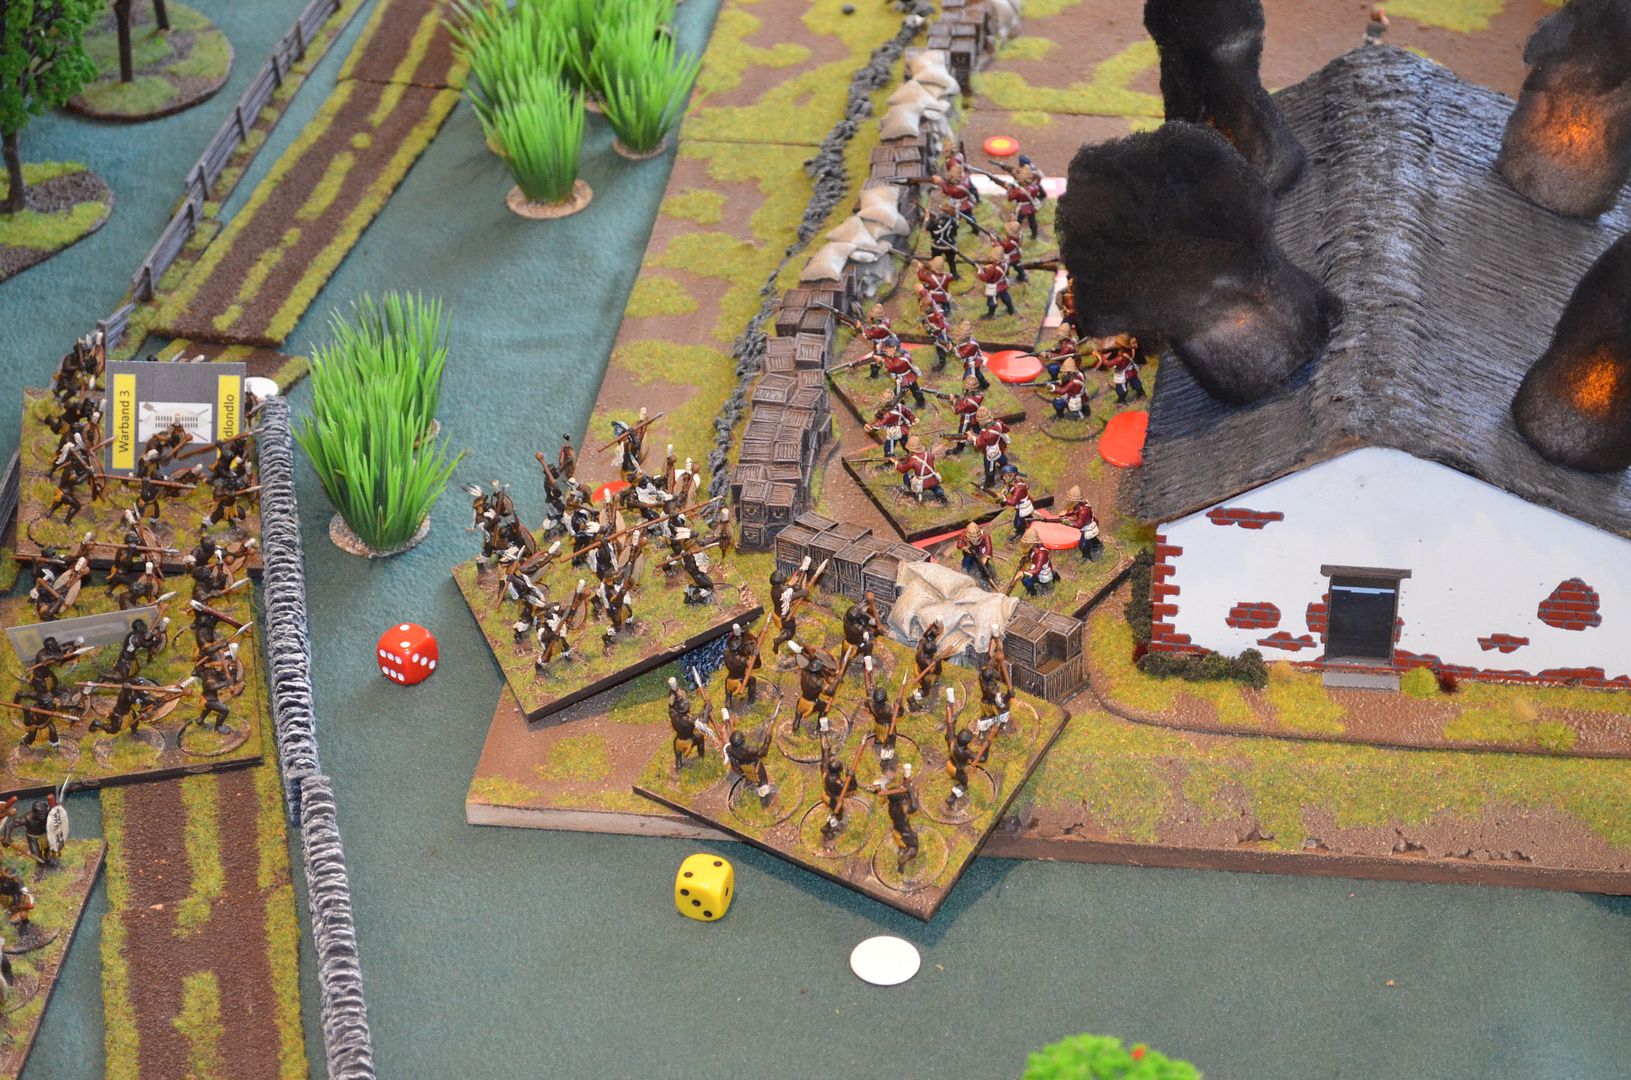
Meanwhile the Zulu attack in the eastern section was also pressing home and fighting over the stone Kraal was brutal. The Zulus pressed home and another brave British unit bit the dust .
The combat on the North west ramparts was now petering out but in a final flurry of spears and bayonets Corporal Windridge and his squad were killed. The British had lost 25% of their forces and there were still more Zulus circling the defences.
It was time for a break in the engagement. As the Zulus tended their wounded and rallied their forces the British elected to build the redoubt in the middle of the Drift. Sniper fire continued unabated but was to a large extent completely ineffective.
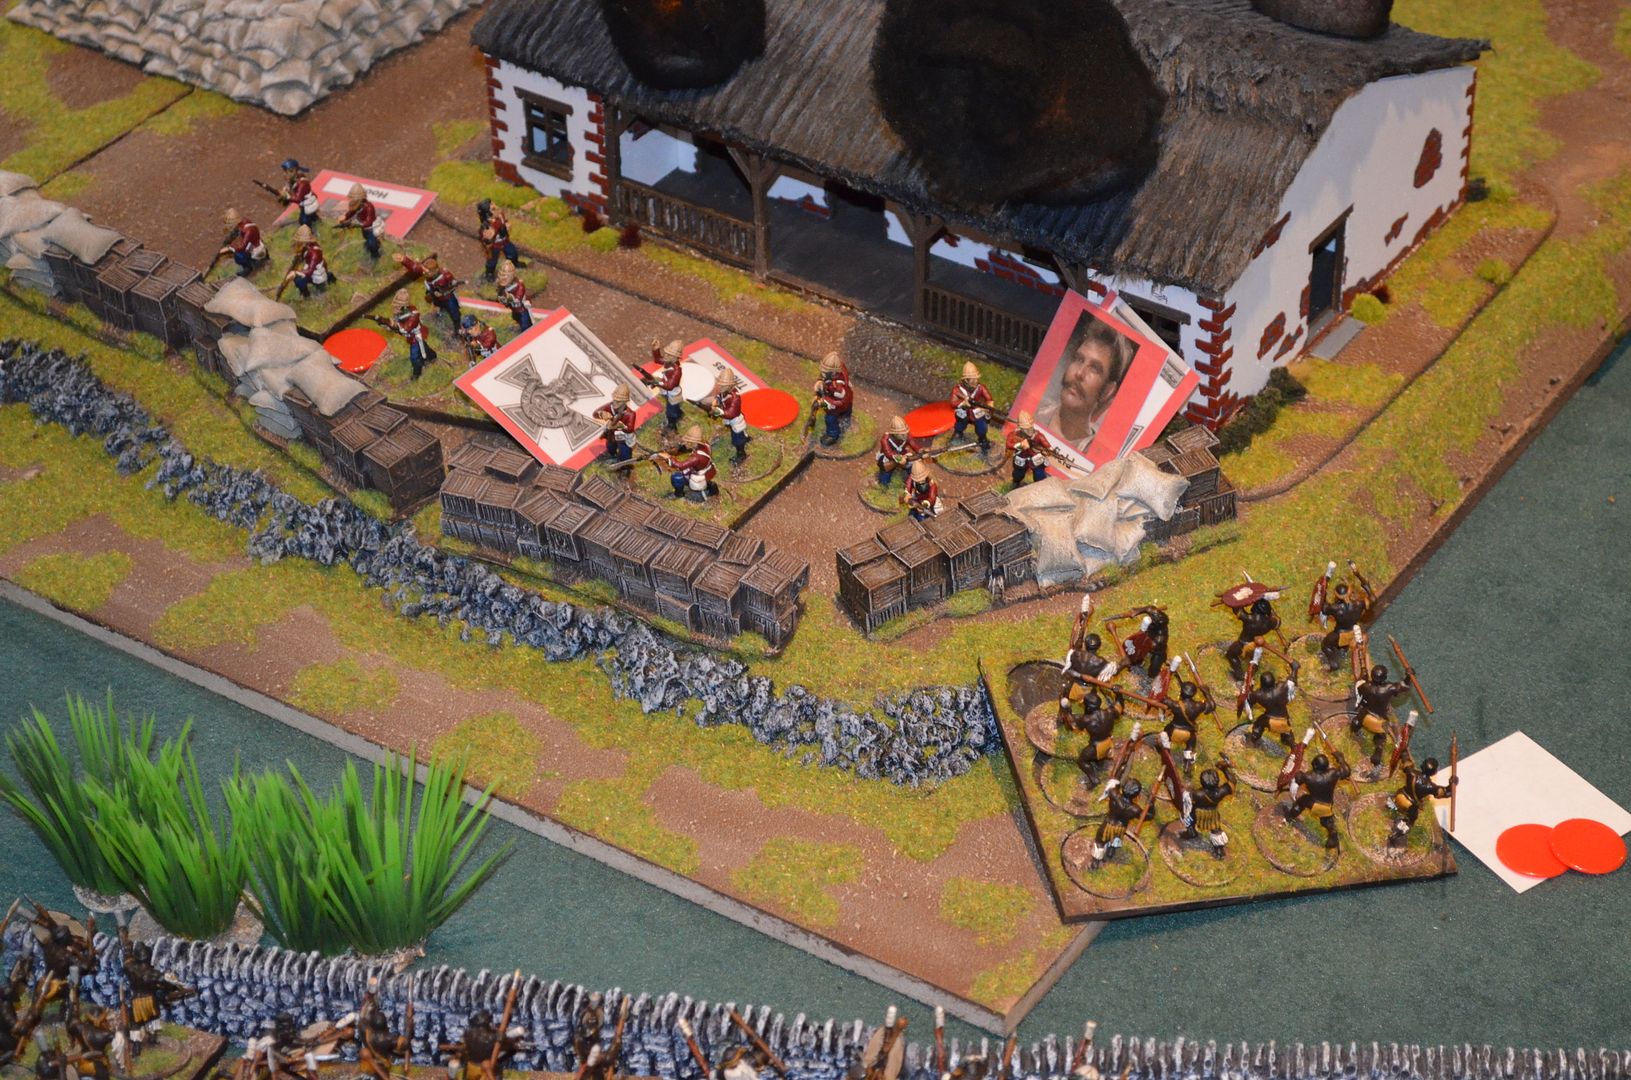
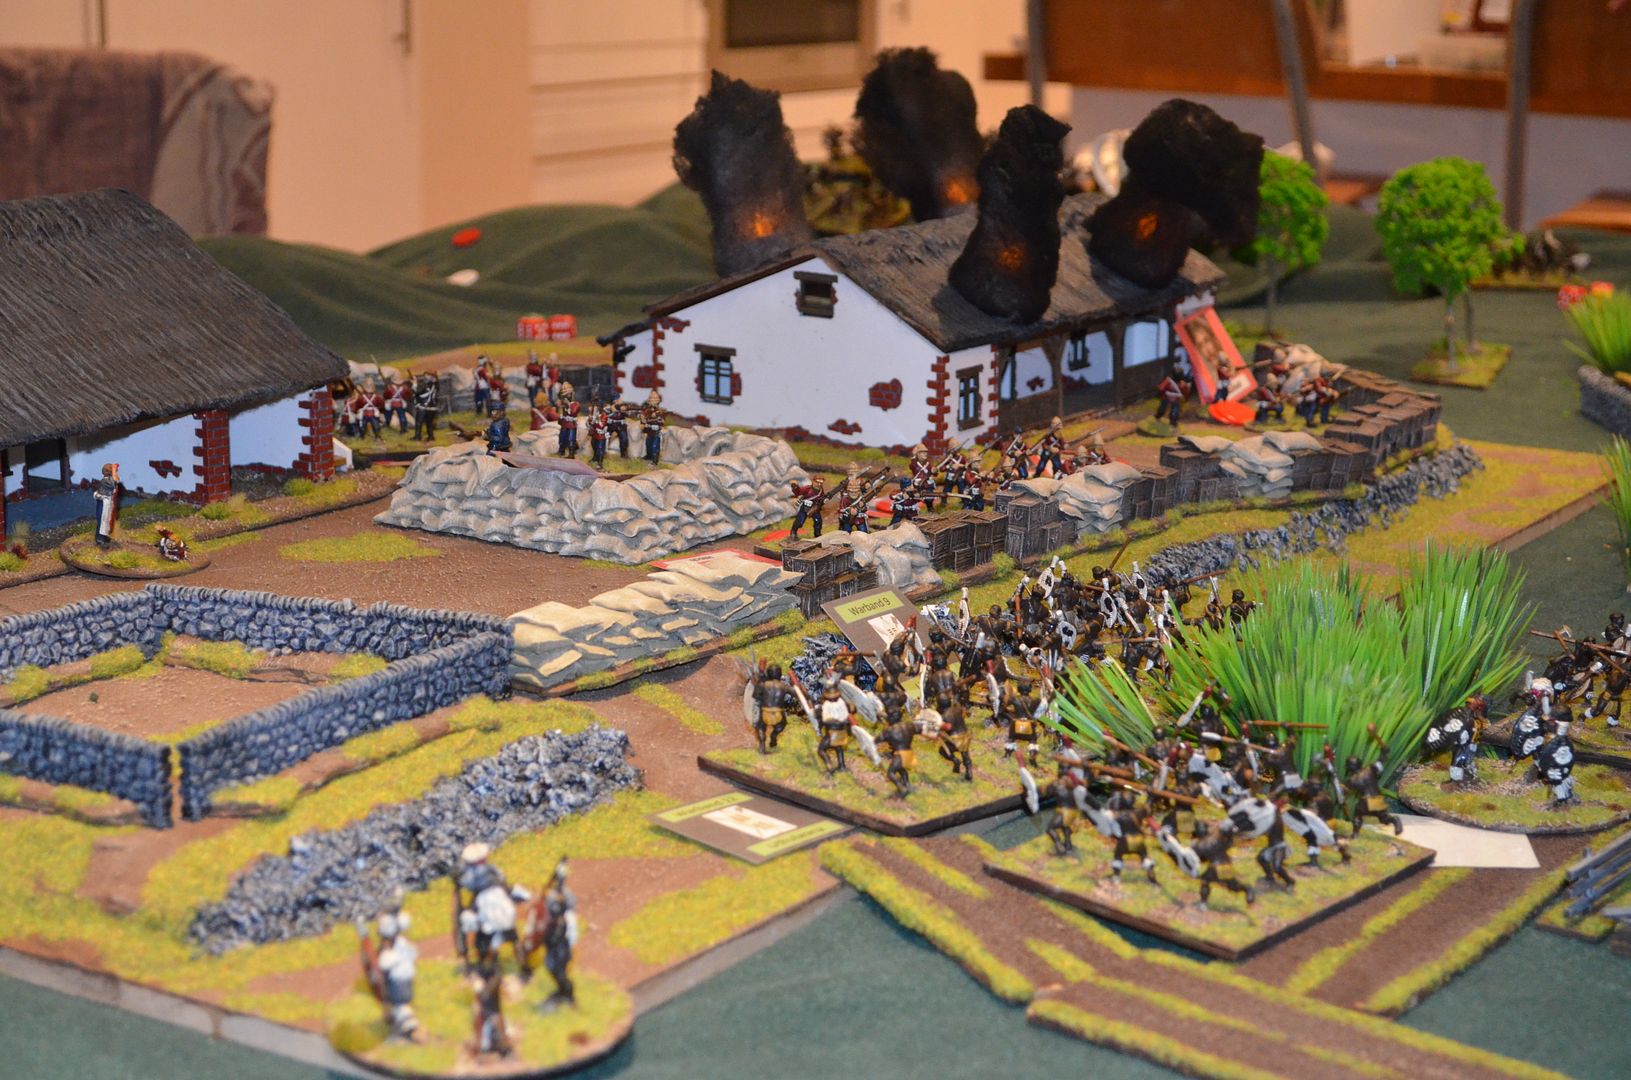
As the sun was setting the Zulus massed for their third attack. (now longer receiving the +1 morale bonus)
Once again forces attacked from the Garden and another large force pusjhed down off the Oskaberg -- intent on forcing a fight around the storehouse.
One Zulu regiment crashed against the northern ramparts only to be driven off and routed by volley fire.
The Zulus from the south closed on the storehouse in in no short time managed to get this building ablaze. The British units began to cluster around the redoubt fearing the worse

The Zulus charges again and again - each time the body count rose and no impression could be made on the defences
As the sun was setting the Zulu tried one final push with a fresh regiment against the ramparts on the North wall - four warbands charged and in quick succession three were routed as they hit the mealie bag walls and a wall of lead. The assault had failed.
It was now 5pm real time and to be frank all the players were exhausted. The Zulus had thrown the best part of half their units at the drift and only had a modicum of success.
Sufficient forces still exist for further attacks but from a starting count of 39 warbands - 13 had been destroyed with two of the four regiment perilously close to breaking.
It was agreed to capture the status of all the units on paper and potentially complete this gamer in the future however based on the superior firepower and defences of the British I think the conclusion might be staring us in the face.
What a game - this really did capture the cinematic feel we wanted. A big thank you to those that took part -
Until next time
Eric the Shed
Wonderful AAR report capturing the essence of the struggle!
ReplyDeleteThank you - at one point in the second assault we felt the Zulus might actually do it
DeleteI usually don't enjoy AARs but this was inspirational. Thank you.
ReplyDeleteHow kind - it was fun putting it together
DeleteYes, gripping report. Thanks for the write up!
ReplyDeleteCheers
Deletesounds like a grand days fighting
ReplyDeleteOne of the best days wargaming I have had for a longtime
DeleteIt was like watching the movie all over again, thanks for sharing.
ReplyDeleteShould have added we had the soundtracks and music from the films in the background
DeleteA great AAR! Quite a game. I played the defense of the Drift a couple of years ago to TSATF rules and really suffered from the Zulu's dropping fire from the hills. I think it was too effective compared with the historical event. It's one of those factors which make getting a good game balance tricky.
ReplyDeleteOur sniper fire really was ineffective - just a case of bad dice
DeleteGreat report and photos!
ReplyDeleteCheers
DeleteVery cinematic report Eric, what a game to be part of I'm sure!
ReplyDeleteEverybody seemed to enjoy it
DeleteWhat a great and well organised game.
ReplyDeleteThank you - I have learned that Wargamers are happy if they have figures, dice, good company, rules they understand PLUS hot Drinks and Food
DeleteLooks wonderful , plus 1's to hit for anyone singing Men of harlech !!!!
ReplyDeletelovely setup!
ReplyDeleteyou mispelled one of the names, it's Corporal Christian Schiess, not Scheiss (Germans/Swiss pronounce the ie and ei opposite of the way you English pronounce it)
I am about to test play Rorke's Drift this weekend. Using the Zulu supplement. I see we have many of the same concerns with the scenario as written. Your take is brilliant and I plan to give it a try. Thanks!
ReplyDeleteAaron
Cheers Aaron - please let me know how it went
DeleteWarlord forum has been down. Played scenario Friday at ROCKCON. Had 7 players and it went great in time we had. Made corrections from playtest and our discussion. Everyone loved it. Look forward to playing myself to conclusion when we have more time.
ReplyDeletehttps://m.facebook.com/story.php?story_fbid=1556341587785330&id=1002351263184368
Not sure when Warlord forums will be back up, but here is my post on Rock-Con. you scenario played great.....wish we had a little more time. Look forward to playing again at home.
ReplyDeletehttp://rallyroundtheflag.blogspot.com/2017/10/rock-con-2017.html
I've just purchased the WG set of Rorke's Drift and am curious to know the number of figures you used in your British and Zulu units. I've recreated Isandlwana in 6mm using the guide put online by Little Wars TV. This is my first venture on to 28mm Zulu War.
ReplyDeleteI used about 600 Zulus (but you can get away with about 200 for the RD scenario) - for the Brits you need about 40 figures
Delete