This has always been on the top of my bucket list to re-fight these cinematic engagements and following all the hard graft to paint up hundreds of figures over the past six months my dream was finally realised.
If you have been following my blog over this period you will be aware that I started this project when my father was sadly diagnosed with a terminal brain tumour. Sadly he passed away before he could see the fruition of these labours but the following is dedicated to him.
On Sunday five of us gathered to commemorate those souls who fought and died bravely in the opening salvos of the Anglo Zulu war of 1879. The day was made even more poignant by the fact that Sunday 22nd was actually the anniversary of the battles of Isandlwhana and Rorkes Drift.
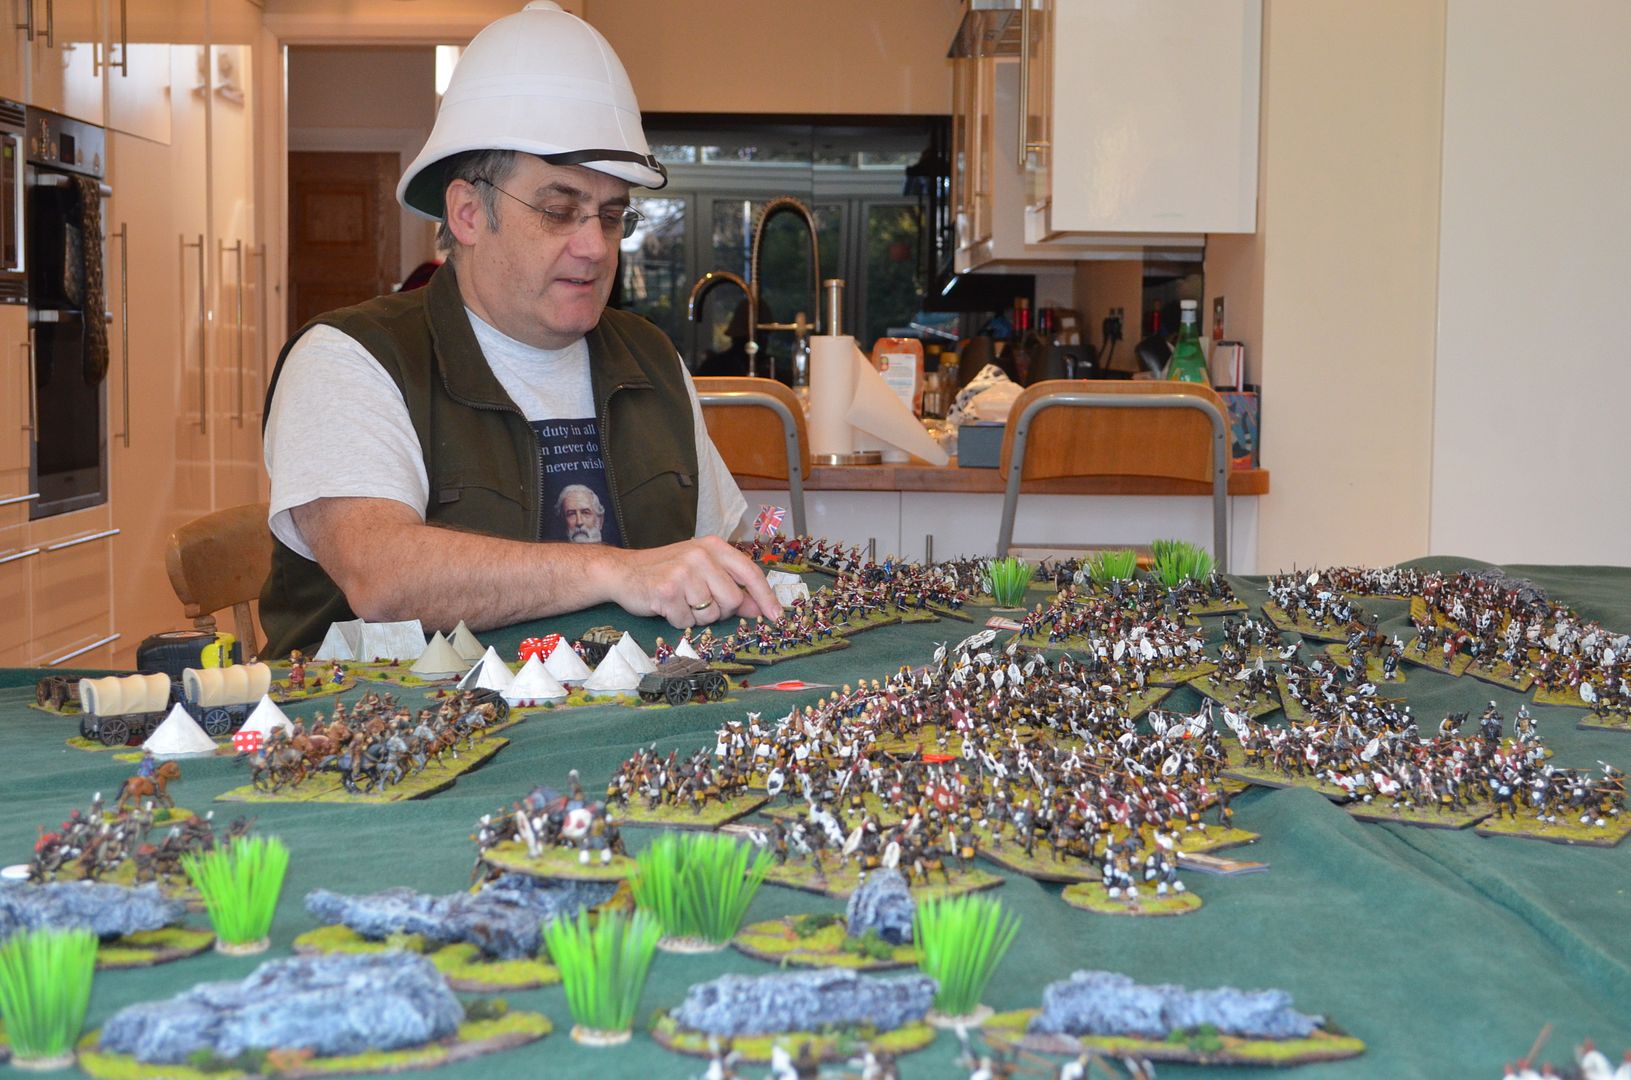
With the cold weather gripping the South East of England (temperatures barely above zero) the shed was out of bounds so our games were played out in the warmth of my kitchen.
Kicking off at 09.00hrs with Bacon Sandwiches and gallons of tea the forces and players assembled. The morning would focus on Isandlwhana with the attention in the afternoon from 1pm switching to Rorkes Drift. The day would finish around 5pm - 8 hours of great gaming.
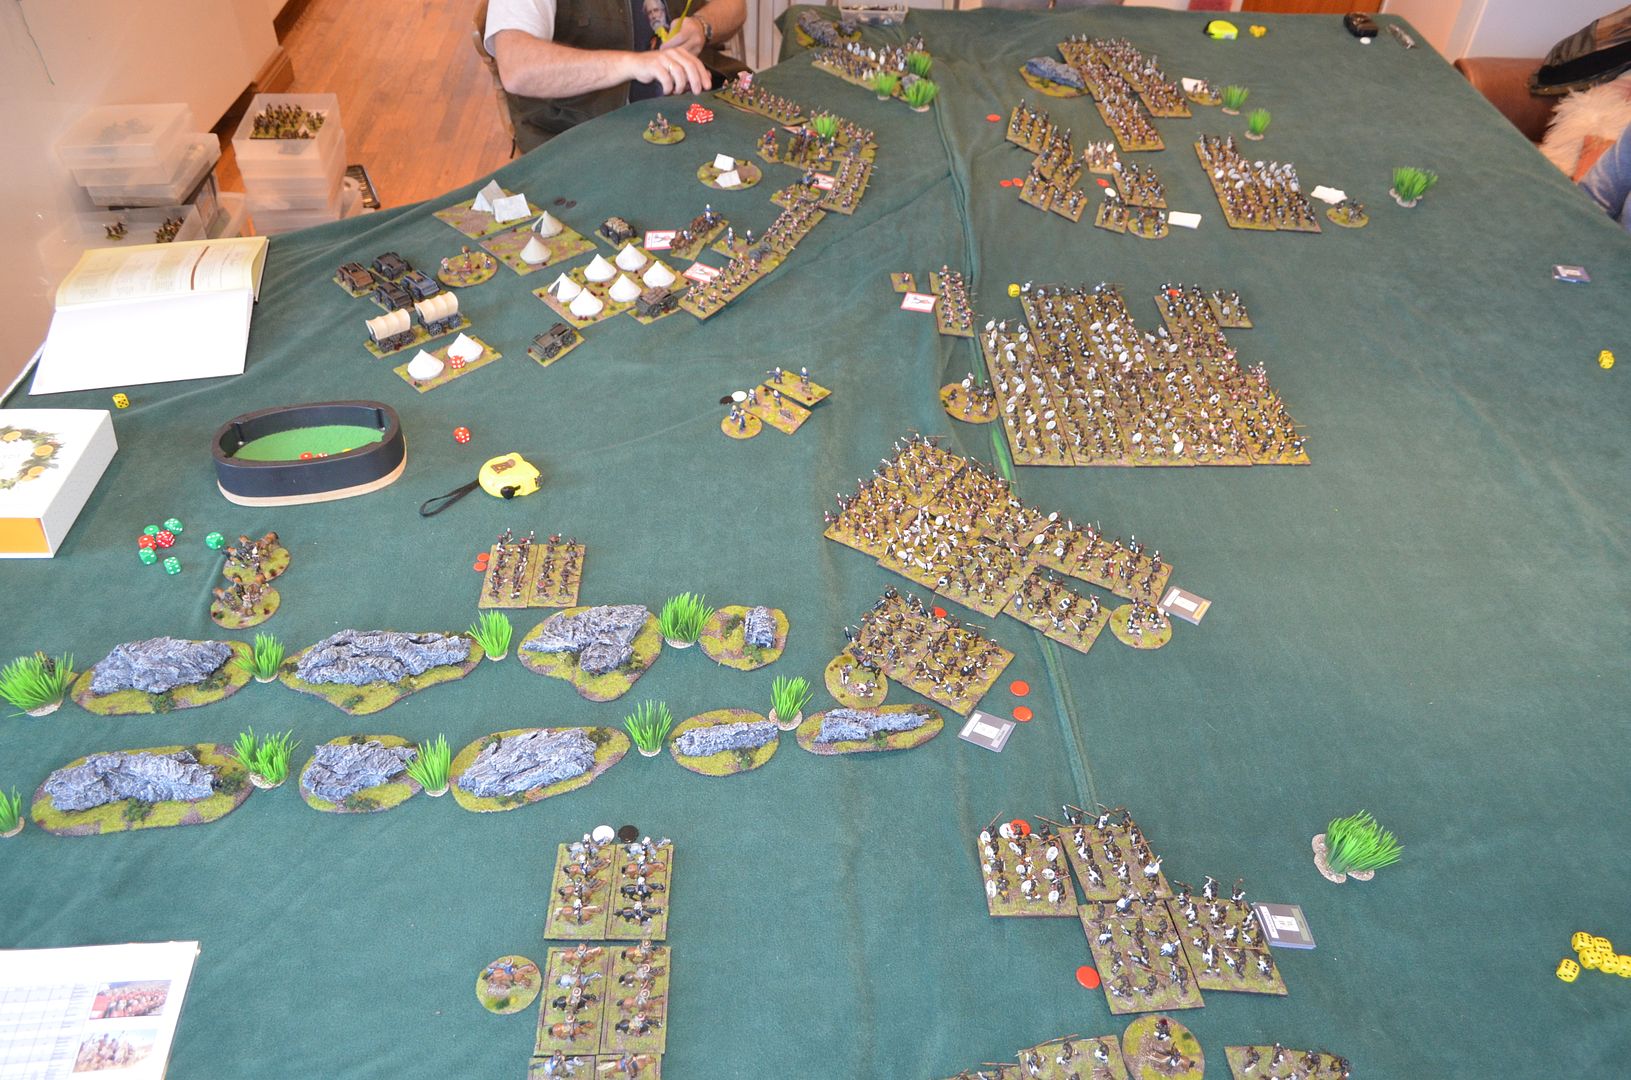
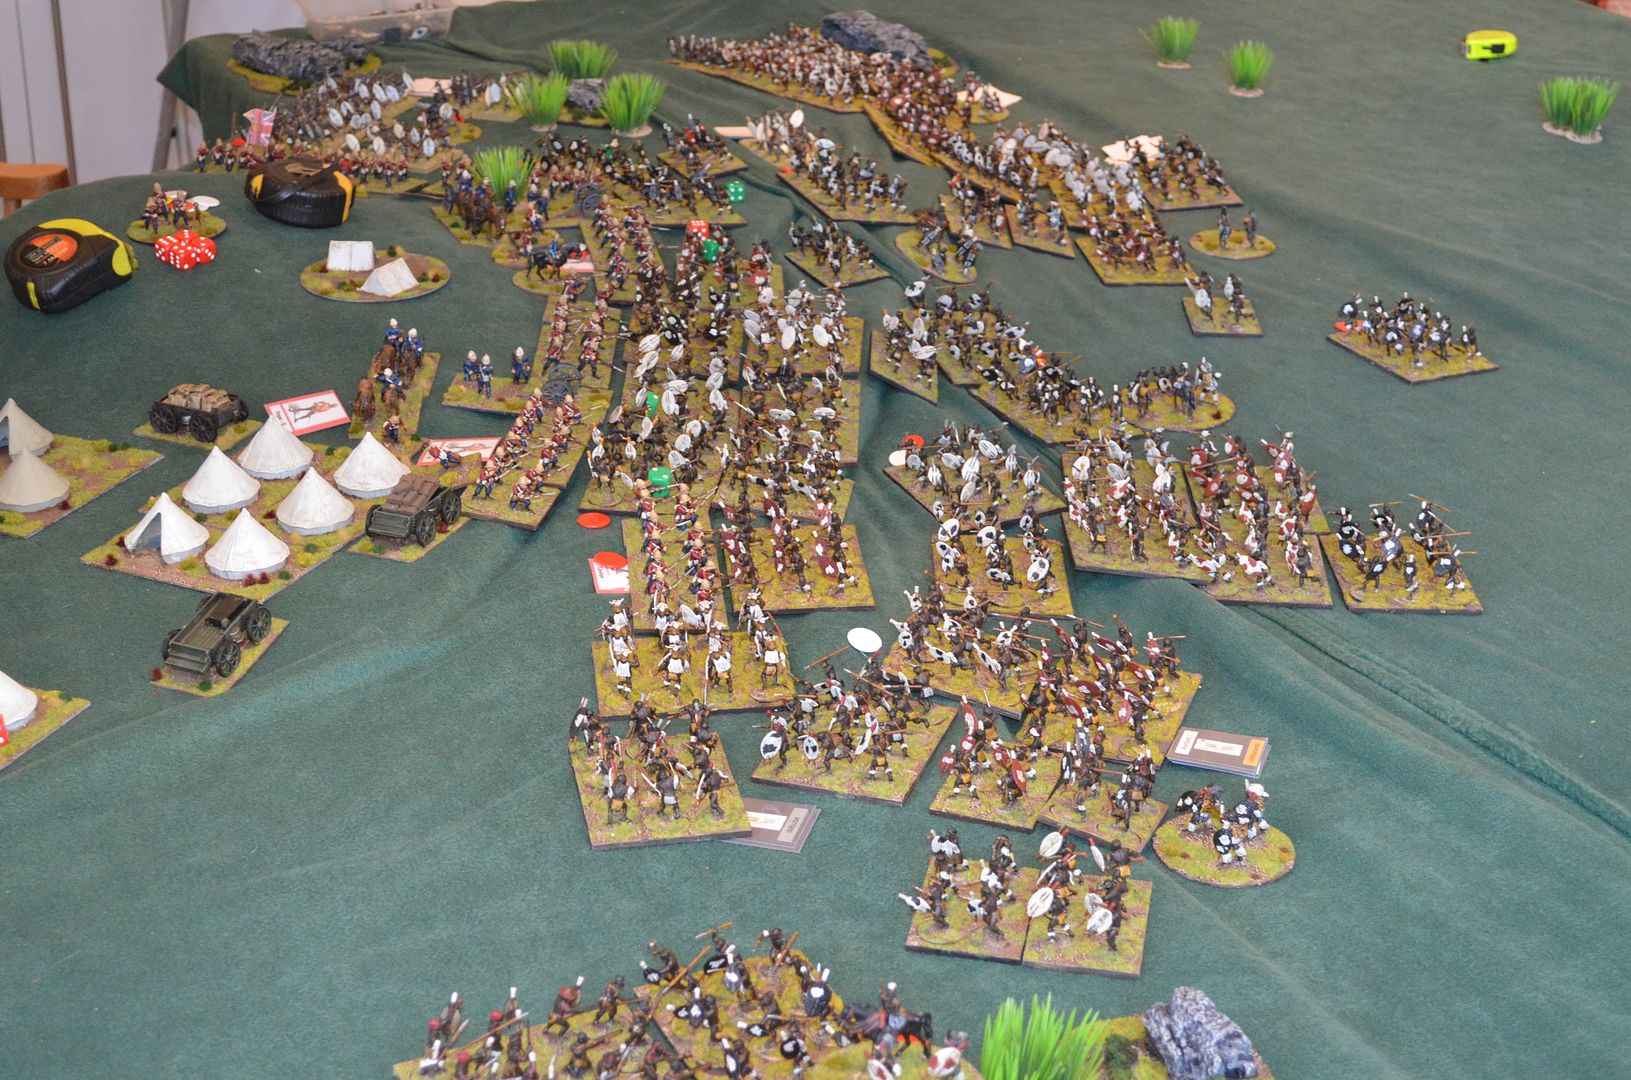
Setting the field for Isandlwhana was no easy feat as I had to draft in both a garden table and our dining room tanble to complement the Kitchen table. This ended up being almost 11ft x 11ft with the invisdible summit of the rocky outcrop of Isandlwhana sitting at the cut off edge of the dog leg.
I'd bought some green fleece cloth to cover the tables (not the best colour) and under this we built up the slopes of the South African veldt.
Both games were fought using Black Powder rules with some variations. These are explained in the following notes.
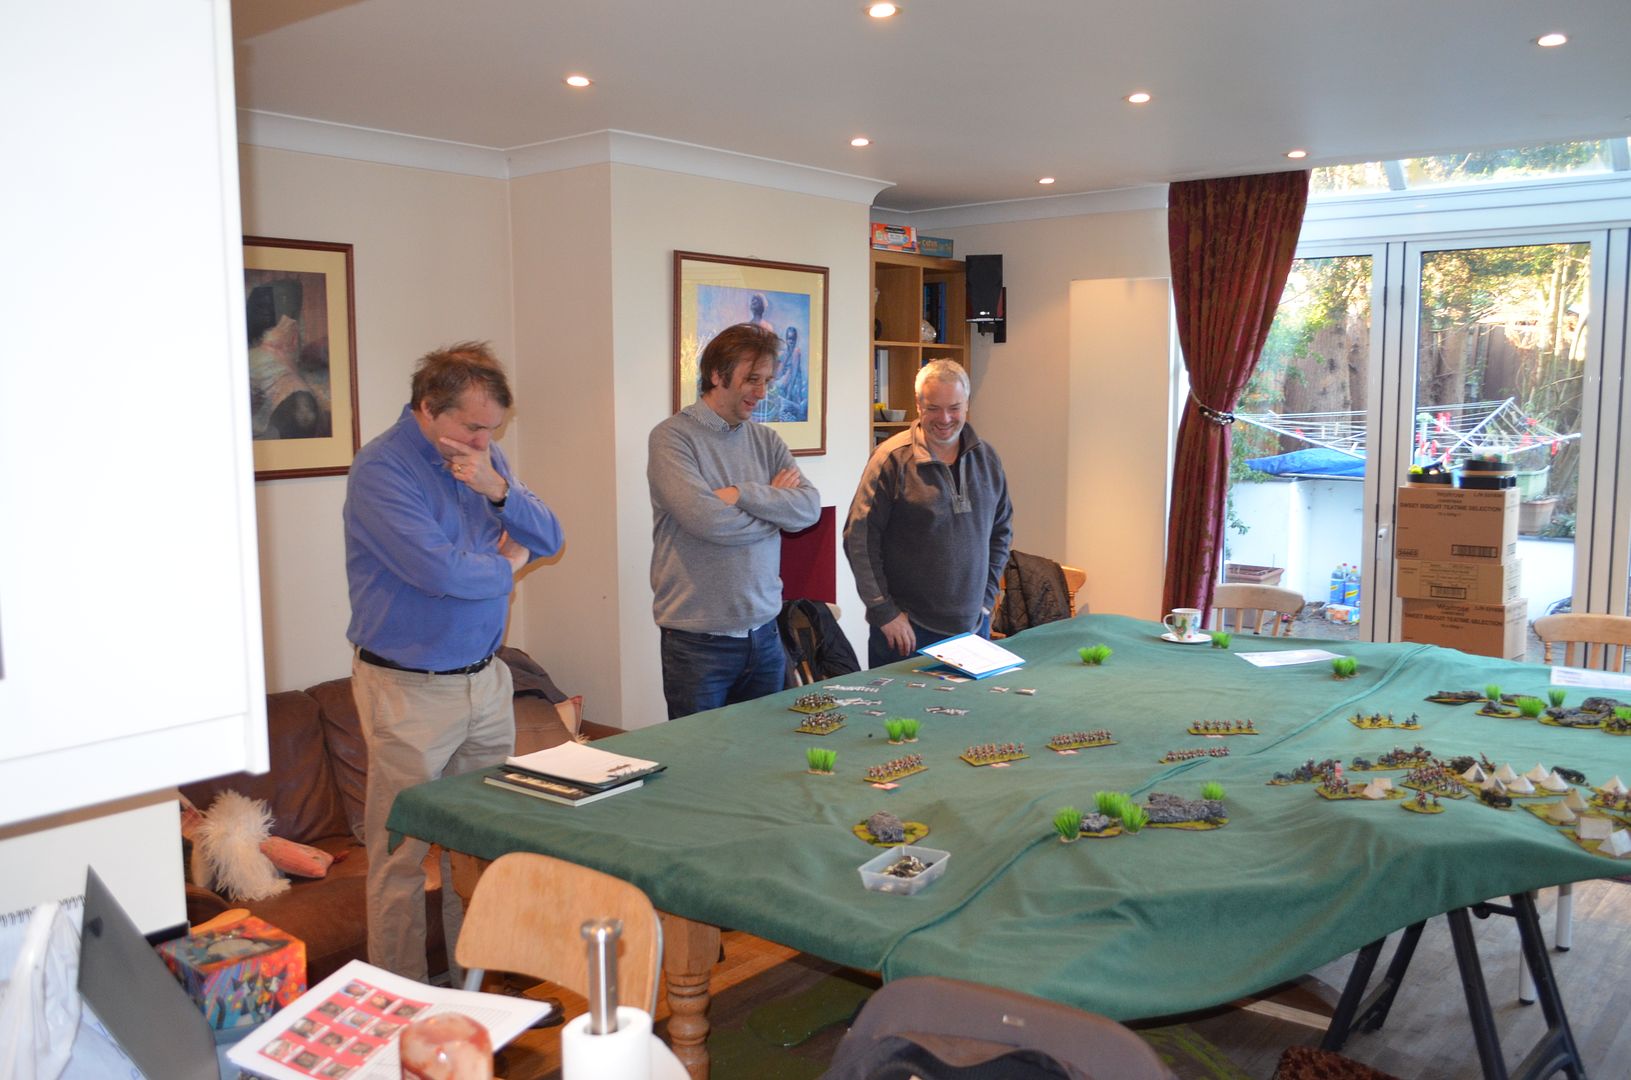 |
| The Zulu Commanders debate their initial approach |
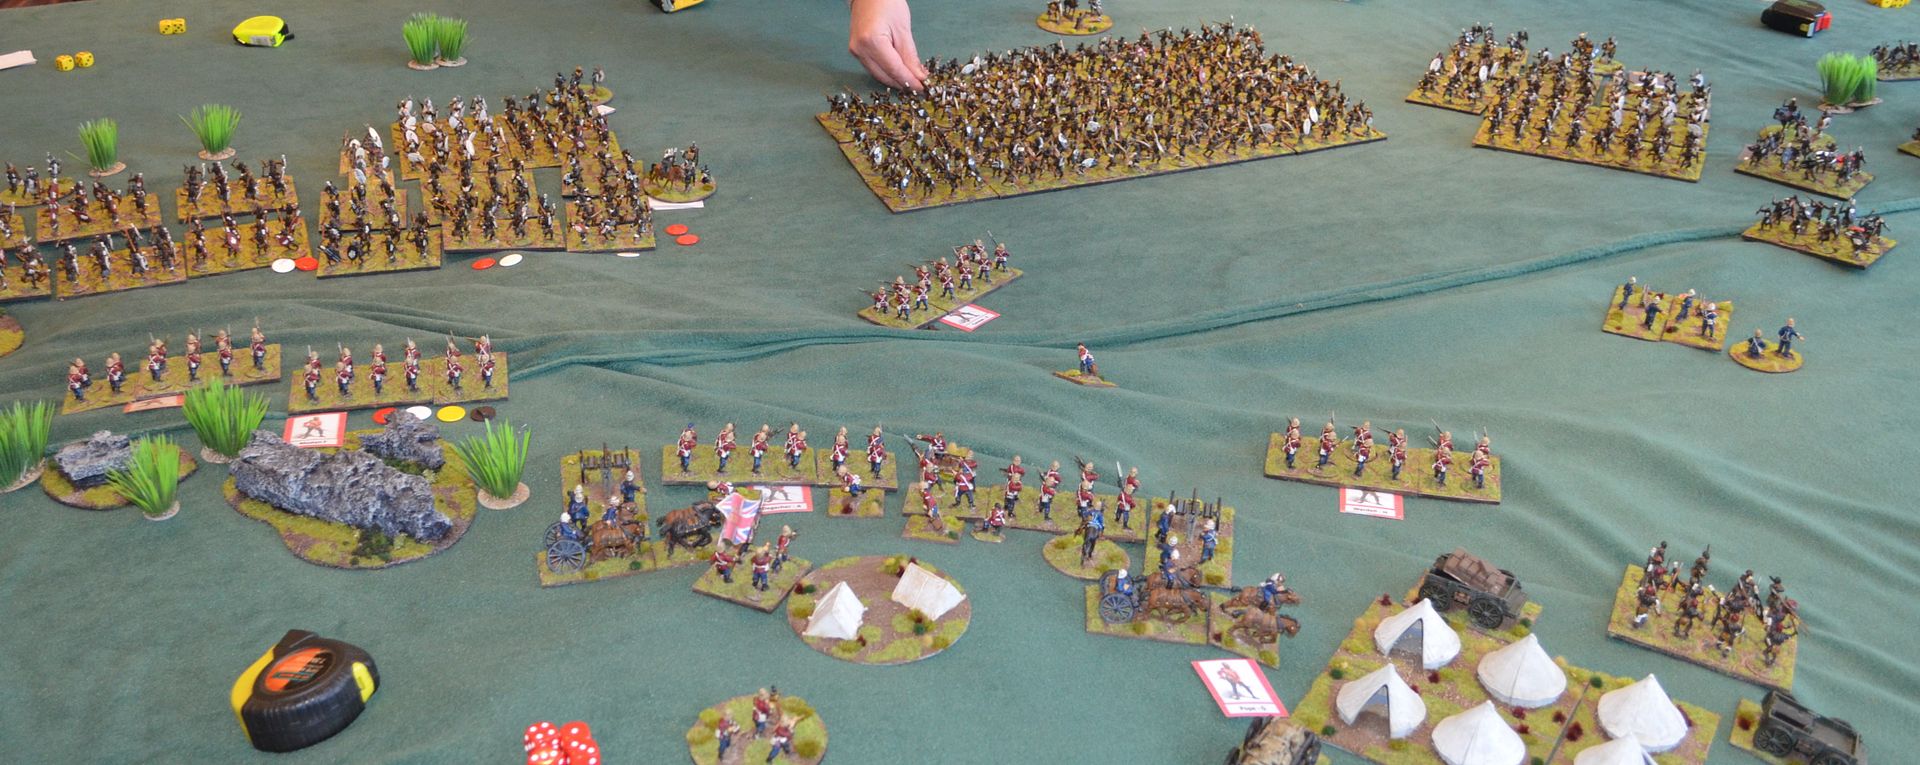
The picture above shows the table set up with the British deployment. I used the following map found on the internet to lay out the British forces. The camp complete with wagons and tents can be seen to the right of the picture

I also found this 3d render on the internet showing the layout of the ground and the direction of attack. Our table represents the lower ground circling the summit

British Forces
The British players (myself and Mark) would command the two columns who fought at the battle.
Number 3 Column, Col. Glyn - Mark
Number 2 Column, Col. Durnford 0- Eric the Shed
British Units and their approximate strengths.
Number 2 Column -
Number 2 Column -
|
Commanded by Durnford 9+
|
11 Battery 7th Brigade R.A. - 3x 9pdr Rockets.
|
One Rocket Units
|
/1st Natal Native Contingent - 2 companies - 240 men
|
One Unit NNC
|
Sikhali Horse
|
One Unit Sikhali
|
Edendale Troop - 50 men.
Hlubi's Troop - 50 men.
|
One Unit Boers
|
Number 3 Column commanded by Colonel Glyn
|
Commanded by Glyn 9+
|
N Battery 5th Brigade R.A. - 2x 7pdr Guns
|
Two Artillery Battery
|
1/24th - 5 companies - 415 men.
|
5 units British Infantry
|
2/24th - 1 company and detachment - 180 men.
|
1 unit British Infantry
|
1/3rd Natal Native Contingent - 2 companies - 200 men
|
N/a
|
2/3rd Natal Native Contingent - 2 companies - 200 men
|
N/a
|
No.1 Squadron Mounted Infantry - 27 men.
Natal Mounted Police - 34 men.
Natal Carbineers - 29 men.
Newcastle Mounted Rifles - 17 men.
Buffalo Border Guard - 8 men.
|
Unit of Natal Mounted Police
(For game purposes this will be transferred to Number 2 Column)
|
Total Number of Units 14
Each British Infantry unit has its own commander (9+) with non ifantry units rating as 8+
Each British Infantry unit has its own commander (9+) with non ifantry units rating as 8+
Deployment
Durnford’s forces will be deployed along the front Donga at
the beginning of the game. This includes the Rocket Batteries and NMP
Five of the British Infantry companies have been deployed according to the map provided. The Artillery will be limbered
half way between the camp and leading unit of deployed infantry.
The British have two
other commanding units at their disposal
Colonel Pulleine (in
Camp) – 8+ commander
Melville (with
Colours) - Tiny Unit 1 Shoot +2 to Melee
British line infantry were given the volley fire attribute and were steady and stubborn. Furthermore to reflect the ammo issues of the British if a firing sequence rolled more 1's than 6's ammo became limited for the unit in question. With ammo limited the unit lost one firing dice.
Each unit had an ammo runner who could 'run' to the ammo wagon and run back to replenish his unit.
 |
| The British commander had cards showing the names of his companies and commanders - all adds to the character of the game |
Zulu Forces
Zulu Units and their
approximate strengths.
Whilst searching for unit
descriptions of the Zulu Army I discovered that an Impi is just a generic term for
an Army/Regiments. Regiments were actually called IButho’s and these were made
up of several units called Amaviyo’s.
Amaviyos ranged in size from fifty to three hundred men. The Amaviyo will
become my standard warband and each warband will represent 300 warriors.
Zulu Forces (actual
Deployment)
Right Horn
|
||
Regiment
|
Number of Men
|
Warbands
|
uDududu
|
1500
|
5
|
iMbube
|
500
|
2
|
iSangqu
|
1500
|
5
|
Left Horn
|
||
Regiment
|
Number of Men
|
Warbands
|
uVe
|
2000
|
7
|
iNgobamakhosi
|
6000
|
20
|
Centre
|
||
Regiment
|
Number of Men
|
Warbands
|
uNokhenke
|
2000
|
7
|
uKhandempemvu
|
2500
|
8
|
uMbonambi -
|
2000
|
8
|
The Zulus have a total of 52 units in play which gives them
a 4 top 1 numerical advantage
Once 27 plus are
shaken or Routed the Zulu Force is assumed to be spent and cannot attack
Cards for all of the Zulu Regiments were produced to aid identification of the units.

The Zulu player will receive one commander for each regiment. These are all +8 commanders.
Zulu units all have the initiative ability that allows them
to move forward one move provided they have not been ordered.
The Zulu Force – had to be divided into three horns with no horn more than 50% of the total warband
count.The Zulu players could determine the composition of the horns and they would start from any edge facing the summit.
All the Zulu units were standard warband units as described in the book with no differention between married and unmarried units.
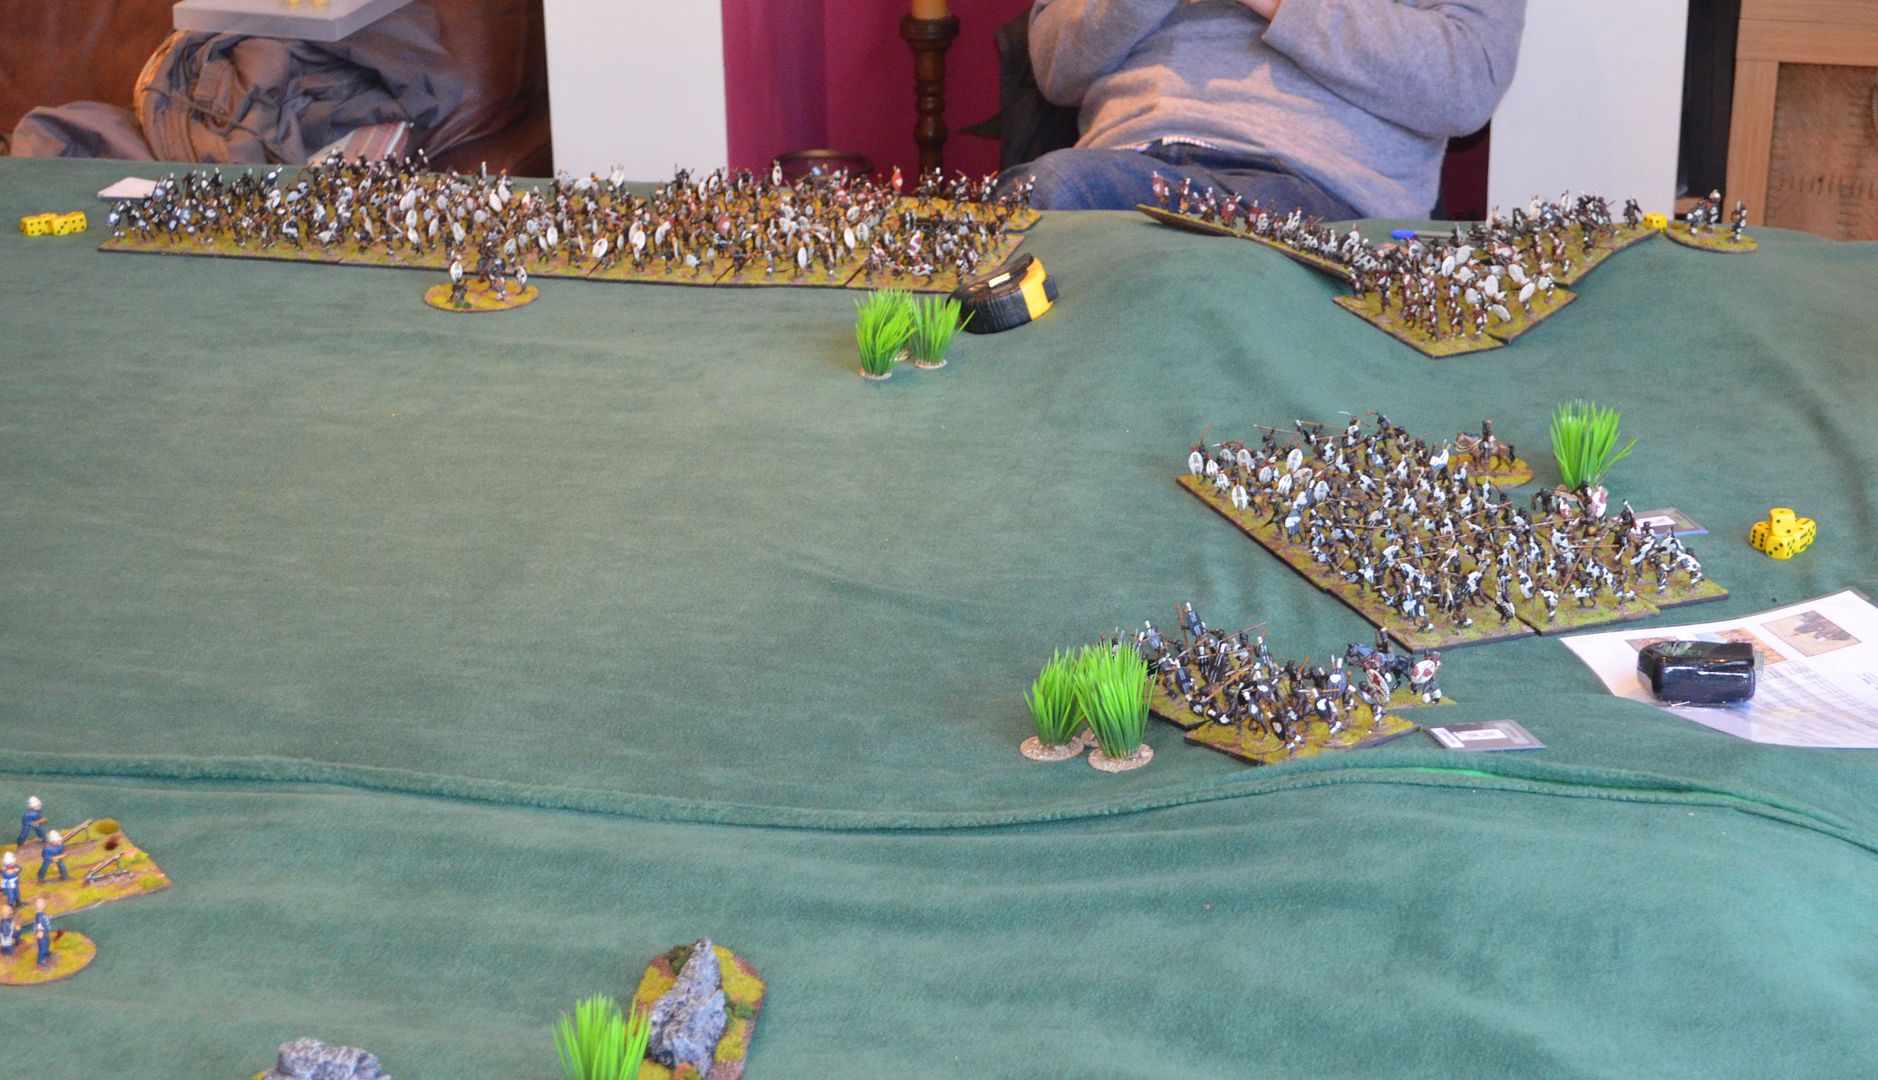 |
| The Zulu Centre and left horn emerged onto the table....they decided to ignore Durnford and his mounted troops in the Donga |
 |
| So Durnford's me mounted up and pushed towards the left horn. Next turn Durnford blundered and wheeled his me away from the approaching hordes |
 |
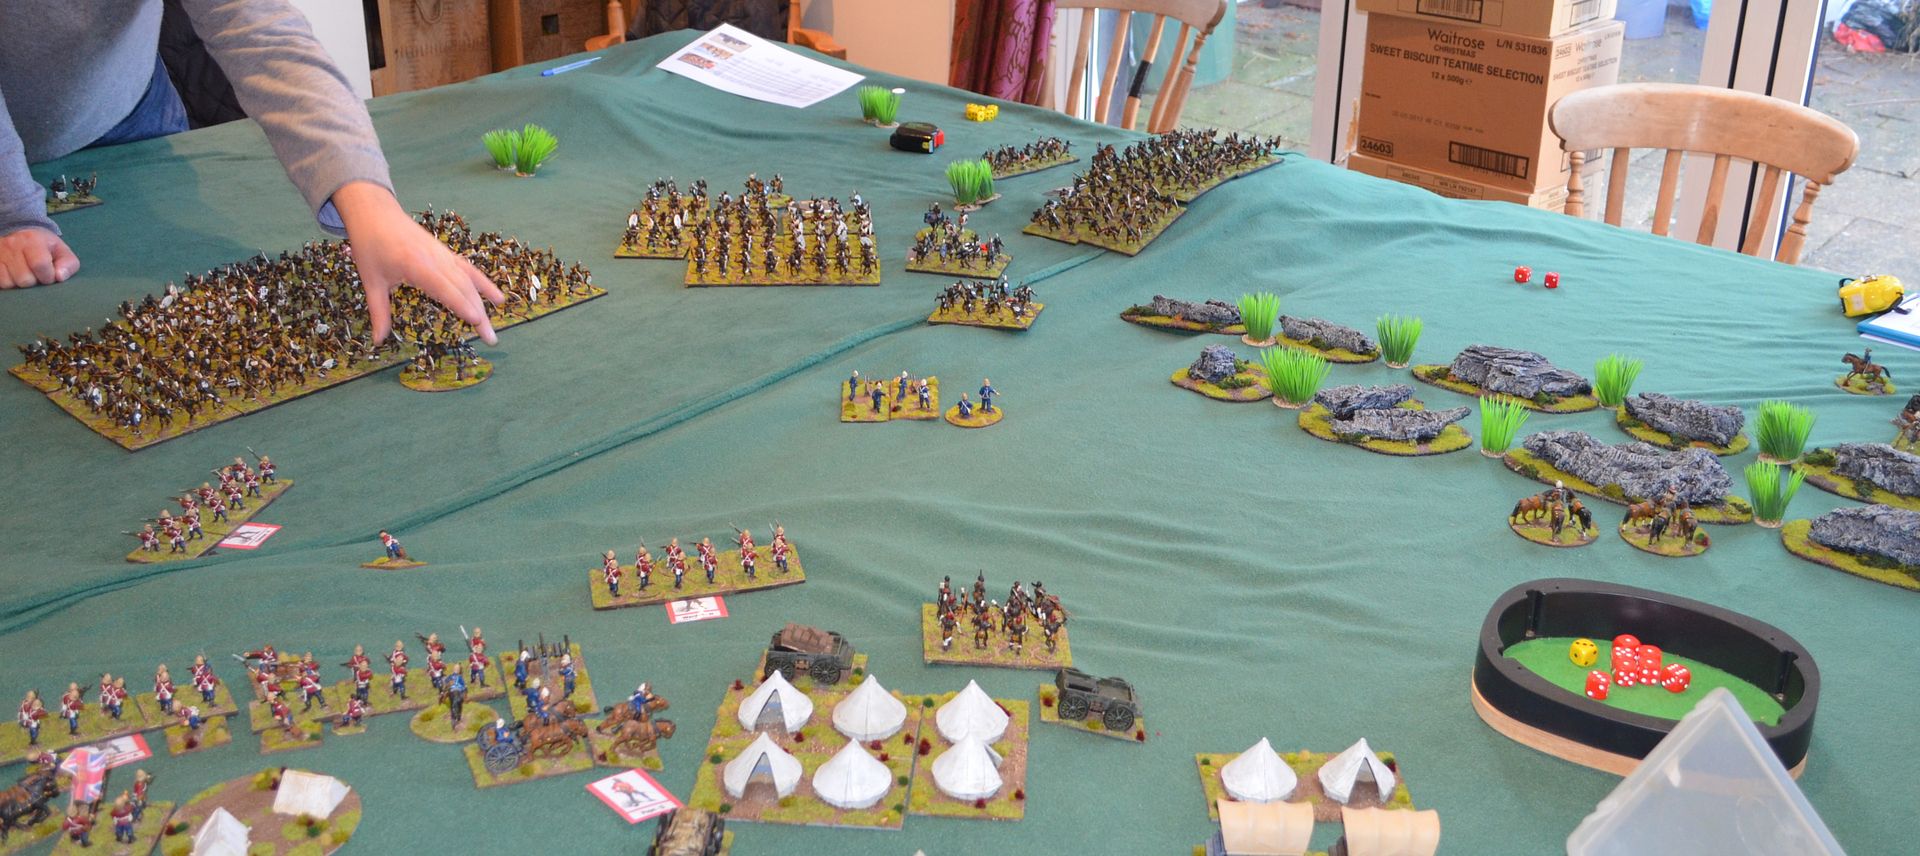
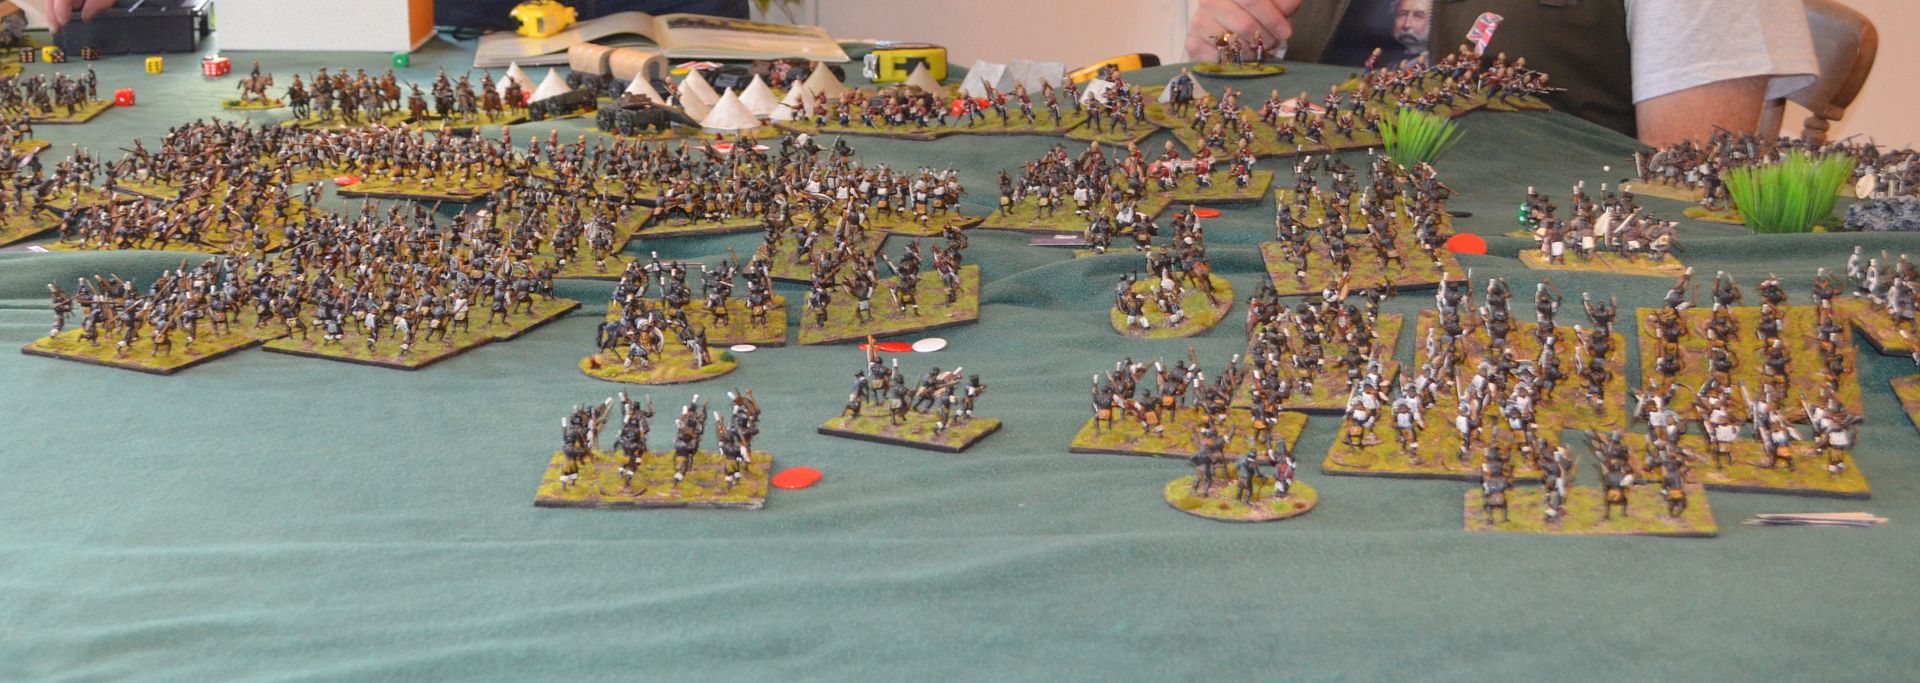
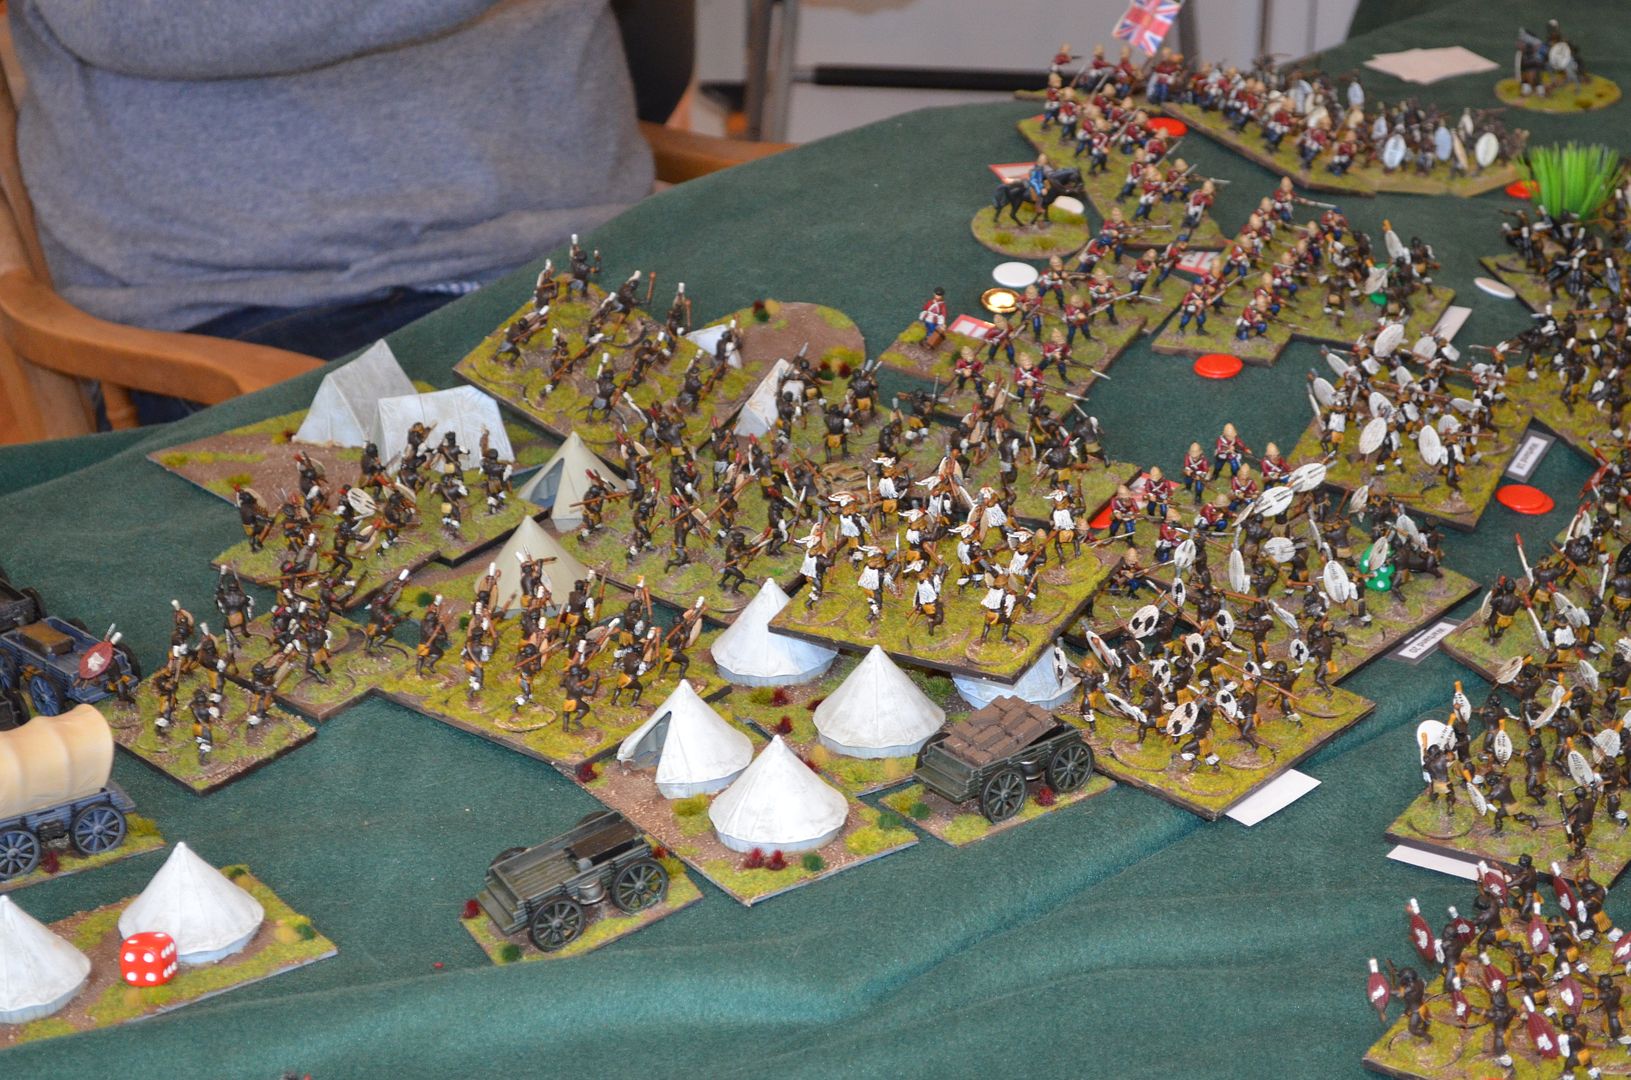
| The British infantry are in extended line across the battlefied - facing the hordes of Zulus |
 |
| The centre and left horns pushed forwards to the British camp - the zulus making rapid advances- Centre picture is the advanced rocket battery - it scored a couple of hits ! |
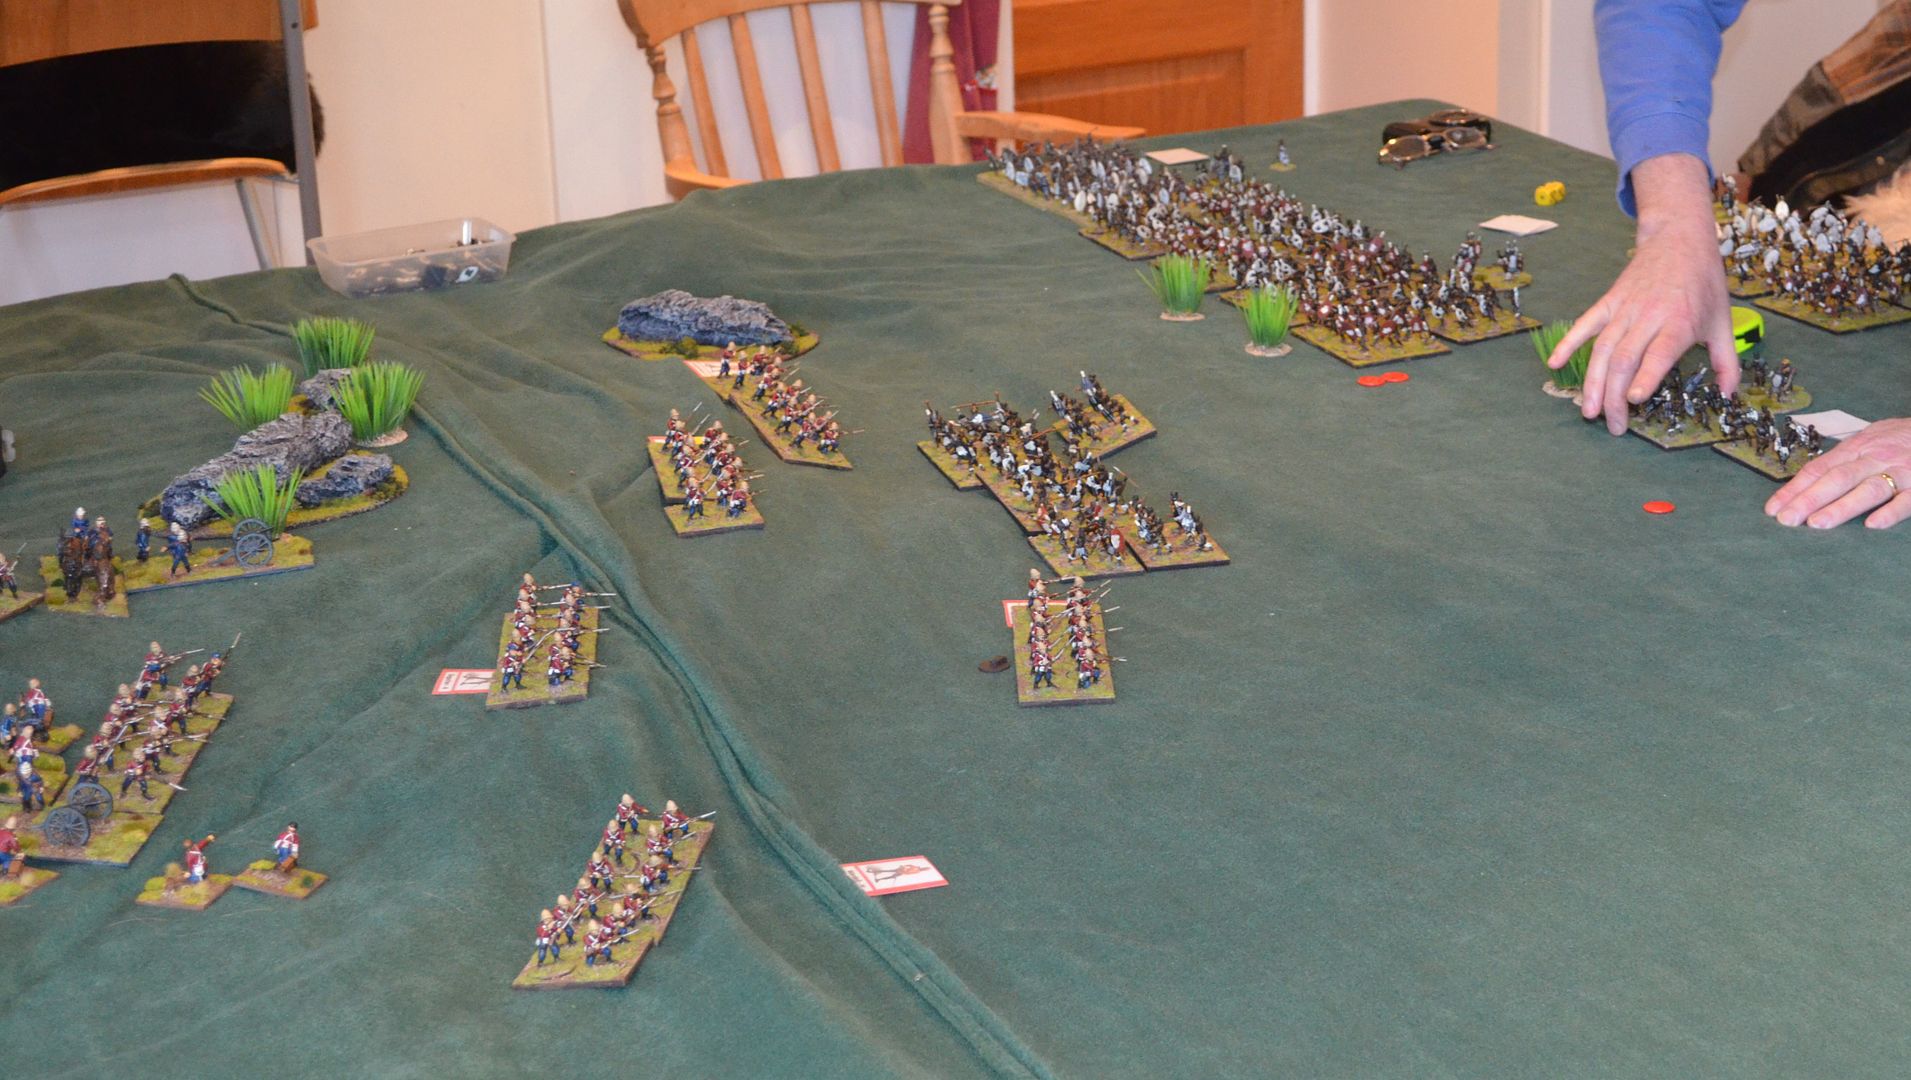 |
| The Right horn rapidly advanced towards the British Infantry companies |
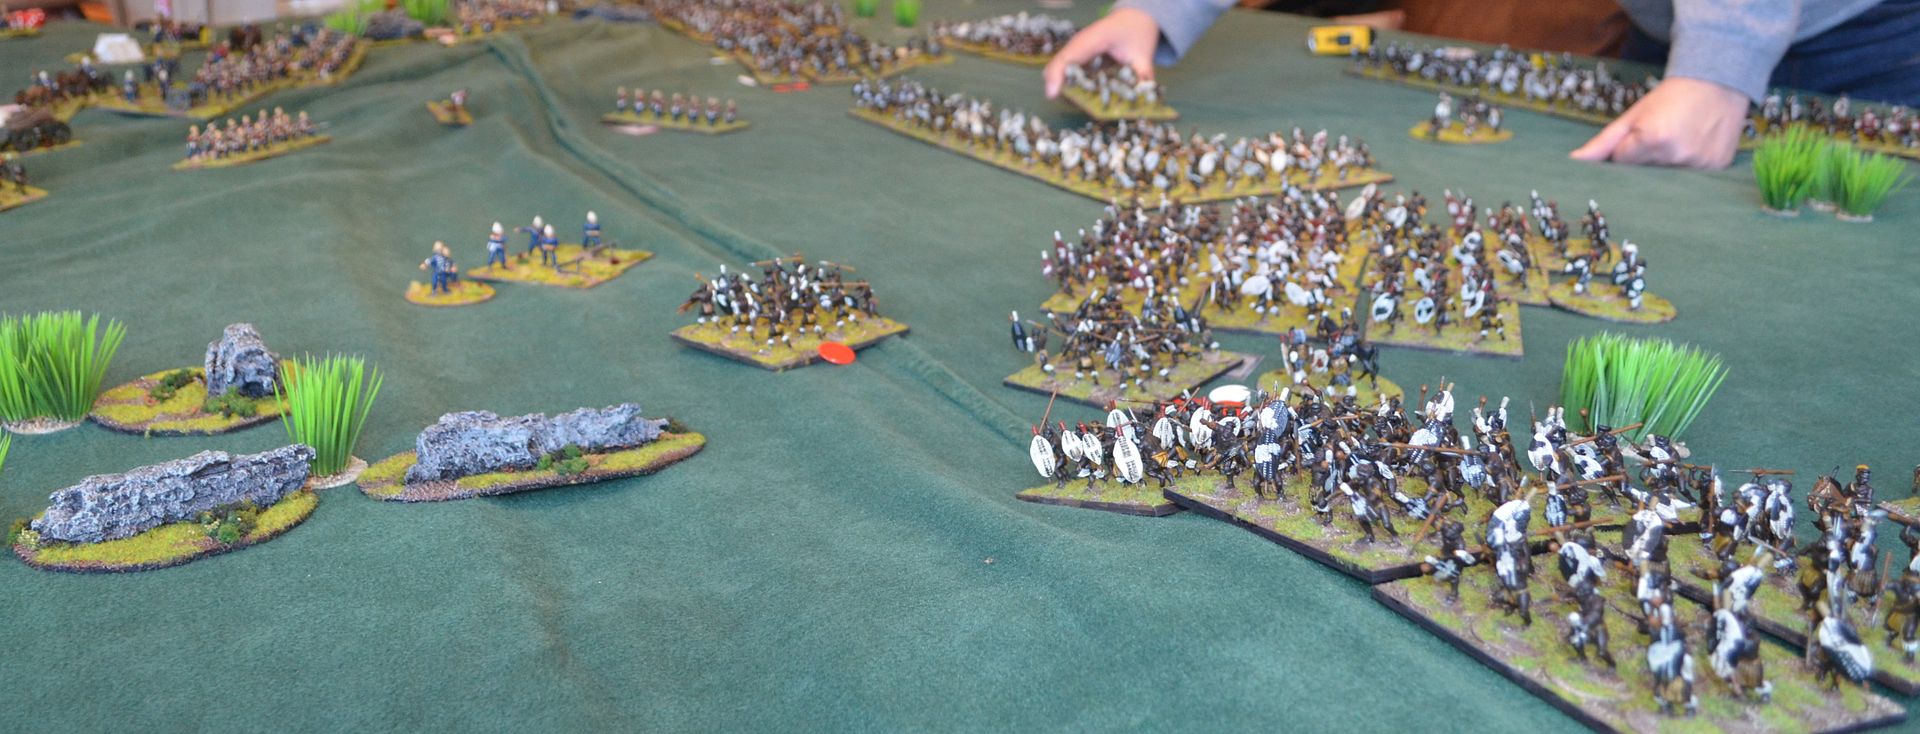 |
| The Zulu units threw themselves against the Rocket Battery - it held for a turn before being engulfed by the Zulu units |
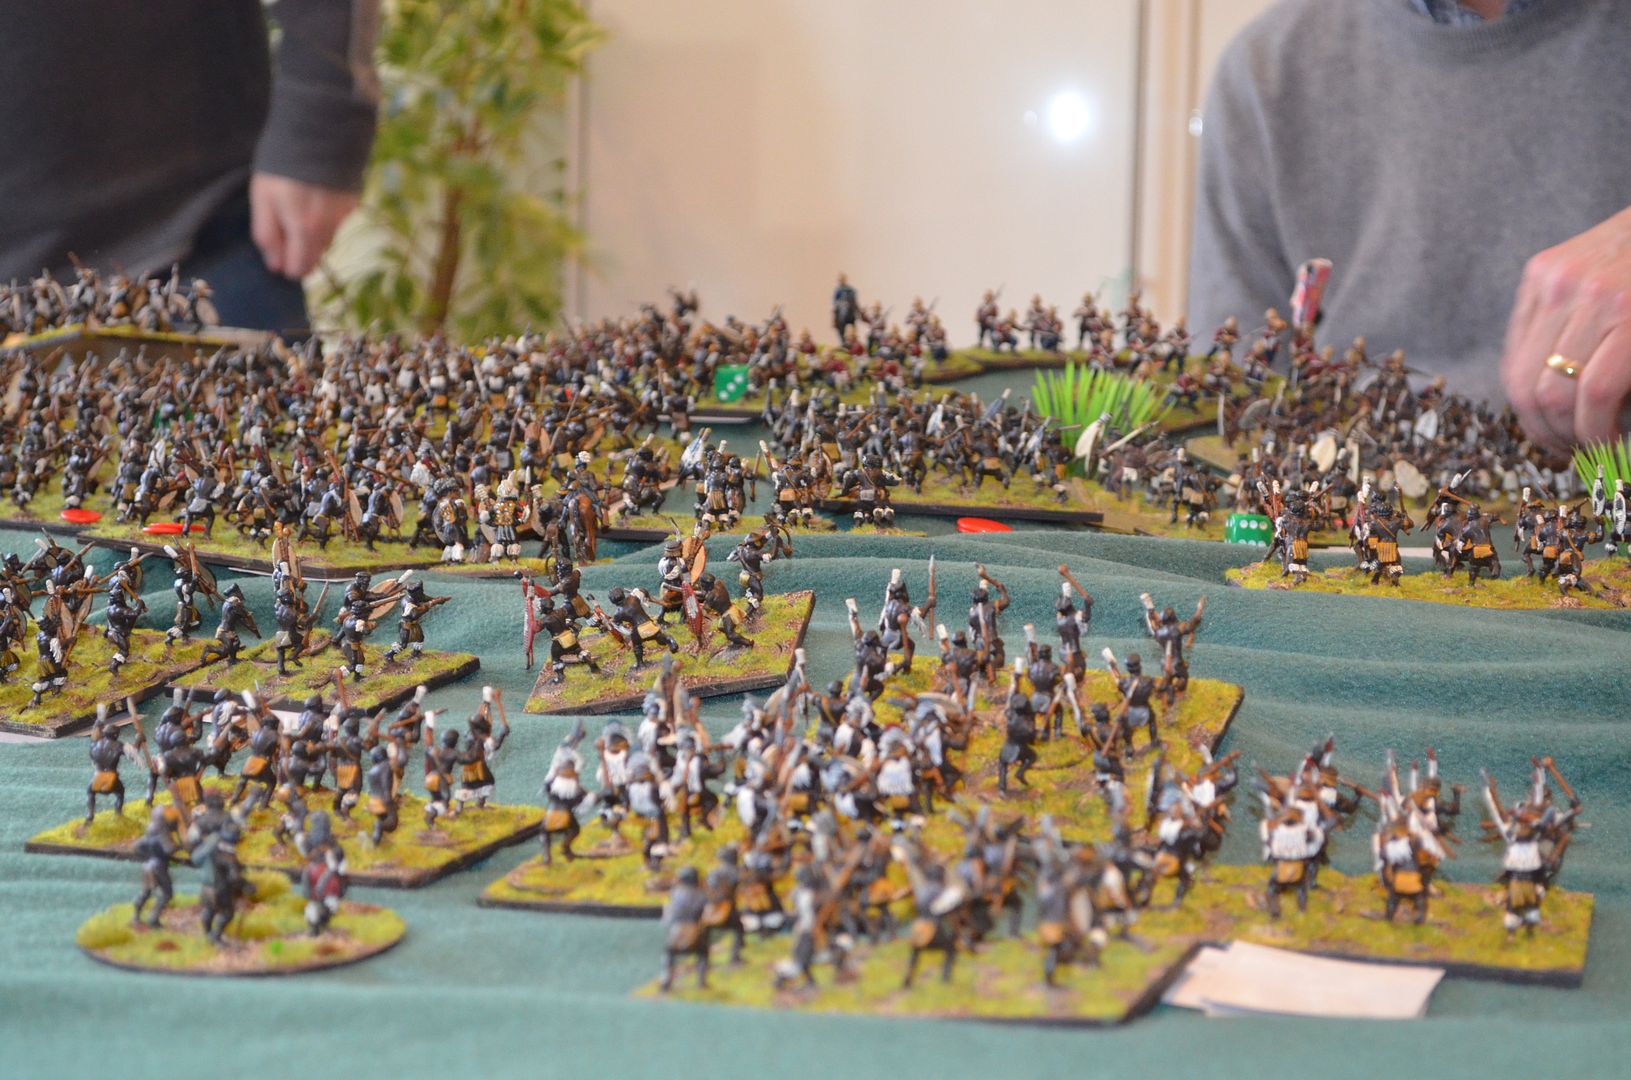
 |
| The entire Zulu army swamps forward - an impressive and scary site. Over 800- 28mm figures |
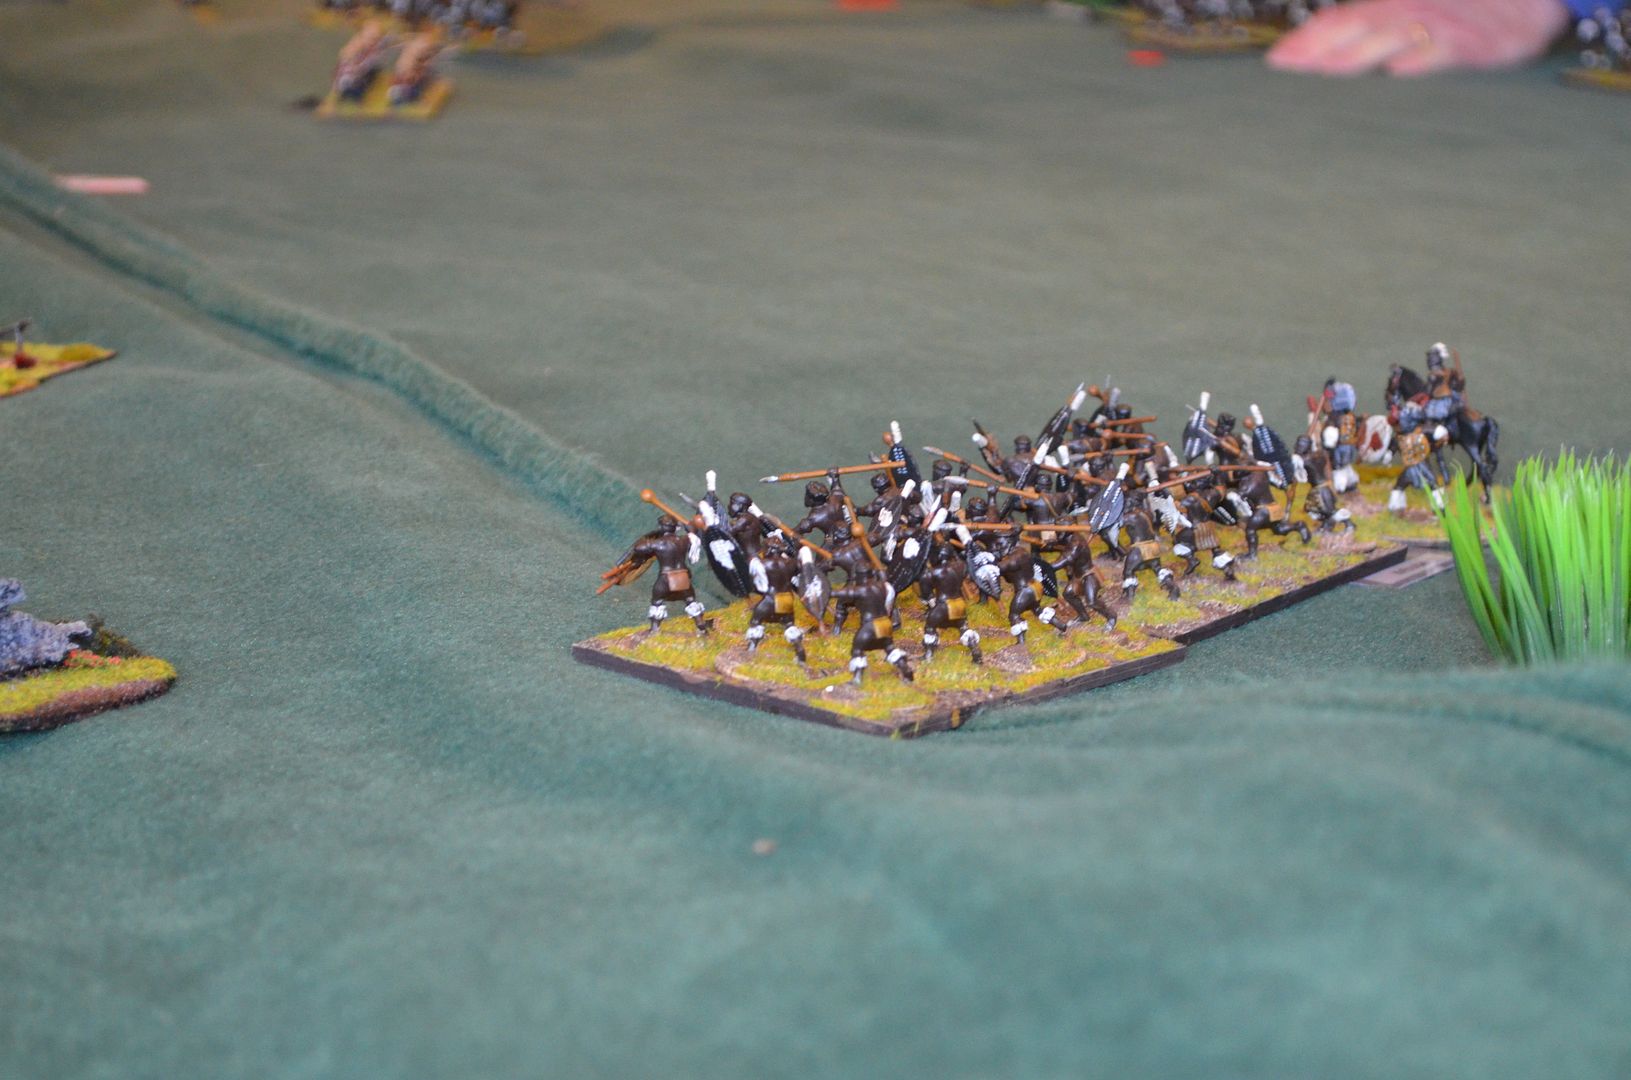 |
| The Zulu unit about to charge the battery |
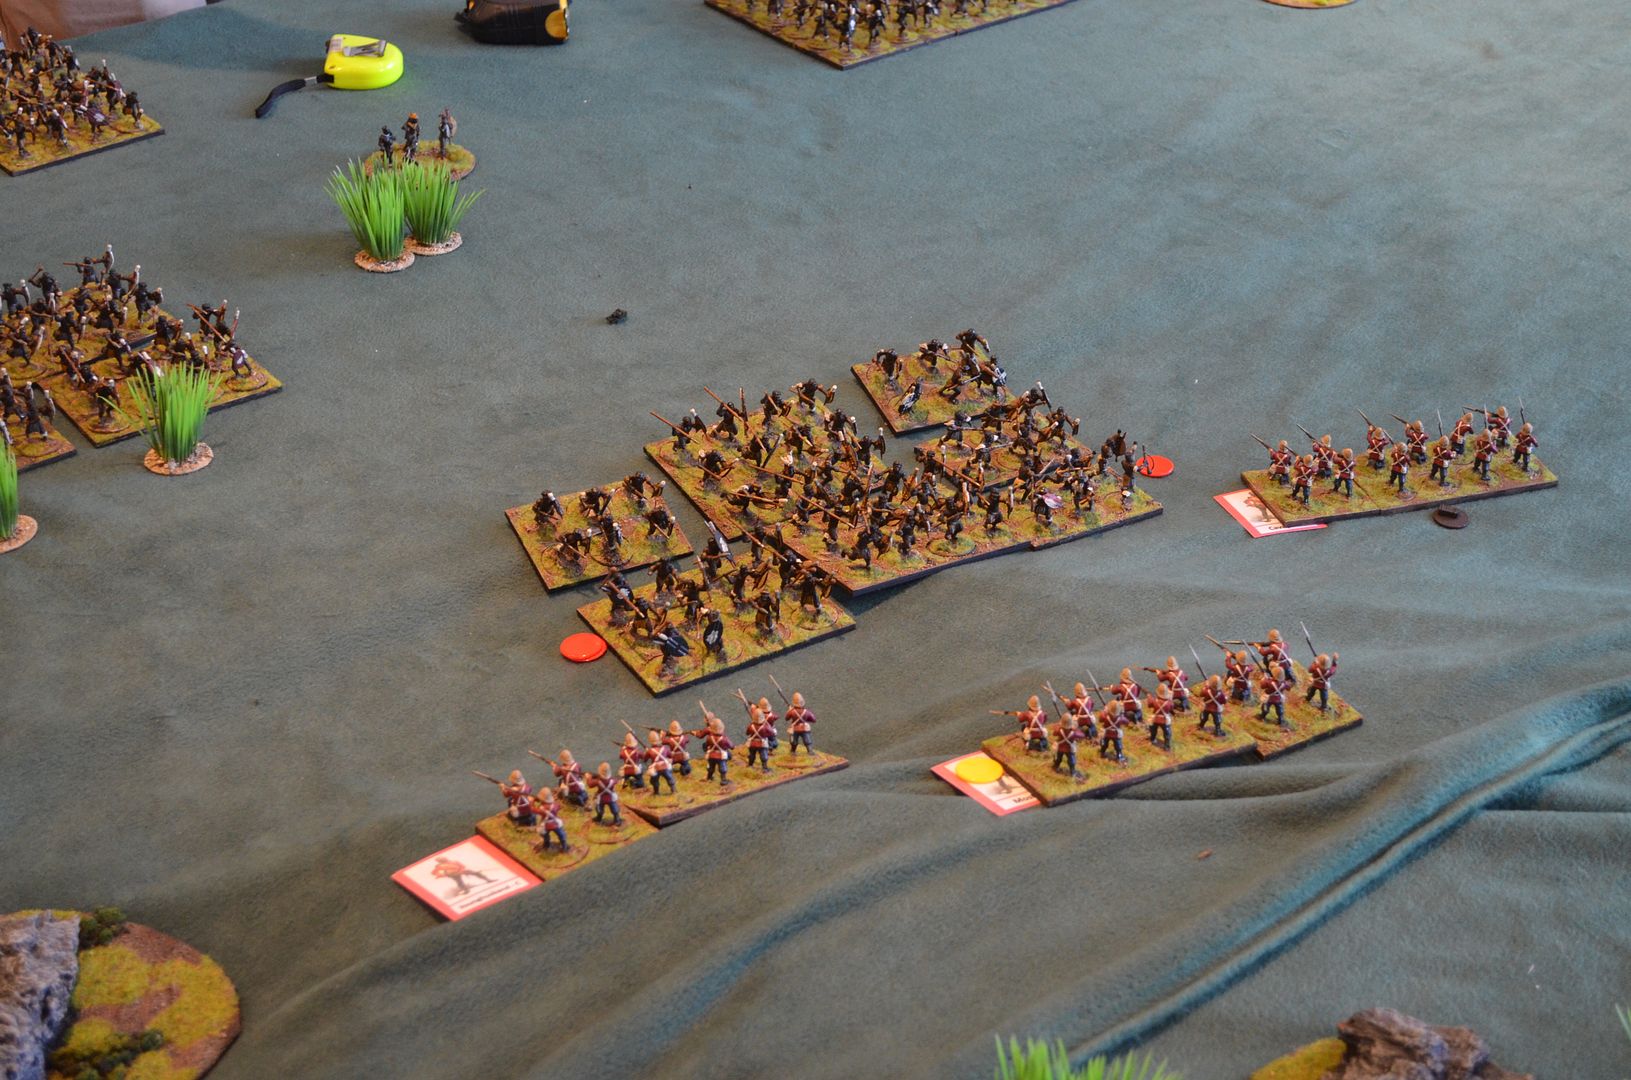 |
| The first Zulu units reach the British lines on their right wing - red counters denote casualties but they are not piling up quick enough. The Right hand company falls short on ammo (see ammo box) |
 |
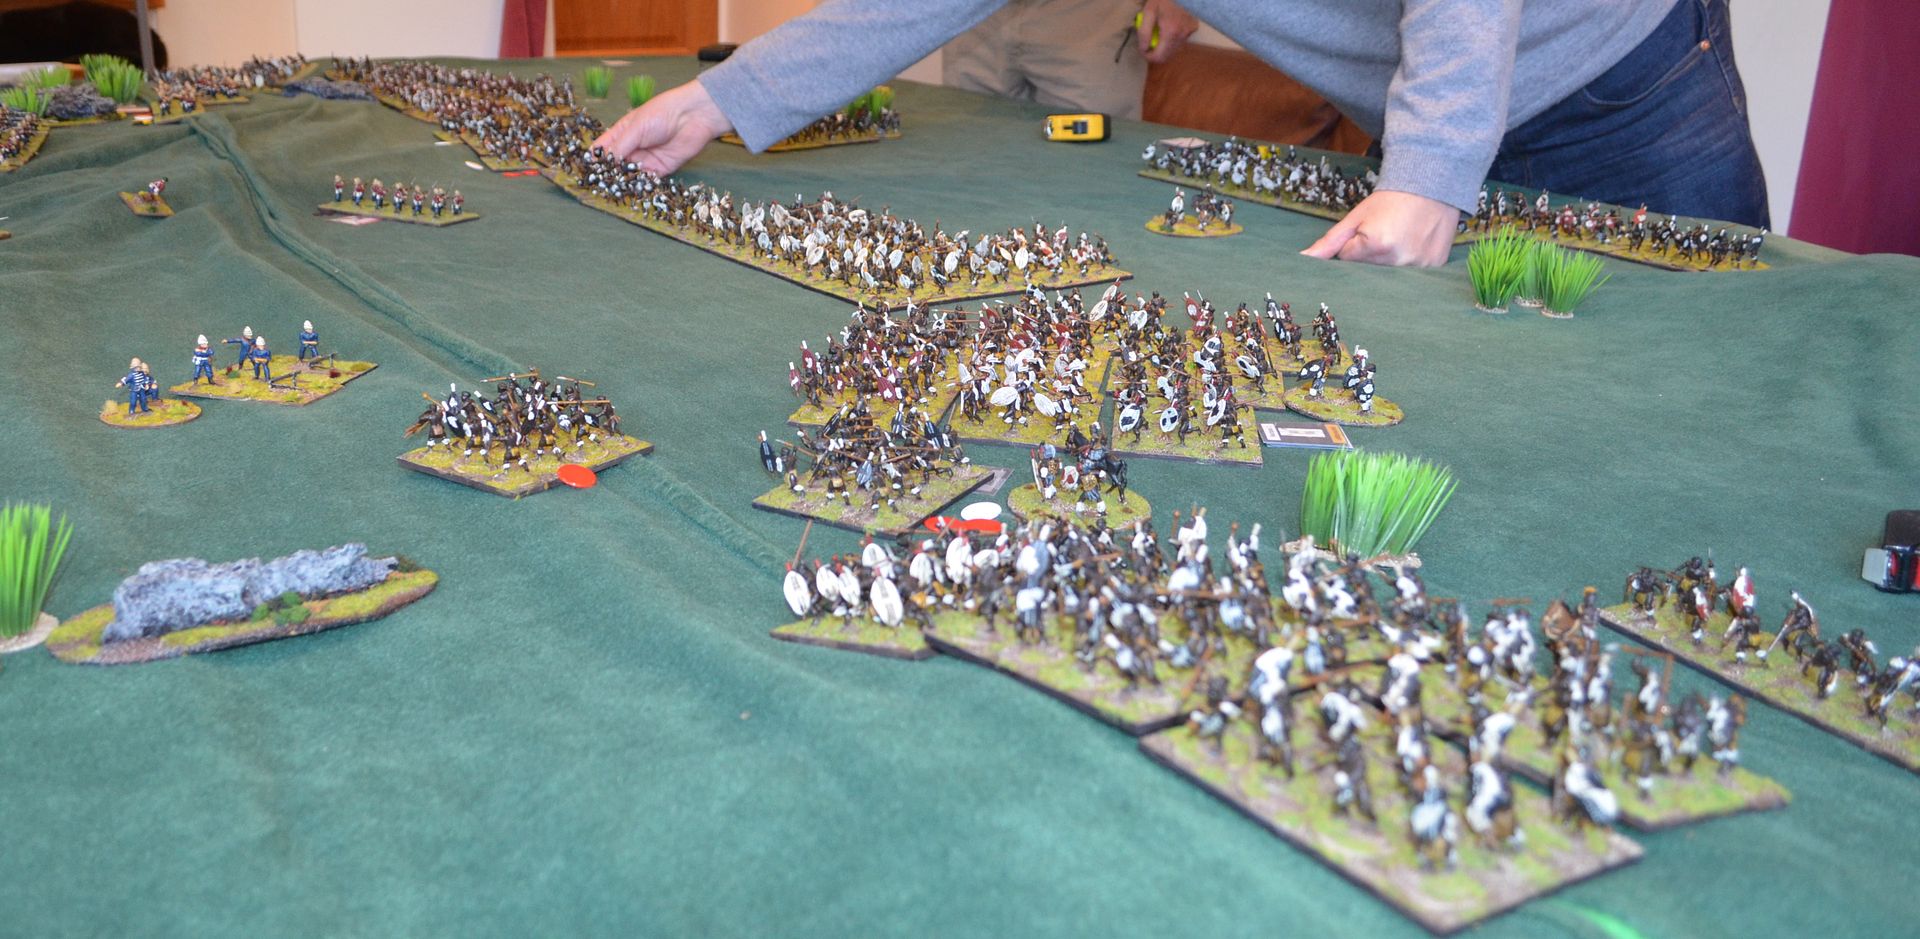
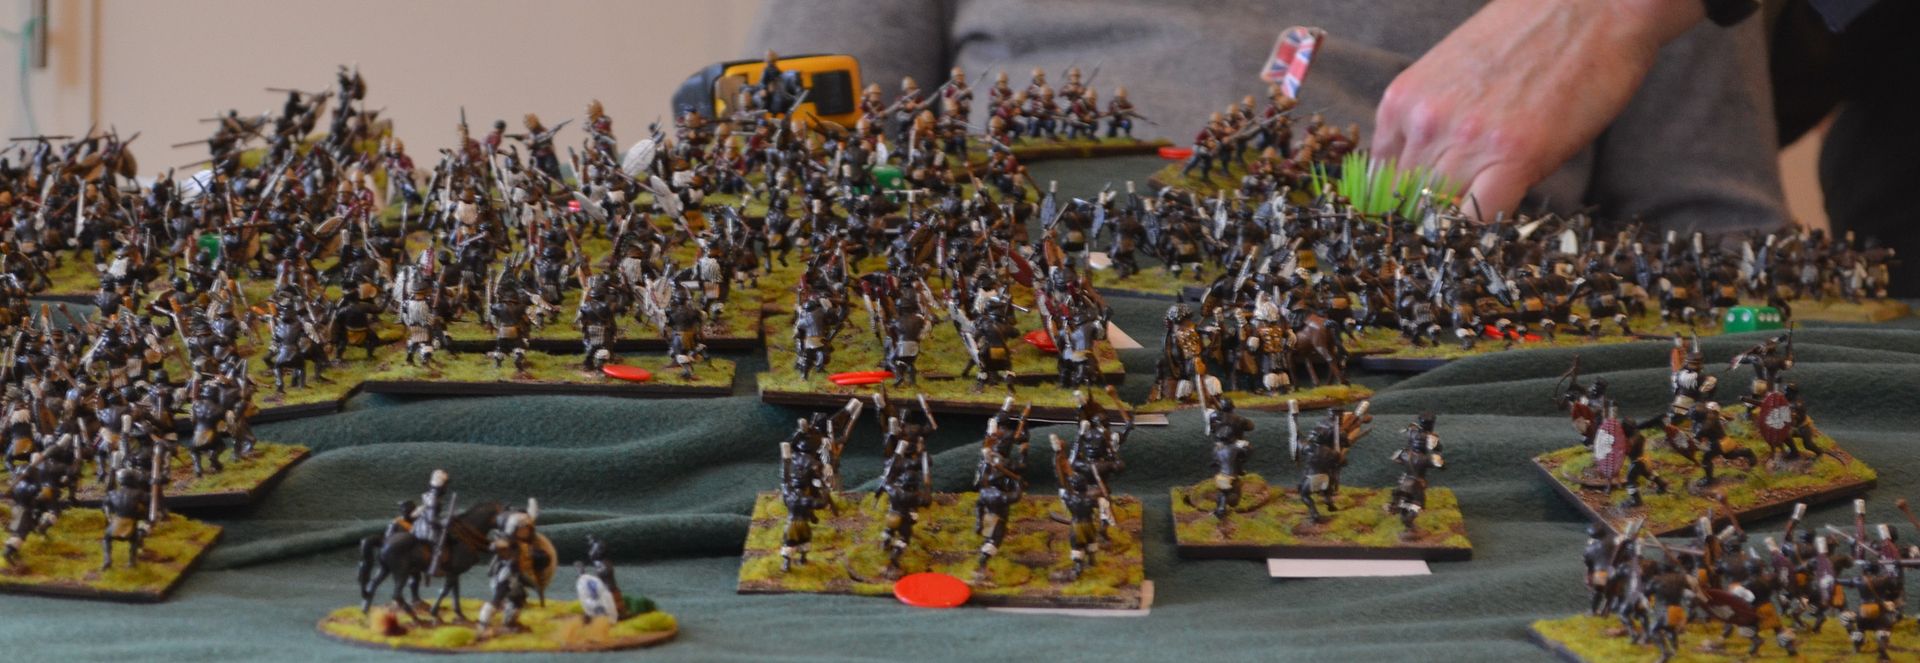
| The British lines fall back towards the summit in good order but they can't hold back the tide |
 |
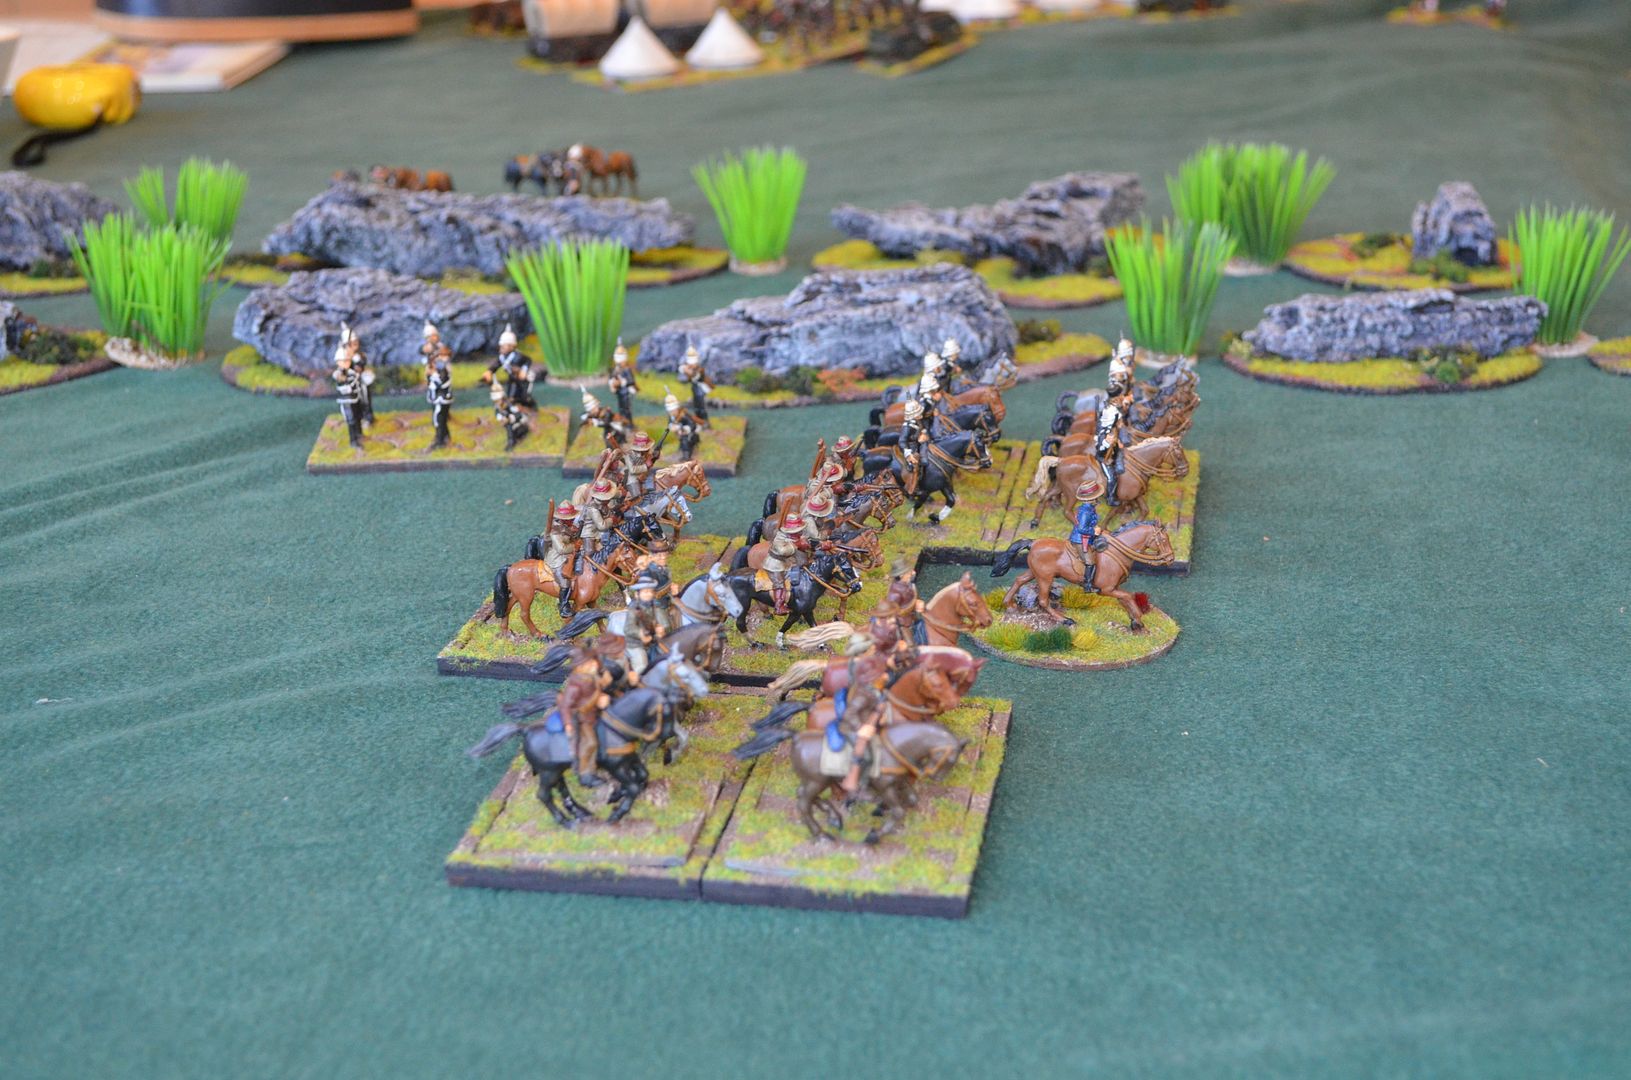
| Dunfords mounted units finally start peppering the Zulu left horn with fire but they just don't stop |
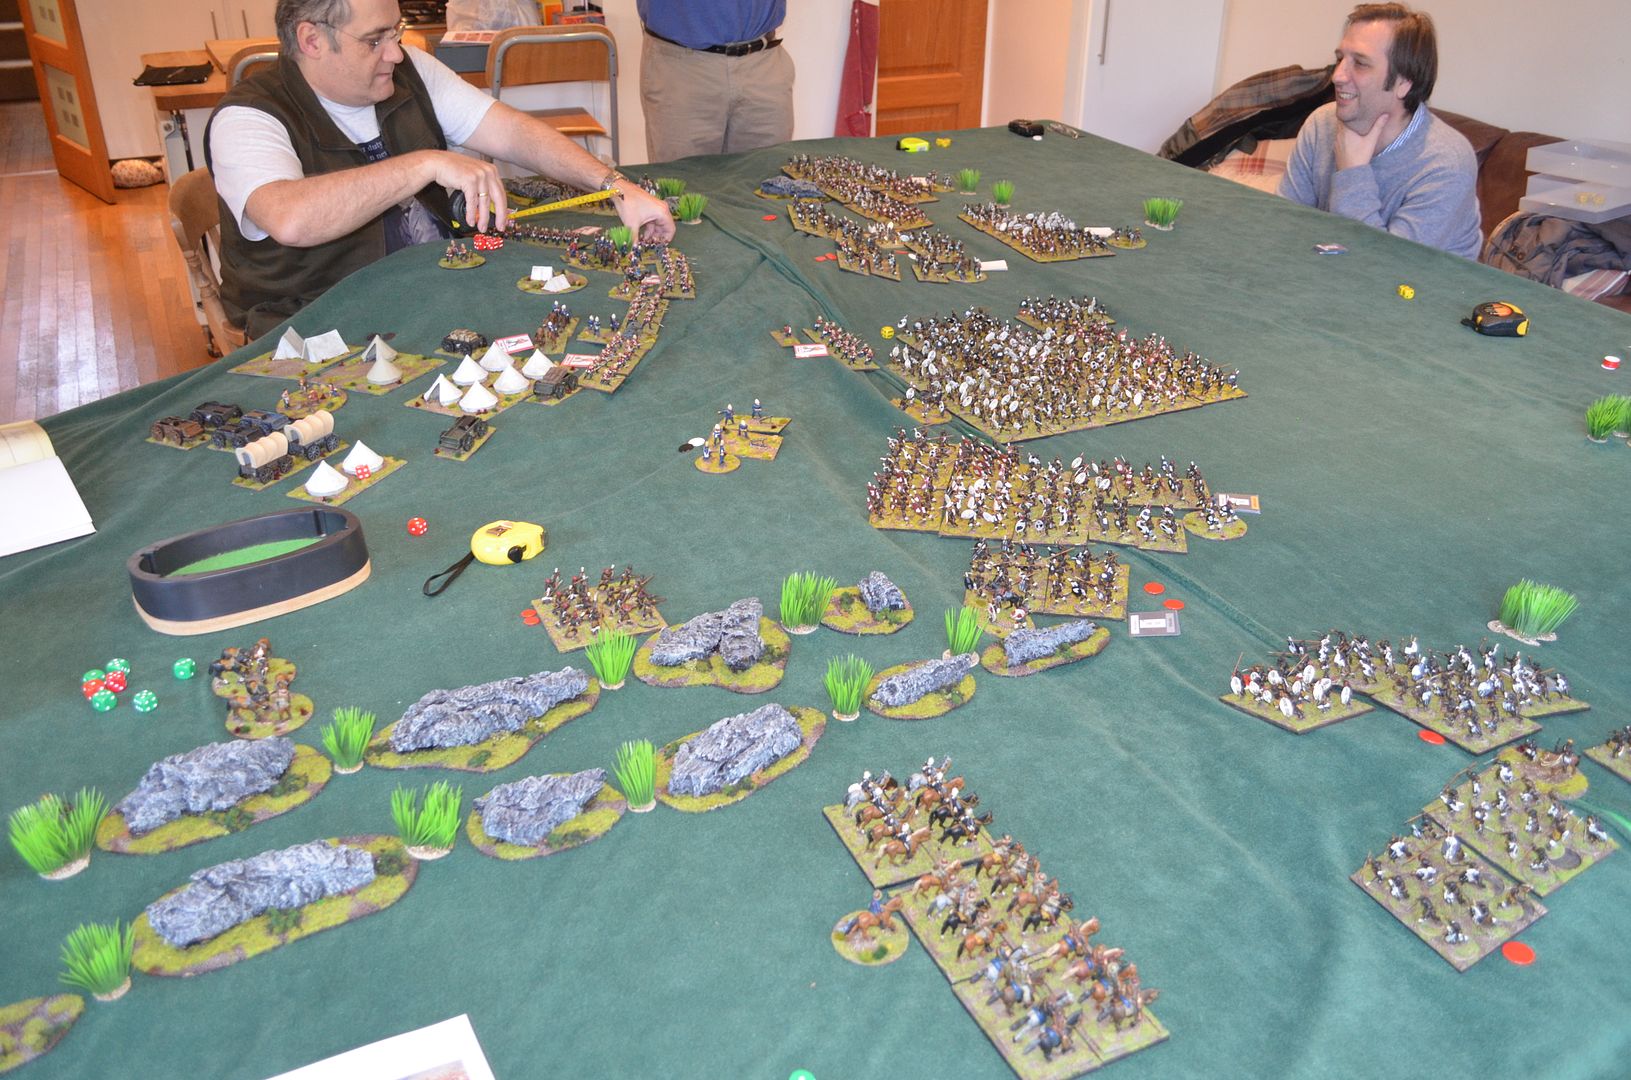 |
| Colonel Glyn (Mark) finally gets the British line into some semblance of order |
 |
| But the Zulus keep puushing forward with casualties mounting up |
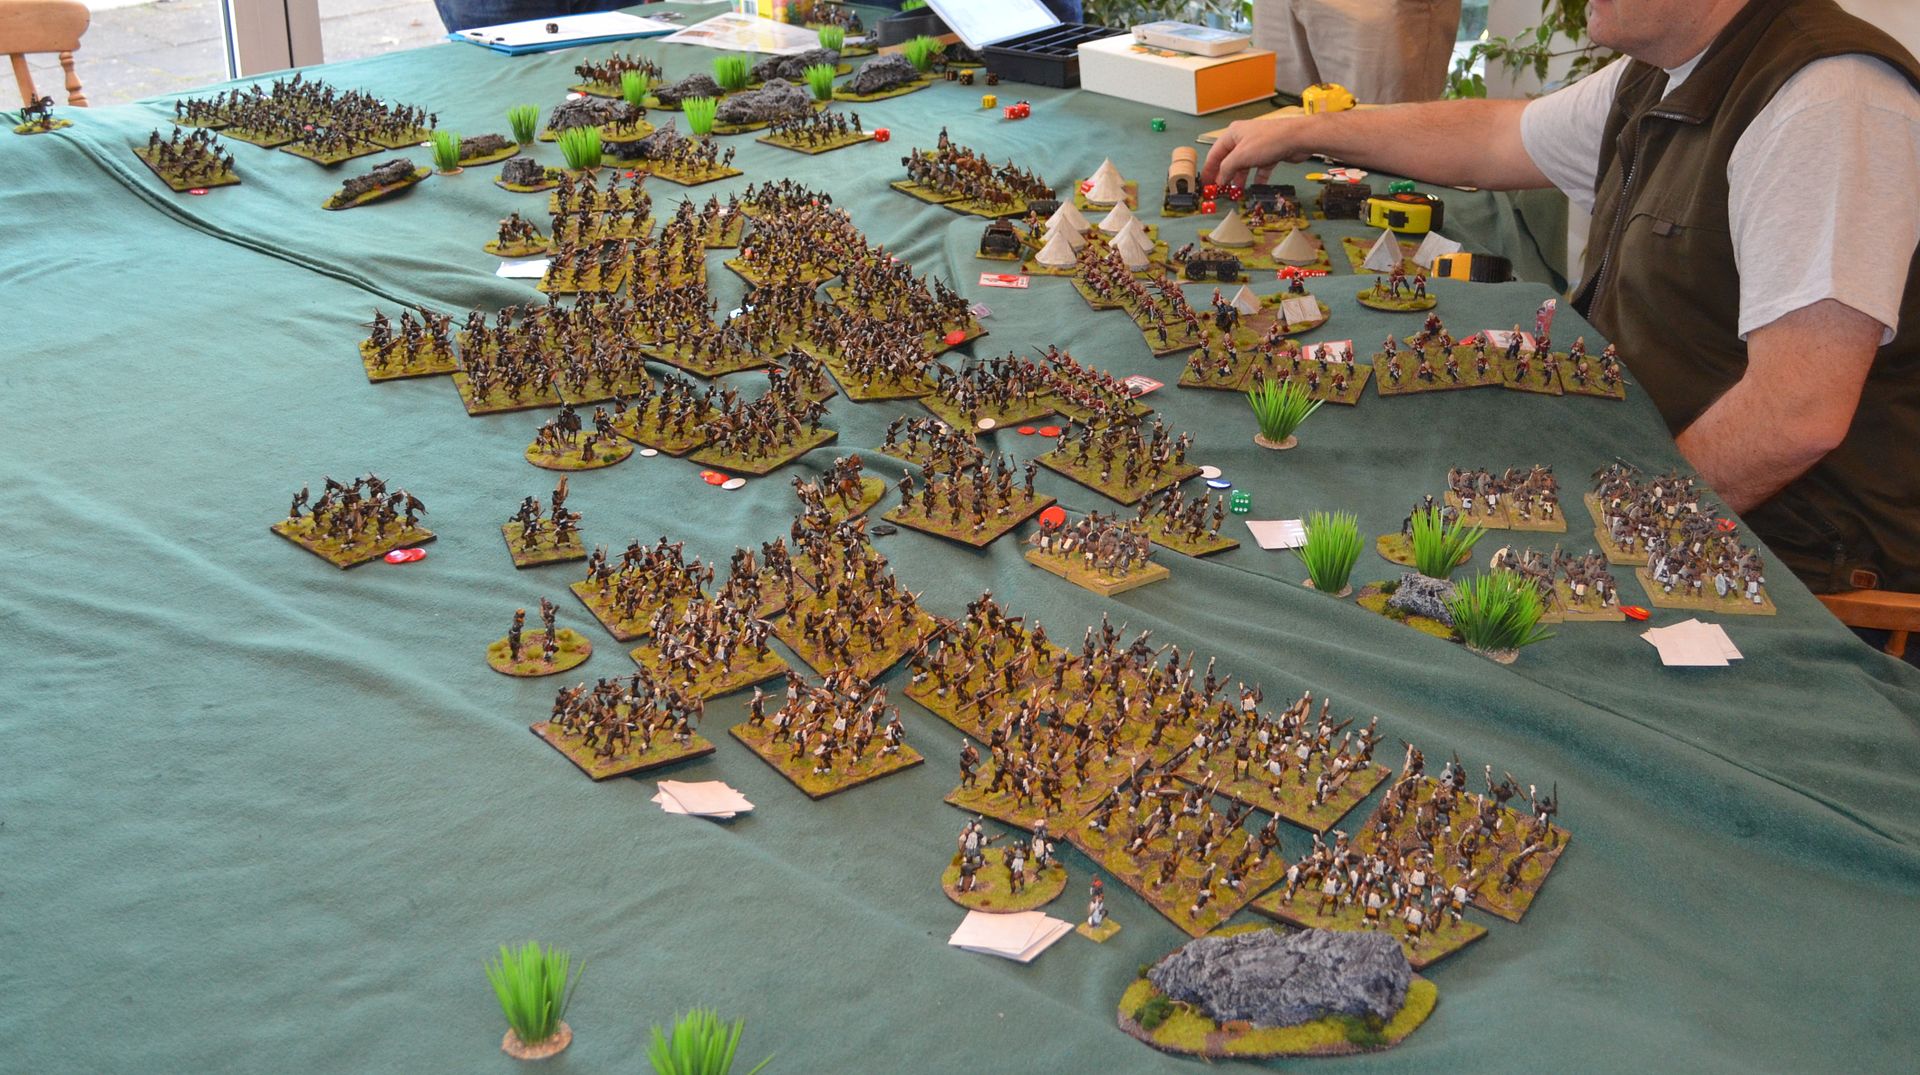 |
| The whole British line is now engaged |
 |
| The British commander surveys his meagre forces |
 |
| The line is charged |
 |
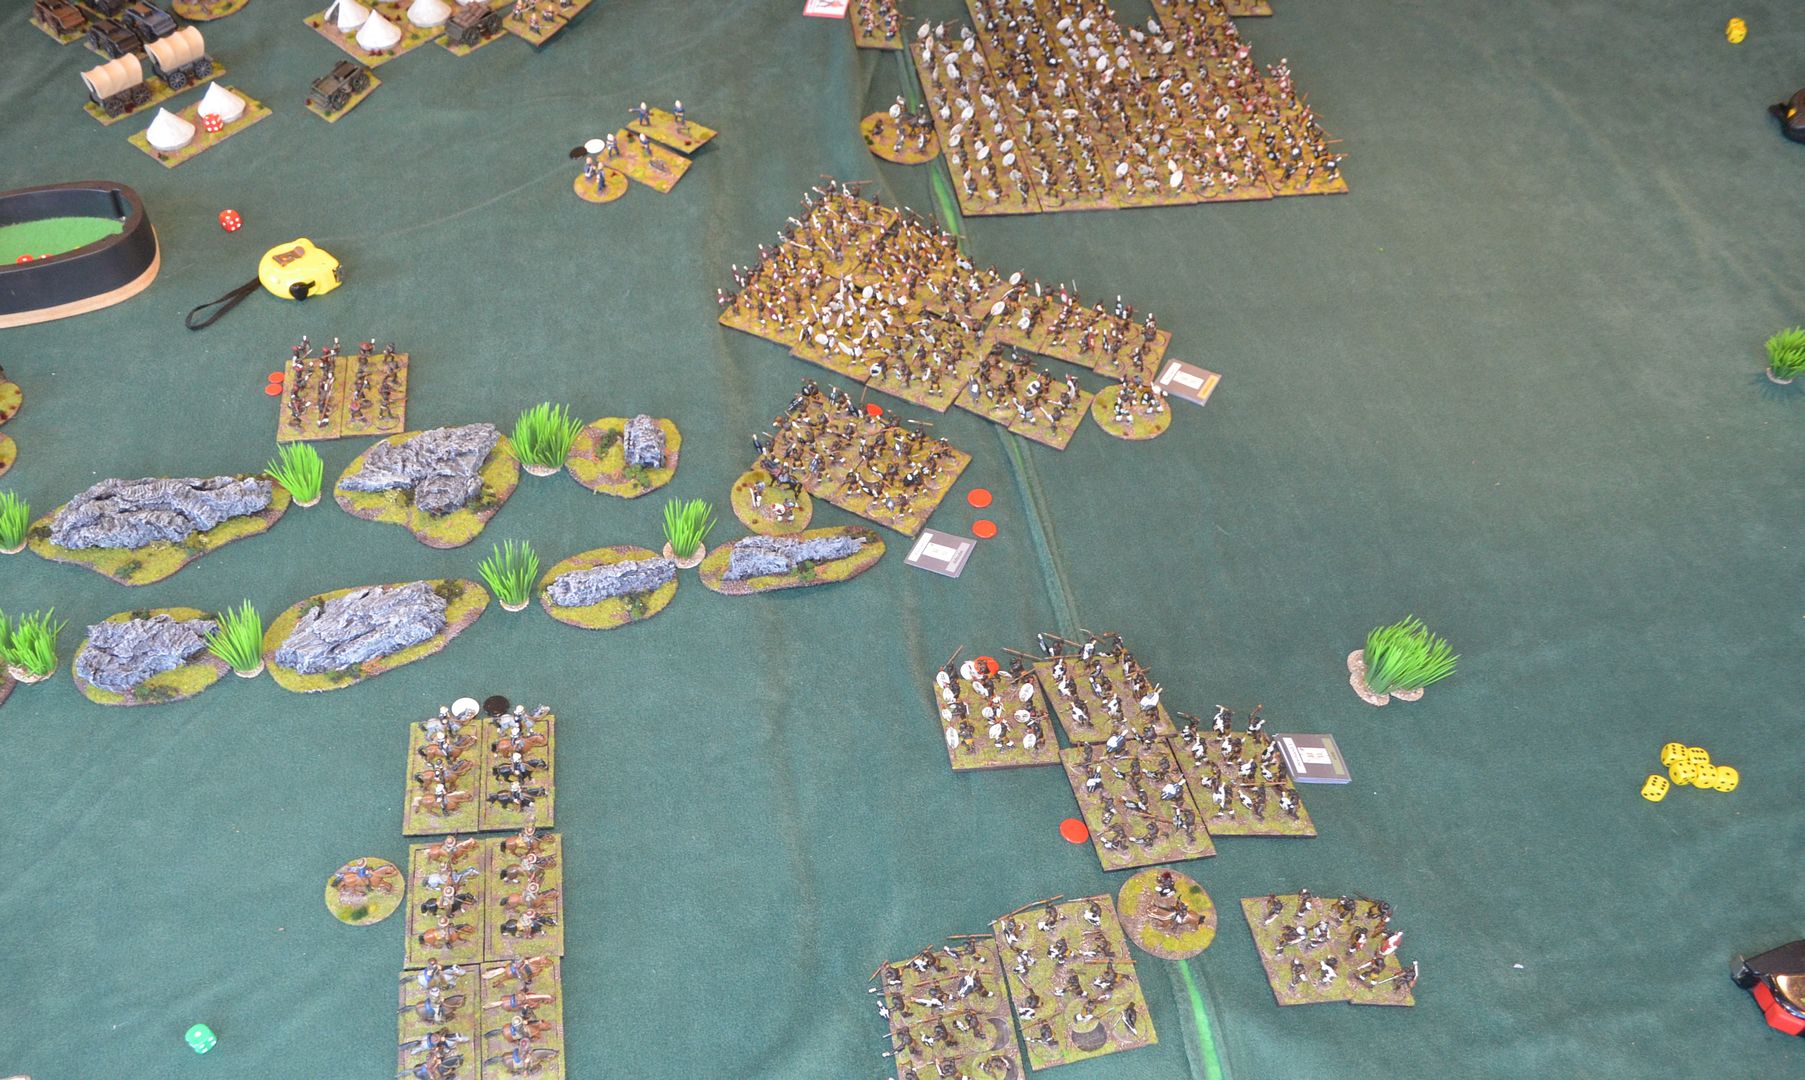
| Fierce hand to hand fighting breaks out across the summit - Zulus are cut down in droves but they just keep coming |
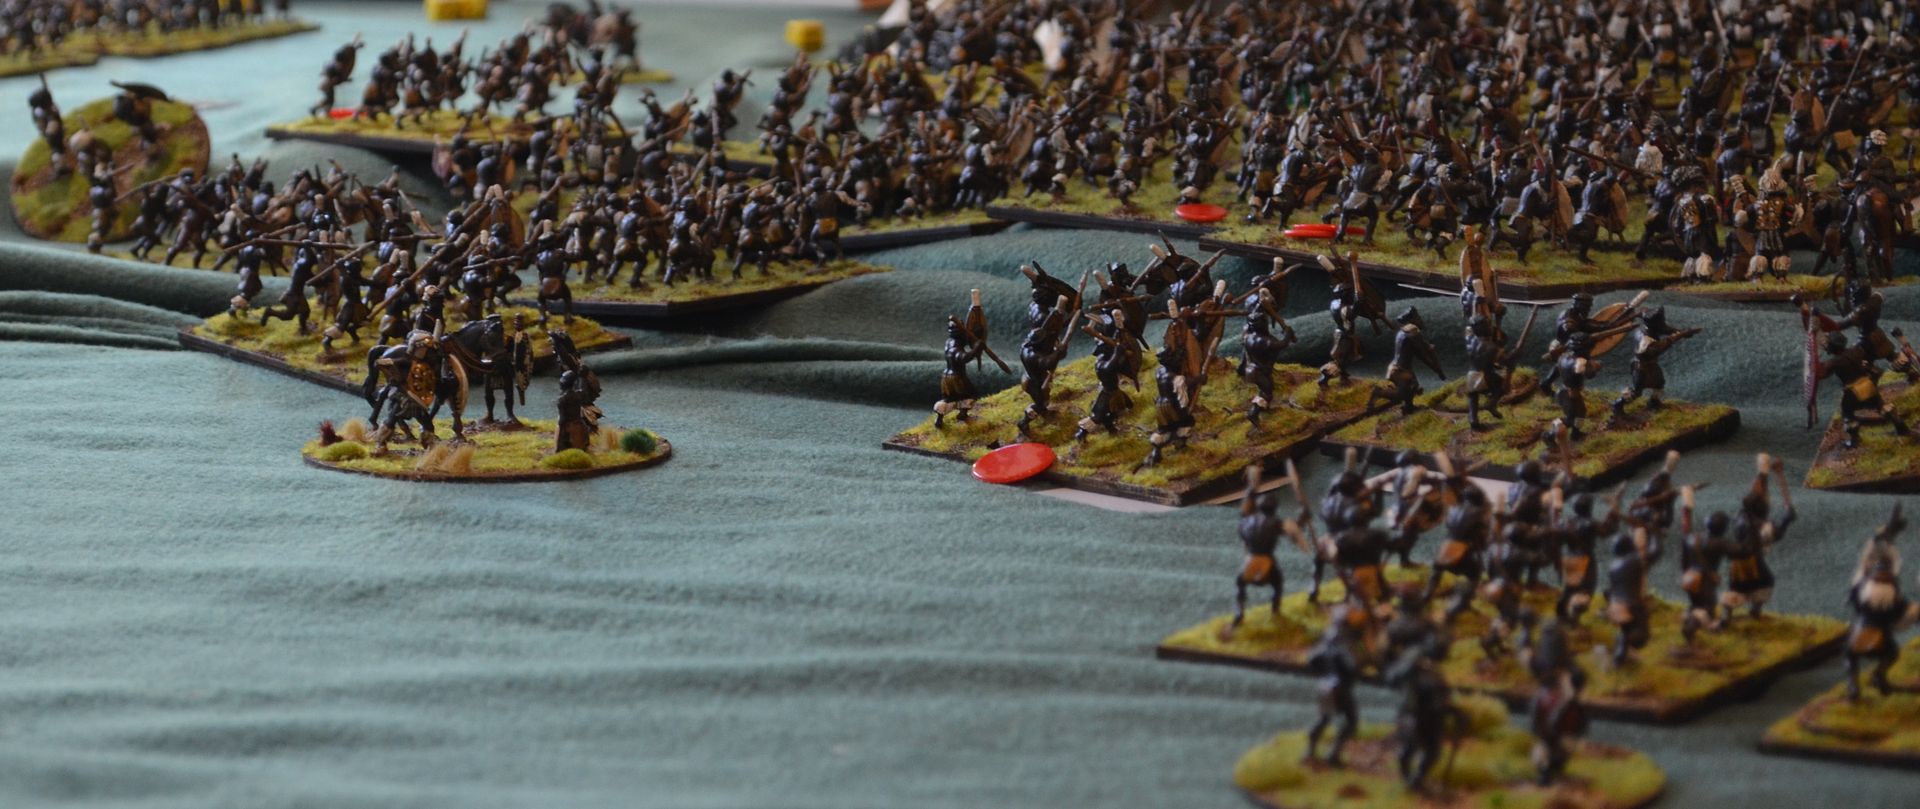 |
| The Impis push there way up the hill |
 |
| Swamping the British companies - moments of heroism but never to be told |
 |
| The left horn crashes into the British Flank - swiftly overcoming the redcoat resistance |
 |
| They swarm into the camp for the spoils of war |
 |
| The colours are about to fall on the summit ! (right hand of picture) The Zulus have wiped out the British columns
In three hours of game play the Zulus had won. The Butchers bill was telling. All of Durfords cavalry managed to escape shaken from viscous fighting with the left horn but what of the British line - massacred and the colours taken.
The Zulus lost four only war bands with a number shaken and disordered. Interesting this put the Zulu casualties at about 1600 men. The real battle reports suggest the Zulus lost around 1000 KIA and an numerable number injured. In other words our game fought much like the real thing.
I had reduced the movement distances listed in the book - this worked well but the rifle ranges appeared to be a little short - at 18" the Brits only really had a chance to fire a couple of times into the Zulu units before engagement. In hindsight these probably needed to be extended.
Orders of Battle Sheets for Isandlwhana

A big thank you to Mark, Legatus, Alastair and James for making this a truly memorable game
Thanks for reading and in the next post I'll be sharing our re-fight of Rorkes Drift.
part 2 - Rorkes Drift can be found here http://shedwars.blogspot.co.uk/2017/01/zulu-sunday-part-2-28mm-rorkes-drift.html |
Looks very impressive: those Zulu hordes certainly look imposing!
ReplyDeleteThey certainly did and were very scary
DeleteThis comment has been removed by the author.
ReplyDeleteAmazing seeing all those Zulu's on the table, well done.
ReplyDeleteAwesome!!! Great looking game
ReplyDeleteCheers mate - you coming around this year? - be good to catch up
DeleteMost impressive game, wow!
ReplyDeleteWonderful stuff!
ReplyDeleteThank you
DeleteImpressive is the word! Quite a feat putting on so large a game, and nicely done.
ReplyDeleteAmbition now sated on this front !
DeleteA splendid effort at recreation of the battle Mr Shed!
ReplyDeleteThank you Sir
DeleteThis was a real spectacle Eric, brilliant!
ReplyDeleteFantastic.
ReplyDeleteCheers
DeleteA very impressive looking battle :)
ReplyDeleteThanks
DeleteA very impressive report.The sheer number of figures you have ppainted is very impressive.
ReplyDeleteIt took some time but worth it in the end
DeleteExcellent stuff. Looks awesome!
ReplyDeleteWow that's a lot of Impi.
ReplyDeleteYup.....
DeleteGreat looking game. I have to agree that it's one of those cinematic battles I've always wanted to play. Finally got the chance at a convention a few years back.
ReplyDeleteThis will live long in my memory as well
DeleteGreat looking game ...who said you can't have great games on the kitchen table. Worth all the effort 😀
ReplyDeleteThank you Sir
DeleteMy lesson learned here is that when you are vastly outnumbered by Zulus, it's good to have a horse between your legs. :)
ReplyDeleteA truly impressive table and restaging of this battle. Well done. Quite historic by the looks of it and a fitting tribute to your dad.
Cheers Michael - agree about the horse...apparently the fifty who escaped were all mounted
Delete