Here goes another tutorial. First up I cannot lay claim to the idea of this build and a quick search on google will reveal a plethora of solutions...but here goes with a Shed Wars version..
Has it ever dawned on you how much you spend on the incidentals of our hobby? It did for me last week whilst clearing the shed and realising how much I have spent on grass tufts in the past 12 months. Could I recreate my own cheaper?
Our recipe includes -
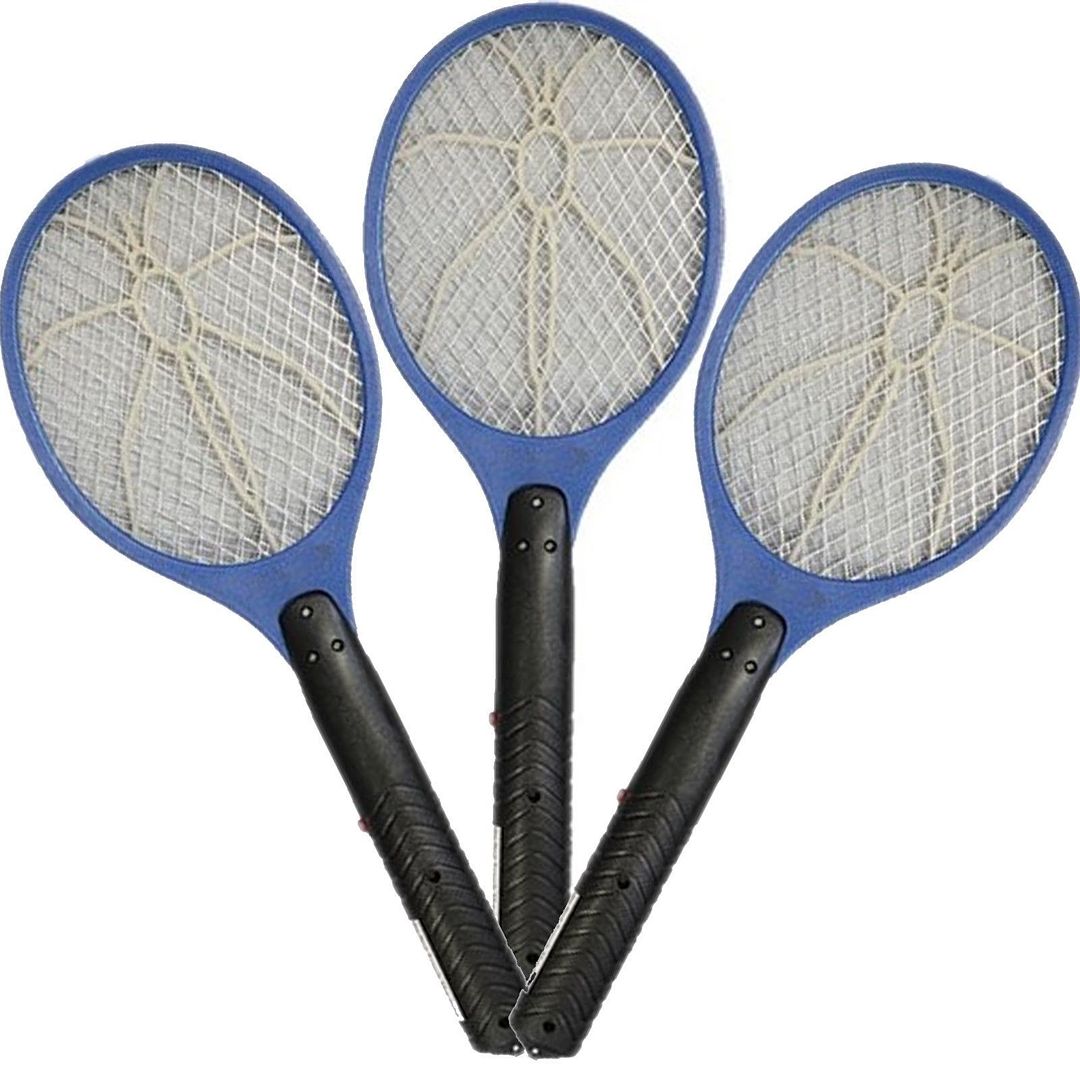
1. An electronic bug zapper/swatter.
Could not believe how cheap these were...a pack of three on ebay for £5.99 including postage - that's £2.00 each !
http://www.ebay.co.uk/itm/311314624196?_trksid=p2057872.m2749.l2649&ssPageName=STRK%3AMEBIDX%3AIT
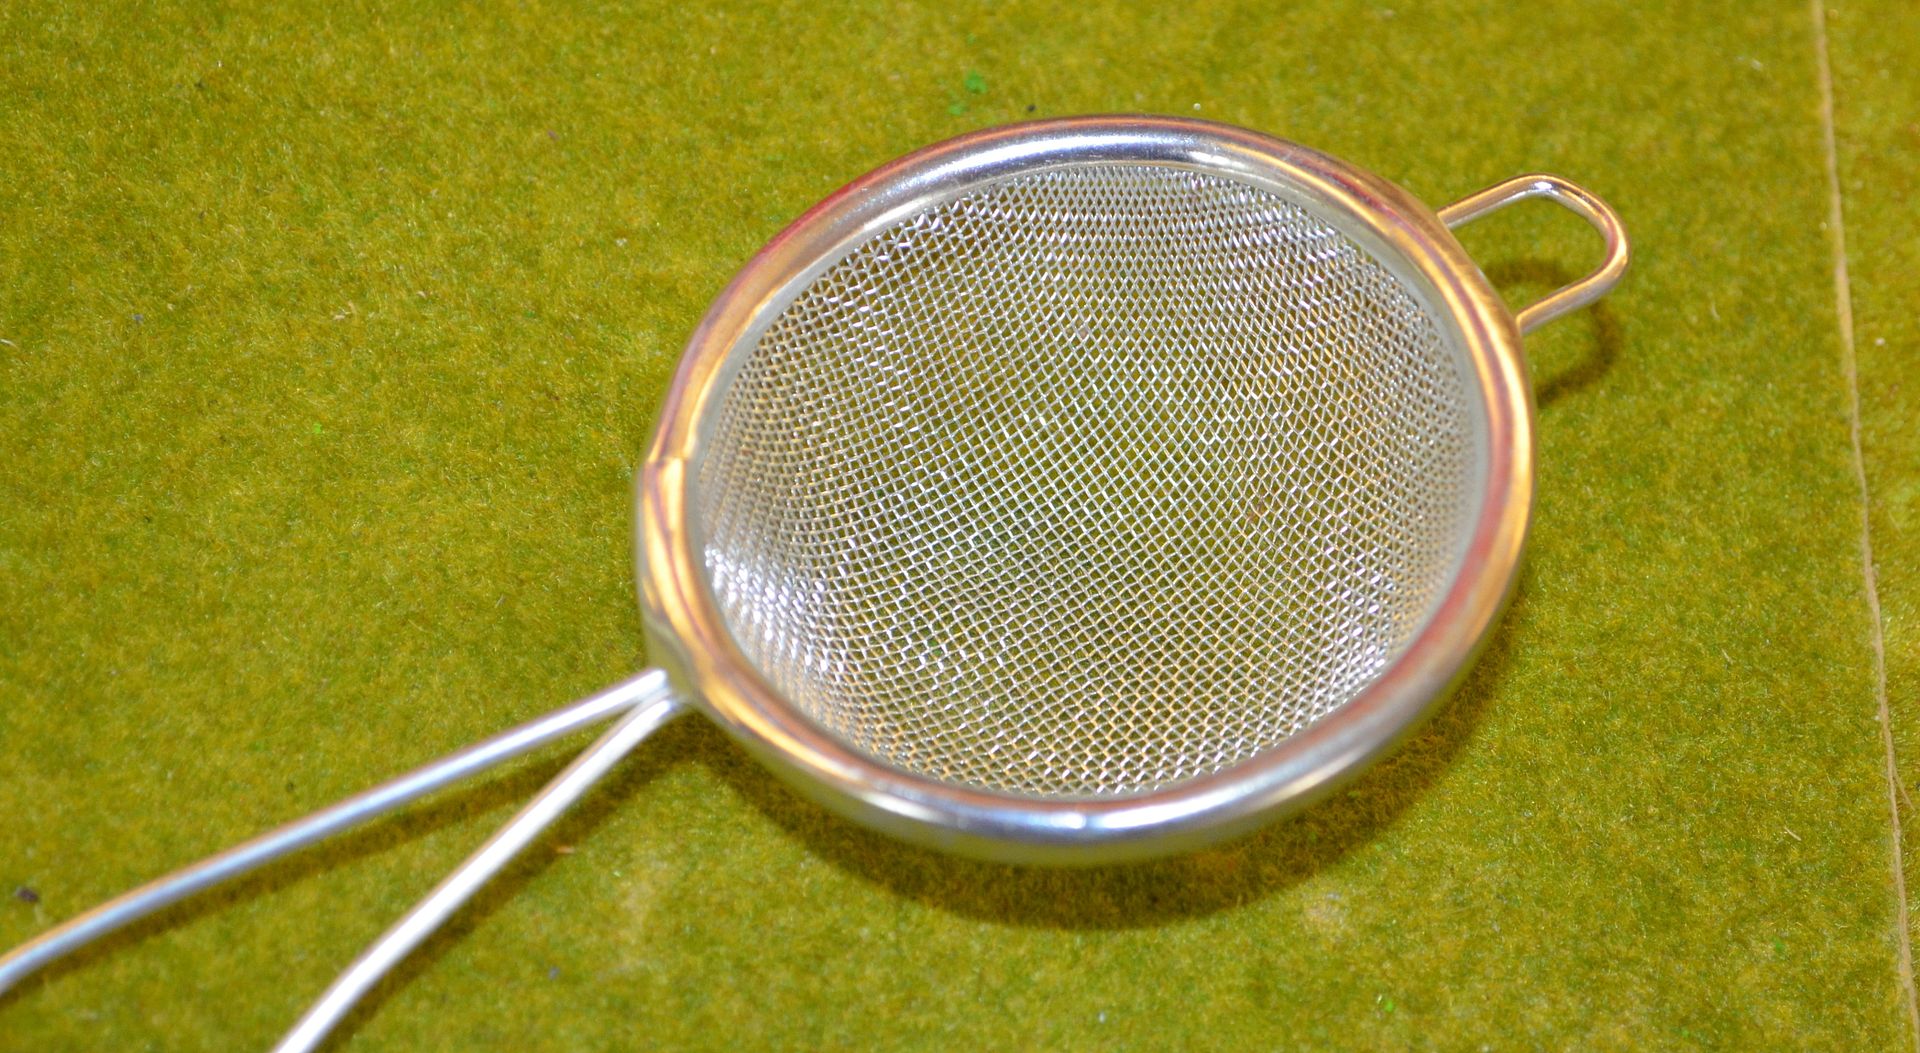
2. A simple metal tea strainer/sieve (small one)
I procured these for 99p each from the local hardware store
3. A Crocodile Clip on a Cable
I bought a pack of ten of these from Maplin for £4.99 - that works out at 50 p each.
Apart from batteries and the static grass itself that is all you need. Total cost £3.49 per unit.
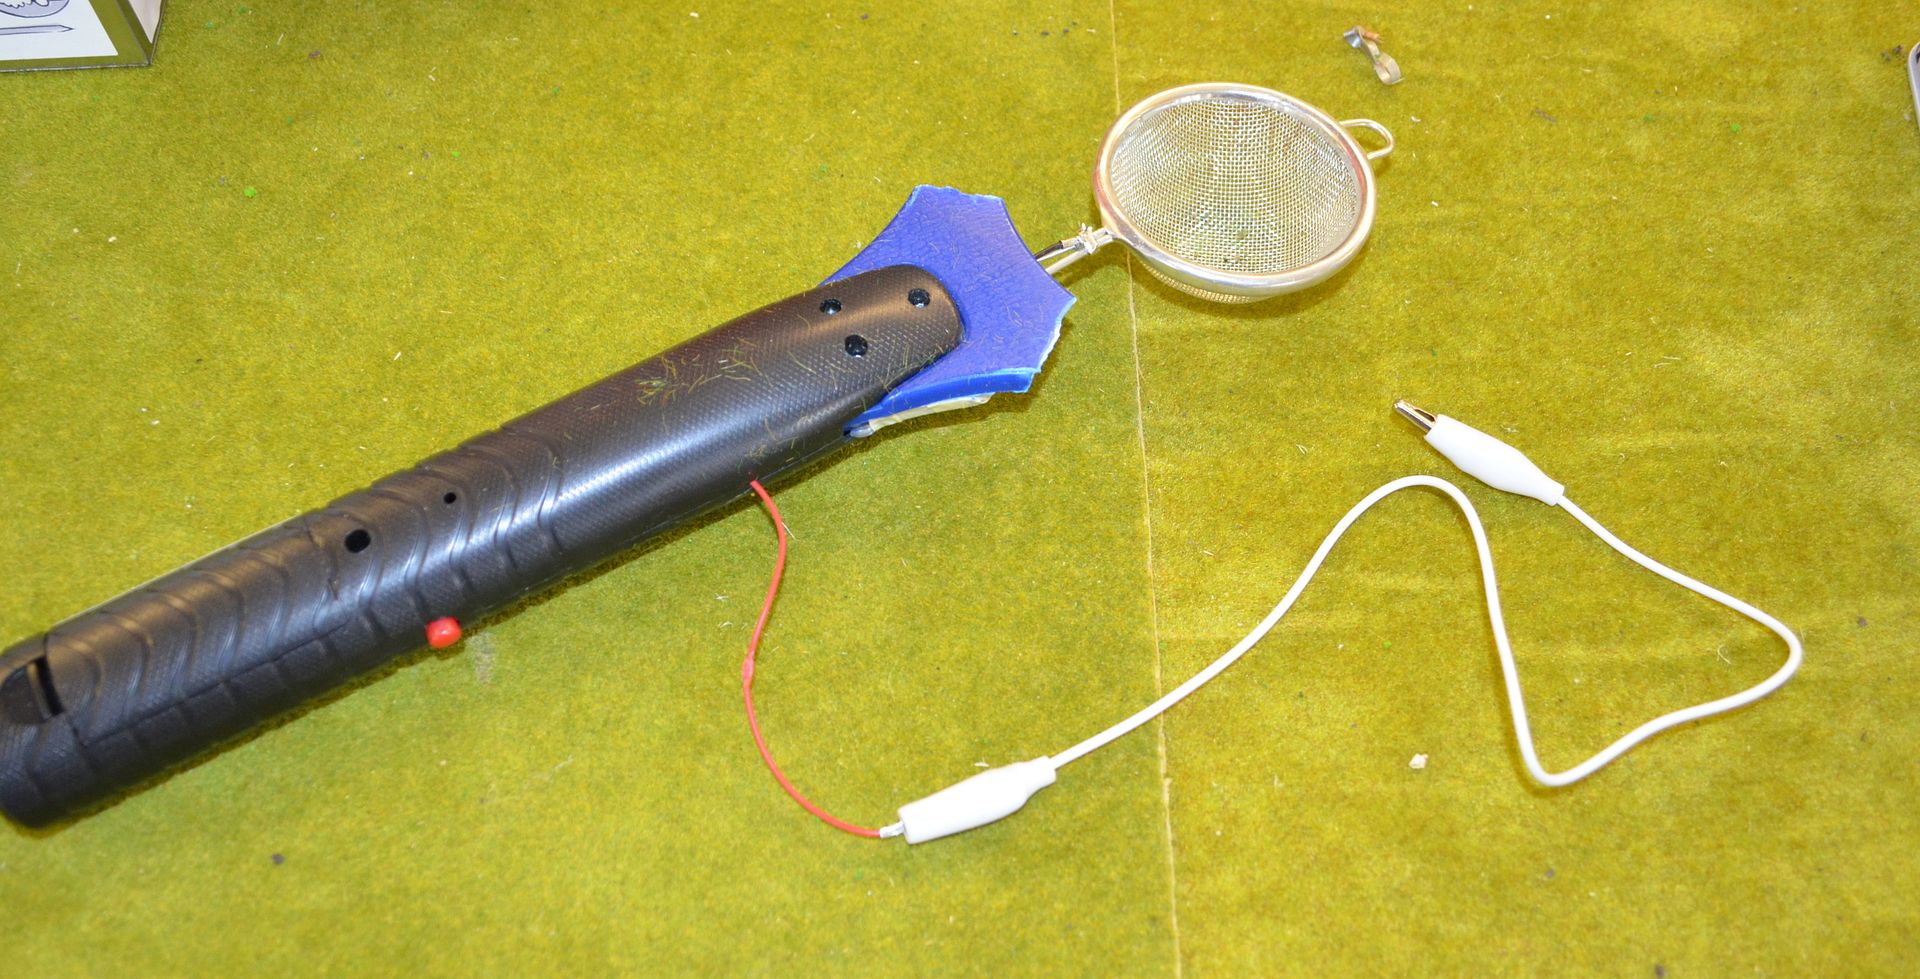 |
| The finished product... |
How easy was it to build...
VERY EASY I COMPLETED MY FIRST ONE IN 10 MINUTES.
So this is how you build a static grass applicator...
1. Undo all the screws on the bug zapper to reveal the inside.

The tennis rack style head is connected to the electronics in the handle with three wires - two black and one red.
2. Open up the tennis racket style head
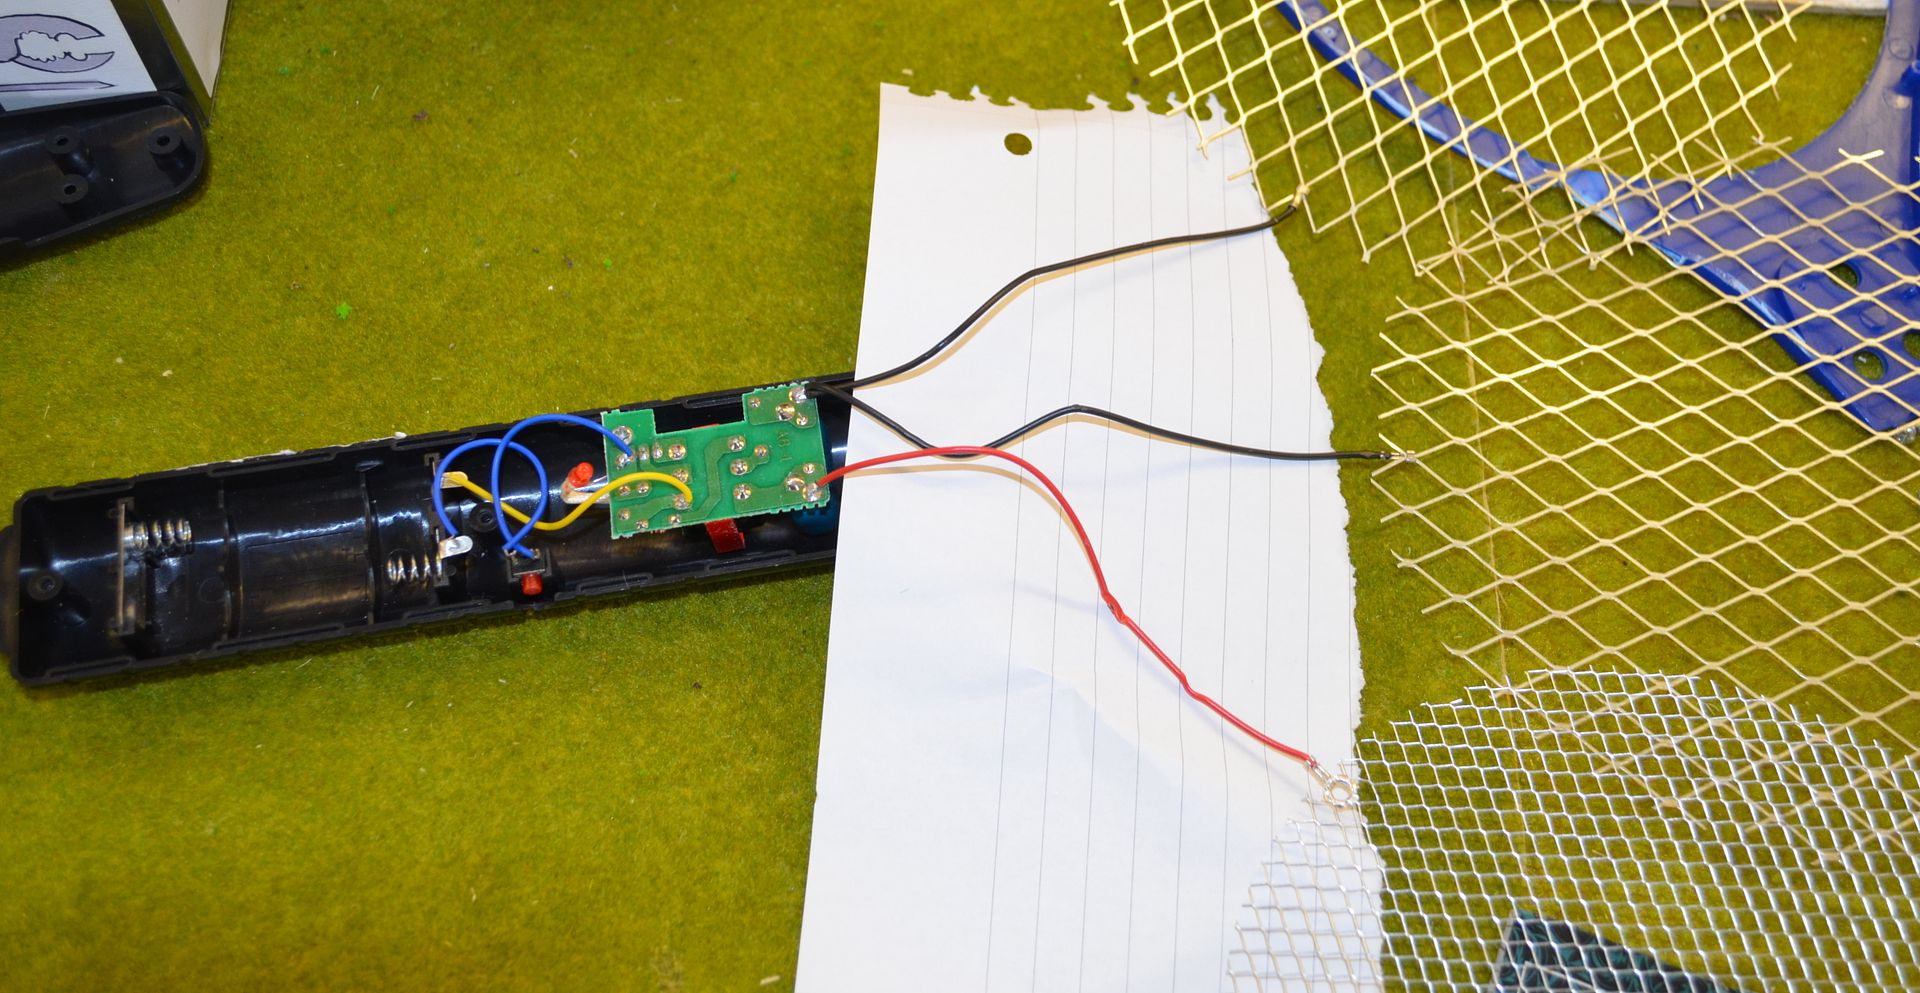
This reveals that the red wire is connected to the inside wire mesh whilst the blacks are connected to the Outside mesh.
Cut one black wire away - as close as you can to the circuit board.
Clip the mesh away from both the remaining black wire and red wire
3. This will leave you with two wires - if you have not already done so remove batteries...
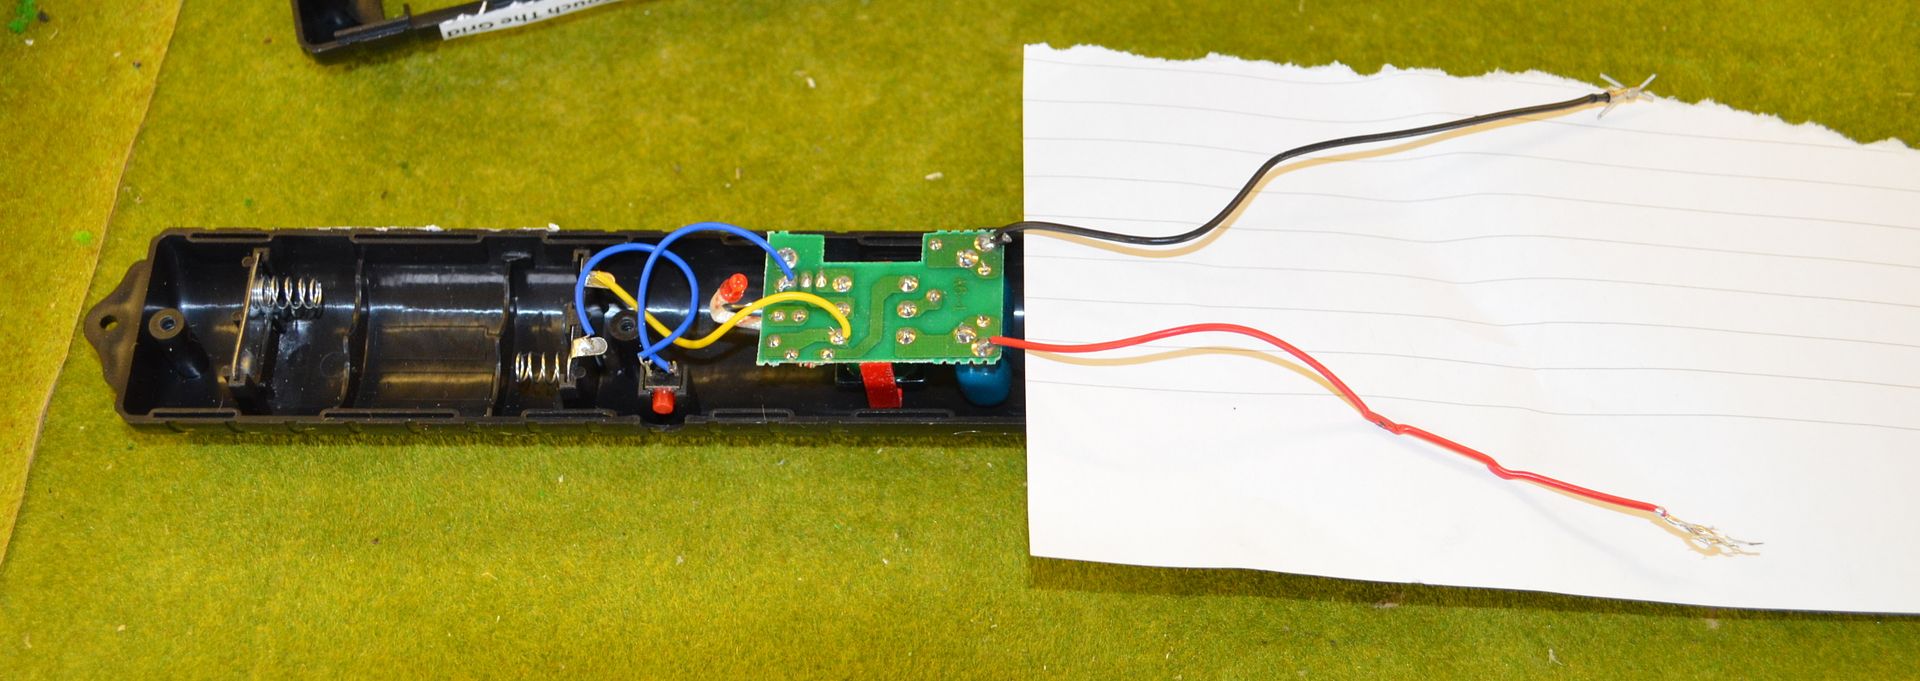
4. Attach the red wire to one of the crocodile clip cables - see white cable below...

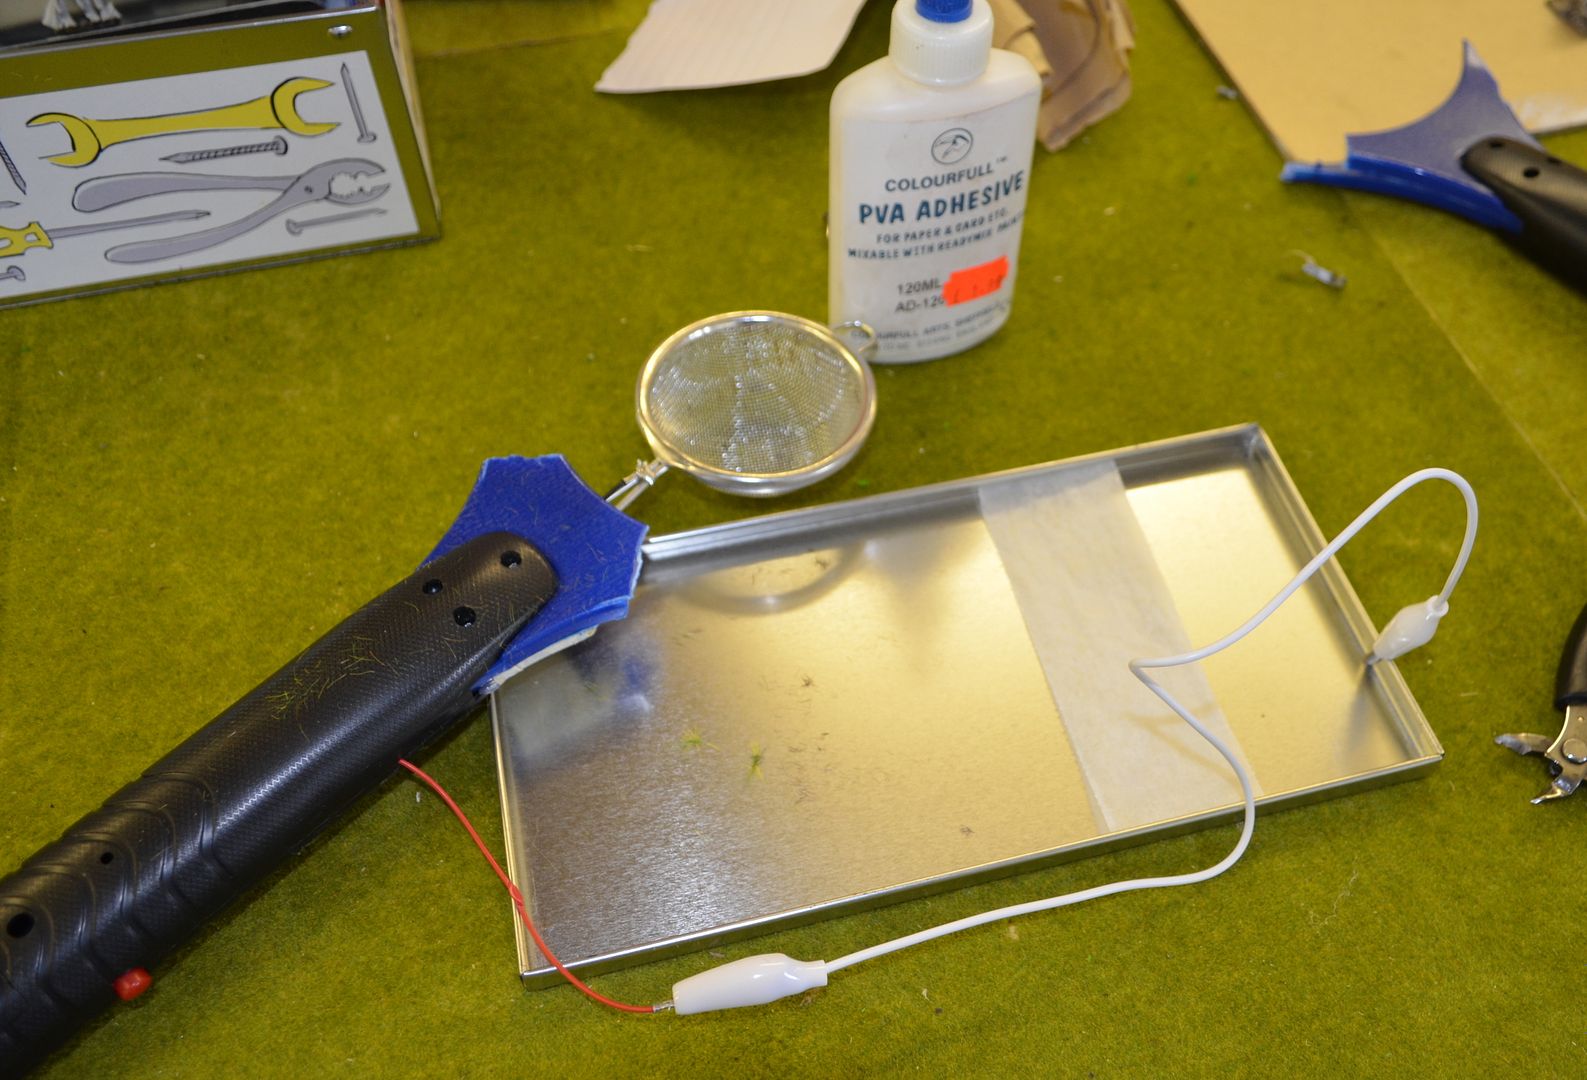
Cut away the blue tennis racket housing to create a 'guard' on the handle of your zapper and then hot glue the sieve to the side of this guard.
Fix the black wire using solder to the sieve. If you don't have solder you could use another crocodile clip and hide all the wiring inside the guard. Once all dry and fixed close up the zapper ensuring that the red cable is out side the handle. Add batteries
That's it folks you have built a static grass applicator
How to use....
1. Get a biscuit tin lid and clip the zapper red cable to the edge of the tin.
2. Lay out a piece of greaseproof paper and add splodges of white glue

3. Fill the sieve with static grass and whilst holding down the on button tap shake and tap the sieve over the wet glue.

4. Once the sieve is empty switch off, unclip the cable and wait for the glue to dry.
Once dry shake off the excess and then you are left with nice green tufts...
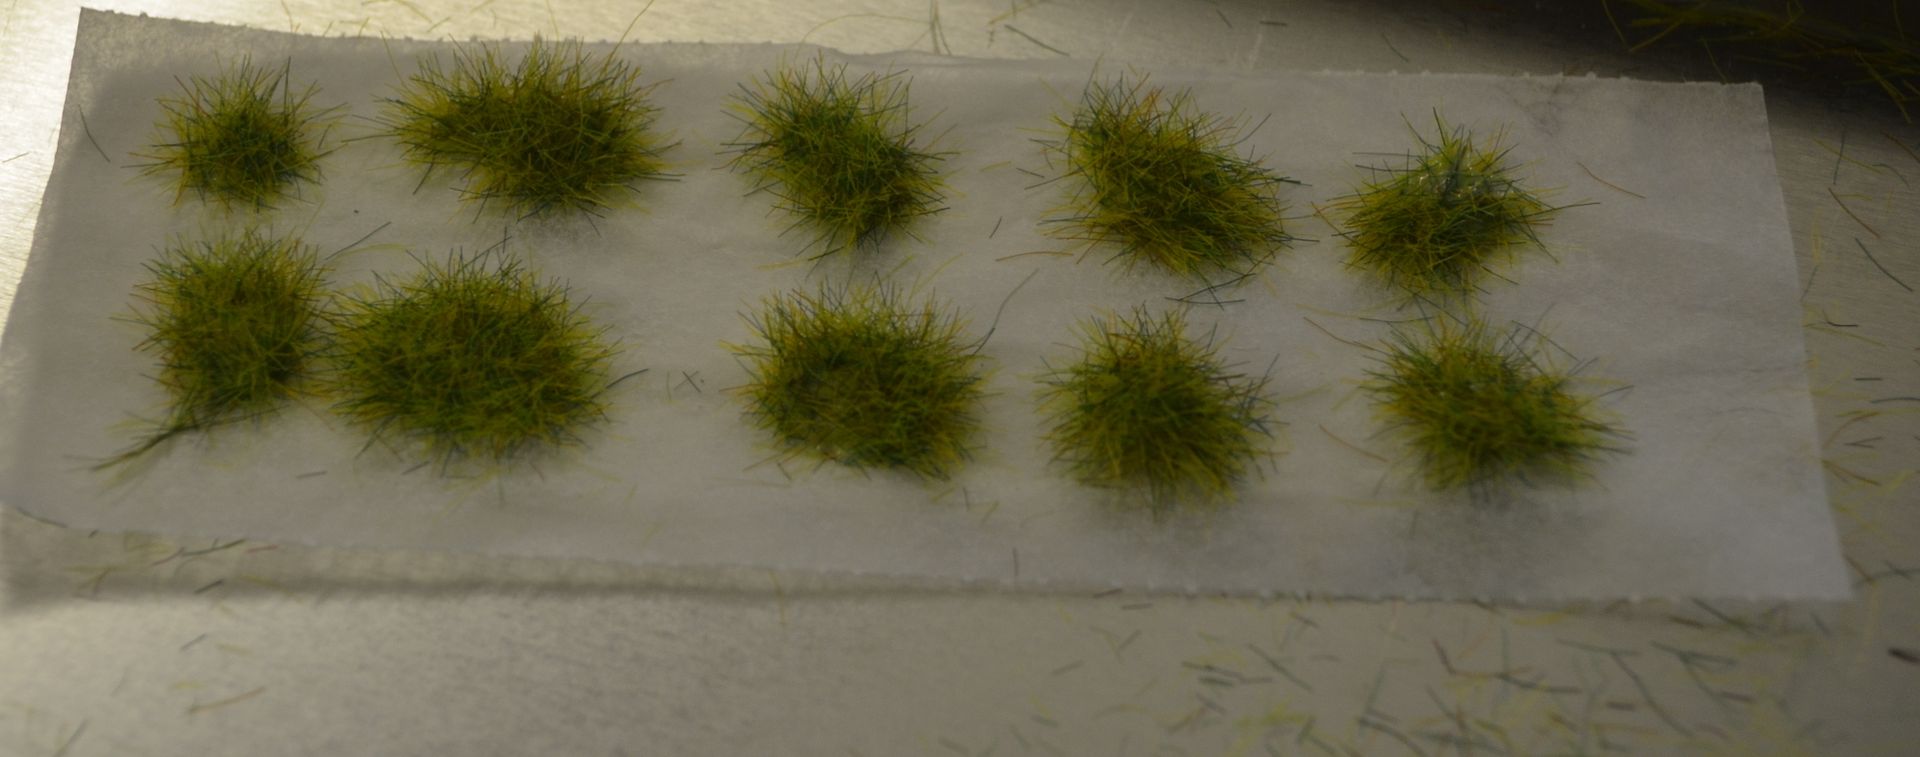
These aren't by any means perfect but with practise I should save a few quid...
Until next time
These are great fun to build and use.
ReplyDeleteI'm still getting used to my new toy.
Tony
That's quite brilliant!
ReplyDeleteHmm. If I tried to do something like this I would probably fuse all the lights in the house!
ReplyDeleteClear easy to follow tutorial...Now I know how it´s done..thanks :-D
ReplyDeleteGreat tutorial Eric. Keen to see them in use for comparison to the commercial ones which I use by the dozen.
ReplyDeleteGreat tutorial! Thanks for putting down the ideas. I think the tufts look fine, too.
ReplyDeleteCrackin' idea, and well documented for all us fingers-and-thumbs brigade to both understand & make one! Cheers! from Squibzy
ReplyDeleteMine doesn't work :( - I must be an idiot.
ReplyDeleteDoes it matter which wire you cut off? Mine had a red, green and black wire (rather than two black wires), I cut off the green wire - was that right?
Provided you cut off one of the pair of wires leading from the same solder point on the circuit board you should be ok...
DeleteI assume the fly swat was working before you started?
Are you getting any electrical circuit at all? Is the battery in correctly?
Good Luck
Thanks for the tutorial. I watched a few vids on this but your step-by-step seems my easy to go through.
ReplyDeleteHave you managed to make a bigger footprint of the turf instead of small blodges? Thanks
Not as yet but it should certainly be possible
Deletenice
ReplyDeleteWhat about this fly swatter - Black Flag Handheld Bug Zapper Racket ?
ReplyDelete