Starting off with four 25cm x 50cm boards I played around with some configurations - one long stretch, a big hill etc
Taking the cork I rough cut this using a handsaw so the sections were 10cm high. These were then laid out on the board. Once happy with the final shape I glued them to the base using hard as nails glue.

Next up was to create the infill. I have a large amount of thick polystyrene left from other projects. This is 10 cm high. It comes in slabs 4ft x 8ft and usually retails around £14 at B&Q. Again using an eye to draw out the infill shape I pulled out my trusty foam cutter and produced the bulk infill.
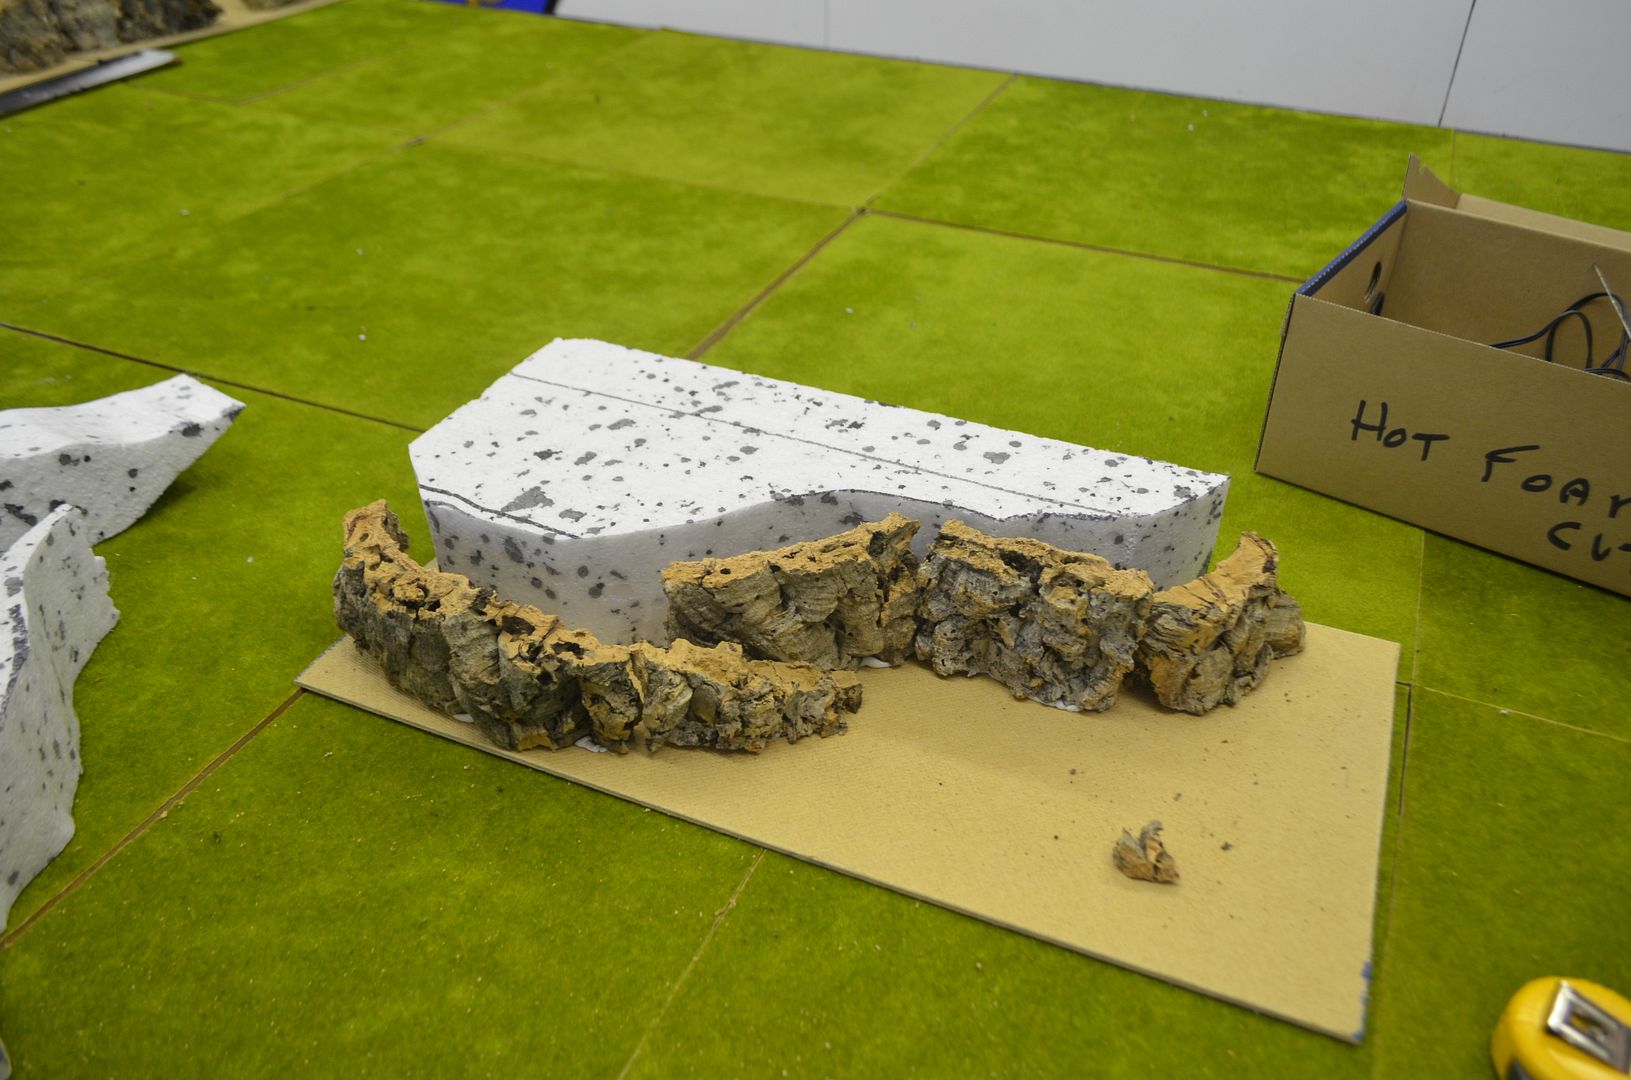
This was then glued onto the base.
The picture below illustrates one of the many configurations possible - I'll need to cut a square block to go in the middle but you can see the possibilities.

The gap between the reverse of the cork and the polystyrene is going to be filled with expanding foam. This will be sourced later today on my return from SELWG.
Have a happy sunday
If you want to go to part 2 - click here
Part 2
Looking good so far...
ReplyDeleteCool like where its going!
ReplyDeleteLooking good - i'm impressed at the size. I tried this a month or so back on a very small scale to see how it work and was really happy. (pic on my blog). Can't wait ti see this mega size one in it's glory.
ReplyDeleteCheers Dan
I wonder if you could grind/crumble this stuff up into a small (1-4mm) size? You might be able to take some shaped substrate, paint it dark brown, cover with white glue and then stick on that small size stuff on it, with some bigger chunks for detail? You might be able to cover slopes and other complex and gamable slopes.
ReplyDelete