If you are coming here fresh you might want to pick up the trail from part 1
When I left you last I had glued down the cut bark and had
created the bulk of the infill using block polystyrene. The following step was
all completely new. It could work or it would go horribly wrong...here goes.
The gap between the polystyrene block at cork bark cliff
faces needed to be filled.
I had three choices:
I could have packed this with smaller blocks of foam but it
would have been longwinded and fiddly
I could have filled the gap direct with filler, expensive,
messy, too long to dry and potentially made the units too heavy
Or I could use expandable foam.

I wasn’t too sure how this would react to the polystyrene
(would it melt?) so I tested a piece and after 20 minutes no adverse reaction
could be seen.
So off I went merrily filling in the gaps. I hadn’t however
expected what happens next, although there is a clue in the name of the
product...expandable. I happily filled the gaps and left the pieces to try when
I returned an hour later the shock of seeing the foam setting in large blobs over
the top of the cliffs was interesting. In deed some of the effects look like
lava (bank that Idea for another project). The good news is that the foam has
filled the gap
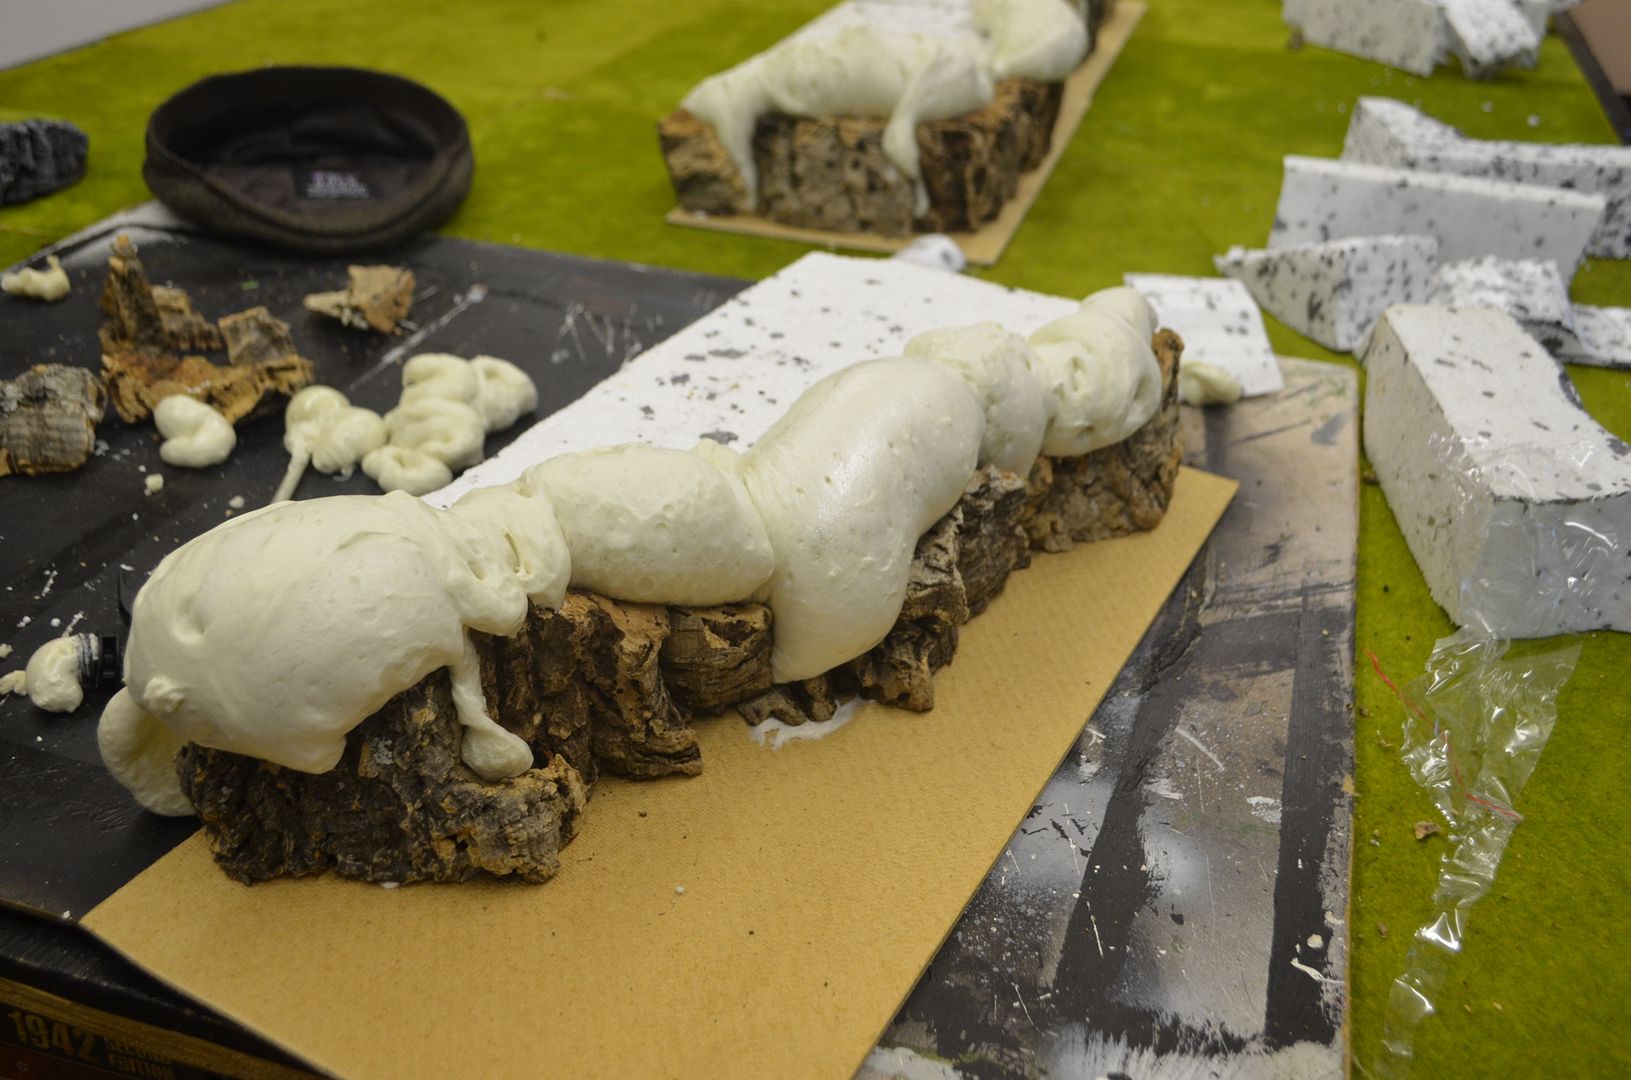
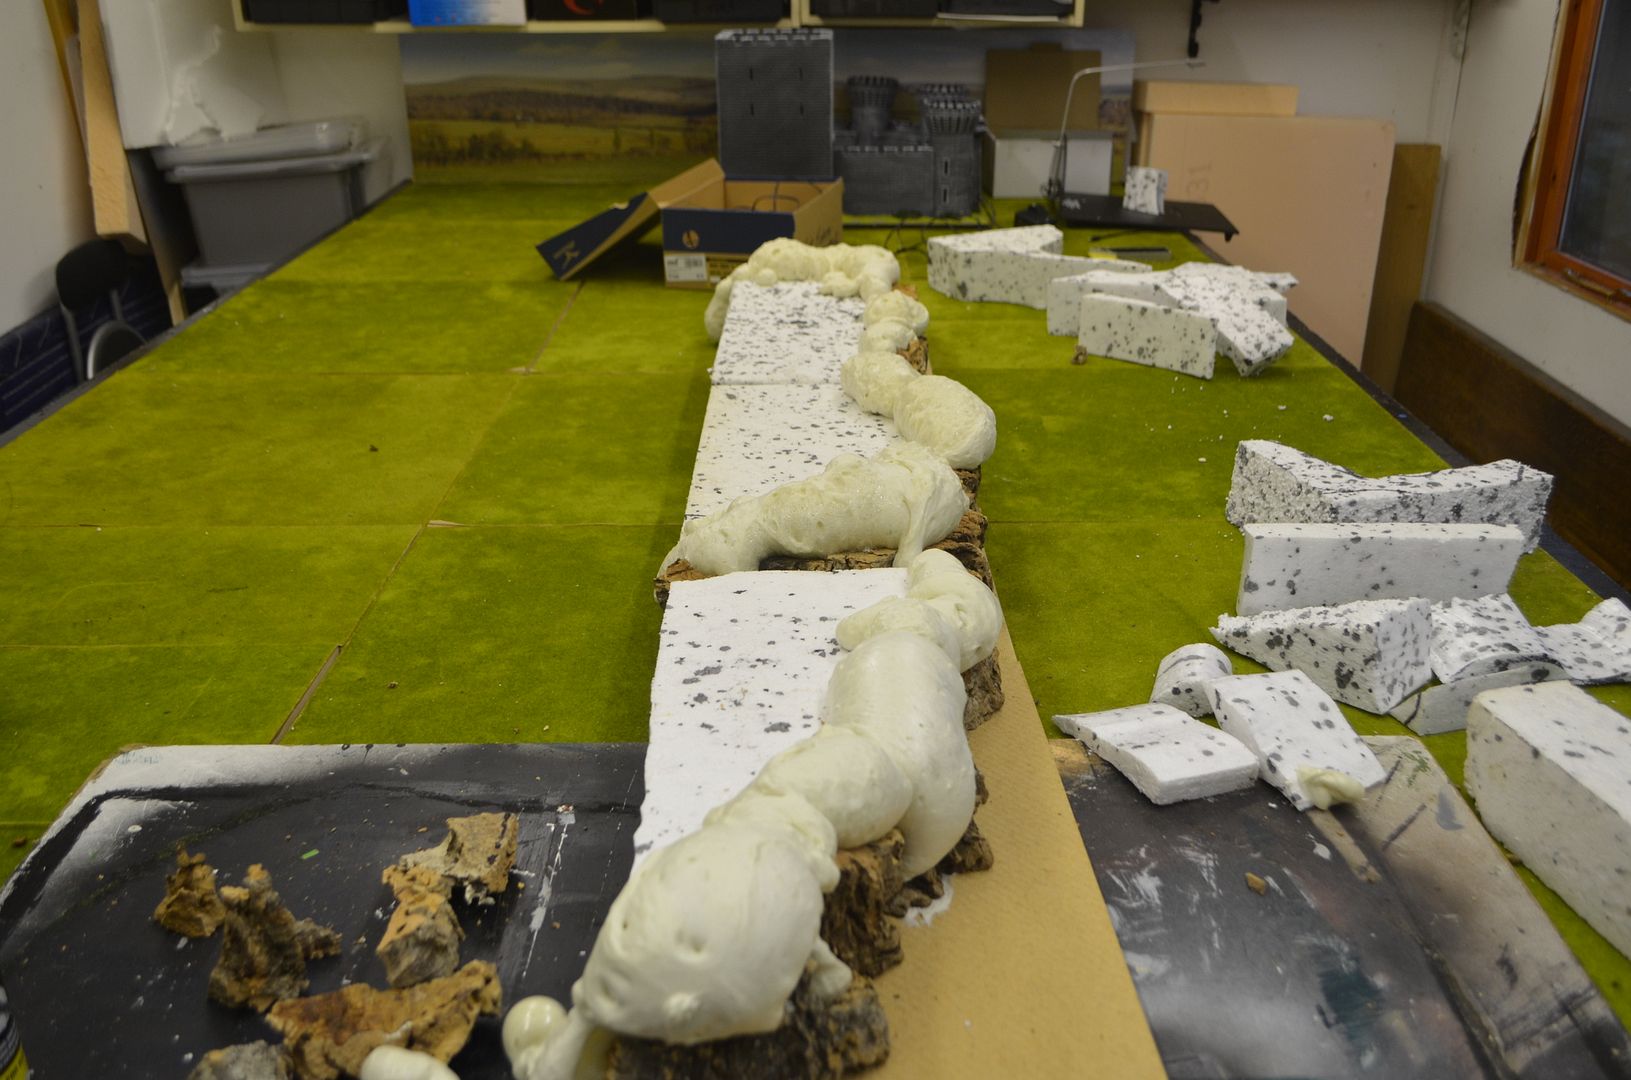
And perhaps more importantly taken on an adhesive quality
helping to strengthen the bark to the base. The instructions on the can suggest
that the foam needs 24 hours to set..
Tonight - get home from work and attack the cliffs with a carving knife
and....it cuts beautifully - the picture below shows the after cut...
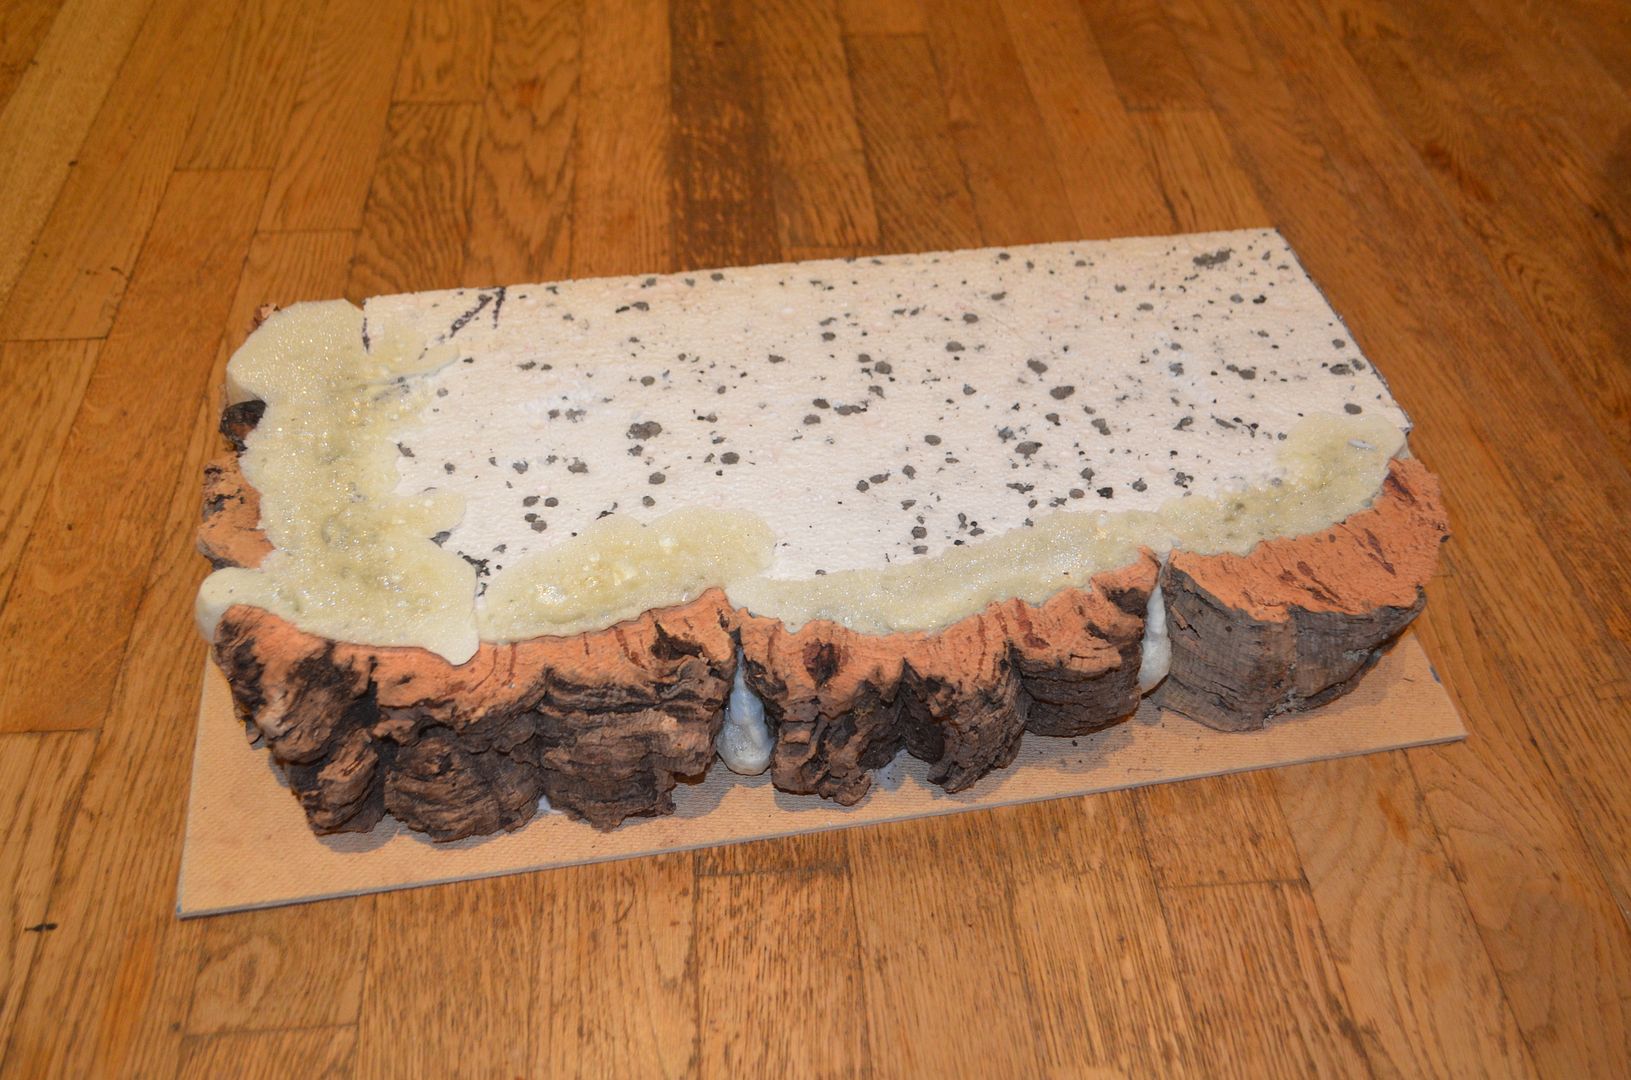

An interesting discovery - and those off-cuts must be useful for something.
ReplyDeleteAsteroids.
DeleteLovely! To partially answer your question, I've used expanding foam filler to fill bottles and the like for modelling projects. I cut one open once and it took on the shape of the bottle nicely. I can see two potential problems with using it for moulds. First, I suspect the detail could be a bit soft. Second, the foam would expand far beyond the opening of the mould, as it did with your cliffs above. If the back of the mould is narrow I suppose this would be alright, but I have some wide and shallow Woodland Scenics moulds here that I use for cliffs and I think they would be a pain to cut to size afterwards.
ReplyDeleteYou've got me intrigued now though! I have a can of foam filler and my moulds just a couple of feet away. I might give it a try...
I tried it. It failed miserably!
ReplyDeleteFascinating and inspiring! Thanks for sharing. I have just started working with polystyrene and have been using plaster to fill cracks and give a tough surface for painting. Only small scale so far, but this expanding foam is intriguing.
ReplyDeleteThe big challenge is to have terrain pieces, particularly hills, that figures can stand on without sliding off. LOL not a problem with cliffs though.
I love your blog, very inspiring (I even started building wheat fields after seeing you How To). Back to the expanded foam, I've used my pieces to make asteroids for Battle Fleet Gothic & more recently Star Wars X-Wing. Just use your fingers to pick bits off till you have made a suitable asteroid shape. Then glue it to a flight stand & when dry undercoat it black. Then its just a matter of drybrushing it in various shades until you are happy with the look. Its so quick & easy that in no time you've created a whole asteroid field.
ReplyDeleteHope this helps
Andrew
I thought about using expanding foam, to build cliffs, mountains, hills, etc. My original thought was to use two pieces of MDF to create a cavity; line them with Wax Paper, to prevent the foam from adhering to the boards, and let it expand normally, between the two boards, which will keep the top/bottom surfaces flat, while along the outside edges, it would billow, creating an irregular surface. I never tried it, though.
ReplyDeleteI suspect the foam will adhere to Wax Paper, but I have since learned that Parchment Paper will not stick to anything, even paint will flake off, when dry. I would suggest giving this a try, if you like. They would certainly be customizable, lightweight, and fun to make. Cheers!
Interested in seeing how these progress. Always in awe of people who can make stuff!
ReplyDeleteThis stuff can expand more over time. However, that might be a result of high temperatures. Just something to consider. I used it to fill some gaps on my storage building and over time some has expanded out of the holes.
ReplyDelete