Over the last few years I have tried to learn from my fellow
enthusiasts and on more than one occasion their ideas have been borrowed.
This particular project started with a trip to my local
garden centre in Chessington where they have a fantastic pet and aquatic
centre. Whilst picking up some guinea pig food I noticed out the corner of my
eye several sheets of cork bark. Some in slabs others in tube format (old
trunks I assume). These are used as decor in reptile tanks. Up and til now I
had never been able to source this material and having seen some fabulous
mountainous and cliff terrain using this material I decided to go for it.
Interestingly the smaller pieces (measuring around the size
of an A4 sheet) were retailing at £2.99 in comparison to the big tubes/slabs at
almost £30. I decided that the smaller ones would support my purpose and six
pieces went into the trolley.
Once home I looked closely at my new purchase. The Bark is
ridged and fortunately the ridges run along the long side. Clearly to turn
these into something was going to take a bit of imagination and some practise.
I decided a small rocky outcrop would be a good start.
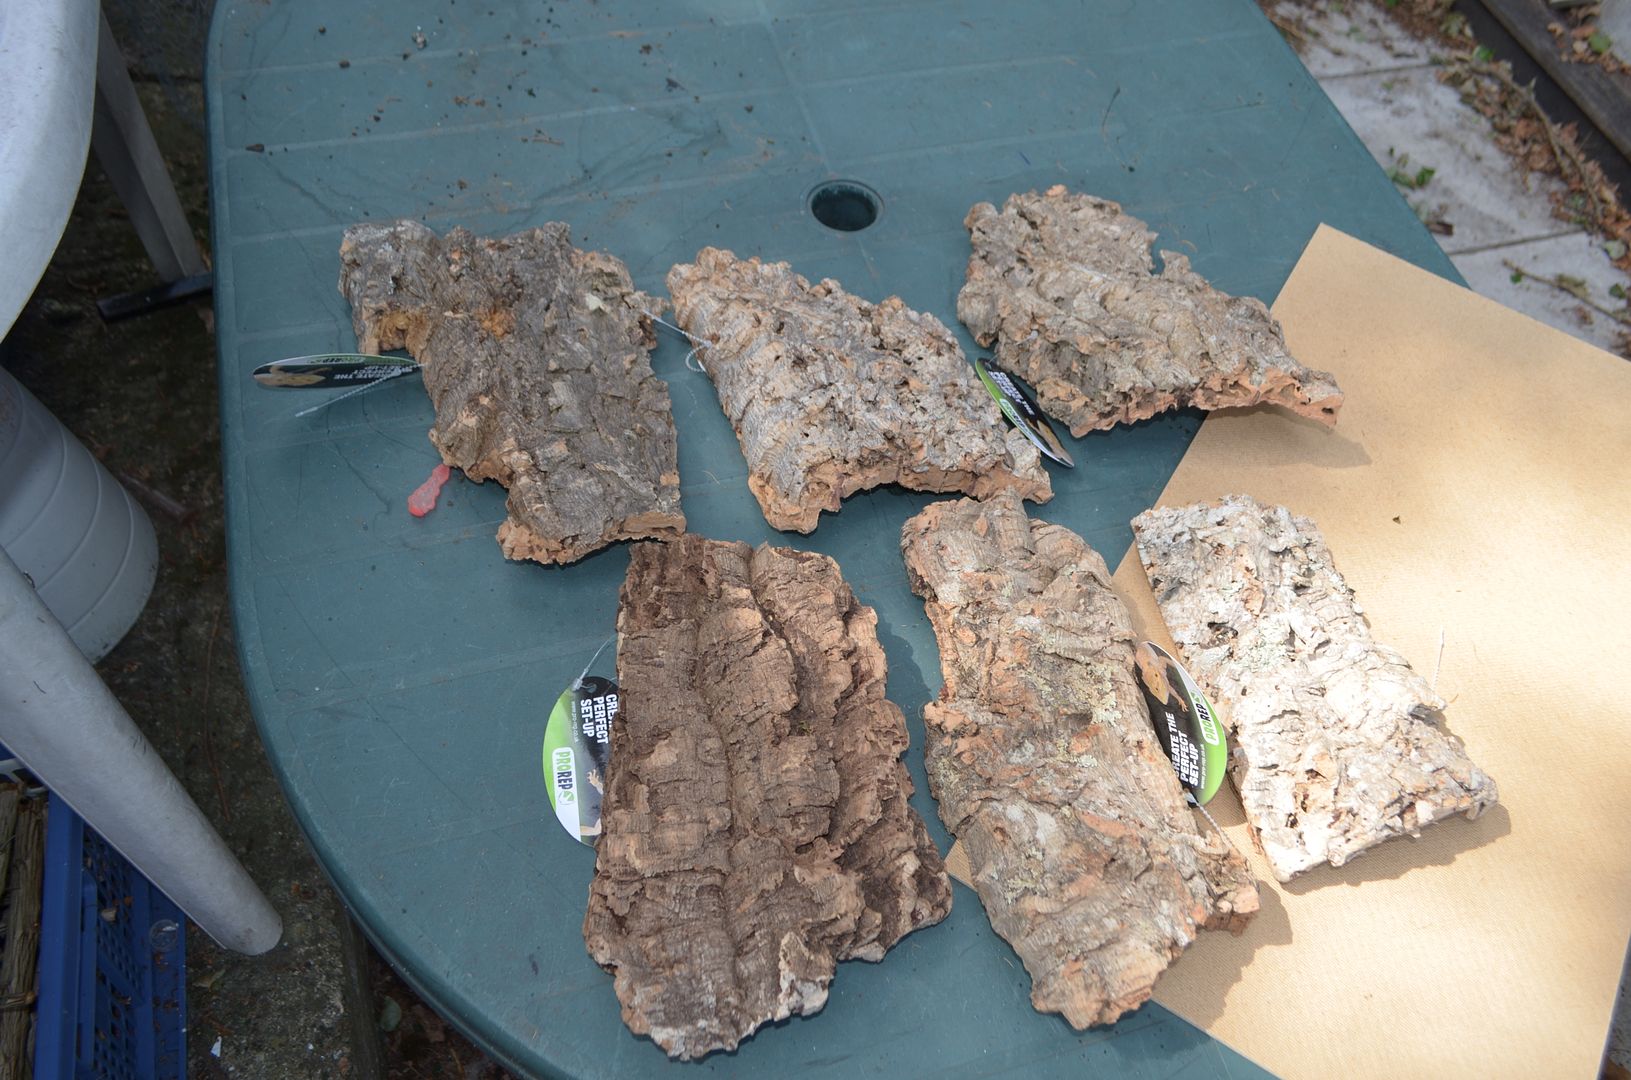 |
| £18 worth of Bark |
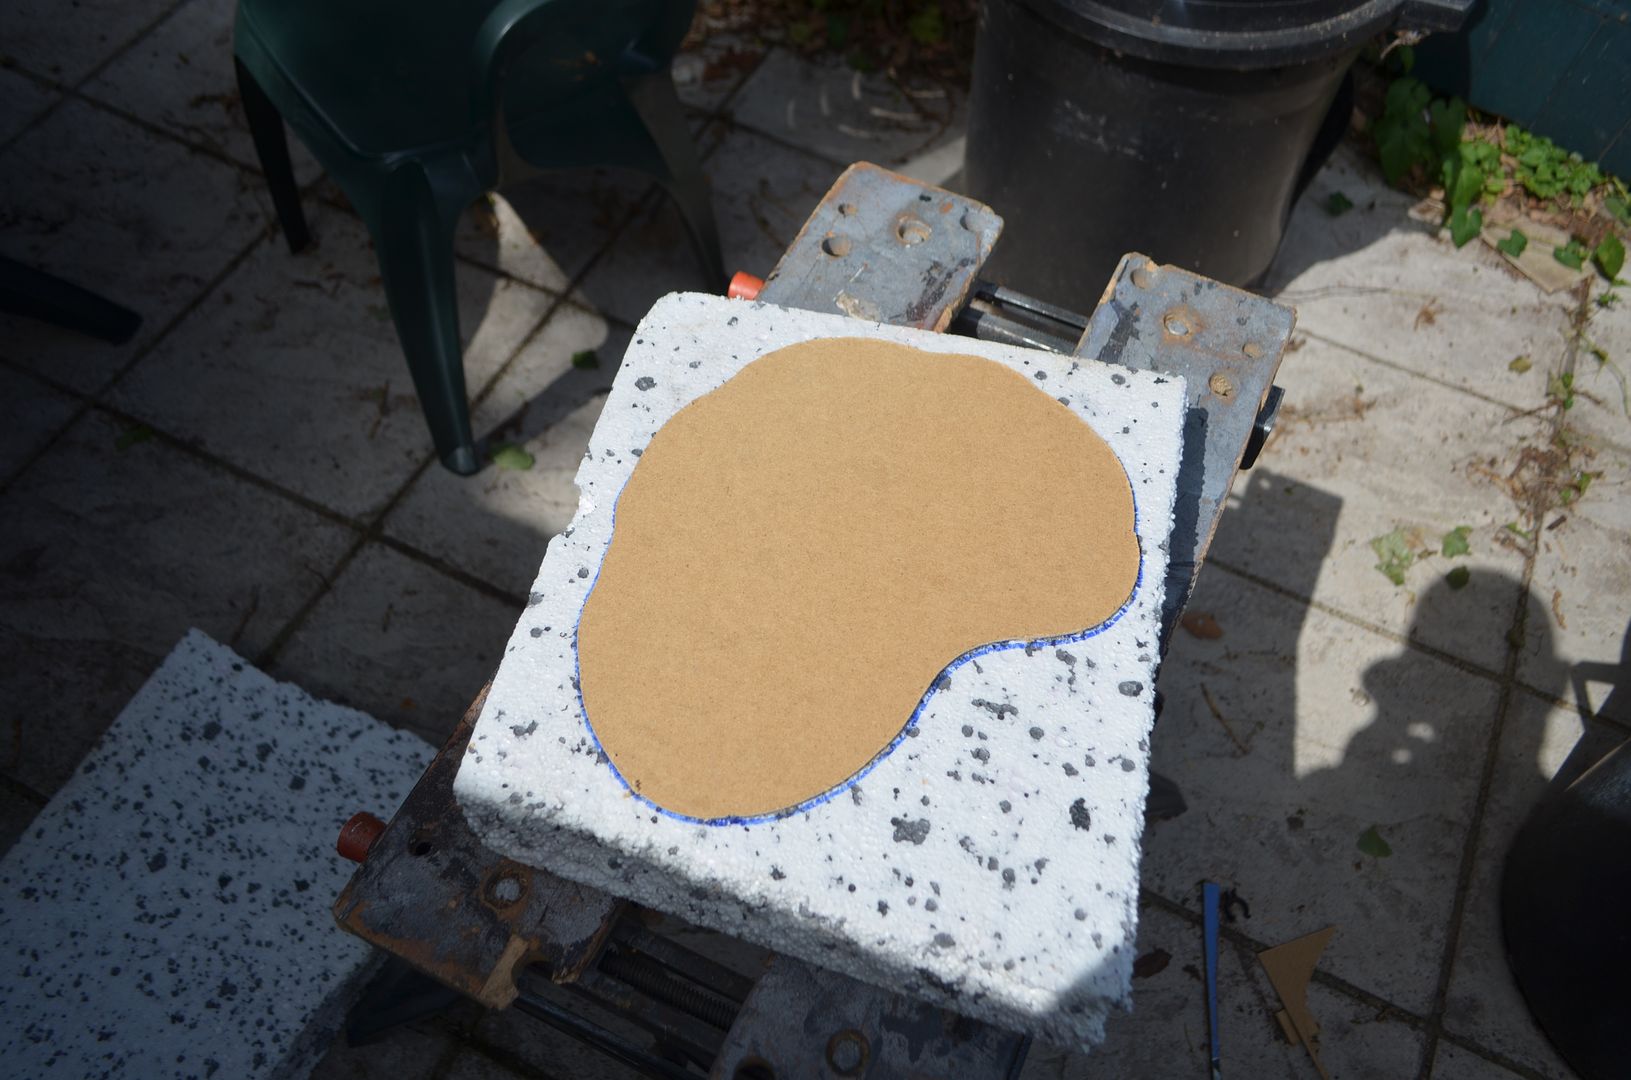
Taking a piece of hardboard I cut out a curved shape that was about 20cm by 30cm.
I then placed this shape onto a slab of thick polysterene and copied the shape. Using my trusty foam cutter the shape soon emerged from the slab.
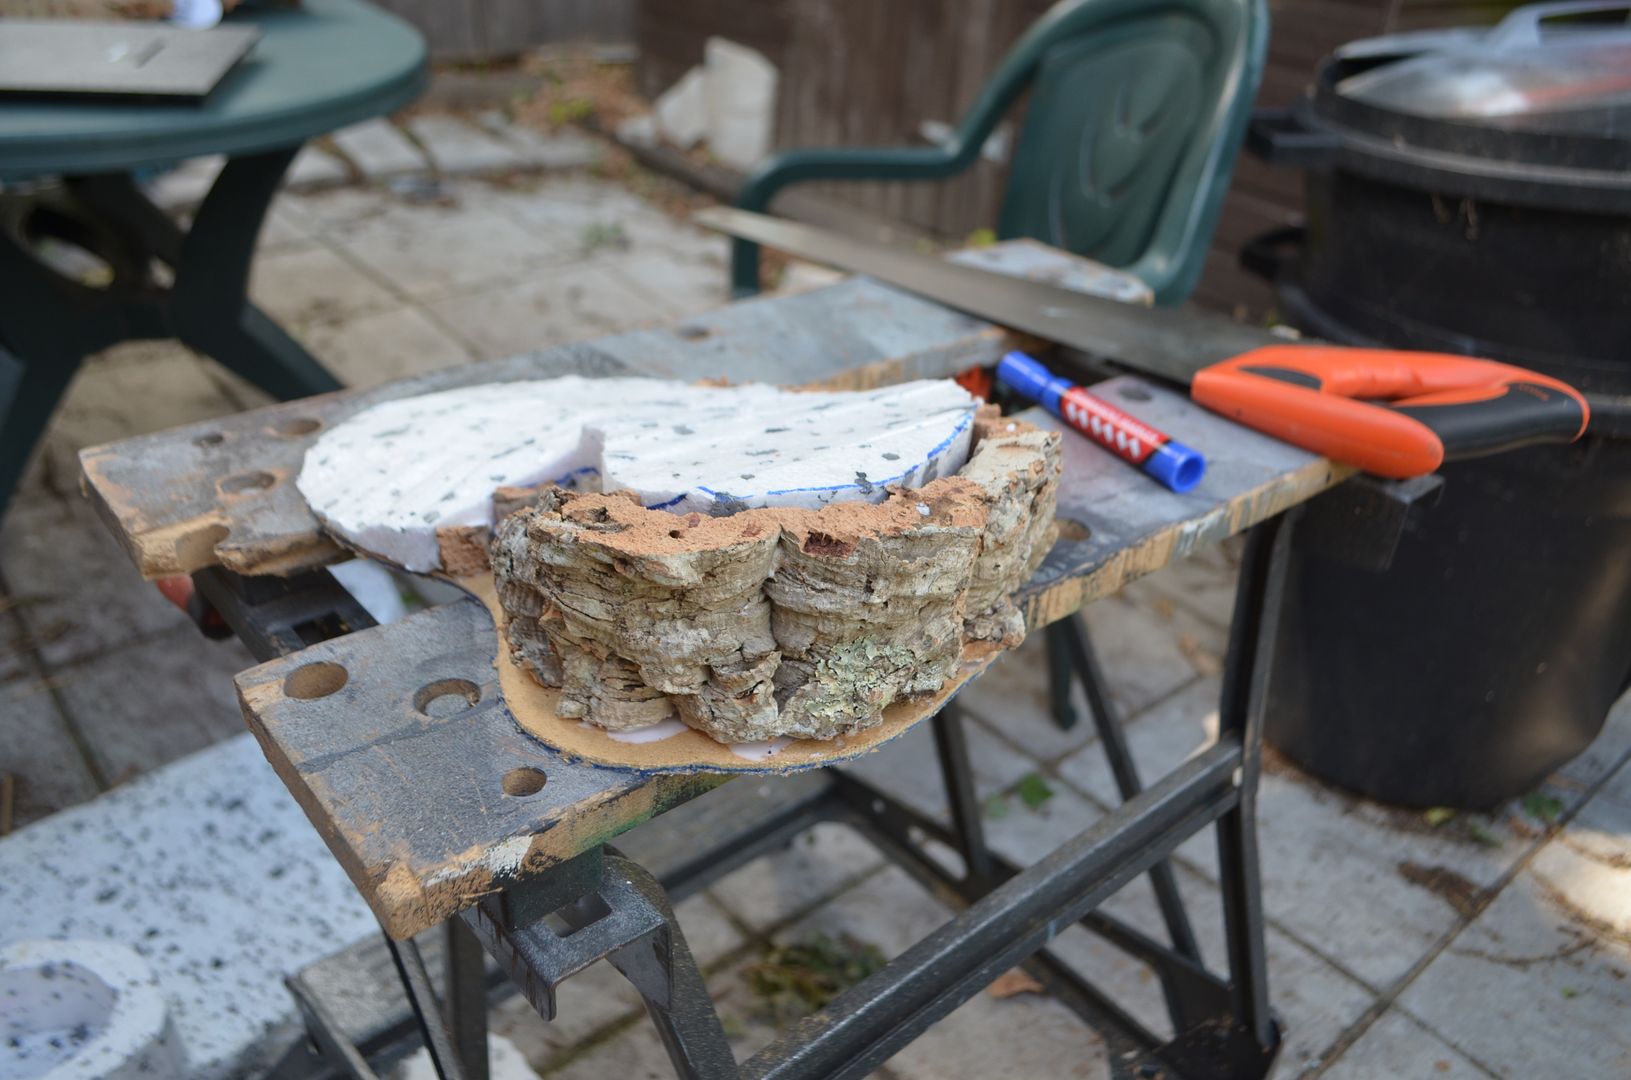
A sheet of bark was selected. The bark slabs have a gentle curve to them so using this I marked out in permanent marker the height of my cliffs that would run half way round the outcrop. The bark was then cut with a simple wood saw. I was concerned that it might crumble with all this handling but my fears were allayed as this stuff is actually quite tough.
Lining out the cut sections actions the polysterene I began to cut away the excess foam so the bark cliffs would sit against the form and on the baseboard. Once satisfied the foam and the bark were glued (PVA) to the base. To add further strength to the construct I drilled holes in both the board and the bark and pushed through glue covered skewers to hold the whole lot together.
The next morning found the unit totally dry. Using some off cuts of polysterene I packed the gaps between the cliff face nd the polysterene hill. Once done I took out the sculping foam cutter and began to smooth done the reverse slope of the hill. It was all starting top look very good.
Next up I slapped filler all over the surface of the hill giving it a nice top strong coat. Once dry the plaster was standed to a relatively smooth finish. TIP: I found a pack of five sanding blocks in the local pound shop – much chearer than the usuial sheets I buy. Sorry forgot to take a picture here.
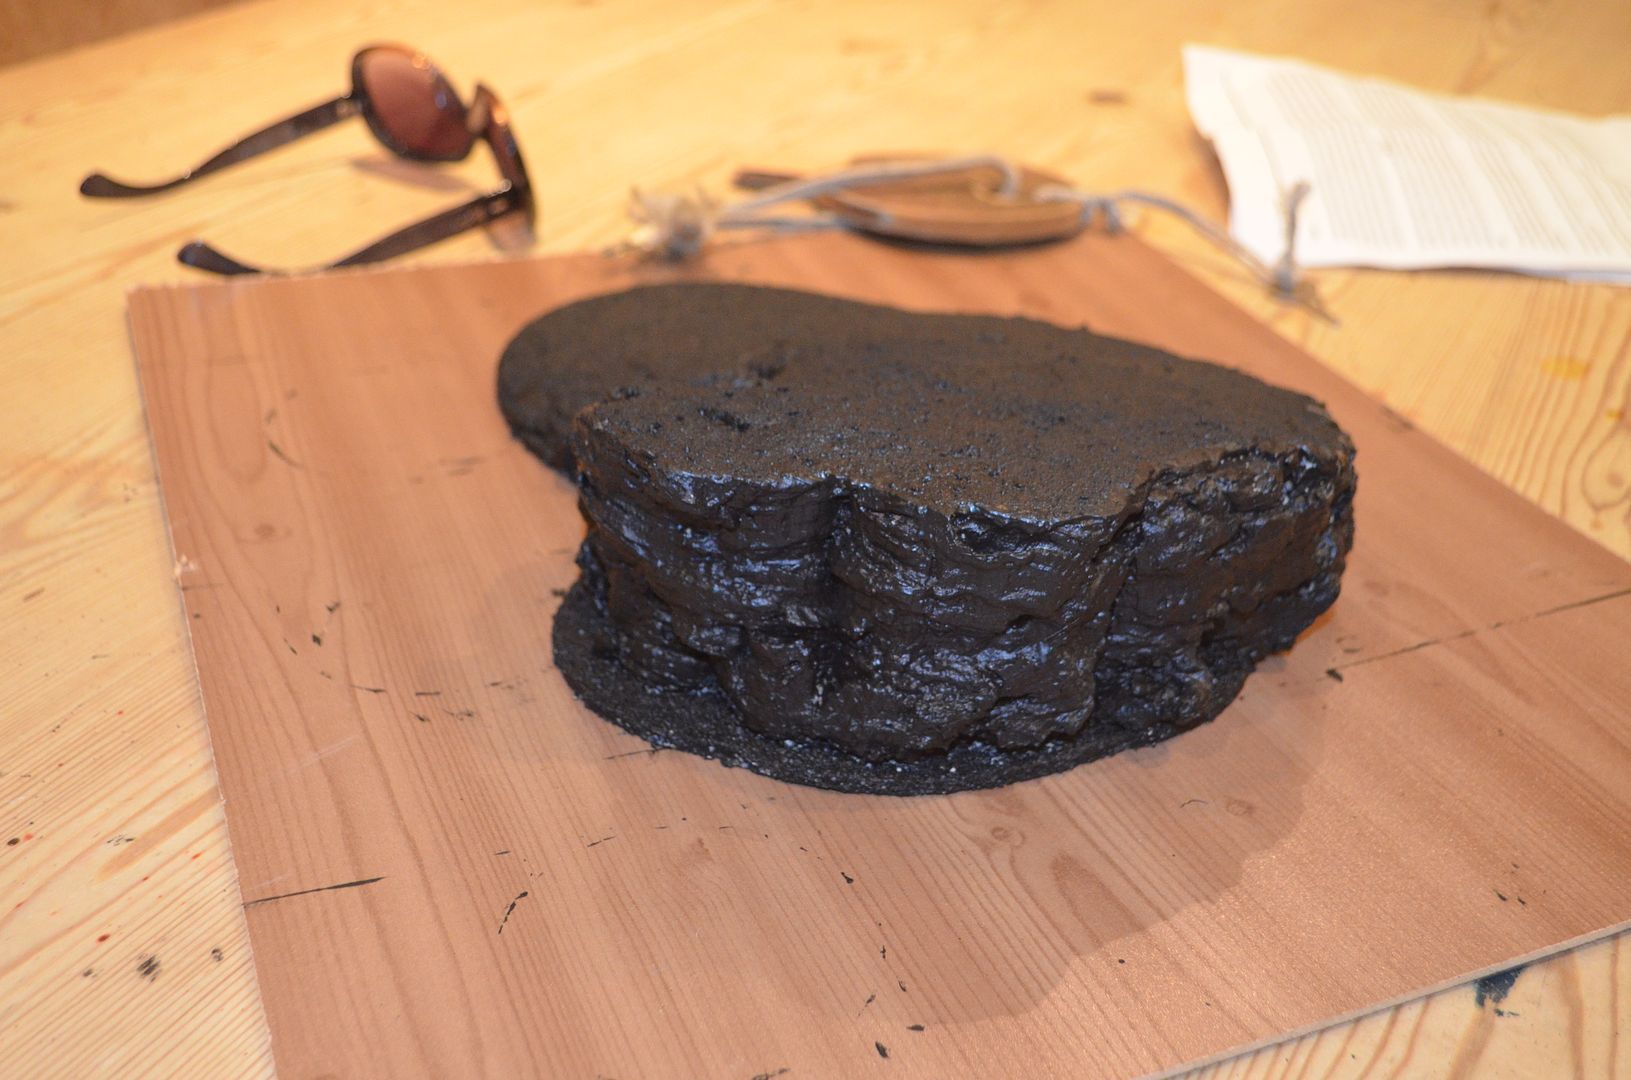
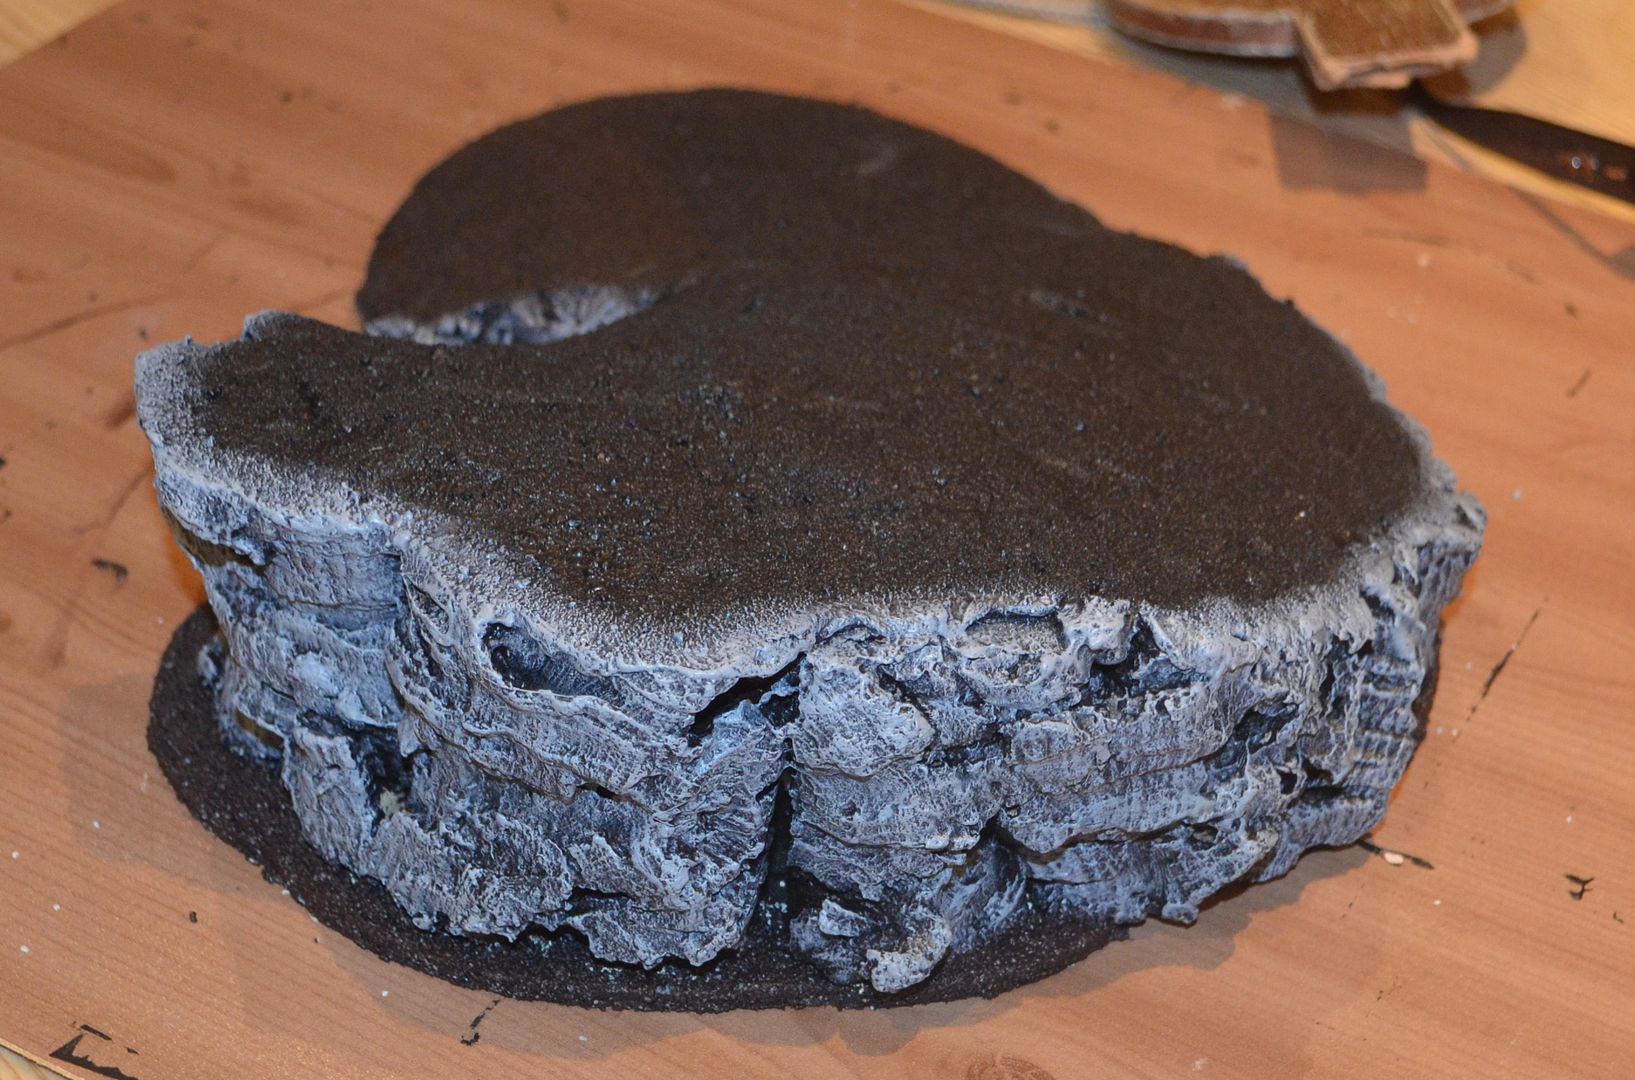
Once the whole lot was dry, I then covered the surface in fine ballast and again let this dry. By doing these simple five minute jobs at either end of the day kept this project moving.
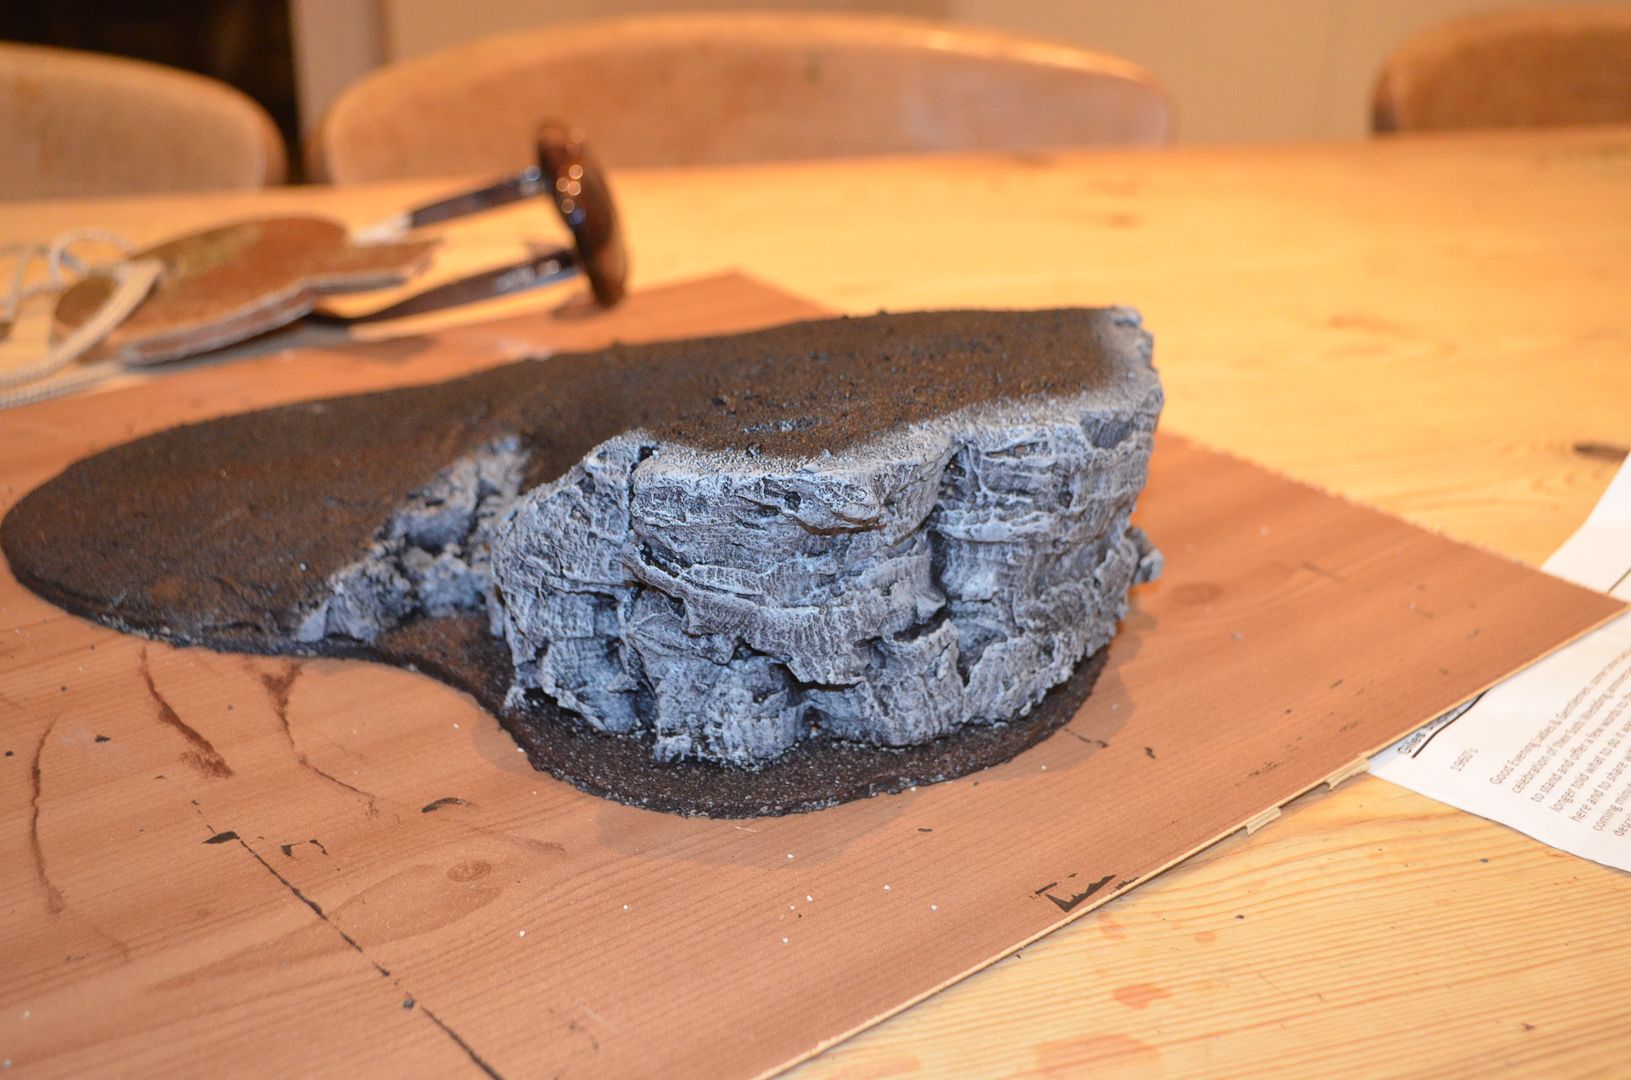
Now the exciting part ! Would the cliff face work?
Well judging from these photos I am really pleased with the effect once the cliff face has been dry brushed various greys.
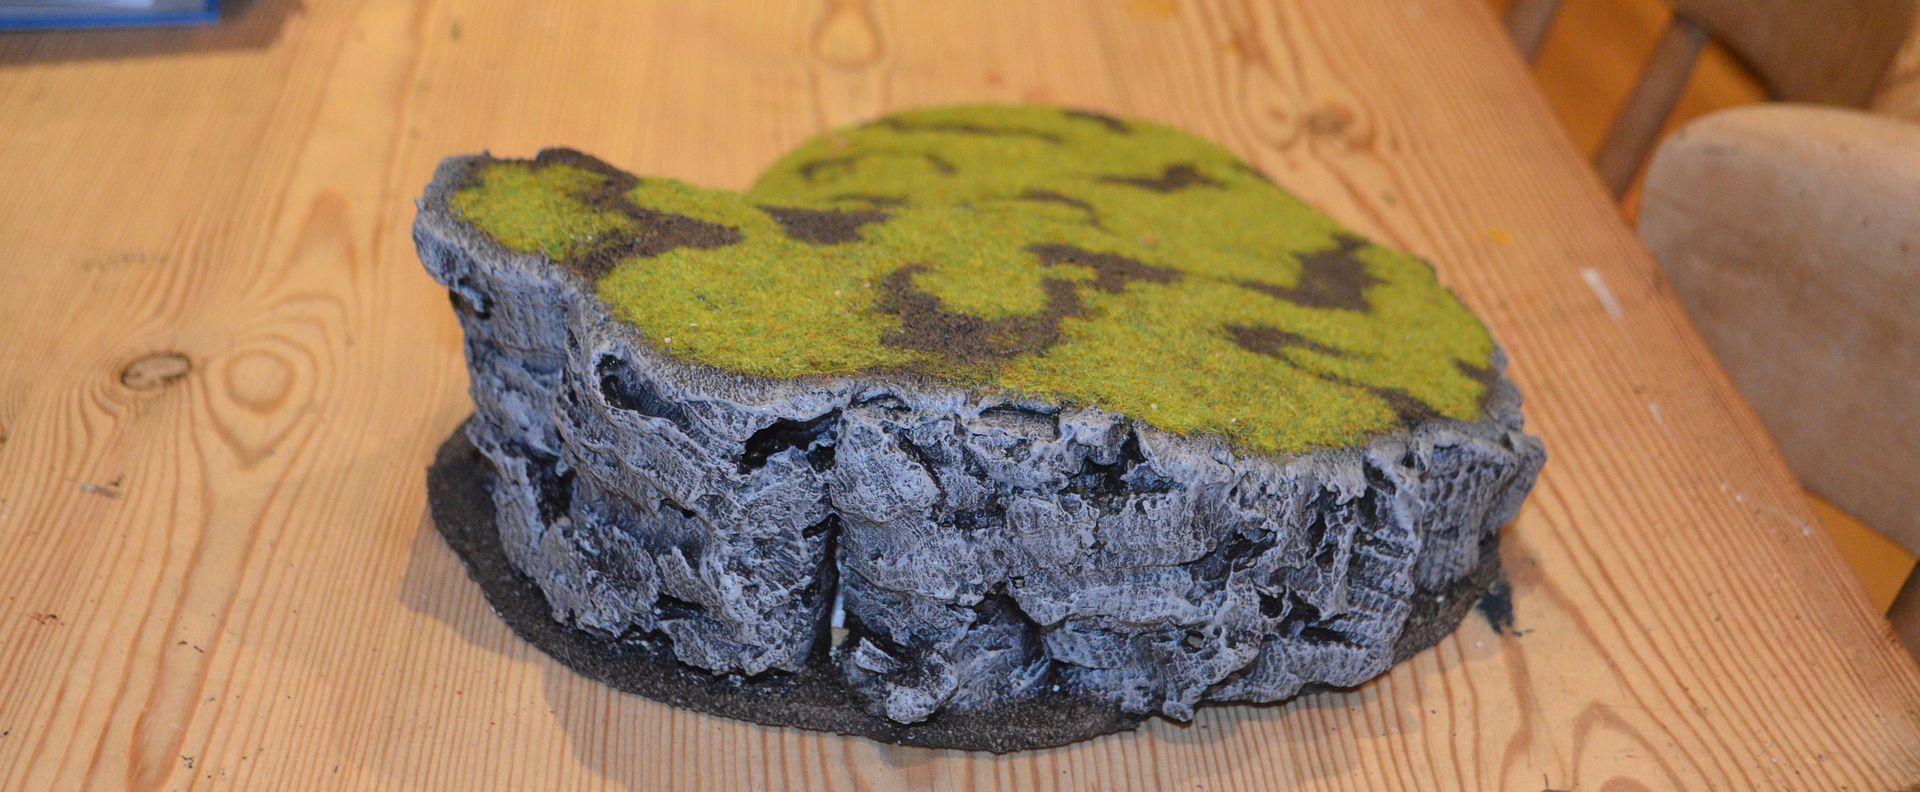
Finally a topping of static grass
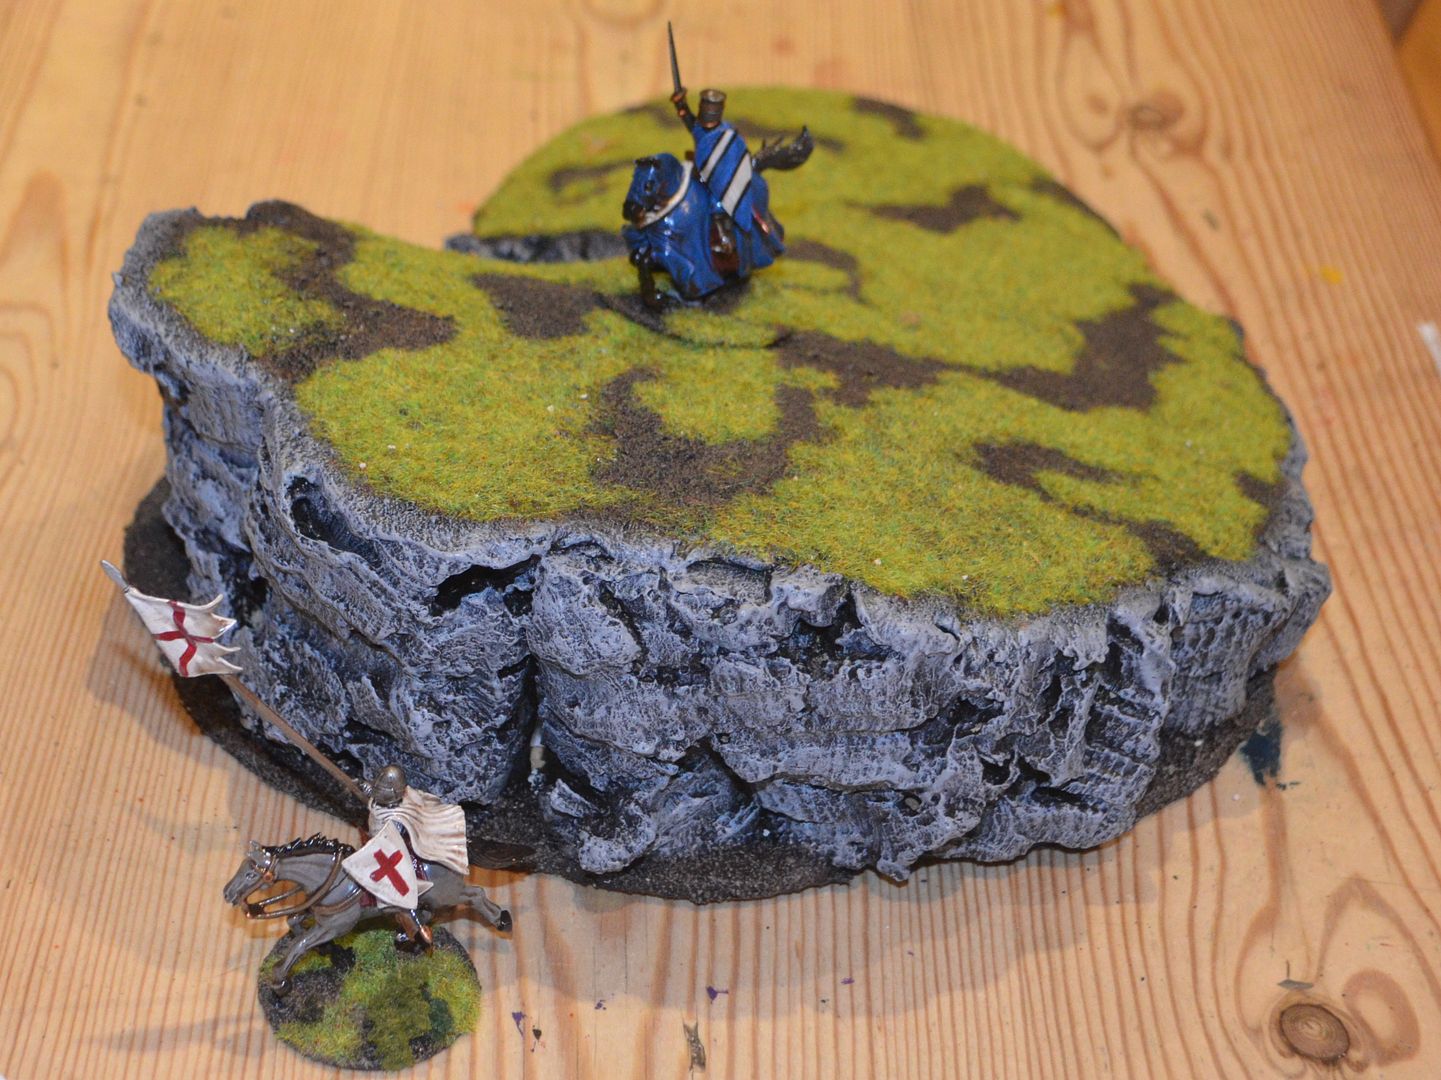
And knowing that somebody will still ask how big is this thing - a couple of mounted 28mm knights
If you enjoyed reading through this you might like to read my earlier attempts at rocky outcrops here...Rocky Outcrops
I have also used kiddy toys as outcrops and built a castle on a cliff start your journey here - Pirate Island Part 1
although I have to say I will be using this approach from now on.
Thanks for reading


A really effective method - thanks for sharing!
ReplyDeleteVery nice piece of terrain and cheaper than (wood)chips!
ReplyDeleteWow, that looks fantastic!!!
ReplyDeleteWoof ! nice rocks
ReplyDelete-- Allan
Very nice....now it is time to go outside and plunder mother nature!
ReplyDeleteThat's really good looking terrain!
ReplyDeleteThanks for the helpful tutorial!
Cheers
Stefan
Barking mad or not this looks superb!
ReplyDeleteGreat idea - I've got some bark sitting here now to get my hands on some polystyrene....
ReplyDeletethanks for sharing
Nice piece of terrain; Good how to. I need some cliffs for my Lake Baikal project.
ReplyDelete