In two days time there is an anniversary of a battle fought in the Anglo Zulu War,. To honour those who fought on both sides the Shed re-fought this engagement on Monday night.
140 years ago the British Army was reeling from
their disaster at Isandlwhana. An entire battalion of British Infantry along
with hundreds of supporting troops had been wiped out, and despite the brave
and resolute defence of Rourkes Drift the morale of the invading forces was at
its lowest ebb. The Zulus, in contrast were in high spirits and many native
regiments were still keen to ‘Wash their Spears’. Isandlwhana proved that a
numerically stronger native force could sieze victory against a complacent
modern European army. Indeed Cetshewayo, King of the Zulus, recognised that his
forces could only win in open battle when the British could not defend behind
defences. Sadly for his people this understanding was ignored and on 29th
March at Khambula the Zulus suffered their first heavy defeat of the war. In
the long run this paved the way for their demise as the pre-eminent military
force in South Africa.
Number four column, commanded by Sir Evelyn Wood VC had
entered Zululand with the intent of marching towards the Zulu capital at
Ulundi. His 2000 men were a formidable force, consisting of two battalions of
regular infantry, artillery and several hundred boers, irregulars and locally
raised native allies. Fearing that the same fate that befell the 24th
at Isandlwhana a few weeks earlier might repeat itself, Wood proceeded with
extreme caution. Aware that a sizeable army of Zulus (ten times his number)
were approaching the commander set about defending a hill known as Khambula.
His defences included the classic Boer Laager of Wagons, a redoubt on a higher
ground and a palisade linking the two. This was a strong position with densely
packed ranks of rifle armed troops supported by artillery. Ammunition was
distributed and scouts were sent out to seek the enemy. The British waited.
For a full account of the battle I would strongly recommend
this link.
Its been some time since we have played a game set in the
Anglo Zulu War and given the anniversary of the Battle of Khambula is this week
I determined that this would be our next engagement. But where to start?
Unfortunately there are few wargamers who have reported their take on the
battle so I had to develop my plans from scratch.
A good starting point was to look at the orders of battle.
Estimates suggest that the British had around 2,000 combatants and the Zulus
20,000. We do know the British had 15 companies of infantry and therefore
basing the company on a notional 100 men the British were given 15 units of
regular infantry. Each unit would be represented by four figures so a scale of
1 to 25 was adopted. To supplement the British regulars the Allied force
was given six more units of irregulars (boers, natives and mounted infantry)
plus a couple of artillery pieces. With 21 standard units the British break
would stand at 11 (ie if the Zulus routed or broke 11 or more units they would
win). In total the British force had 84 figures plus officers and gun crews
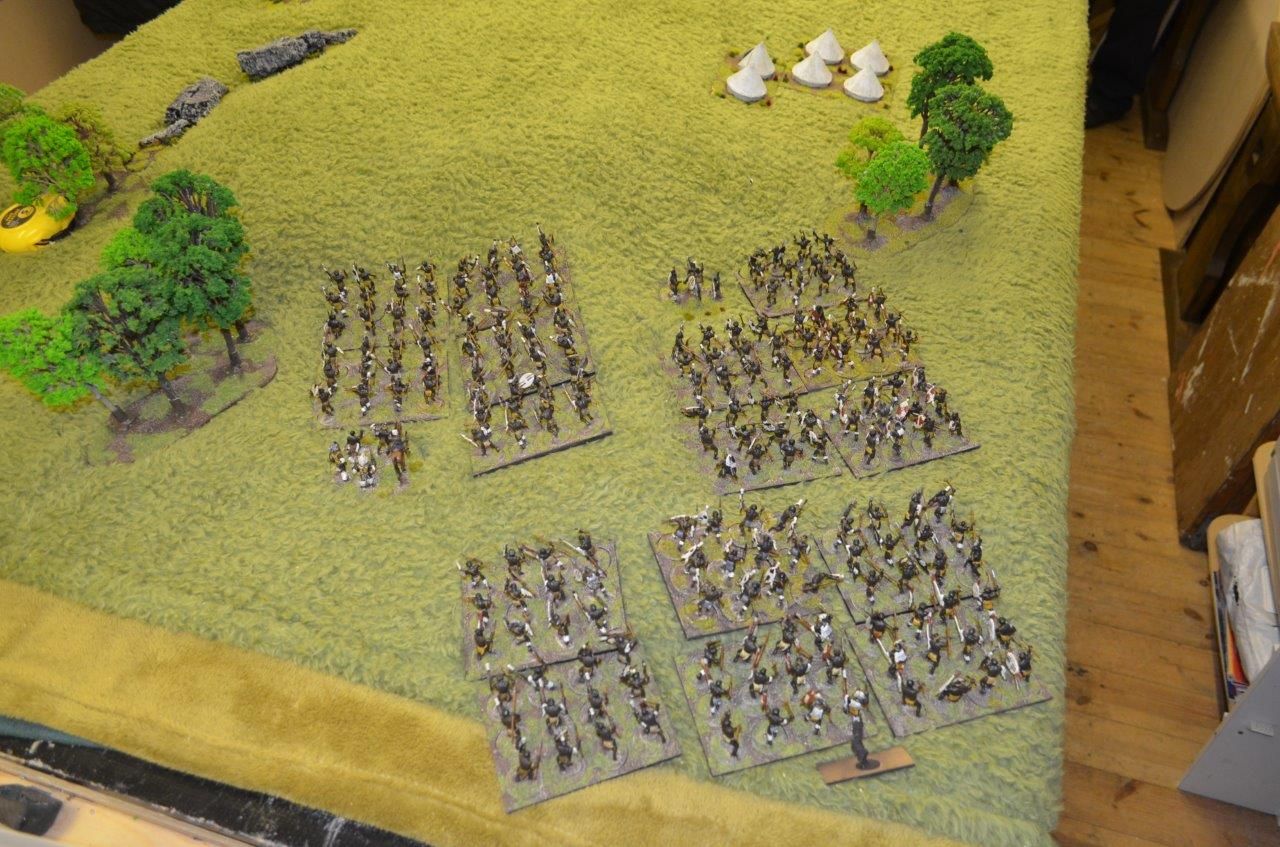
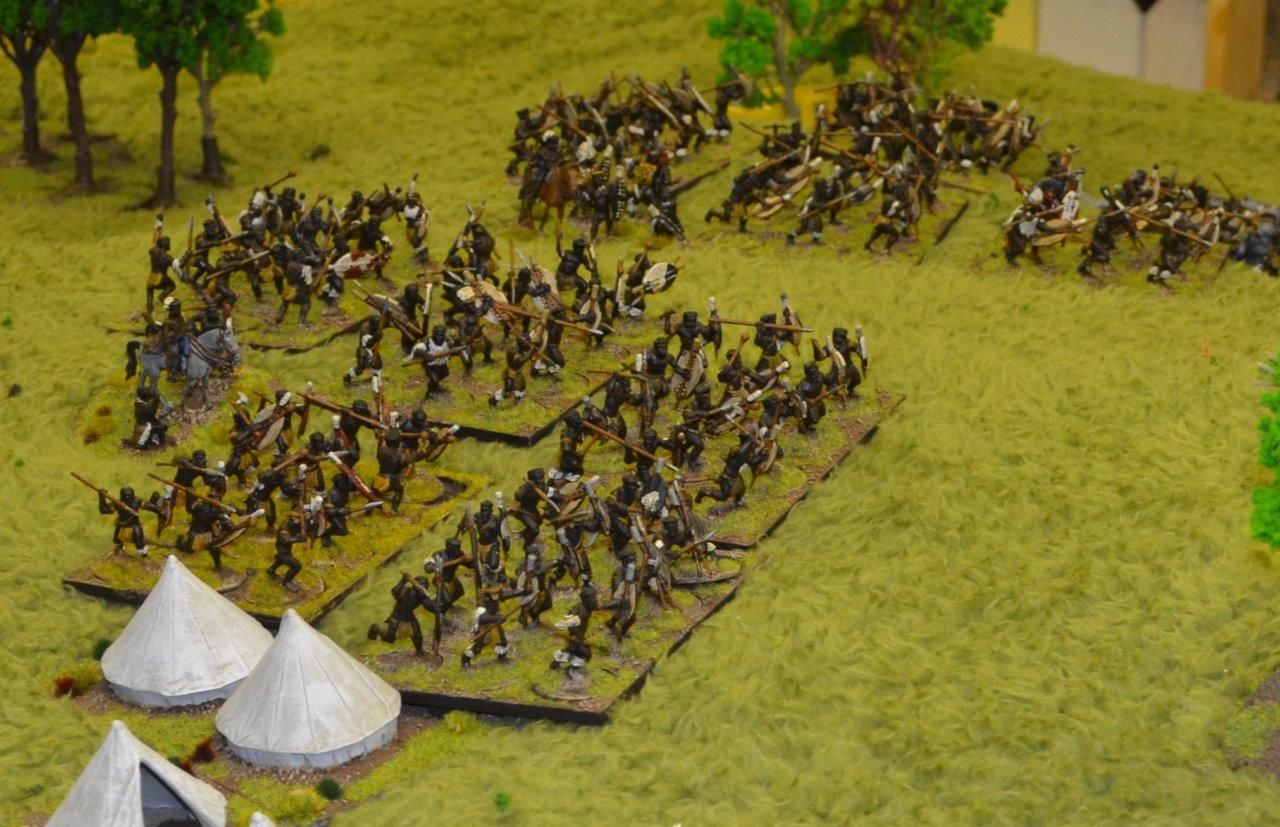
The Zulus needed 10 times that number – sadly I don’t have
840 Zulu figures (only 700) so the Zulus would be slightly undermanned. Each of
my Zulu warbands are 12 figures strong (and would represent 300 natives
in real life). These were deployed equally in three divisions (Left Horn, Right
Horn and Centre) and each division would have three regiments consisting of six
warbands. A regiment would therefore have 1800 men, a division 5,400, the Army
in total 16,200.
Each regiment would be commanded by its own induna and would
break once 2/3rds were destroyed (ie a loss of four units).
With the unit size settled I then addressed the stats for
each unit. With so many forces on the table simplicity would be the order of
the day. Using the Zulu warband as the base these guys would get 6 attacks in
hand to hand, 1 missile attack, a morale save of 5+ and a stamina of four (ie
they could take four hits). Previous games had shown how brittle these warbands
were with only 3 stamina so an extra point was given. By contrast the British
regular units are only a third of the zulu warband size and as such they would
need to be modified. They would retain their 3 shooting attacks but both their
stamina and Hand to Hand values would be reduced to 2. The British regulars
would save on 4+ all irregulars would save on 5+. I figured that if the British
could not stop the attacks with rifle power then the chances of them winning in
a melee – one company versus one warband must put the Zulus at a disadvantage.
Equally two companies standing side by can only be contacted by one warband and
it becomes a more even affair. All the irregular units had the option of being
mounted if they chose to be and firing from the saddle would reduce their shooting
value by 1 dice.
Finally the Zulus were given the bloodthirsty trait (all
missed attacks in first round of combat rerolled) and the British regulars
given the steady trait (one failed morale save gets a reroll). To put this in
context a unit defending a wall gets +1 added to dice rolls for morale meaning
our pluckly redcoats would save on anything bar a 1 or a 2 (and still get a
reroll.
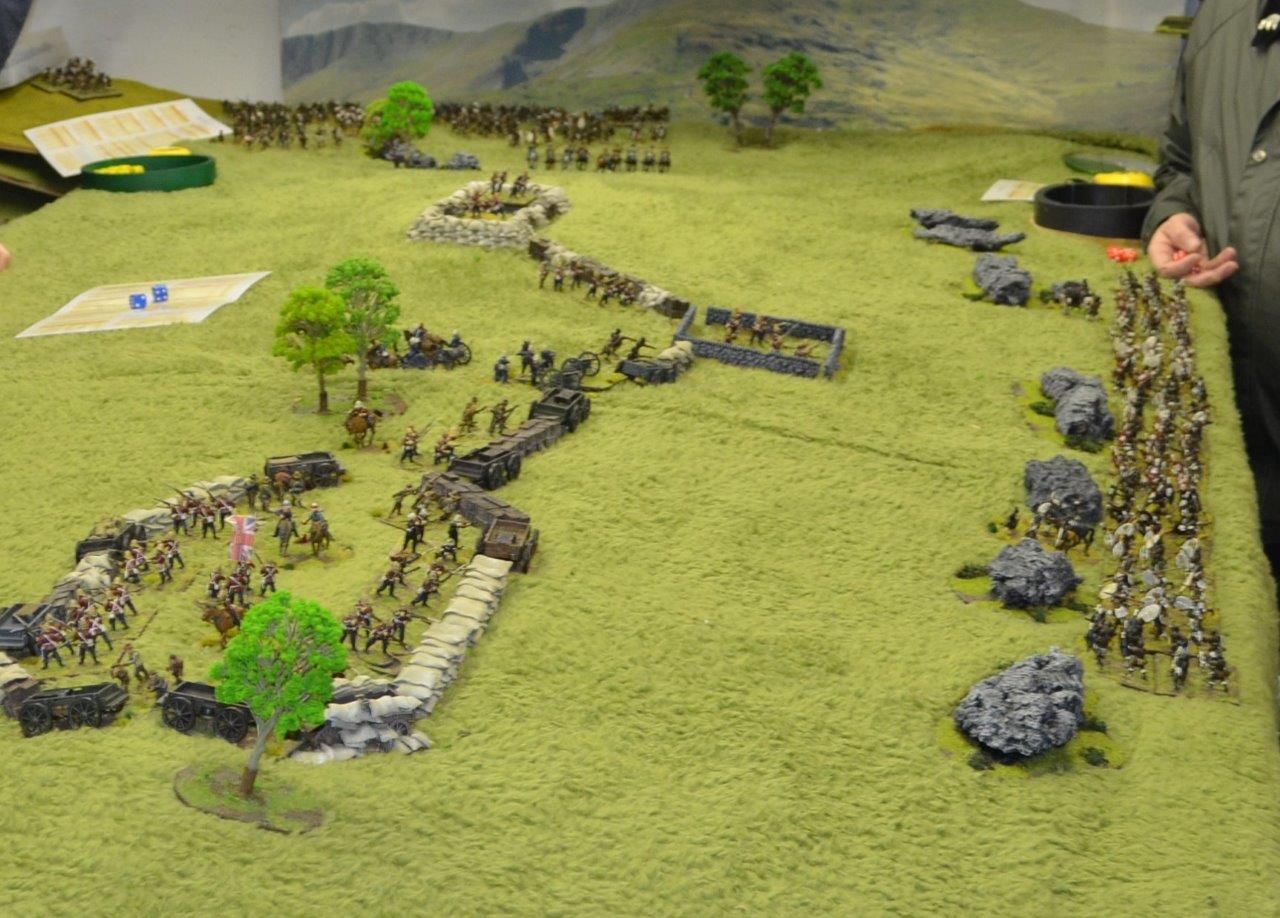
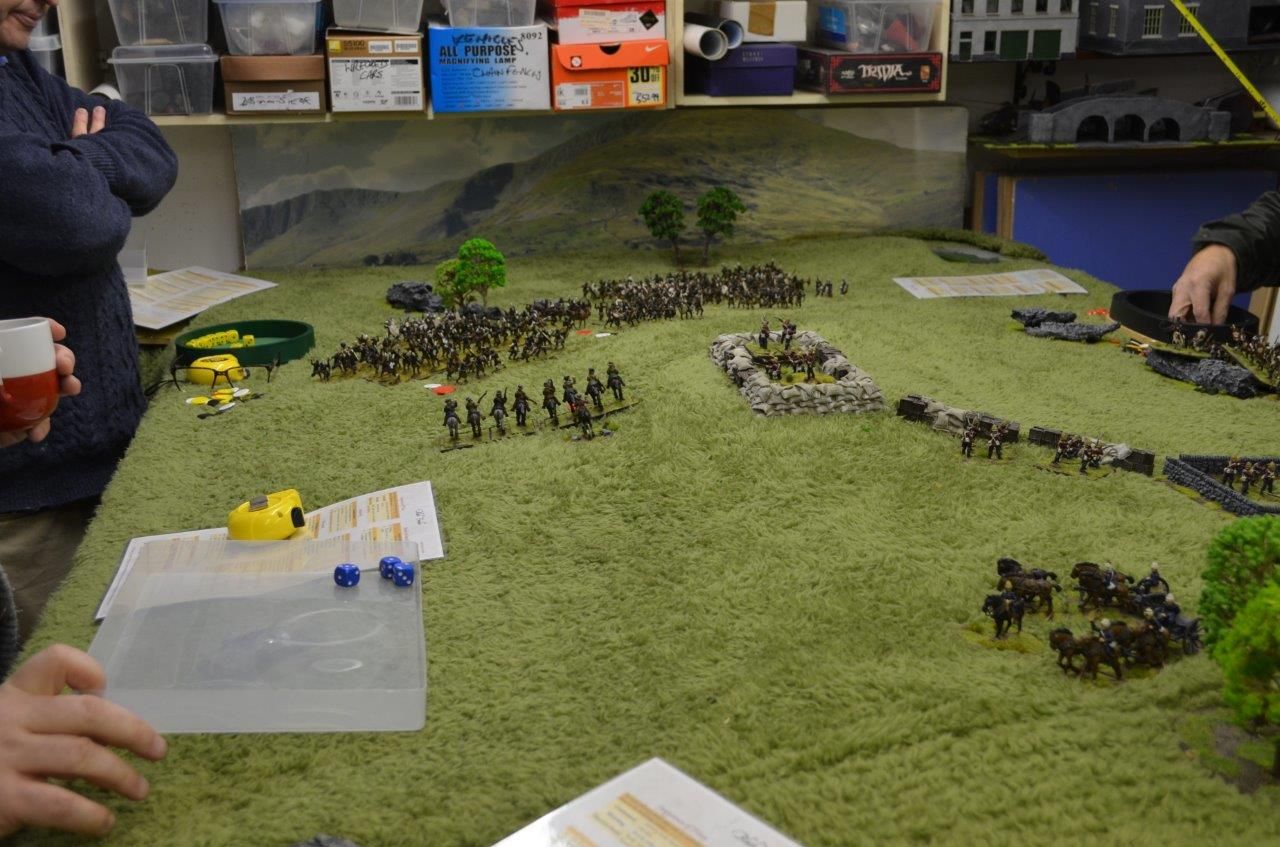
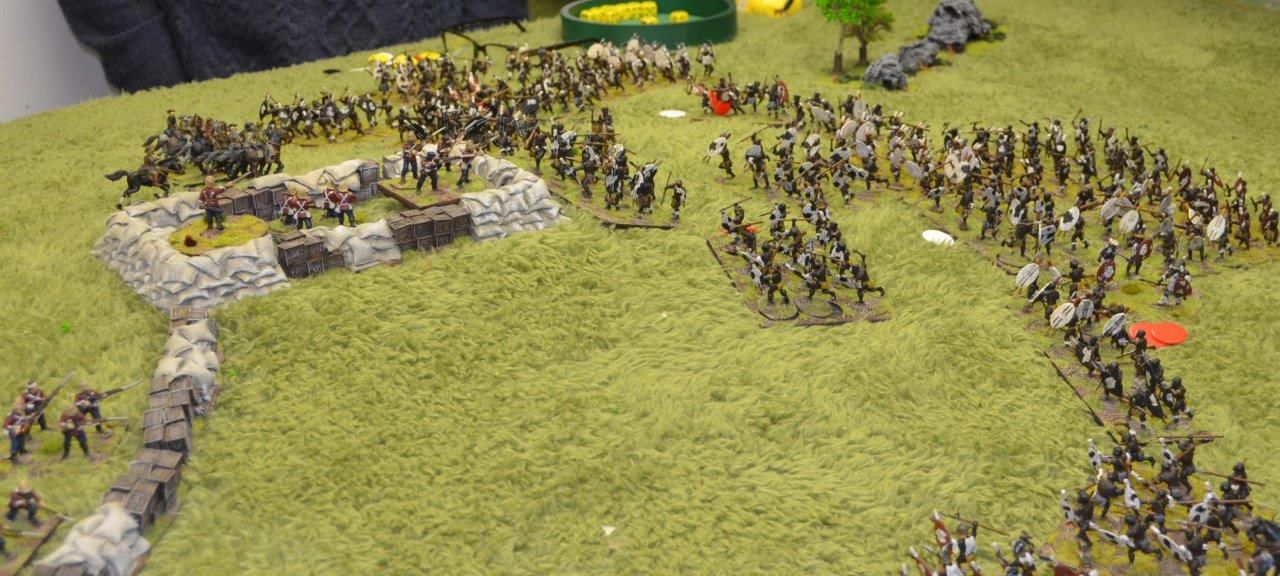
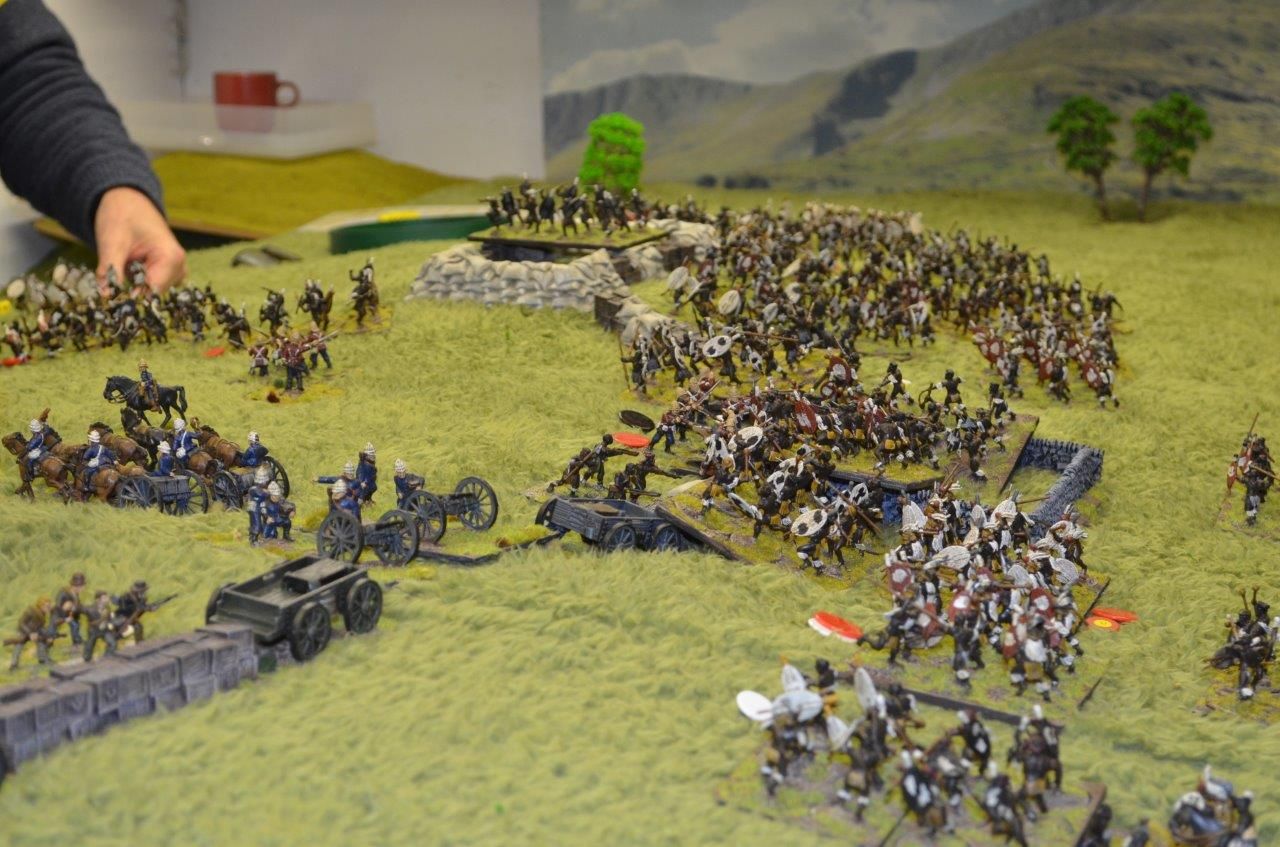
As far as the table was concerned I built the hill (using
parts of the Hastings construct) down the middle of the table. Length ways you
are looking from the west to east. The redoubt sits at the eastern end, the
cattle Kraal to its left on the southern side and the wagon laager in the
centre. The terrain bits came from my Rorkes drift set and it was a perfect
opportunity to use my cheap pencil sharpener wagons. As far as other terrain
features were concerned the battle reports I Have read suggest that the
southern side of the hill was traversed by a ravine hiding the Zulus until they
got to the lip of the hill. We recoignised this by stating that anuy unit
touchoing the base line was in the ravise and to escalate this cost a full
move. To the west lay boggy ground and the left wing could only traverse if
they rolled 4+.
The British units were deployed as per the original battle
includer Bullers cavalry out to the far east goading the Zulu right horn into
attack. The centre of the Zulus forces would come in from the south and the
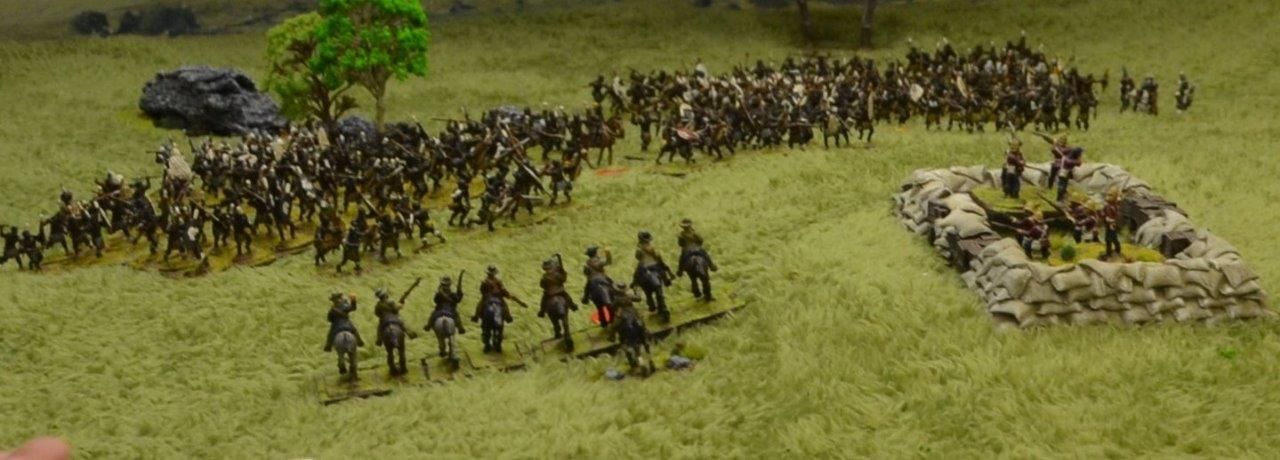
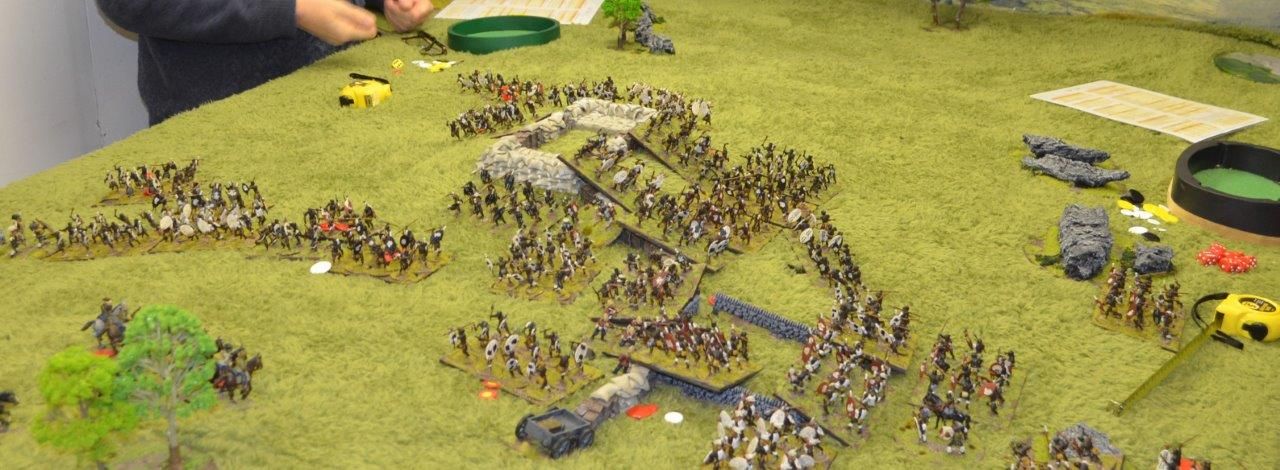
right horn from the Southwest.
 |
| The Zulus emerge in the East (top) and the South |
 |
| More Zulus our in from the West |
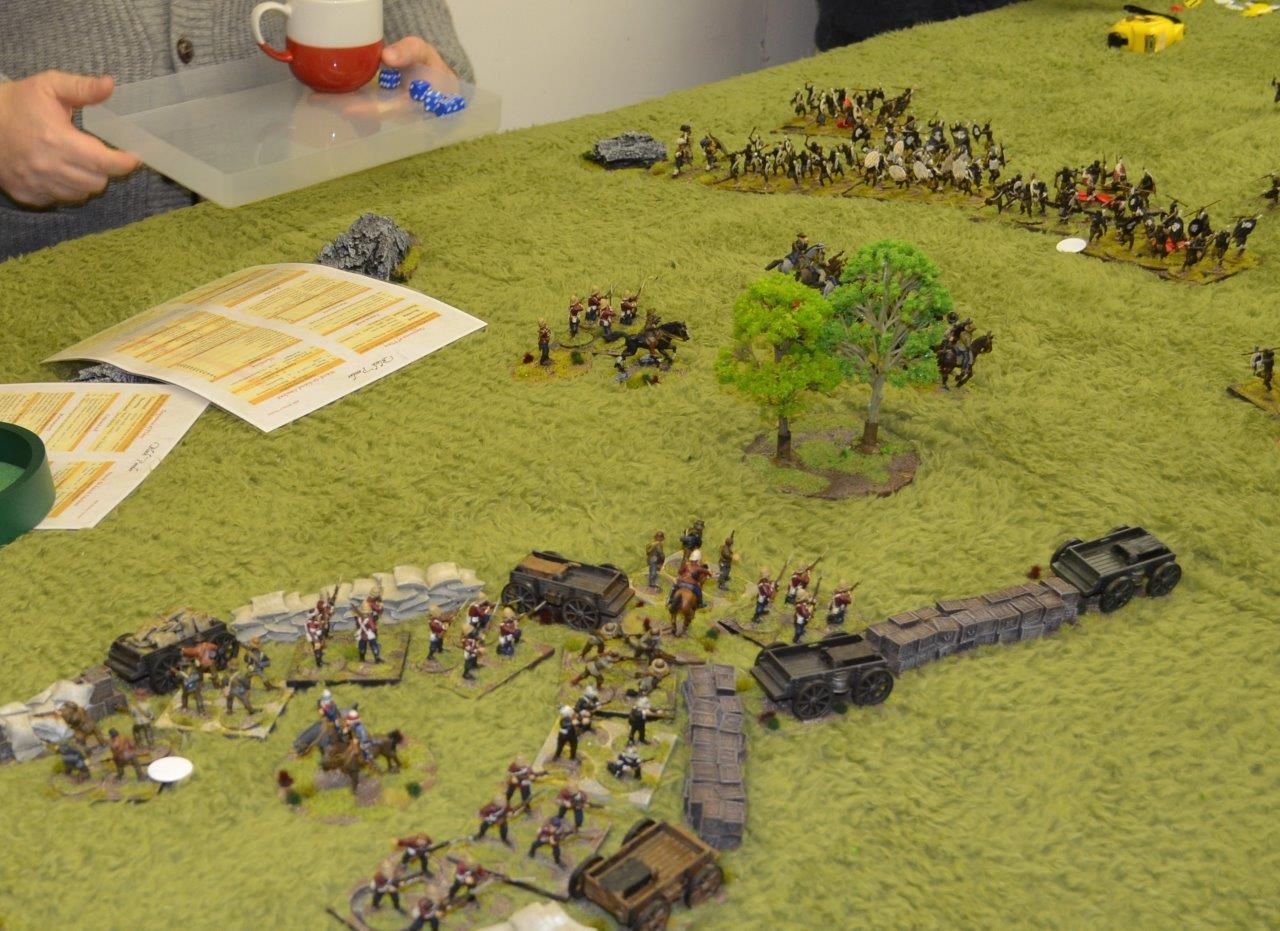
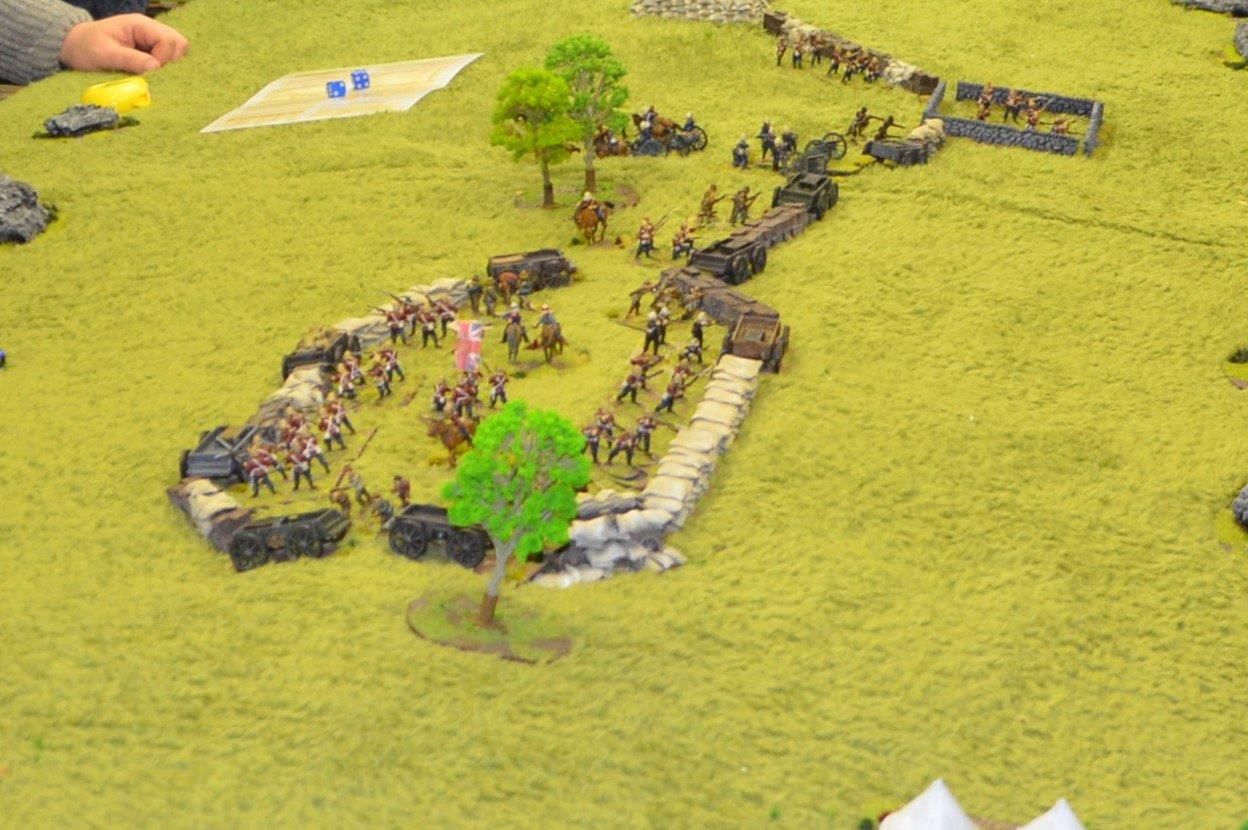 |
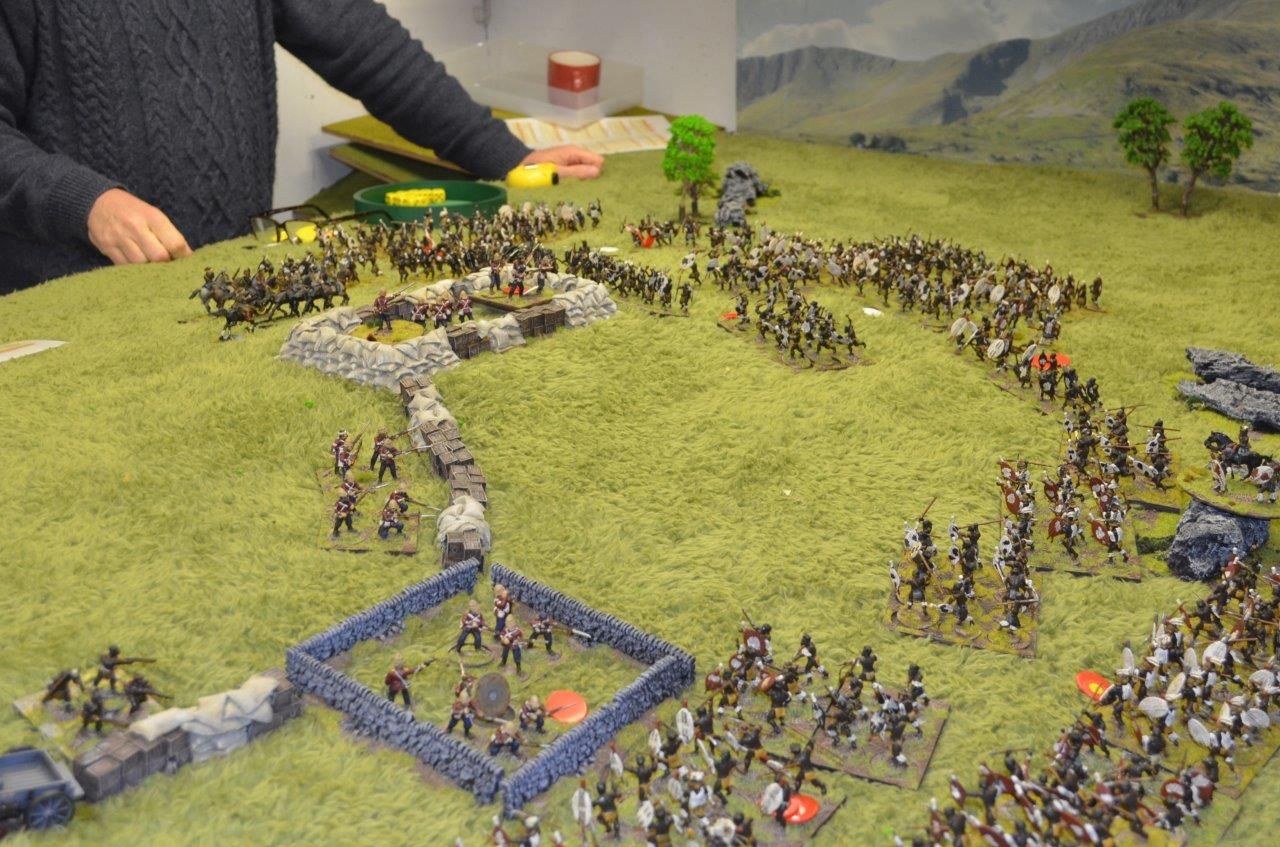
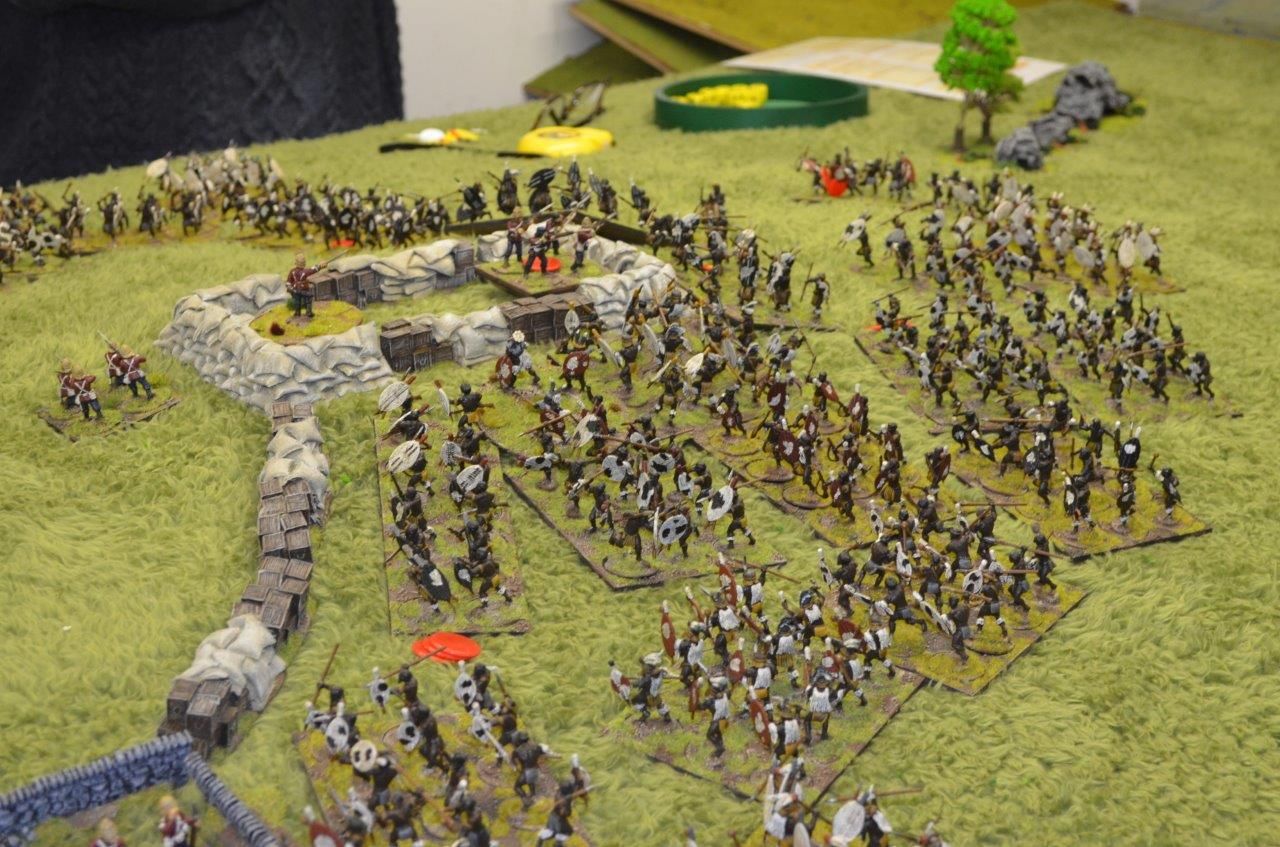
| The defenders stand ready |
 |
| Usuthu - the centre holds til the horns are engaged |
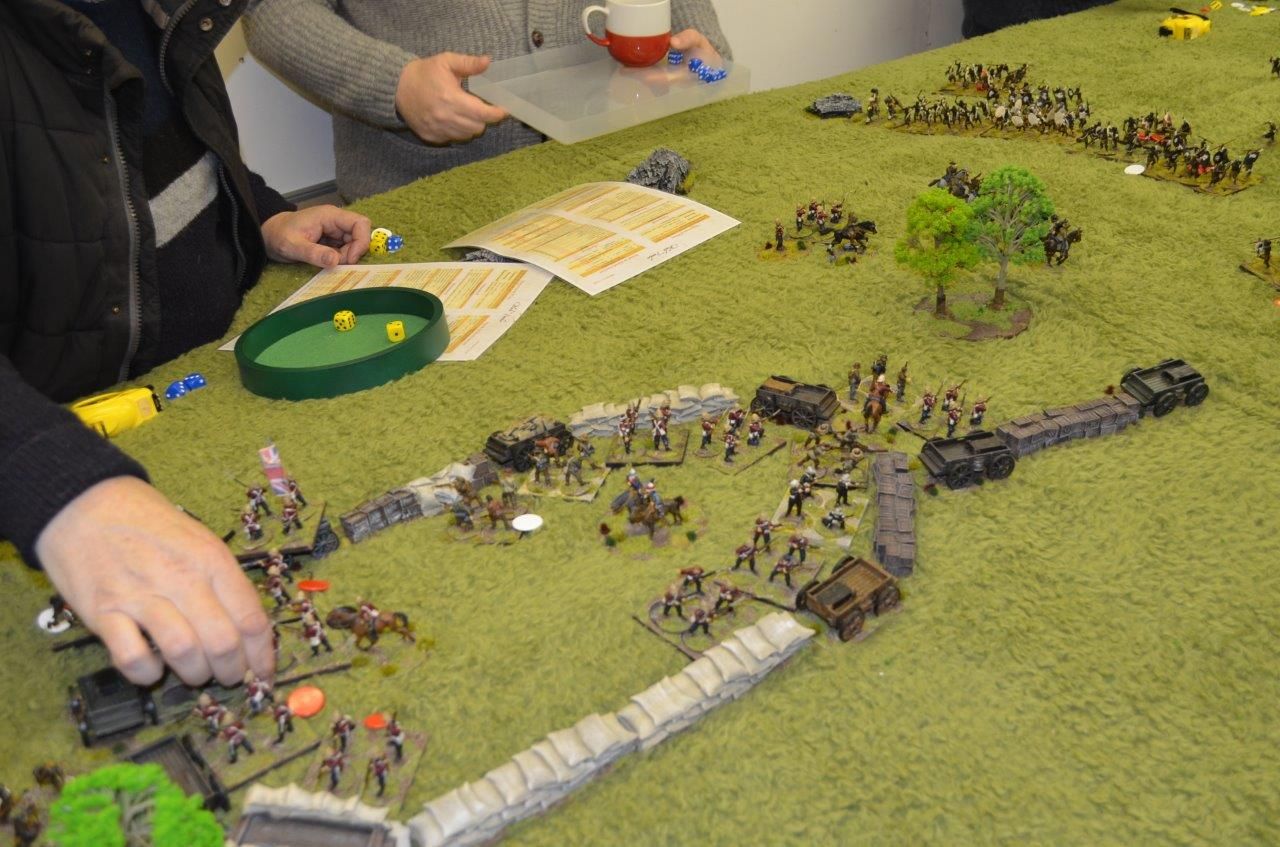
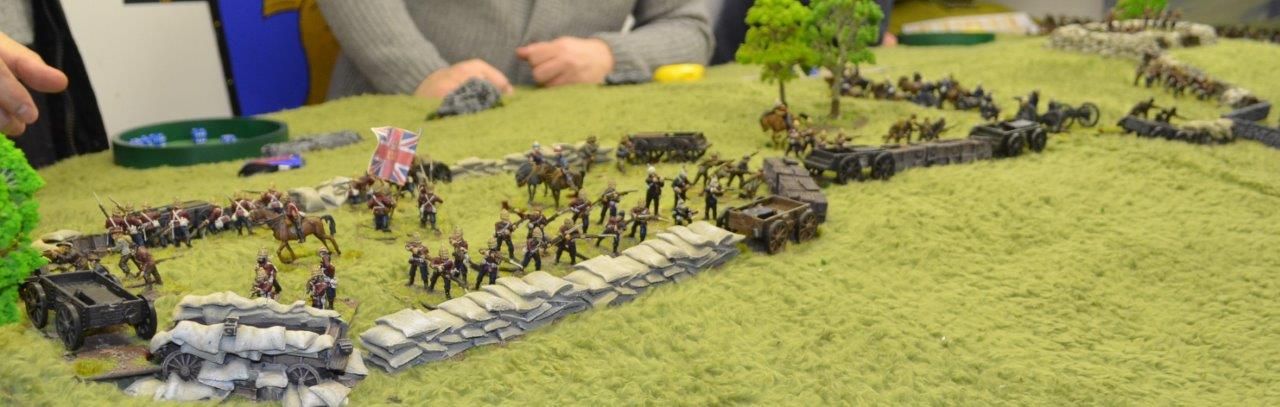 |
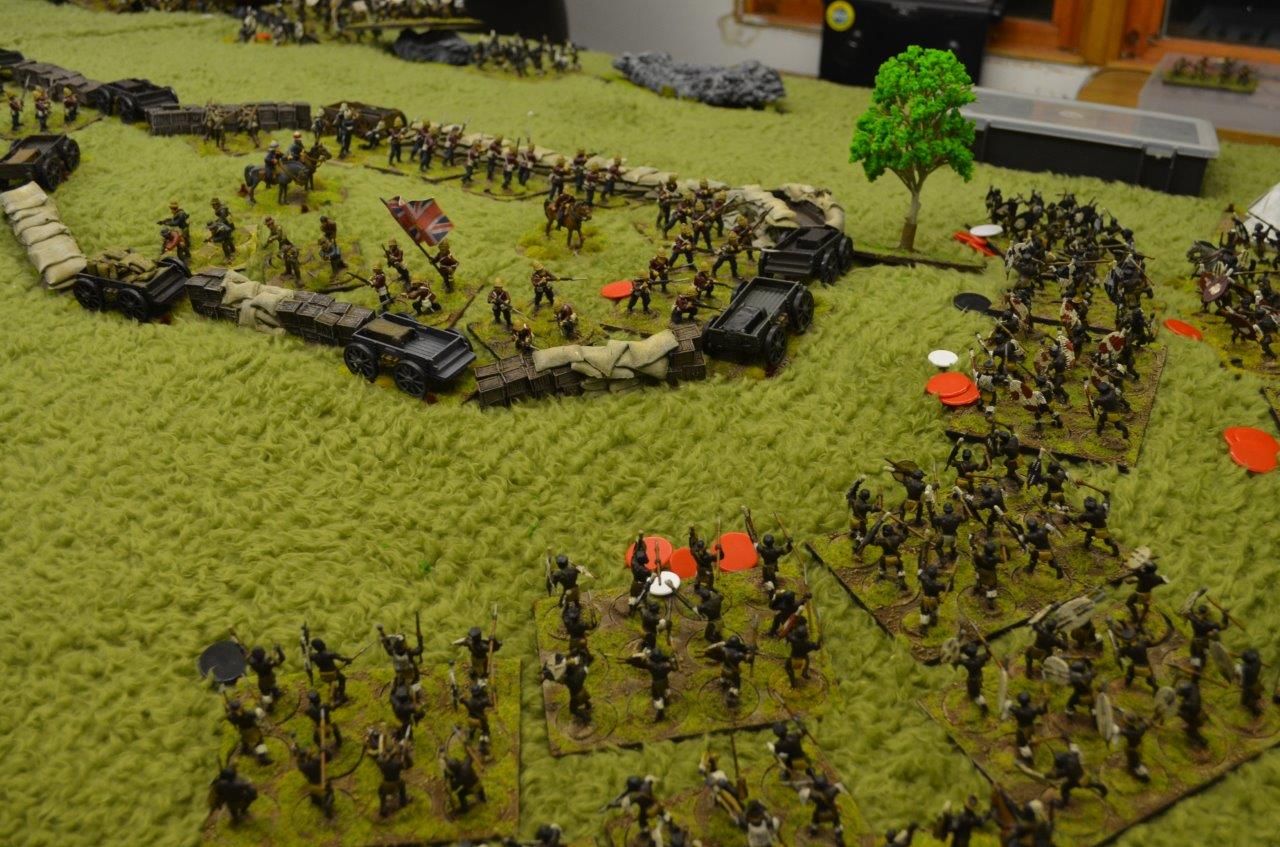
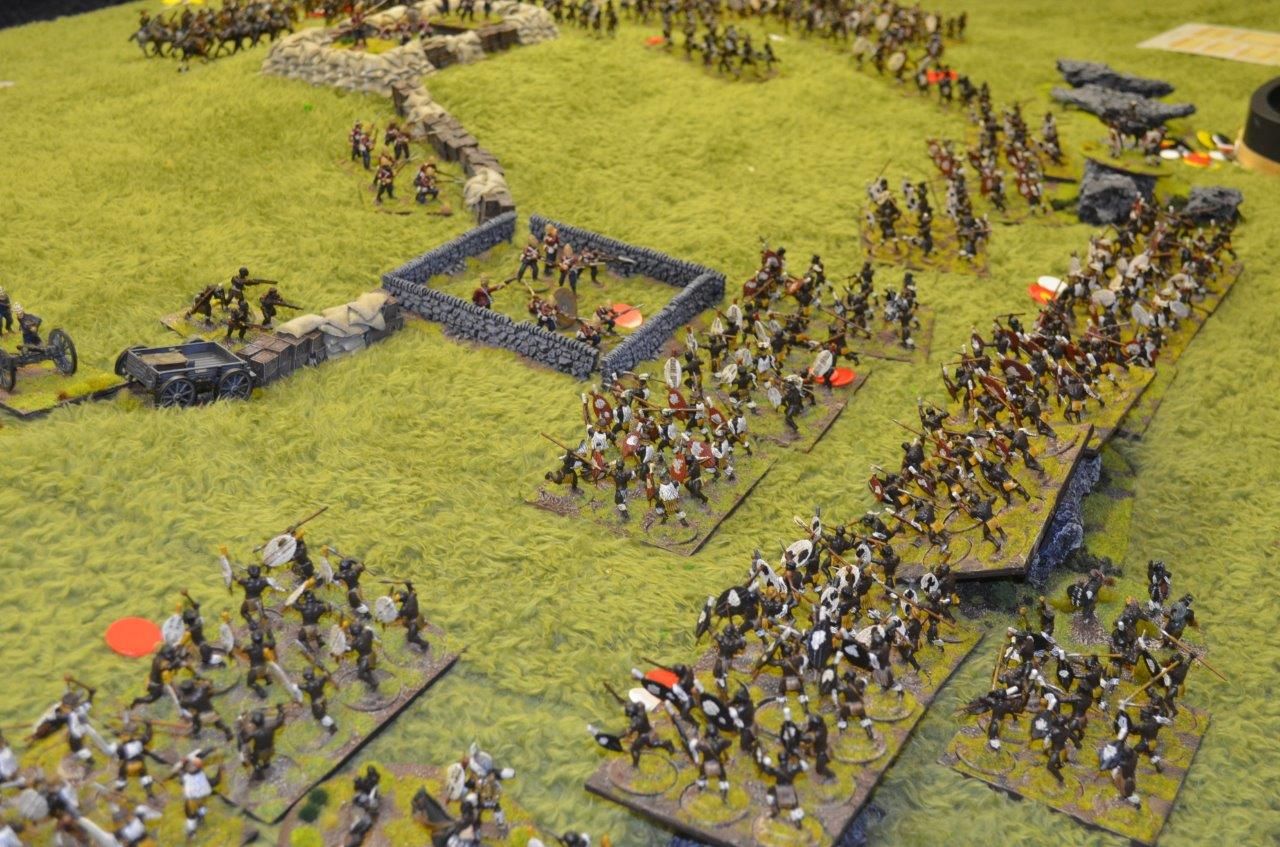
| Companies disperse along the barricades |
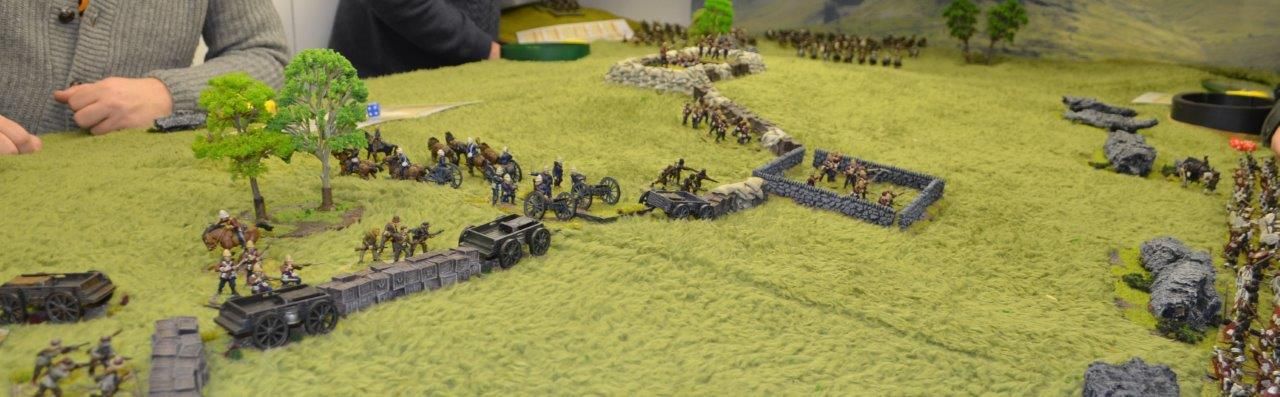 |
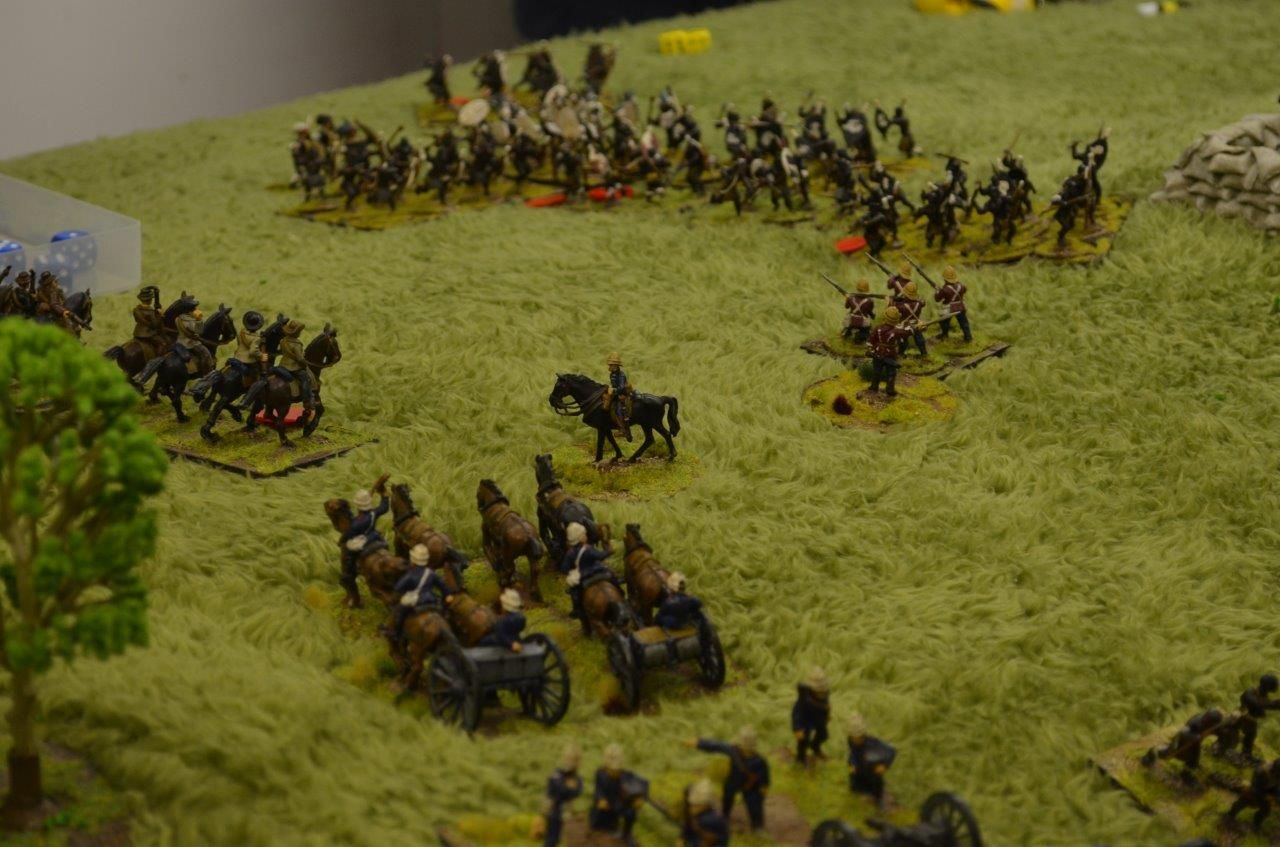
| The British centre supported by artillery |
 |
| Bullers cavalry in the distance open up on the Zulu right |
 |
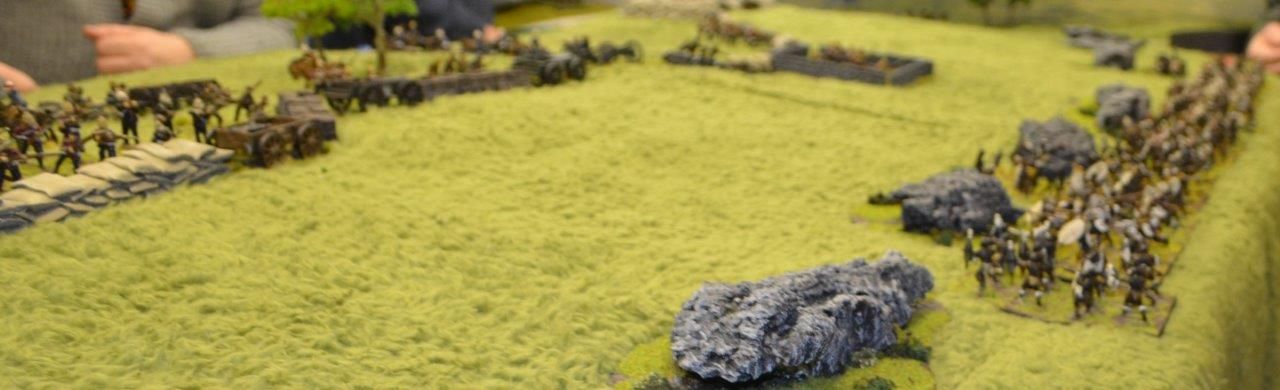
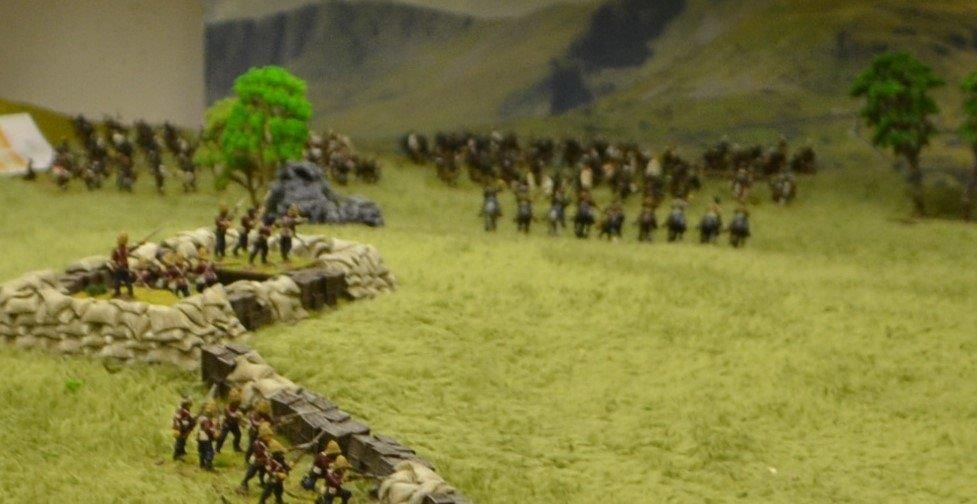
| The left Horn pours forward |
 |
| As does the right - the redoubtr is under threat |
 |
| The first assault is repulsed oin the Zulu left - just too many guns |
 |
| The right commences its climb up the hill under sporadic fire |
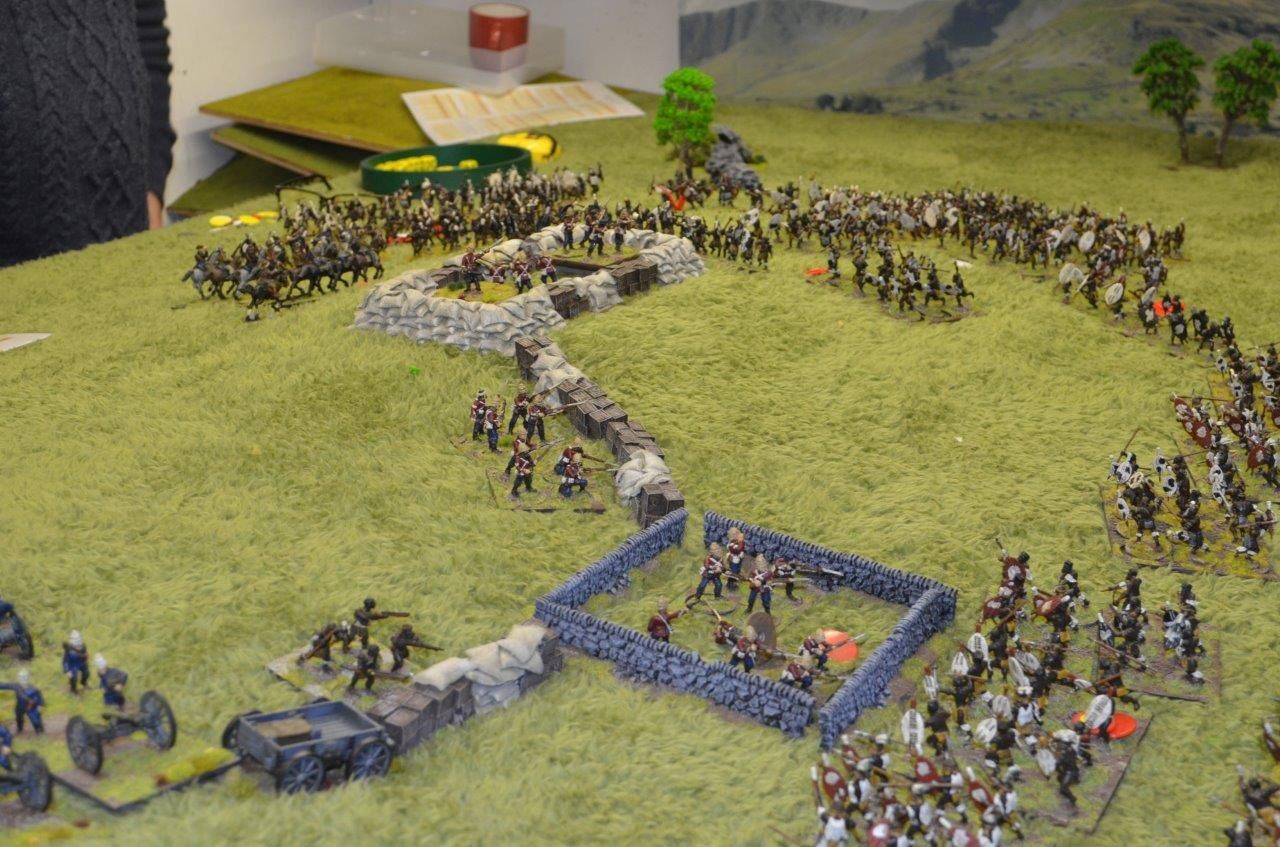 |
| The Redoubt comes under attack |
 |
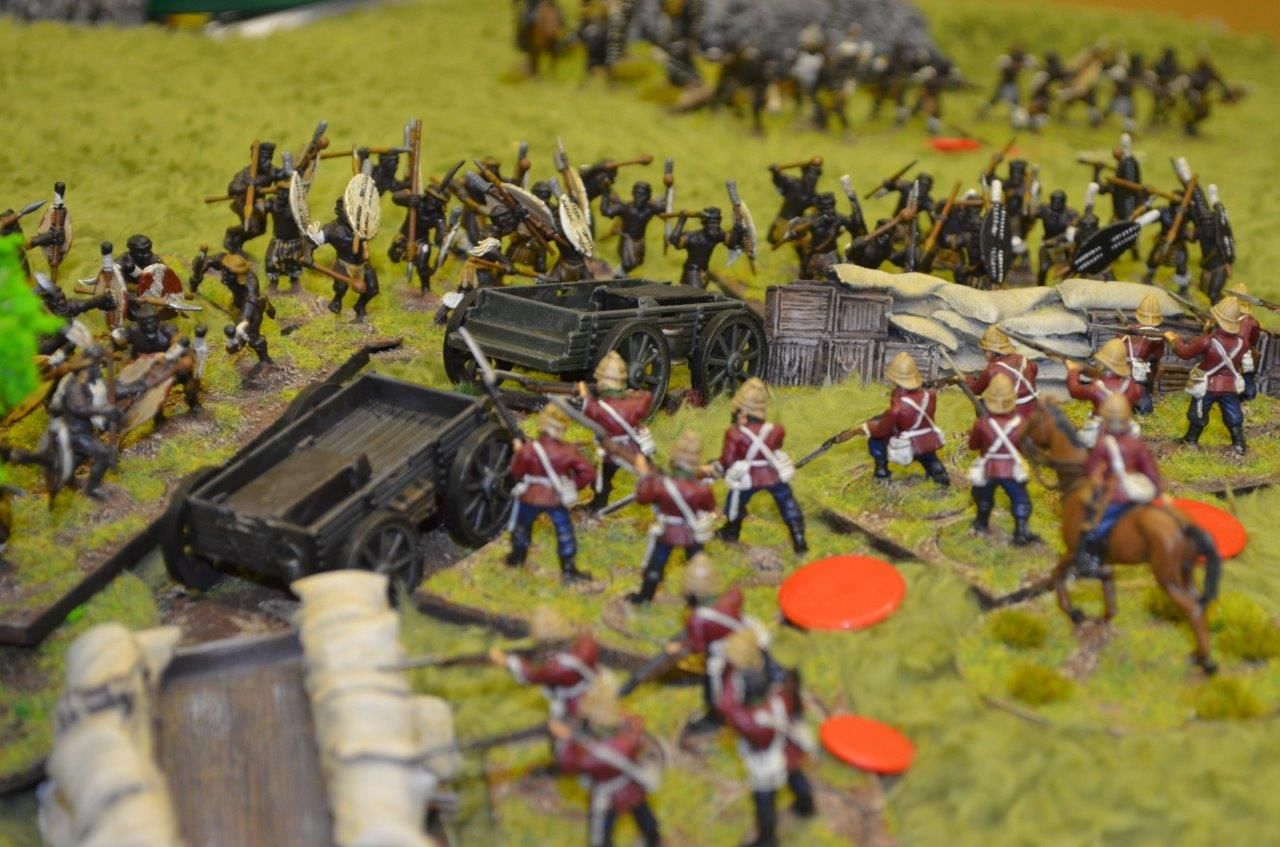
| Zulus crash against the defences but the Brits hold on |
 |
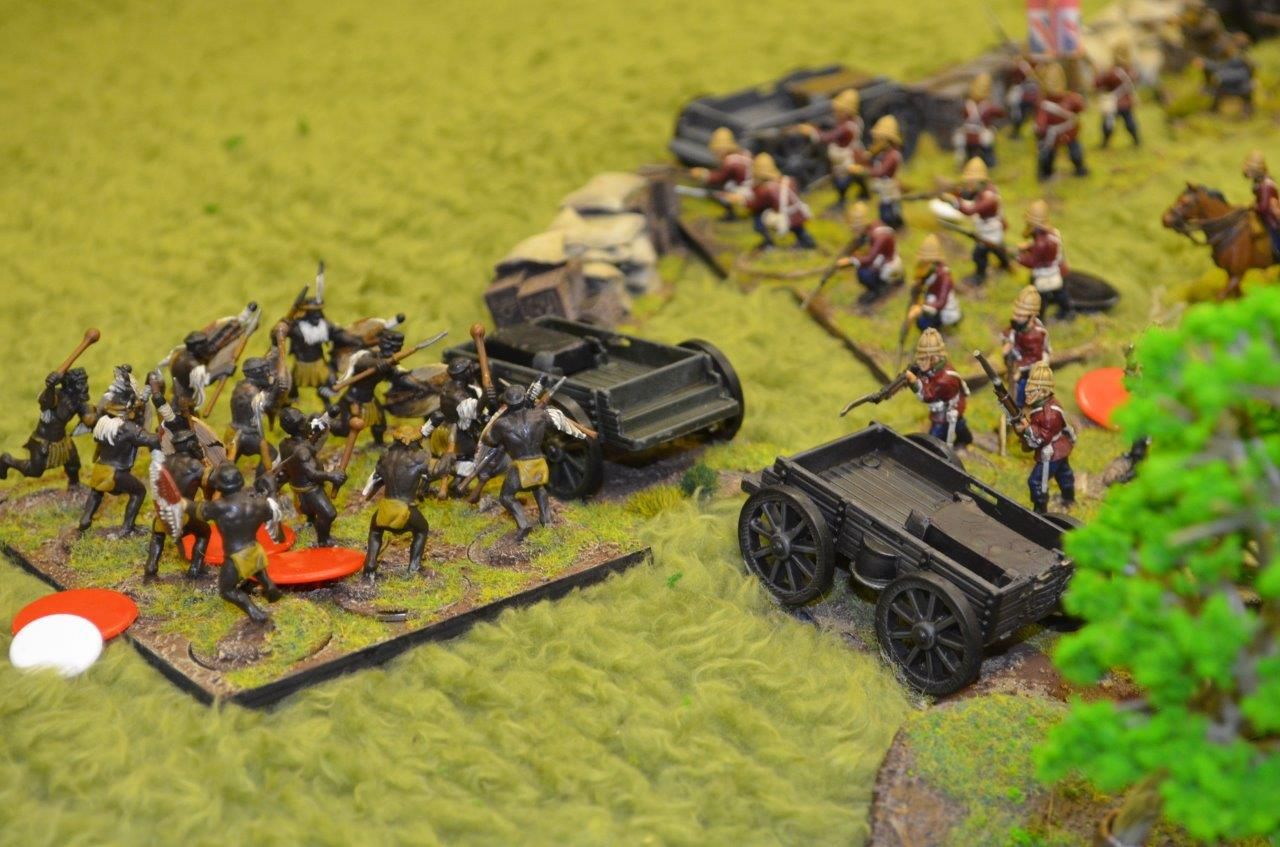
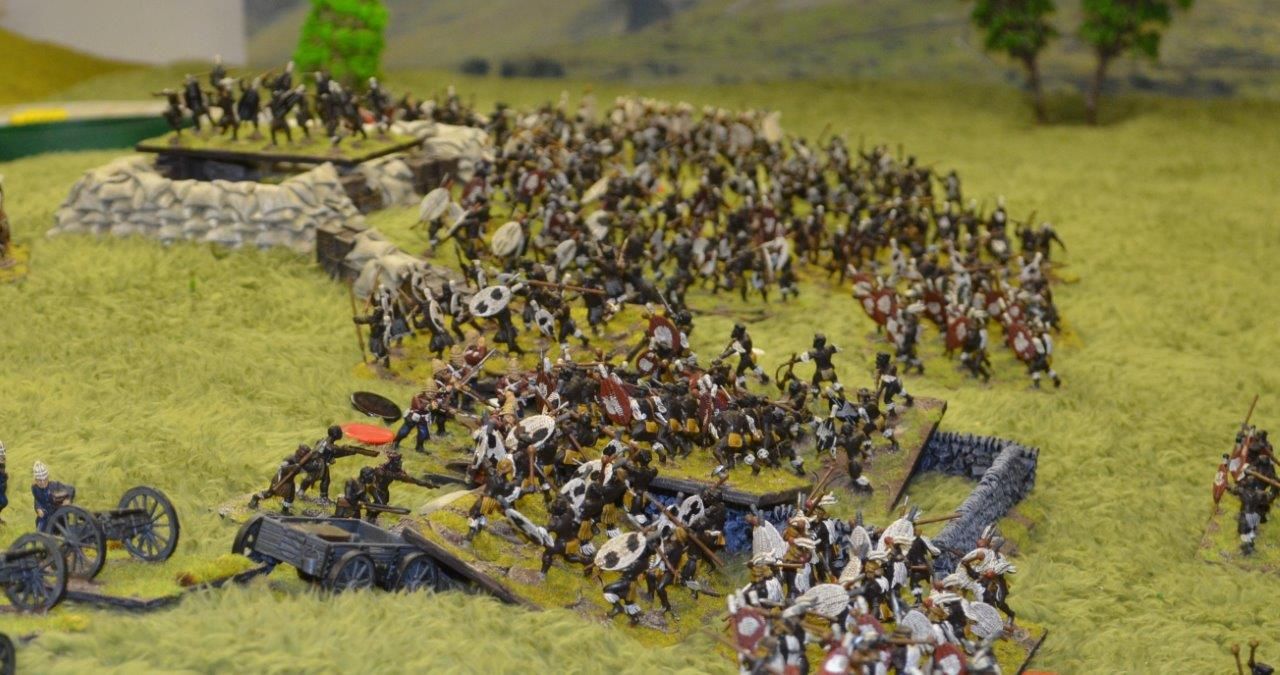
| The Cattle Kraal is under attack |
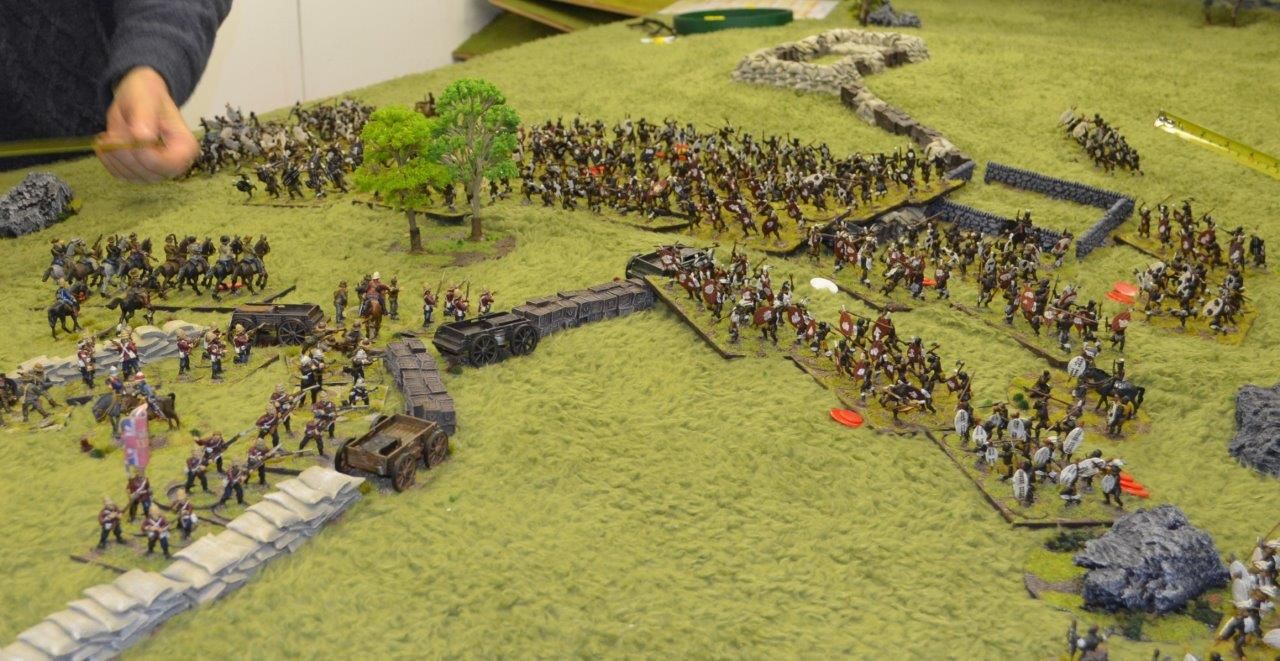
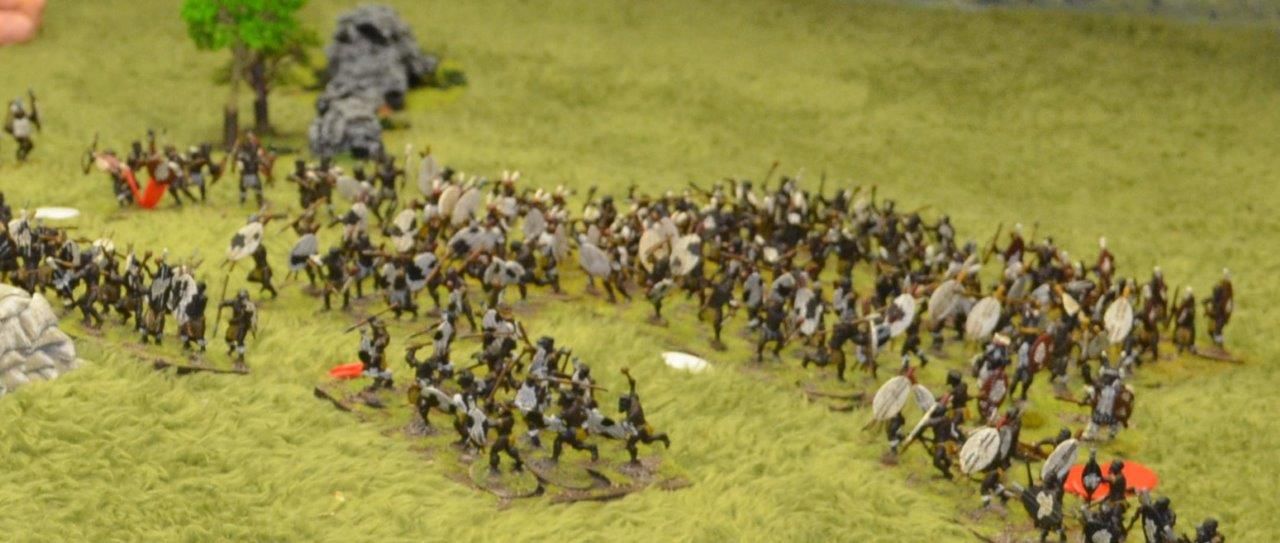 |
| More Zulus rush forward ready to wash their spears |
 |
| The last stand of the redoubt as one company meets its demise |
 |
| A lone zulu unit braves fire from the Laager and is repulsed |
 |
| The plucky redcoats are just holding on in the Kraal |
 |
| The redoubt falls |
 |
| The Kraal falls - the Zulus rush on |
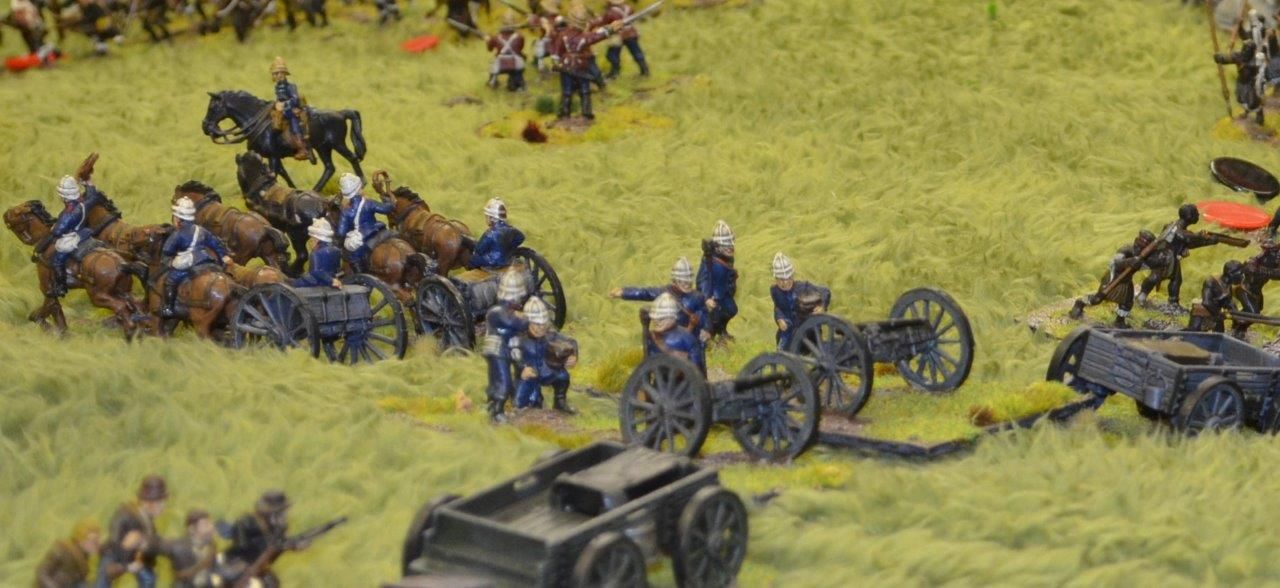 |
| The batteries are blasting away but get caught in the open. |
 |
| The guns are about to be wiped out. The Zulus are siezing the initiative on their right and centre |
 |
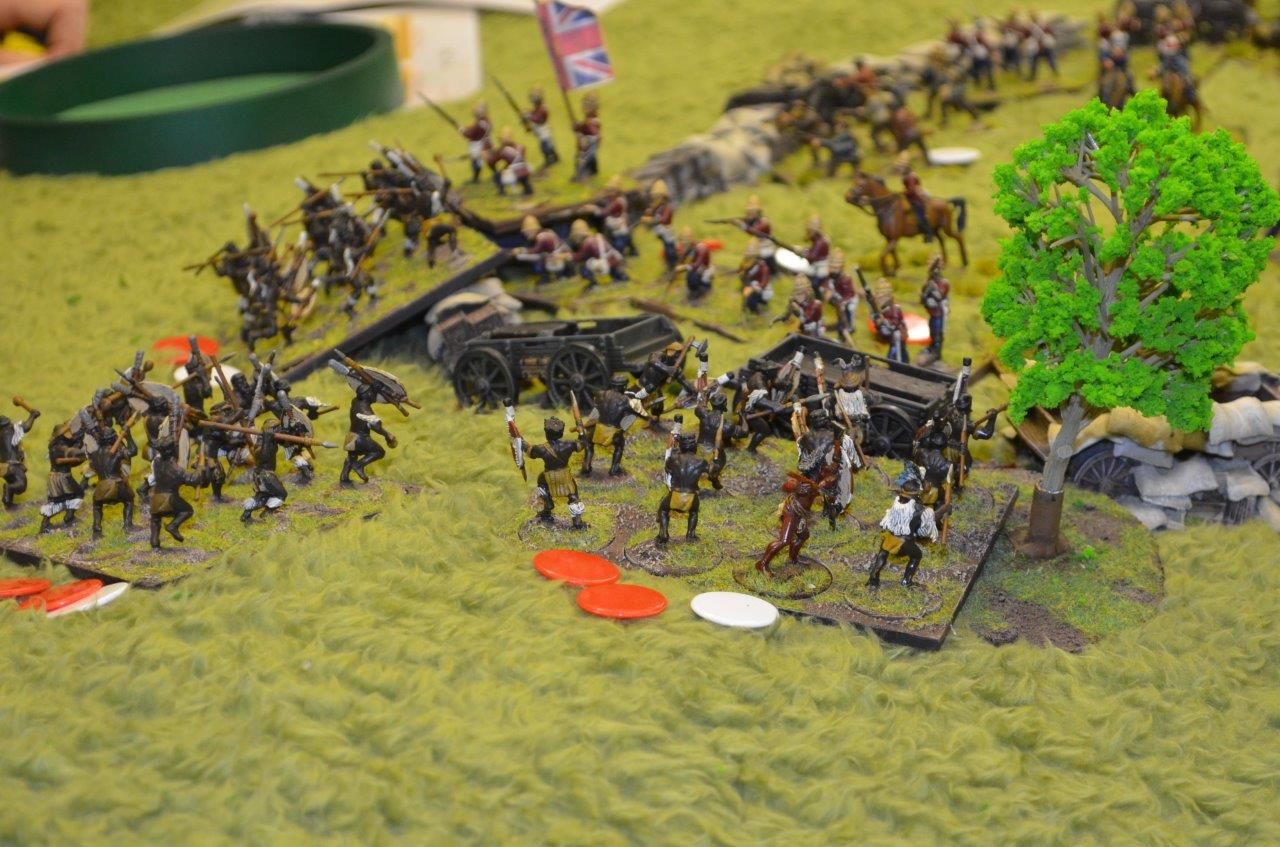
| A furious firefight erupts from behind the redoubt as the Zulus press on |
 |
| The Left horn finally attacks the Laager but get driven back in disarray - the Zulu left wing is virtually wiped out |
 |
| Defending the ramparts - independent fire at will |
 |
| With the British left gone remaining units rush to the safety of the Laager |
 |
| A lull as the Zulus ponder their next move - casualties have been extremely high |
 |
| With the left horn gone the Brits can redeploy |
 |
| The last stages of the battle - about half of the original zulu units are still intact - only tour british units and the guns have been taken down. With time running out the Zulus conceded feariing more lives would fall to the Martini Henry |
As a game this was a visual treat and despite my our best efforts
to break into the Laager early on we were thwarted by the massed ranks of British Infantry.
In the real battle the Zulus managed to take the cattle Kraal
but could get no further.
It is estimated that every allied soldier
shot on average 31 bullets – that’s 60,000 pieces of lead flying through the
air. The Zulus got their backsides kicked bigtime. In historical terms the
Brits lost about 80 men the Zulus close to 2000. A resounding British victory.
Although we failed to complete the game it was evident that the Zulus were going
to probably come off second best. The entire left wing had been destroyed and
much of the centre had suffered heavy casualties. A full assault on the laager
was possible but the bloodshed was going to be horrendous.
The group agreed that it was a relatively well balanced game, had fortune
shined on the Zulus they could have won albeit improbably. Its
interesting to note that when we fought Isandlwhana the British forces got
decimated – they had no cover, were too spread out and could never sieze the
initiative. In contrast, this game illustrated that a concentrated defence wins these types of battles.
A big thank you to all those that took part


A great game report, and a close run thing.
ReplyDeleteGreat looking game and well done for attempting a battle which is so obviously numerically challenging...and making it work out 🙂
ReplyDeleteIMpressive battle, and situation! Looks spectacular and fantastic!
ReplyDeleteFantastic looking game
ReplyDeleteAmazing battle!
ReplyDeleteSo the games and black powder give historical results. That's good.
ReplyDelete