Here we go folks ...as promised my take on 1066 Hastings. This is a long post but contains a load of information and pictures...please indulge me.
Twelve months ago I embarked on a project to bring the Battle of Hastings to the games table. As you will have seen over the last 12 months I have been painting up hundreds of plastic 28mm figures to realise this dream and in the last couple of weeks we have playtested the Hail Caesar rules to refight the other battles of 1066.
Sunday 10th March 2019 was the culmination of
this project and I was delighted to finally bring Hastings to life. As you will
read in the following text the table for the game needed to be of a certain
size, and sadly even the shed could not deliver the space we needed. So I packed
Mrs Shed off to her parents for the day and took over our family room at the
back of the house to host the game.
A big thank you at this point to my fellow gamers who joined
me on that blustery Sunday morning.
Your enthusiasm and good humour created a fantastic day and one that will live on in memory for a long time.
This was an iconic battle that changed the course of English history and so to do it justice this is going to be a long post. This post will not only our game but also my research, the orders of battle and the various house rules and components we introduced to support this event.
Should any readers want to use this in their own recreations please feel free to do so, just give this blog a nod 😉
Setting the Table
Settling on the Size of table
I am very aware that there is some dispute over the real location of the actual battle but for the purposes of this game we will be fighting this engagement at Senlac Hill with the Saxon line ranged across the top of the hill where Battle Abbey now stands.
In order to scale this battlefield we can use the dimensions of crest of the hill that Harold was defending. His flanks were guarded by woodlands and steep climbs up the sides and reverse of the hill. William’s only choice was a frontal assault.
The frontage of Harold’s position was about half a mile in width (approximately 800 meters). With a troop ratio of 1-10 this would mean we need a scaled frontage of about 80metres.
The following calculations illustrate on how I arrived at a scaled view of the Saxon frontline.
Using a scale of 28mm = 1.5metres (the height of an average man in 1066) the games table would need to be 1.5metres wide for a ratio of 1 to 10.
Calculation: 80 metres divided by 1.5 multiplied by 28 – 1.45 meters.
Such a table is too narrow for our game but clearly illustrates how tight this battlefield really was.
More calculations needed….
1. On the basis that each Saxon warrior is standing shoulder to shoulder with his neighbour in the shield wall the total number of actual troops in the front rank would have been about 1300 men (I have worked on the assumption that each man needs 60cm of space – around 2ft).
The historical records talk of the ranks as being so tightly packed the dead remained standing up !
2. Such a frontage of troops means that there would have been at least 6 ranks of Saxons facing the Normans. So on our scaled map I need 130 men facing the Normans in the first rank.
3. However, my figures are not based in tight formation. Each of my figures is based with three of his mates on a 5cm x 5cm base (so each man occupies 2.5cm of game table frontage).
4. By multiplying the 130 figures by 2.5cm gives a table width of 325cm – Decision the table will be 3 metres wide.
This means my final ground scale is now 1cm = 2.6m (80 metres divided by 3 meters on the table)
As far as the depth of the battlefield is concerned we will need to illustrate the top of the hill, the hill itself and the valley where the Normans mustered.
The Hail Caesar rules give bows of this period a range of 18 inches (45 cm) – using our ground scale this means these bows can shoot (45cm x 2.6metres) around 117 meters – according to my internet searches the bows of the time had a killing range of about 90 meters so I think we can keep these ranges as they are.
Given the real battle started with the Norman Archers shooting at the shieldwall we should keep the forces a minimum of 60cm apart. This way the archers will have to advance into range when they want to shoot.
As far as the Saxon Line is concerned I reckon 60cm of depth from table edge to front rank would be sufficient to denote the ridge at the top of the hill. The base edge of the Saxon line will be the point where the hill falls away.
Further reading on the battle suggests that the hill in front of the Norman varied in gradient from 1 in 8 to around 1 in 12. We can use an average of a 1 in 10 slope. (The flanks and reverse were much steeper) By making the slope 60cm in depth I can create an elevation of 6cm – enough to suggest a gentle slope and prevent the figures sliding down. A further 80cm on the valley floor provides a table depth of 2 metres
The battlefield needs to feature the slope – a small rise in the slope part way down the Saxon right flank (the hillock), the London road (more likely a track) running across the battlefield, and the marshy ground in the valley.
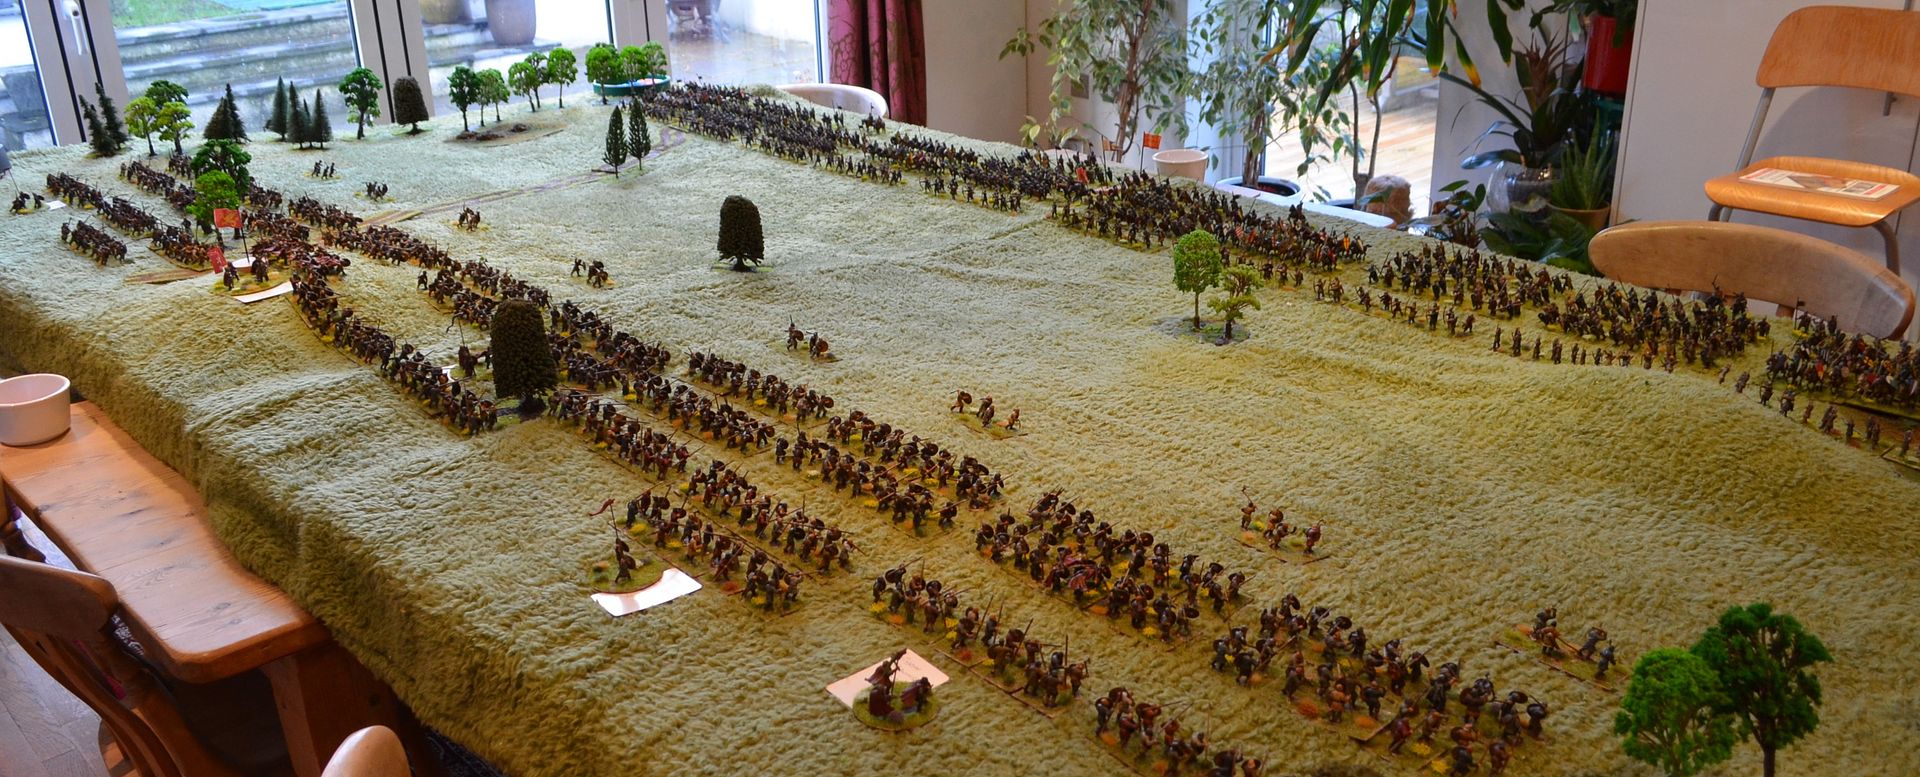
Using the kitchen table as the main support I constructed a
sturdy 3.5metre x 2 metre table in the middle of the room.
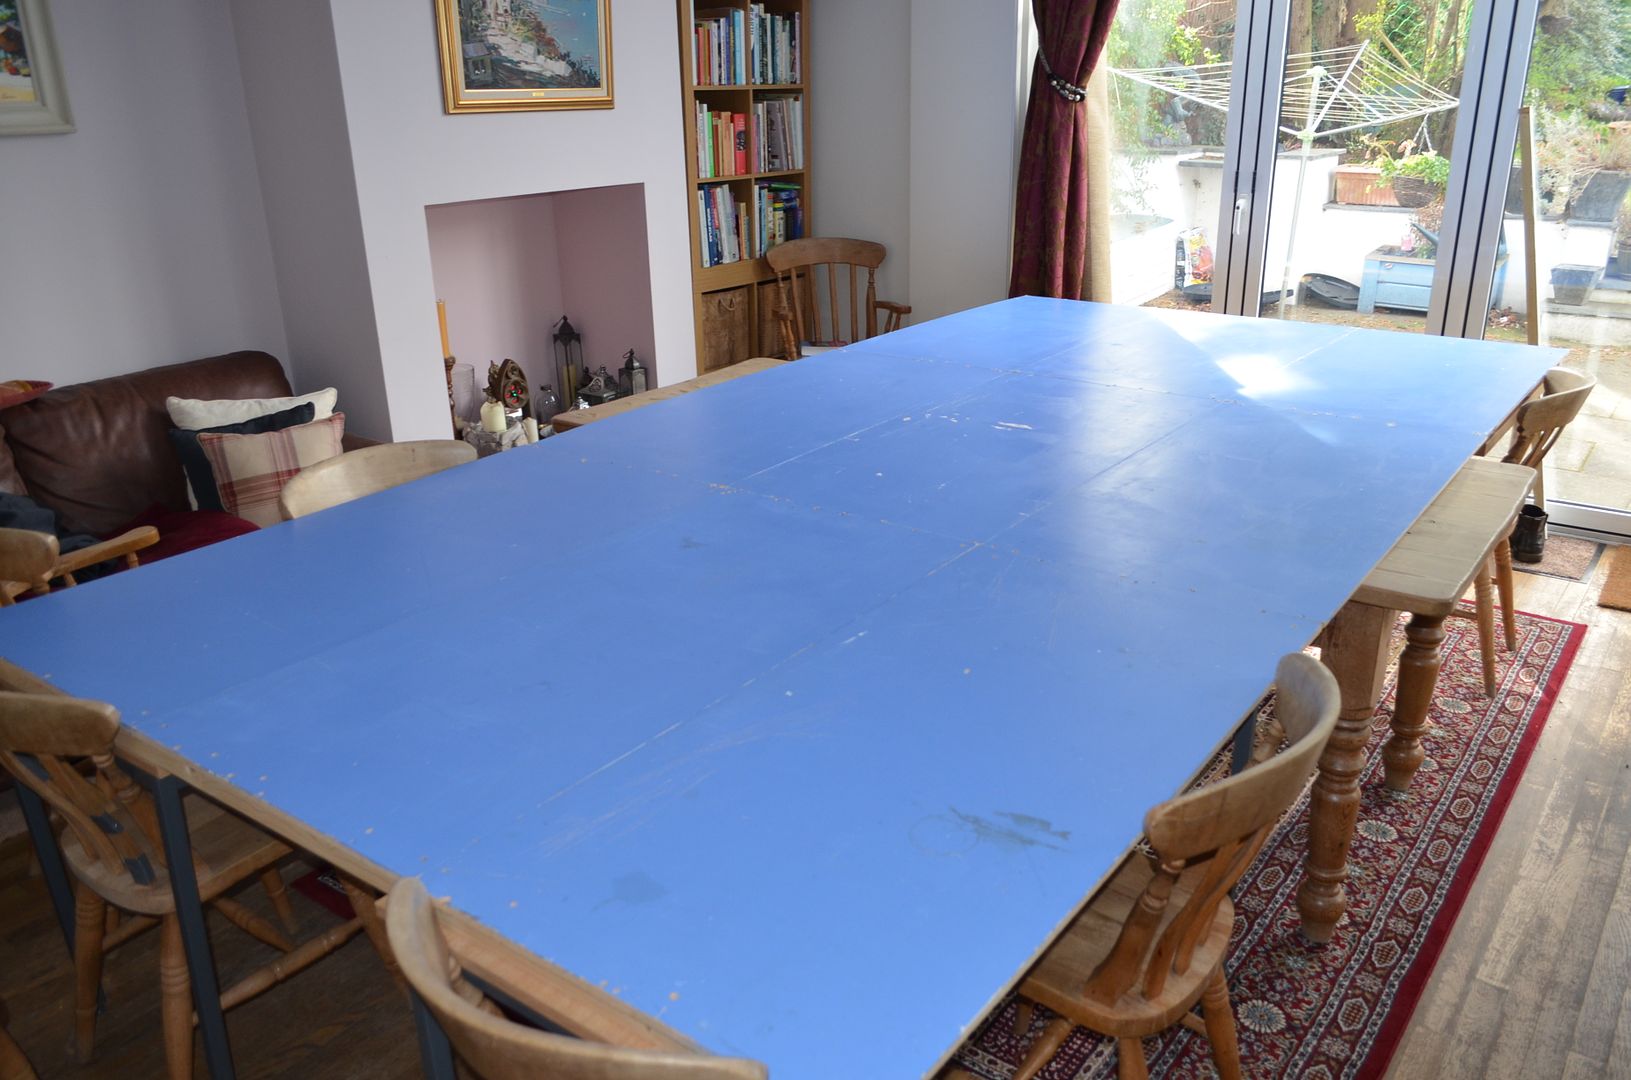 |
| The table |
 |
| Hill added - top of hill padded out with pink foam and boards |
 |
| Here you can see the slope |
Sitting astride the boards was a hill slope constructed from timber earlier in the week. Once my teddybear throw (2 stitched together) was thrown over and a few trees added the table was good to go.
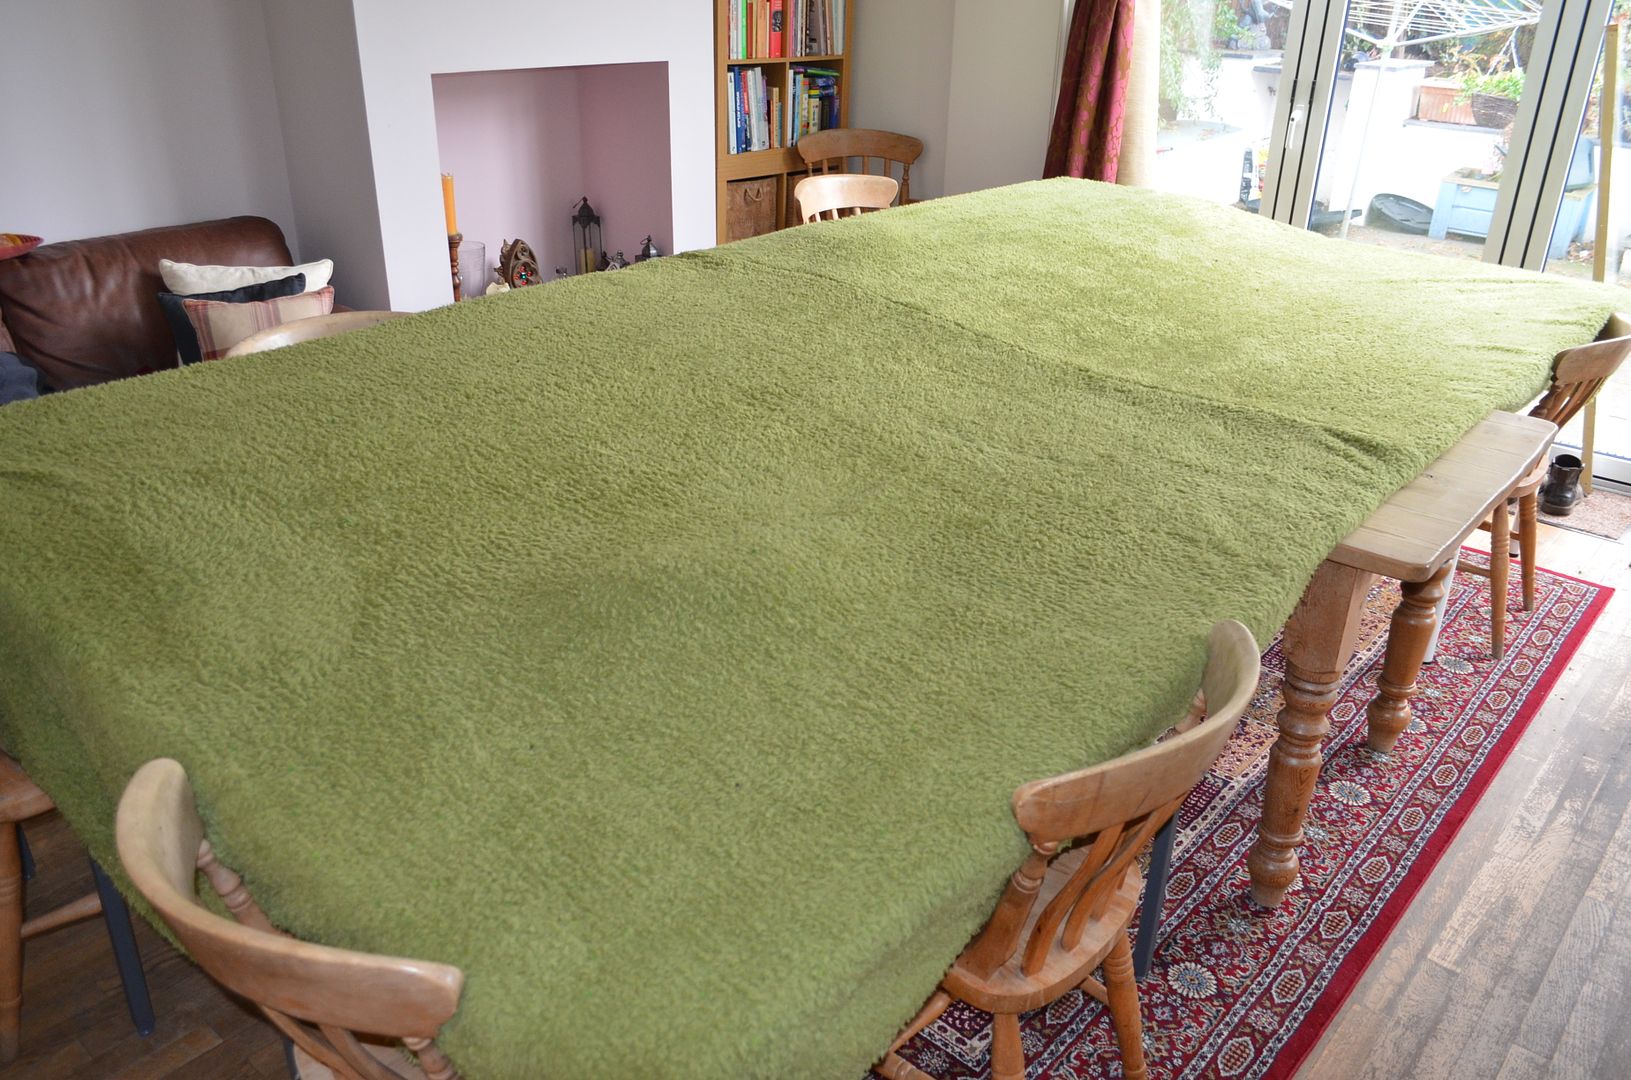 |
| Add one (actually two ) teddy bear throws. These were sold in Dunelm but are sadly no longer available |
All of the
troops on both sides (bar any Saxon reinforcements) will start on the table in
their deployed positions.
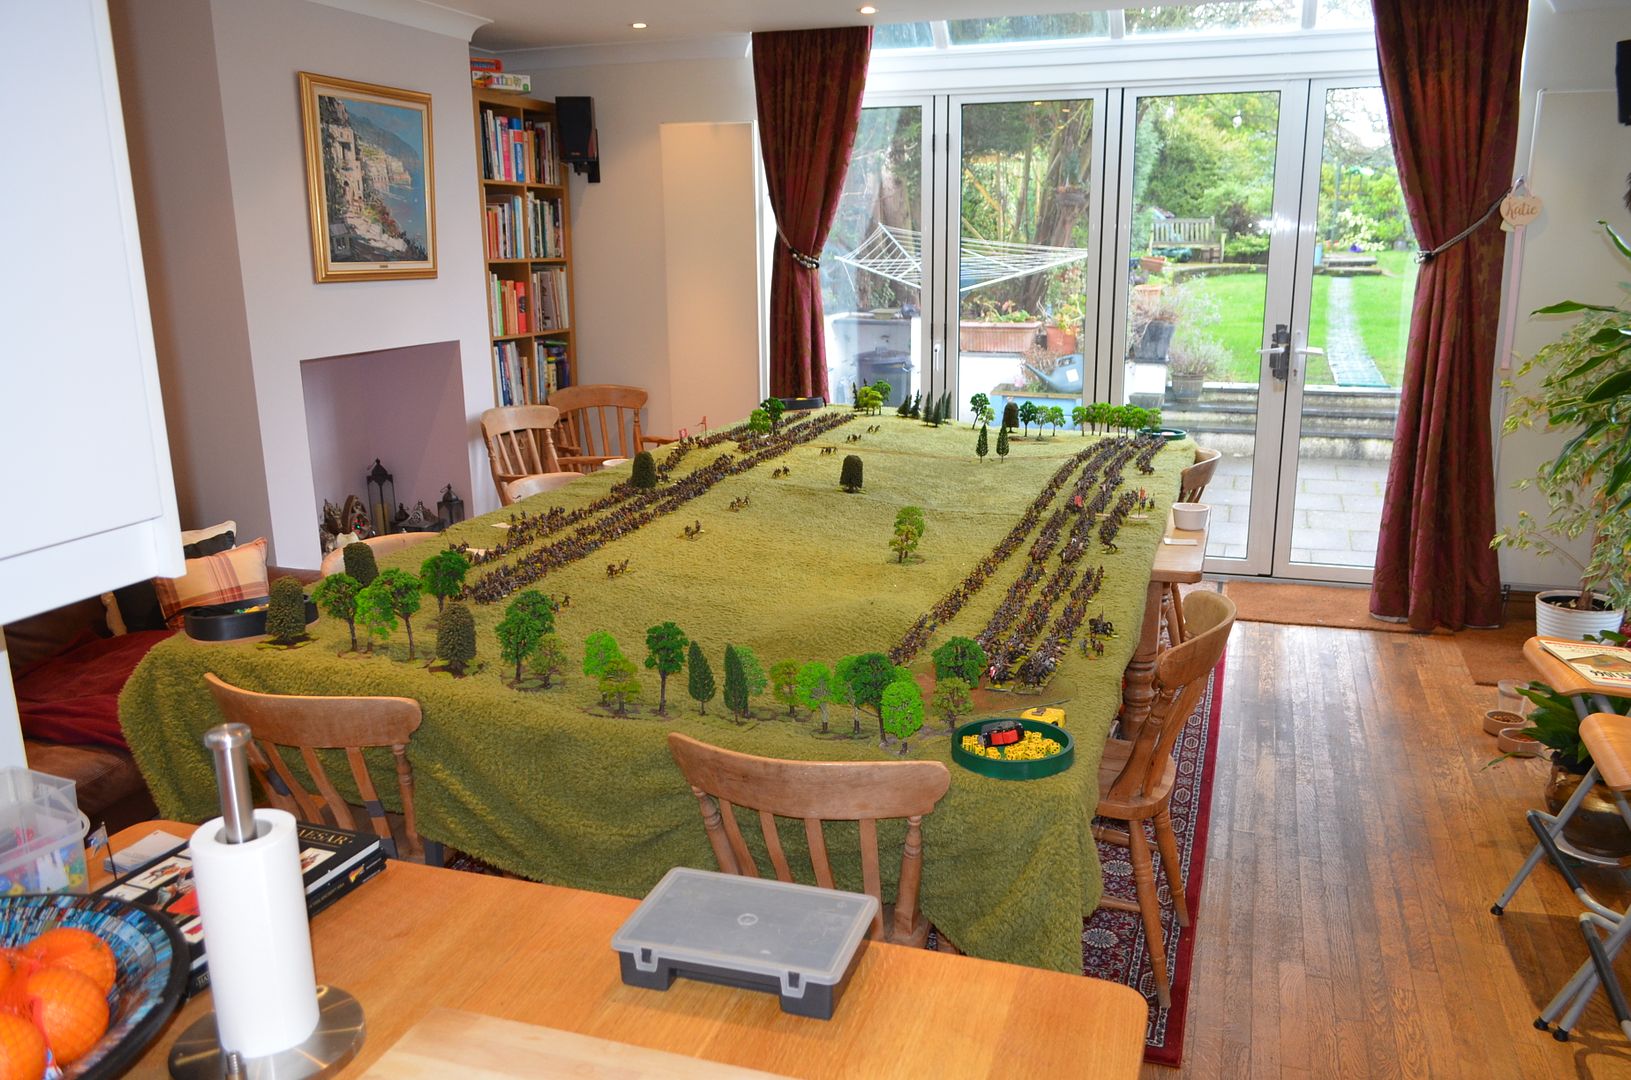
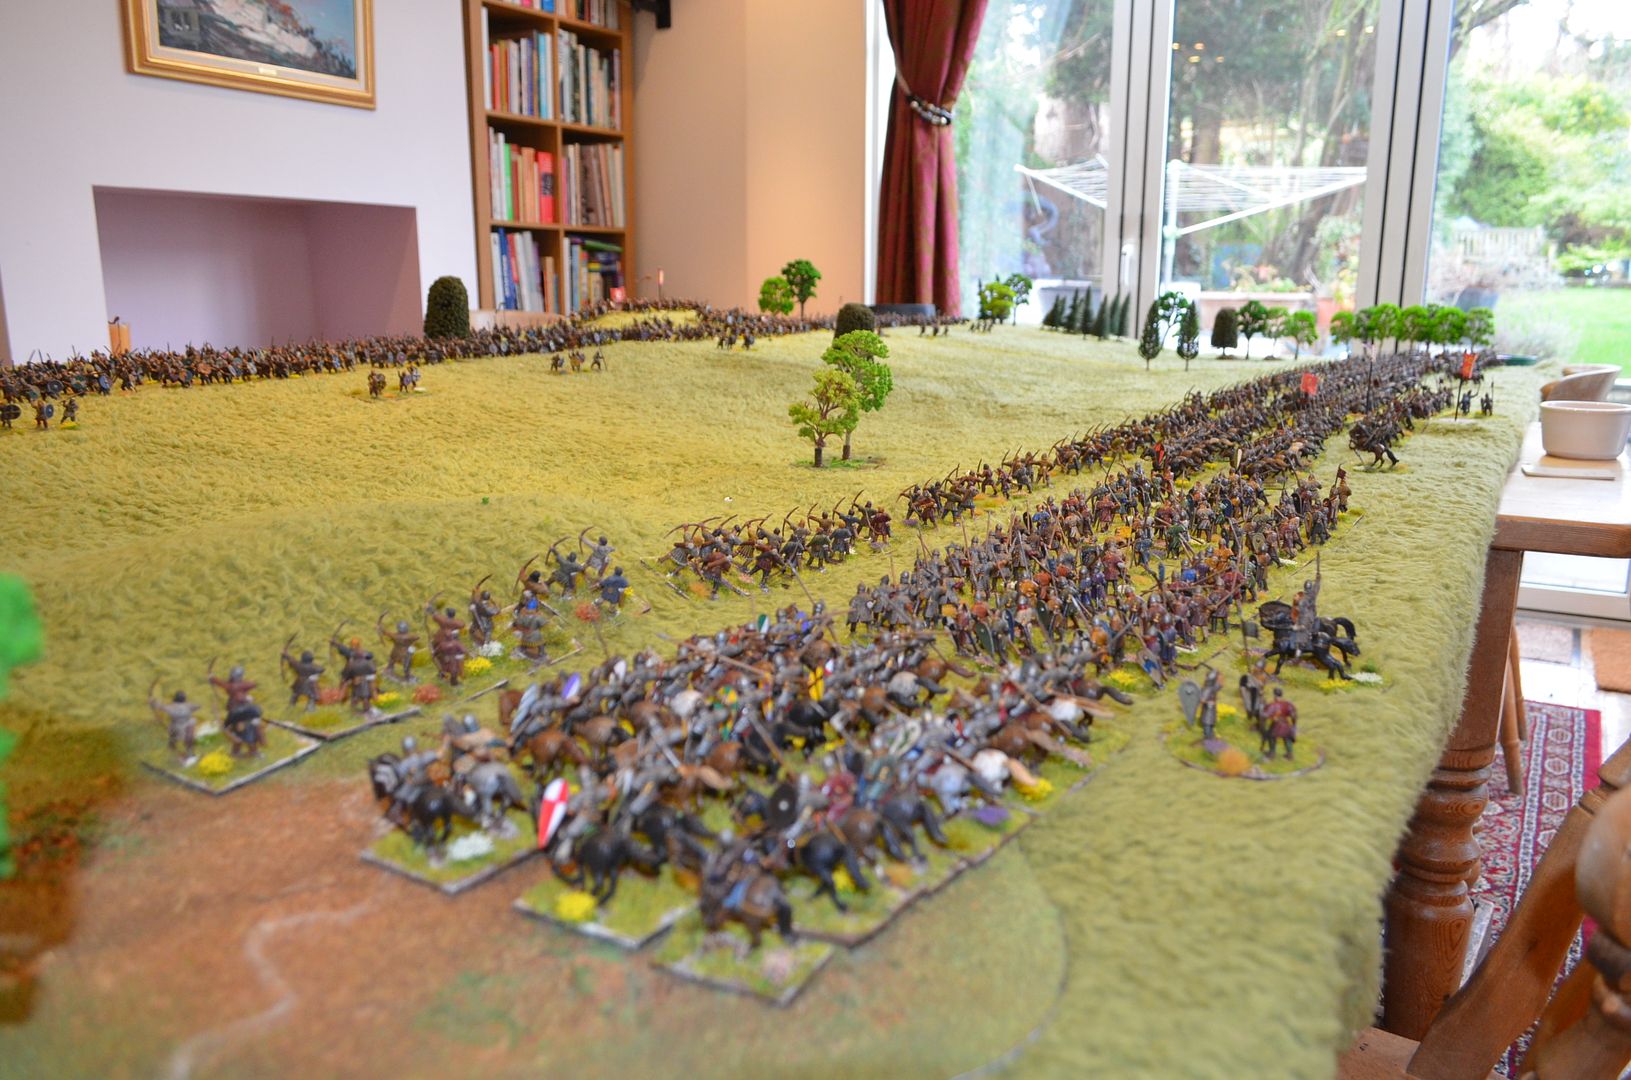
The best bit.....
Then came the very pleasant job of putting out all the
figures. This was the first time all of the figures had graced the table and
aside from a few odds and ends 95% of what I painted made it onto the field.
Standing back and looking at the finished article was a very proud moment.
Indeed when my gamer's arrived they
 |
| almost 1500 plastic soldiers |
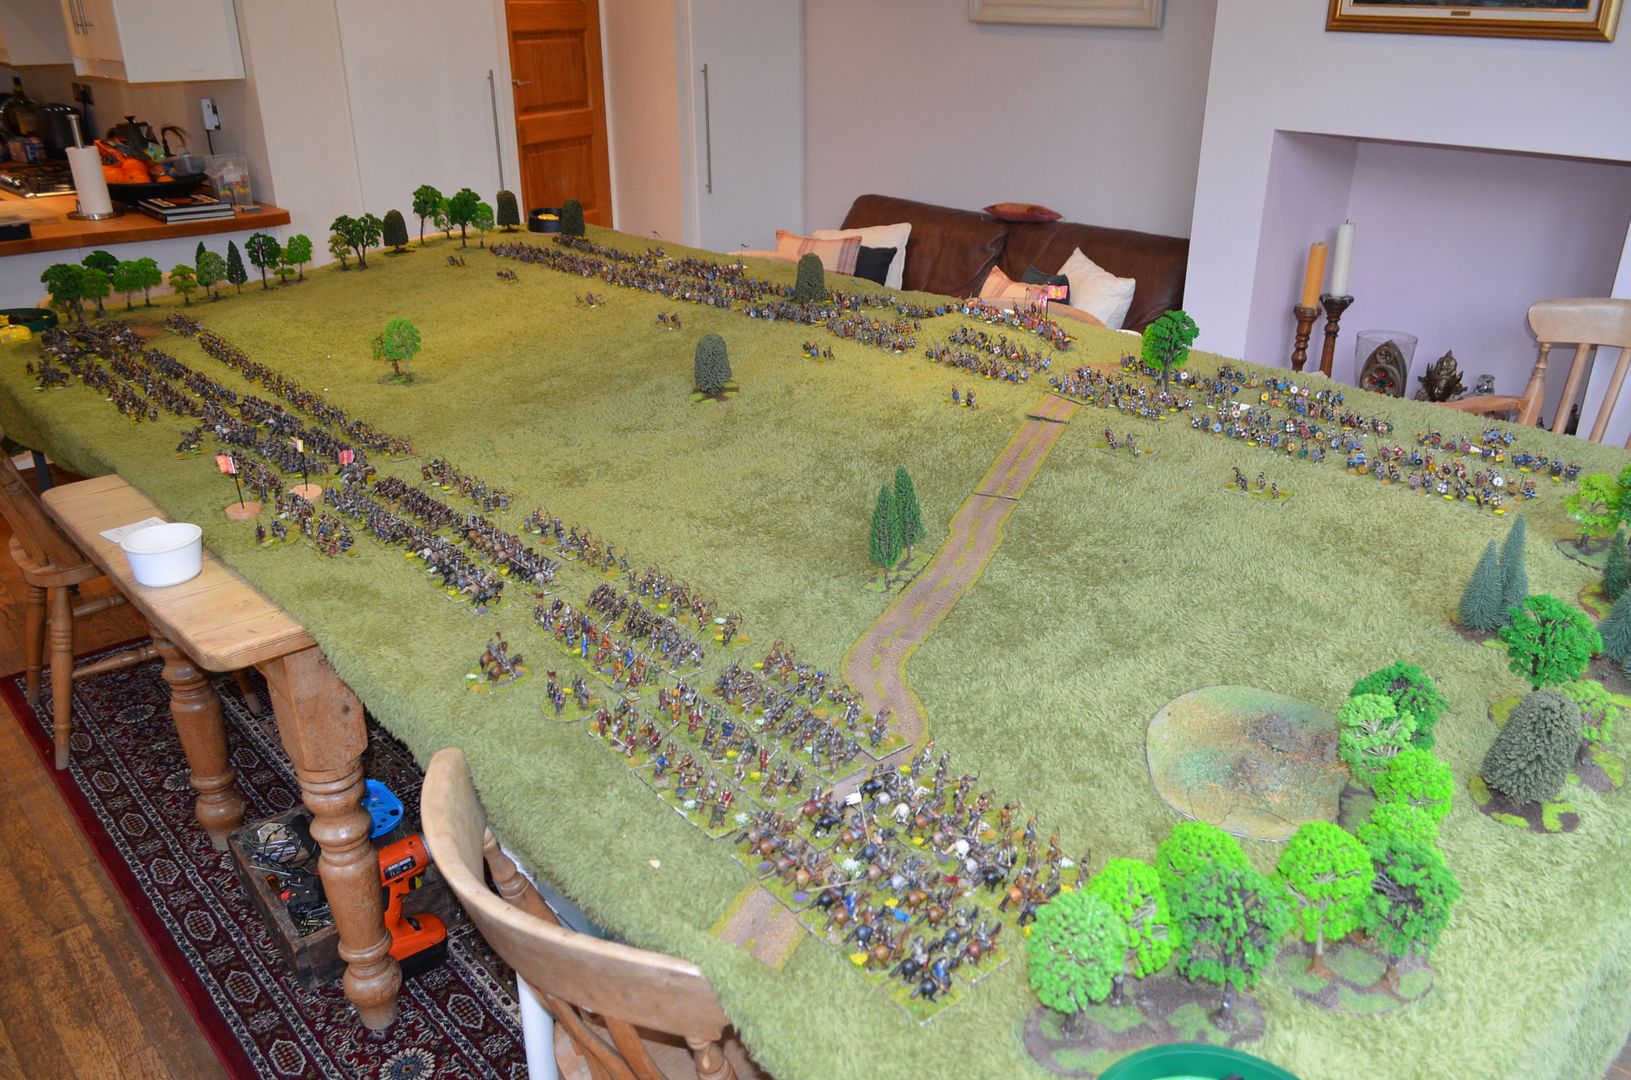 |
| Ready for battle |
It was at this point I fortified my guest’s with bacon rolls
and then proceeded to explain what would happen. We agreed in advance that play
would take place between 10am and 4pm – with food and drink being available as
and when folks wanted.
Background to the Battle
This battle
was the culmination of three men’s attempts to secure the crown of England. In
the period of a couple of months England witnessed three of the most bloody
battles of the Dark Ages and English society was changed forever.
In January
1066 the English King Edward the Confessor died leaving no immediate heir. The
throne was seized by his son in law, the most powerful Earl in the kingdom,
Harold Godwinson. His conation sparked two others to react. Harold Hardrada,
King of Norway, who had his own claim through King Cnut (and no doubt spurred
on by Harold’s estranged brother Tostig) made plans to invade. Similar
preparations were made by William, Duke of Normandy. His claim, also tenuous
was based on the promise that Edward had bequeathed him the throne and was
supported by oath from Godwinson.
By the late
summer of 1066 King Harald Hardrada invaded the north of England and soundly
beat the Northern Saxon Earls at Fulford. (you can read our interpretation of Fulford here)
A few weeks later Hardrada’s
ambitions came to a grisly end at the Battle of Stamford Bridge (our refight is here) when faced by
the army of Harold Godwinson. Whilst the Saxon king was fighting in the North
William the Bastard invaded the southern coast of England near Pevensey.
With victory
still ringing in his ears, Harold marched his forces south to meet this new threat.
A couple of weeks later the forces were to meet on the road leading out of
Pevensey marshes on what was known as Senlac Hill.
The focus of
our game will be to re-enact this engagement as best we can in both a
methodical and fun way. One of my concerns when putting together this project
was that the battle might just end up as an attritional maul with little
tactical and strategic planning so with a bit of artistic license I have
endeavored to create a scenario where both sides can fully participate and have
a chance of winning.
Designed very much as a team game – ideally with three players a side. Two players will
play the lead protagonists, William and Harold, and these will control and
command the central divisions of each of their armies. The remaining players
will play the divisional commanders on the left and right flanks of their
respective armies. Each player will control a ‘lead personality’ and a defined number
of sub-commanders.
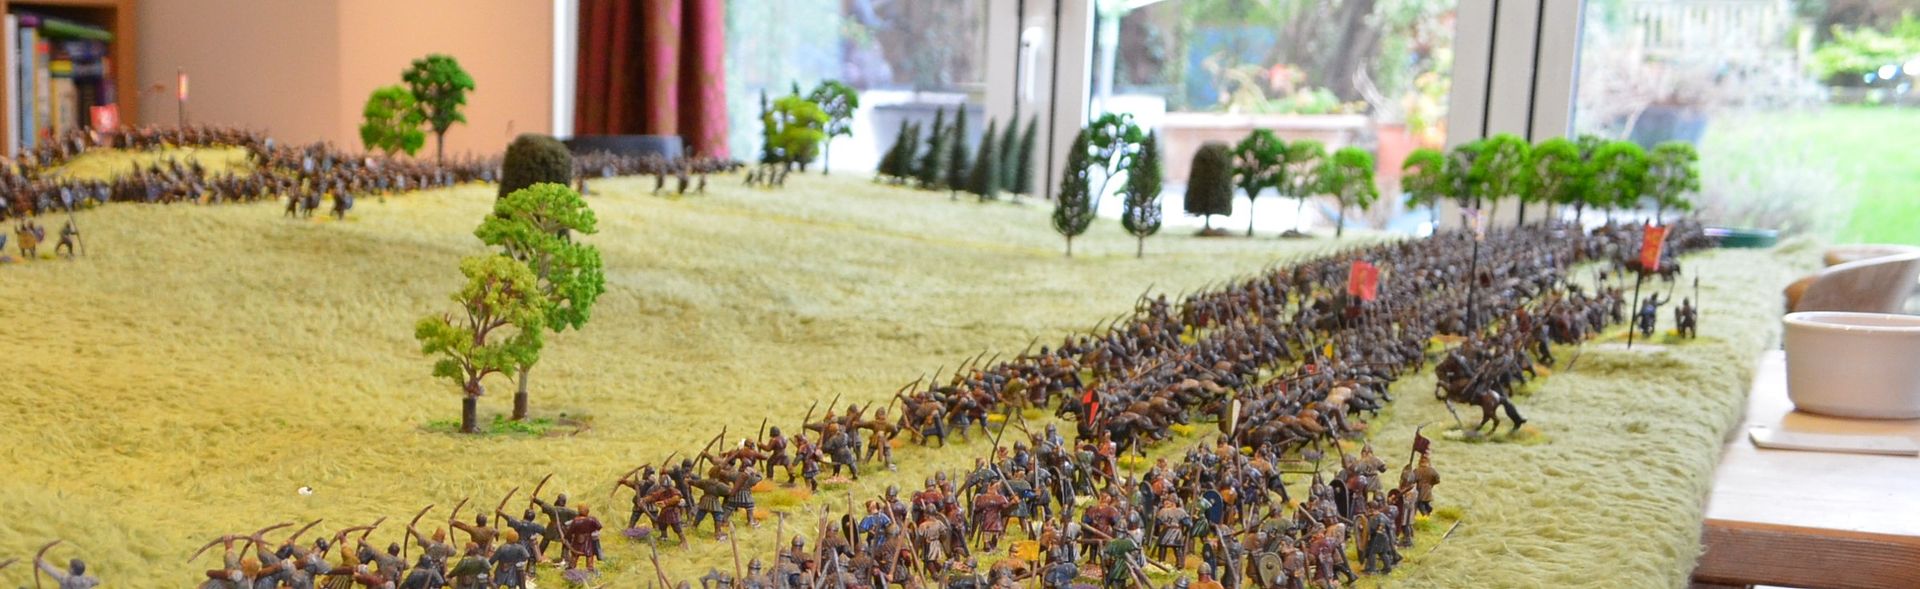
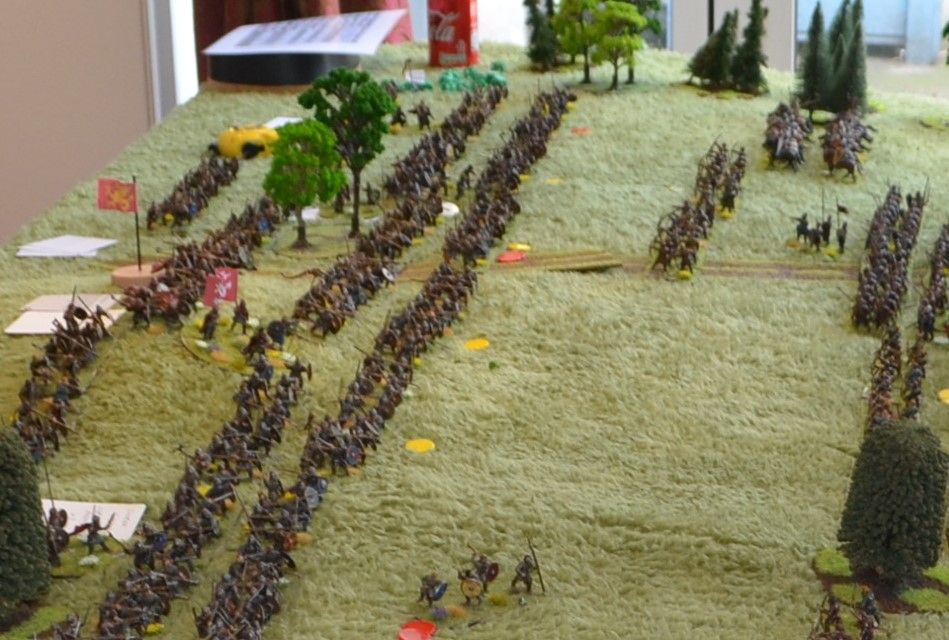
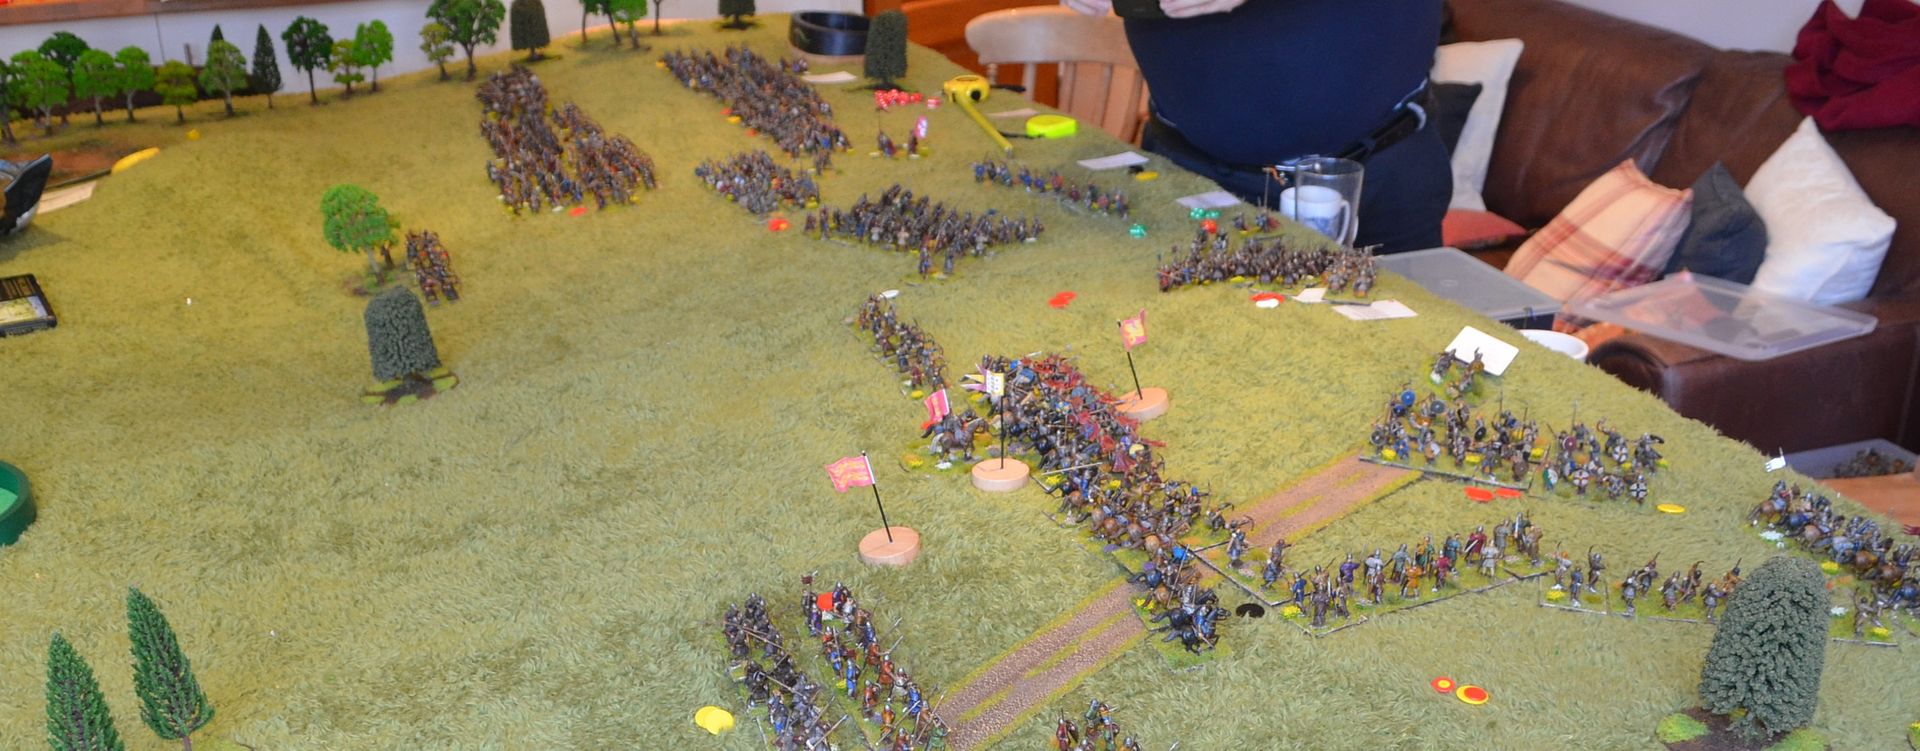
 |
| The Saxons await on the hill |
The Rules
For this refight of the battle we used the Hail Caser rules produced by
Warlord Games. The choice was relatively easy given the familiarity we have
with comparable rules sets – Black Powder & Pike & Shotte.
Inevitably I tweaked the rules to fit with the scenario.
The stats for
each unit will be lifted directly from the Army lists provided by Warlord Games
for this period. Player sheets appear at the end of this guide.
The
Objectives
William’s Objective:
William’s
objective for this game is simple he must kill Harold.
Were Harold to escape he
could raise his dragon banner elsewhere in the country and prolong the
resistance. Ultimately William does not have the sufficient man power to engage
in a prolonged campaign.
To avoid a
scenario where Harold might flee the field, Harold may not leave the
battlefield until either 2/3rd of his forces are broken or his elite
Huscarls have been defeated.
This is a fight
to the death. Unless Harold is killed the Normans cannot win the game. As soon
as Harold is killed the entirety of the Saxon army will rout and it is game
over.
Should the
Norman Army ‘break’ the Saxon Army but Harold is able to flee then the Normans
can only claim a minor victory.
 |
| The Norman Army waits |
Harold’s Objective:
Harold, conversely,
does not need to kill William he just needs to blunt this invader’s capability
to take his throne. Harold just needs to break the Norman Army on his shield
wall.
Harold wins a
major victory if the Norman Army is broken. 2/3rds of the Norman must be shaken
or disordered at the end of a Saxon turn.
Should William
die his half-brother, Bishop Odo, will assume command but all units will suffer
-1 to their morale for the remainder of the battle. If Odo and William die the
Saxons may also claim victory.
The Armies
Both armies were
said to be of comparable size with estimated numbers ranging from 5000 to 12000.
Using the
excellent Osprey series book on the battle of Hastings I have decided to use
their listed order of battle for the two sides, for the purposes of this game
we will assume that each army consists of around 7000 troops.
This count works
well with the forces I have available for the game with some 700 x 28mm figures
painted per side and gives a ratio of approximately 1 to 10.
The Saxon Army
was comprised entirely of foot and the historical records report that these
were all infantry. It is unlikely that Harold had any formed archer units and
certainly no cavalry. That does not mean that the Saxons did not have archers
available they just weren’t available in large numbers.
We also know
that Harold had a unit of his personal bodyguard (Huscarls) with him. These
were most likely to be found in the centre protecting the king and the
standards.
His infantry
would have been drawn from two sources, the Thegns (landowning Saxons with
quite possibly good military equipment and training) and the Ceorls (local
farmers and peasants with little or no equipment and training). These two types
of troops would have been mustered by the King at the time of war in what was
known as the Fyrd.
From the various
accounts I have read it appears that the front ranks of the Saxon shield wall
would have been made up of the better troops in Harold’s army (the Thegns) with
the lesser and lighter troops in a more supporting role.
From an
organizational perspective the Saxon forces were organized into bands of
approx. 100 men with each band lead by a ‘hundredthman’
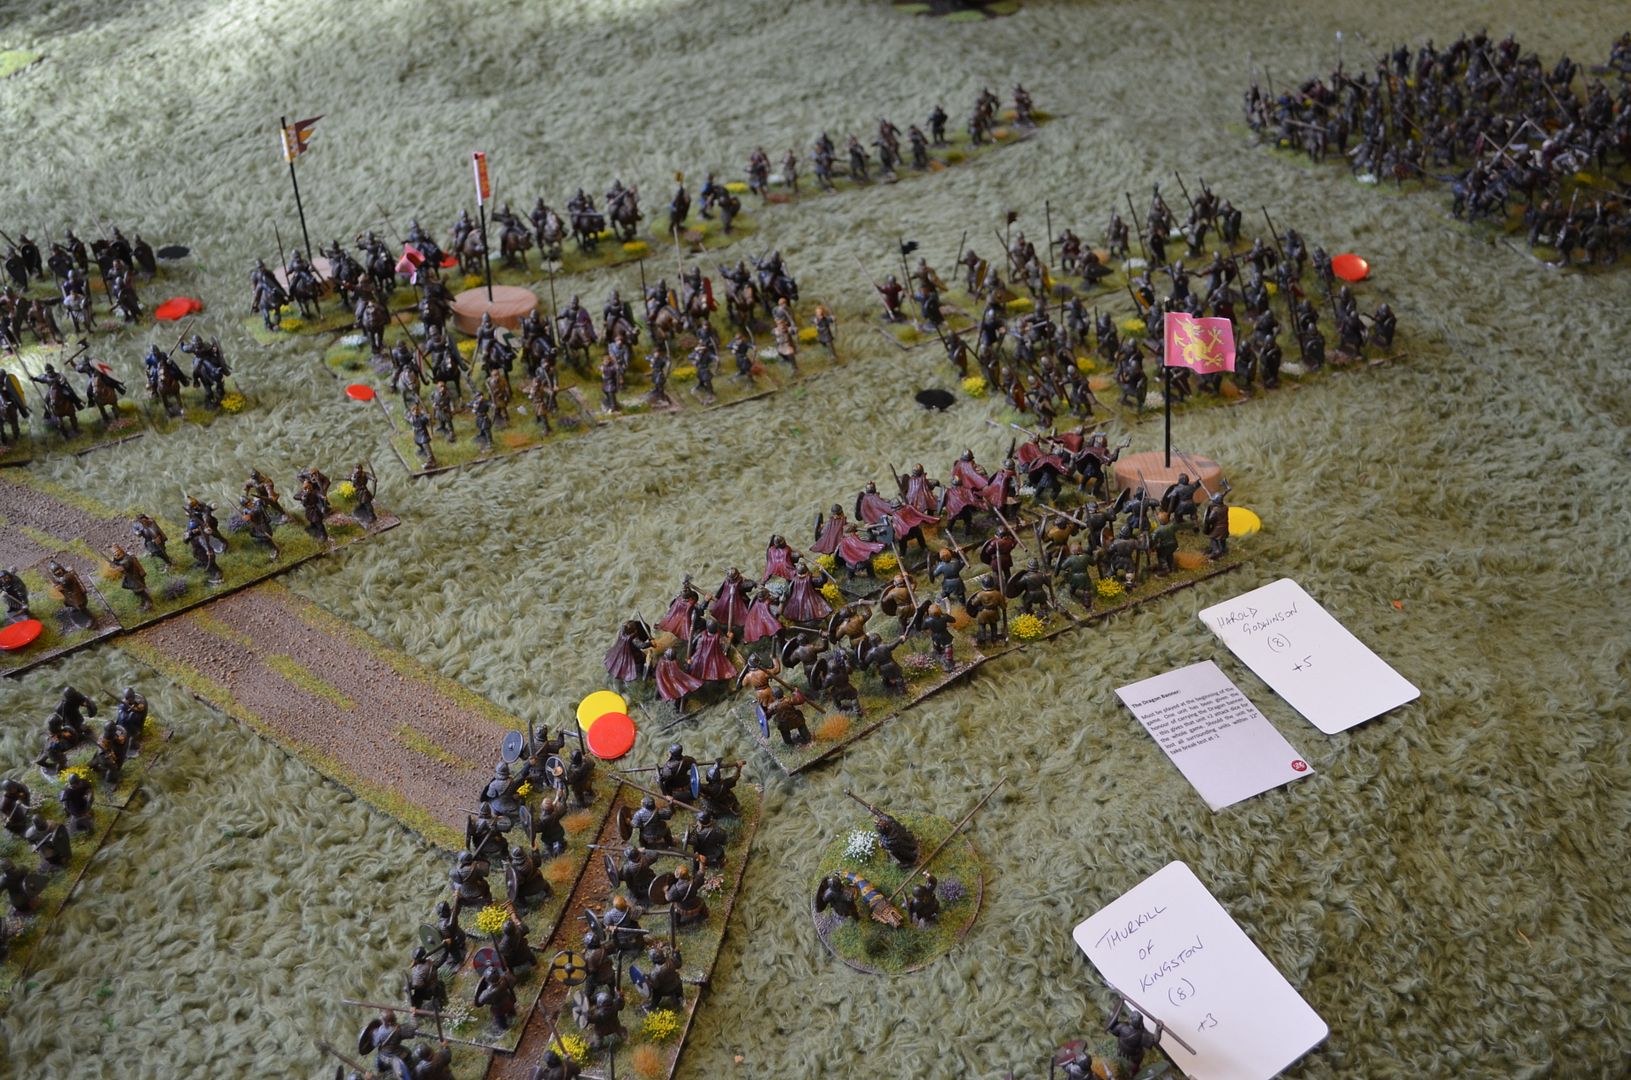
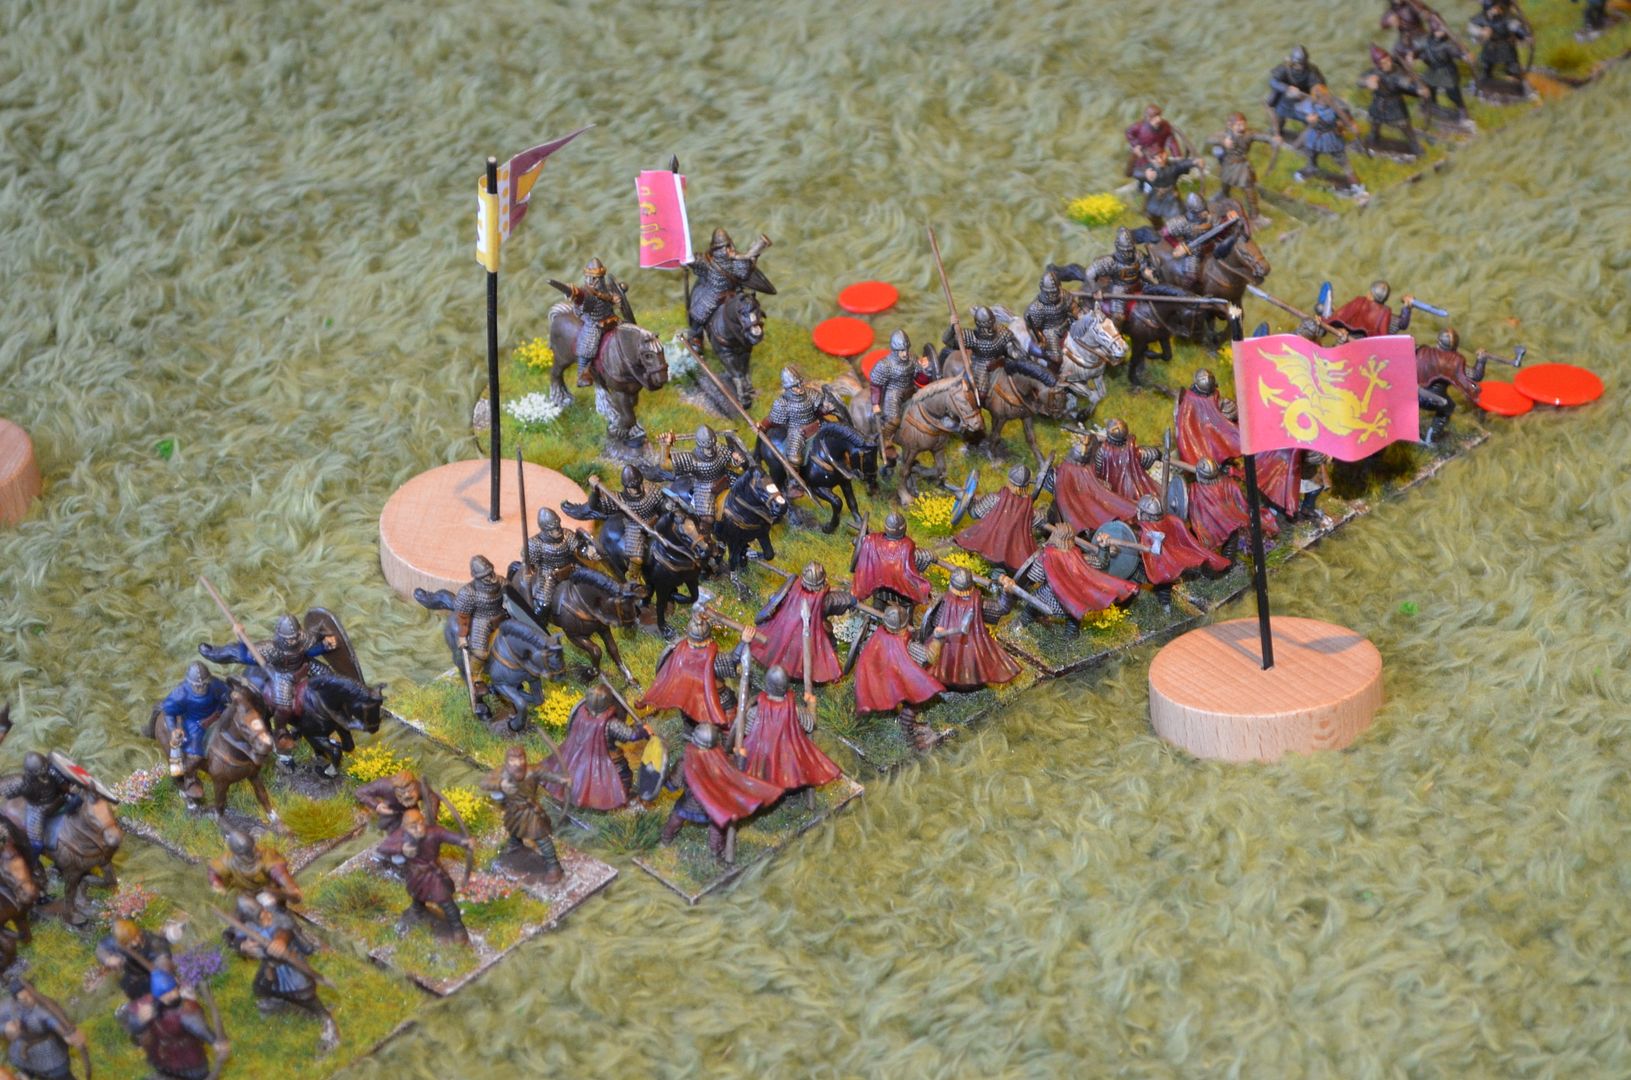
 |
| The Saxon Dragon Banner looking down from the hill |
To keep things
manageable in the game the Saxon Army will consist of only three types of
Warriors
·
The Housecarls
·
Thegns (heavy Infantry)
·
Ceorls (light Infantry)
S Sling armed Skirmishers
All units will
be two ranks deep with a frontage of 25cm.
We have more
information pertaining to the Norman Army with many records stating that it was
a combined force of Archers, Infantry and Cavalry.
These will be
split into three divisions – Bretons on the Left, Normans in the centre and
French on the right.
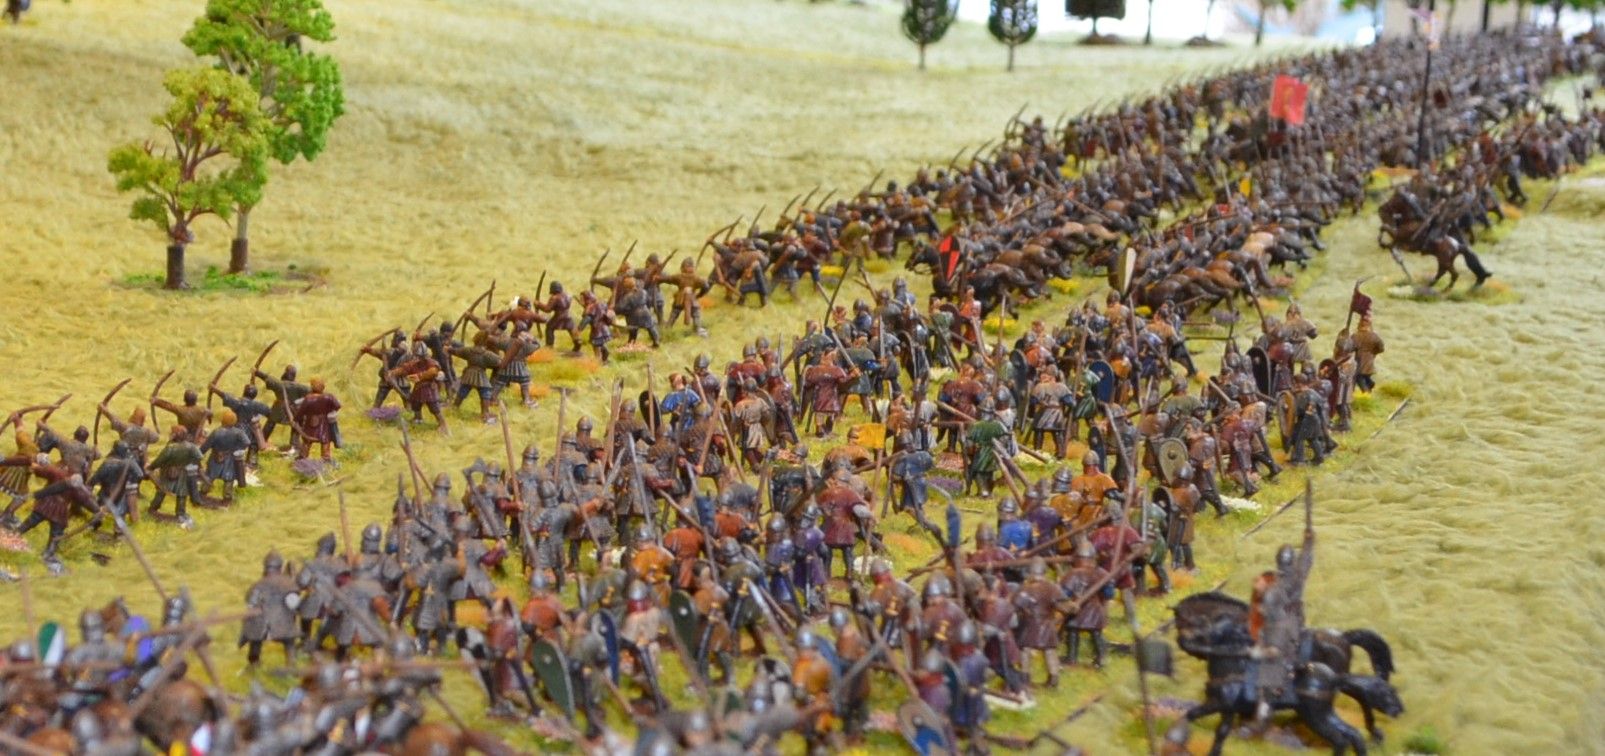
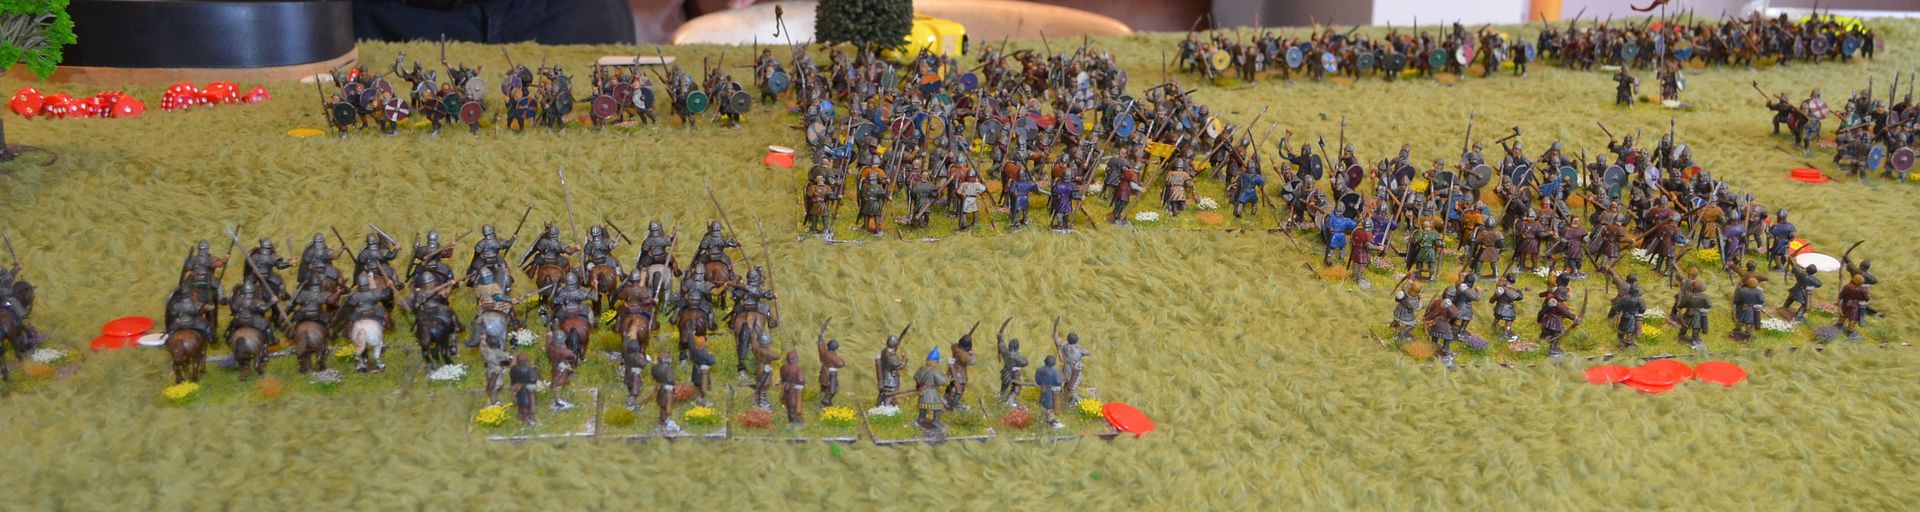
 |
| The Norman Army |
Unlike the
Saxons the Norman forces will consist of a few more different troops types,
again all will be standard sized with a facing of 25cm (note that each cavalry
unit will consist of 10 horsemen)
·
Archers
·
Medium Infantry
·
Heavy Infantry
·
Medium Cavalry
·
Norman Knights
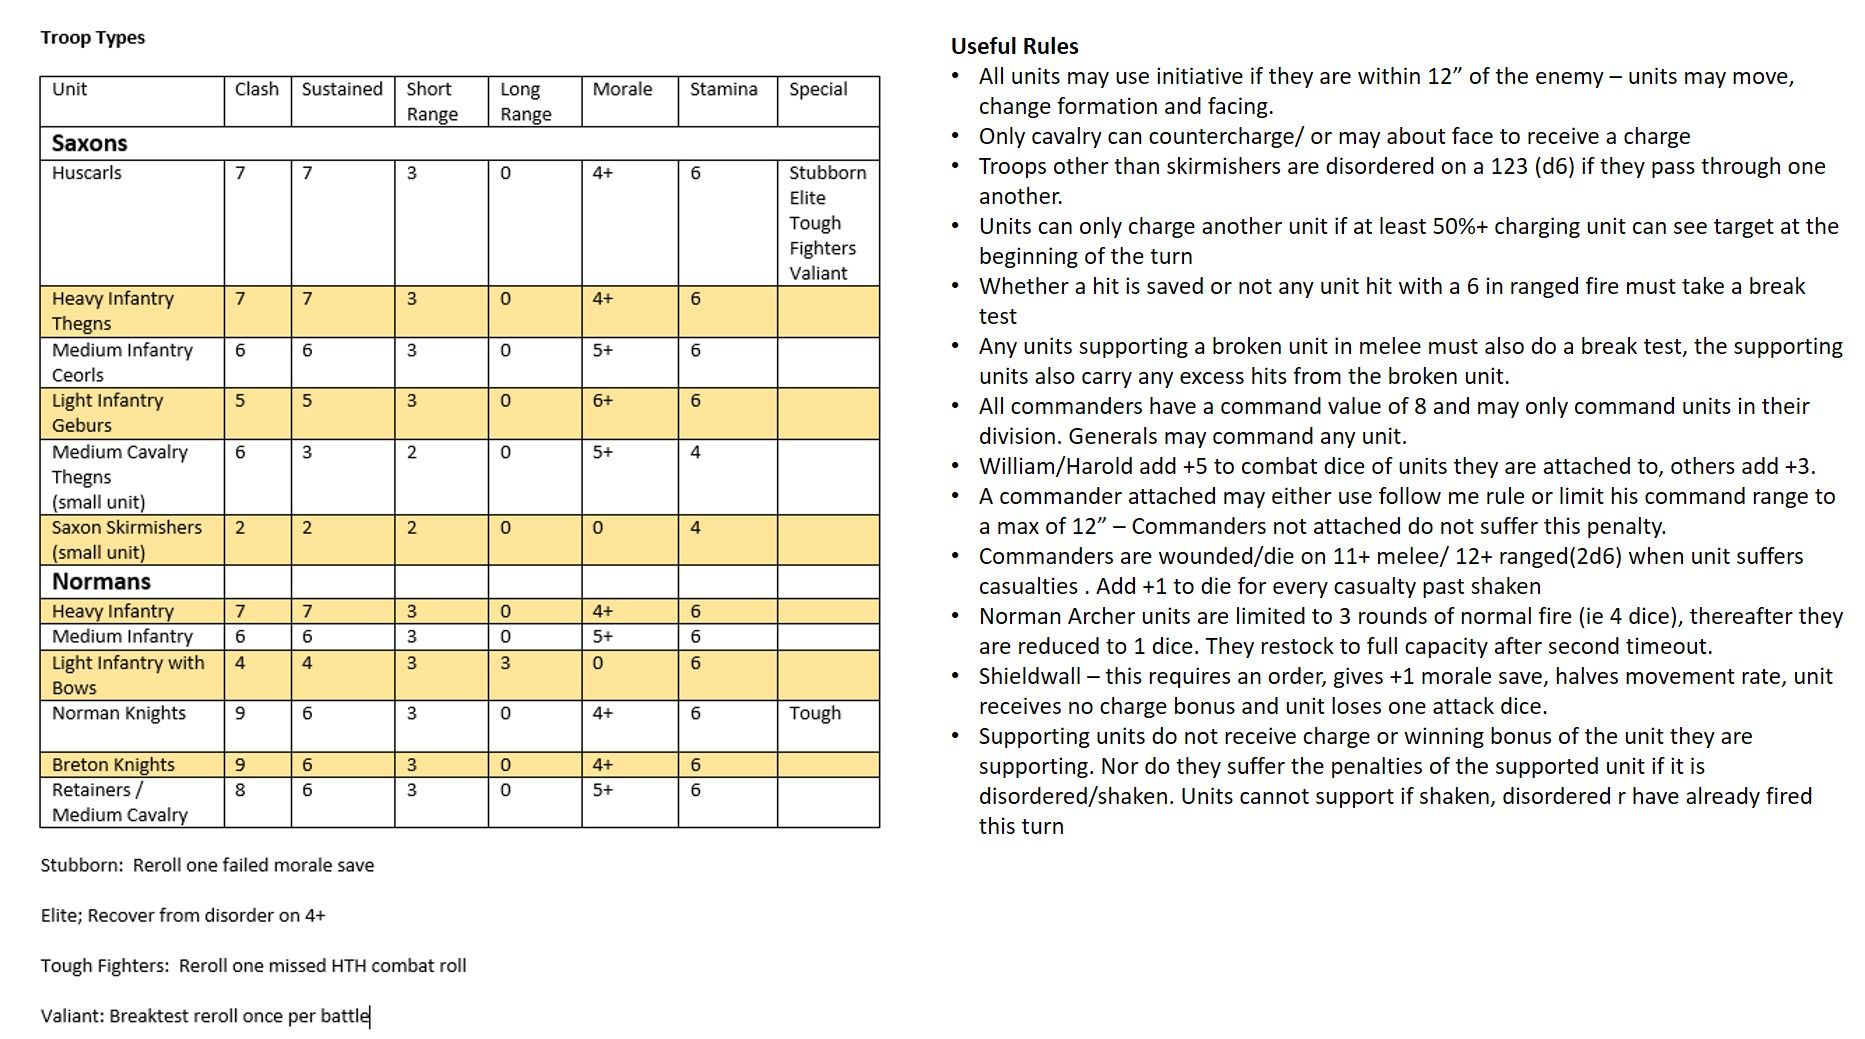 |
| All players were given a summary of the Hail Caesar rules and this handout with houserules |
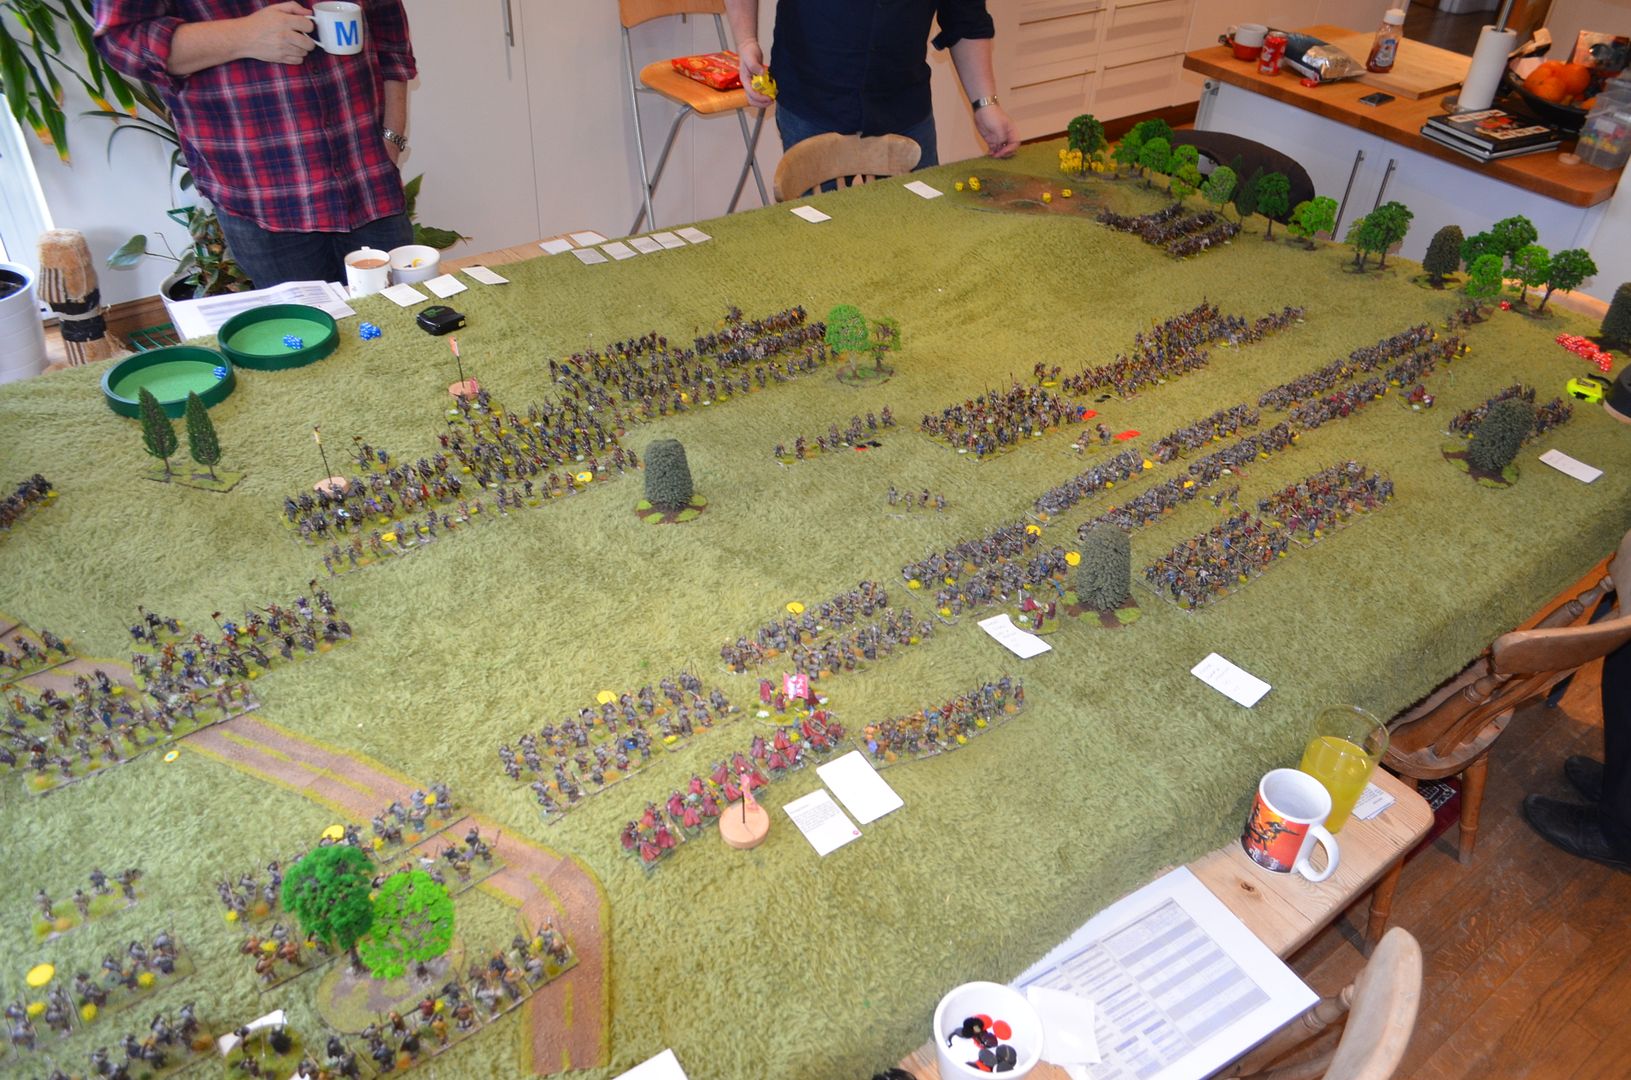
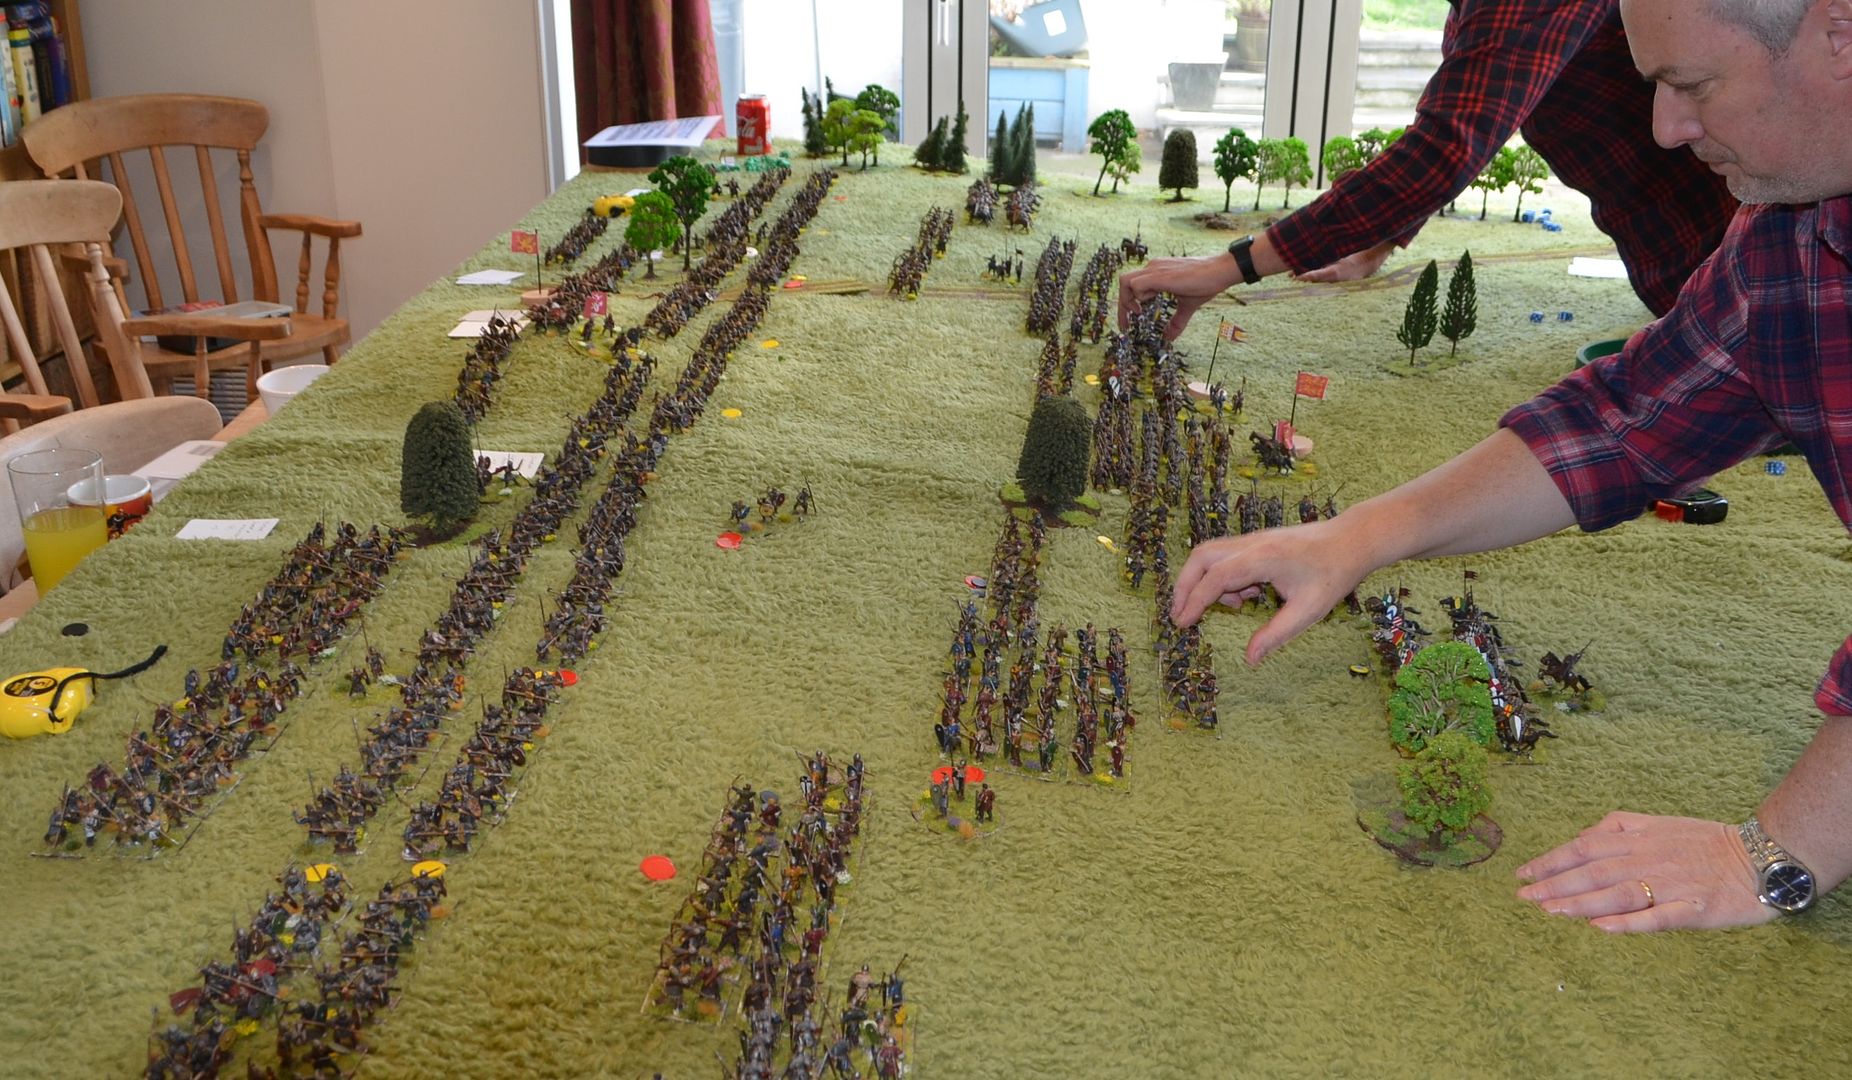
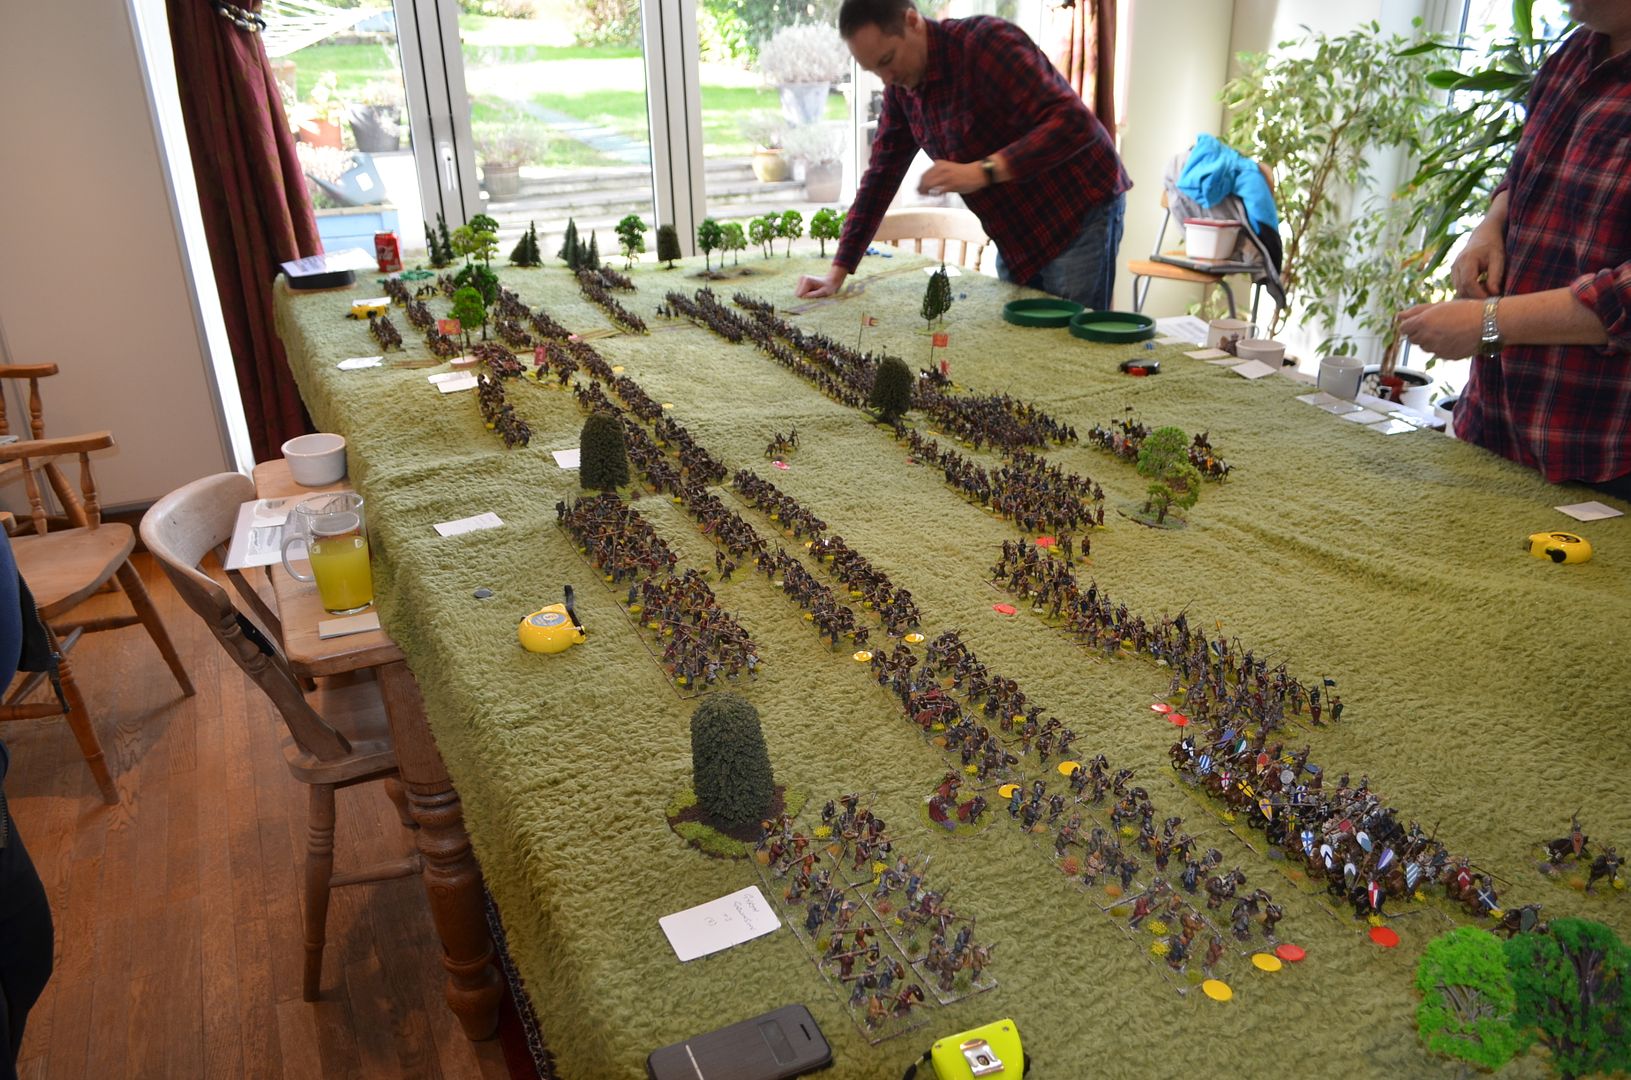
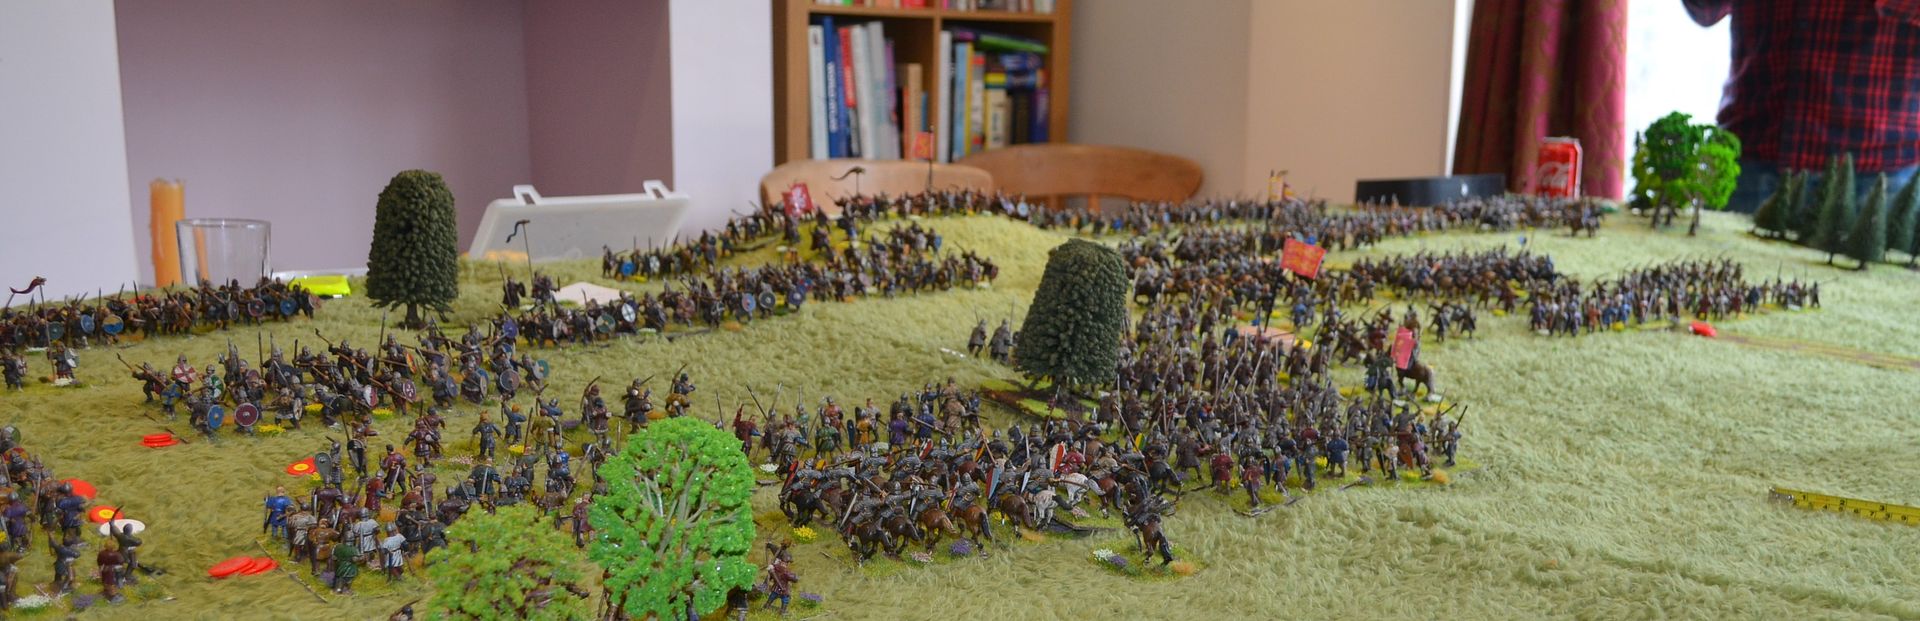
 |
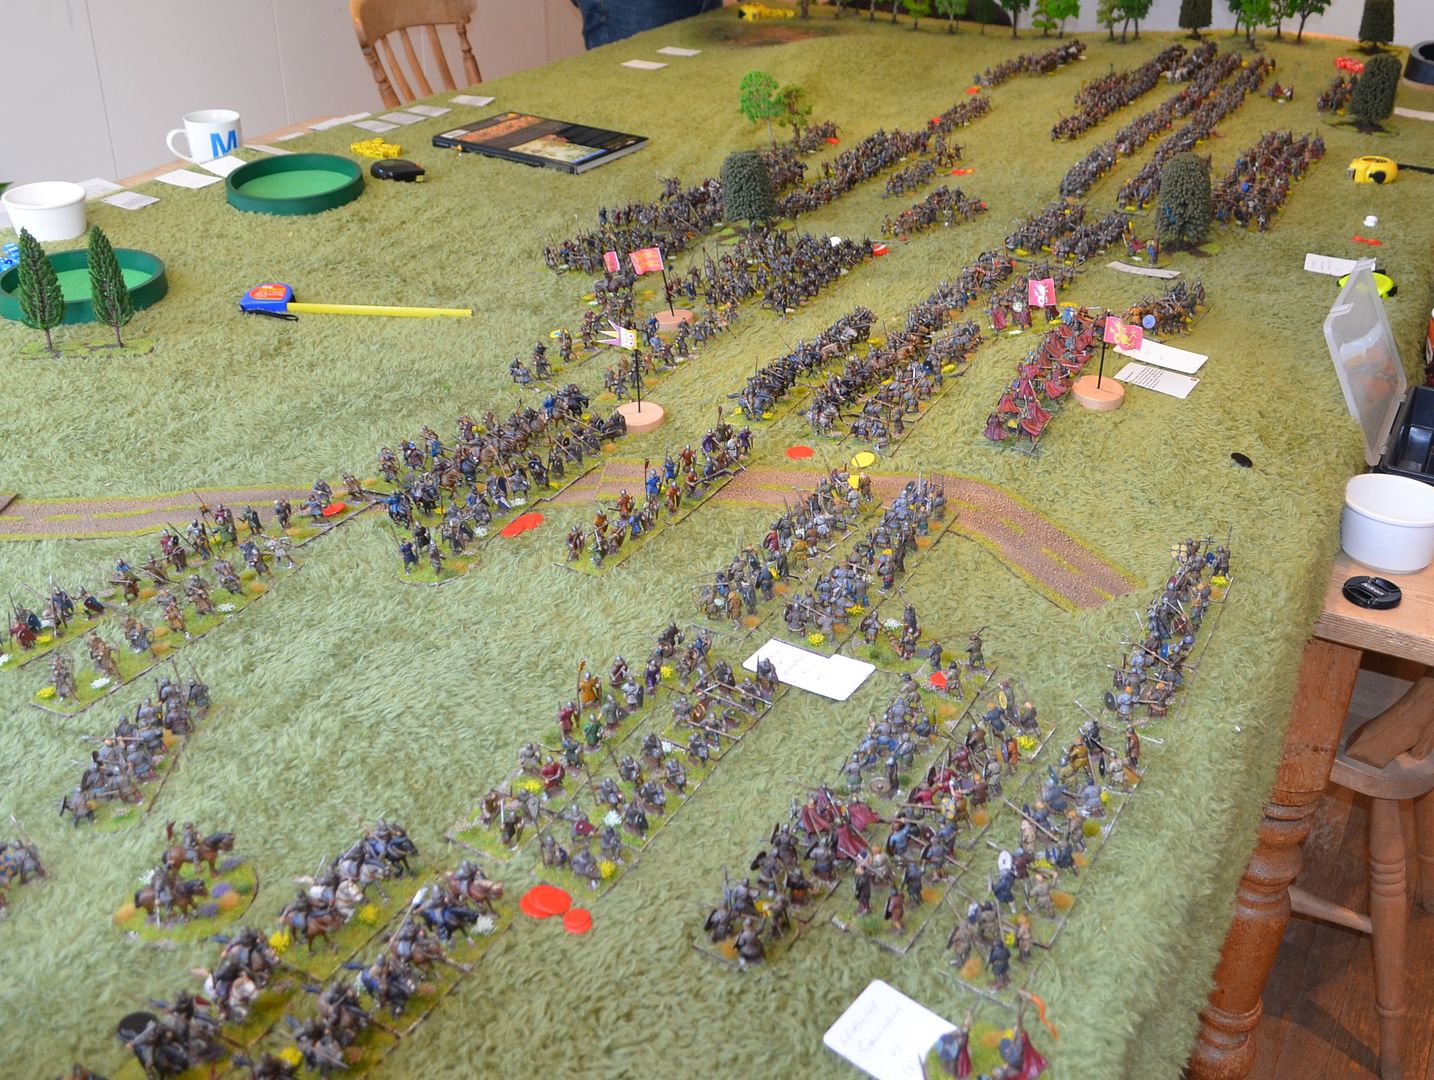
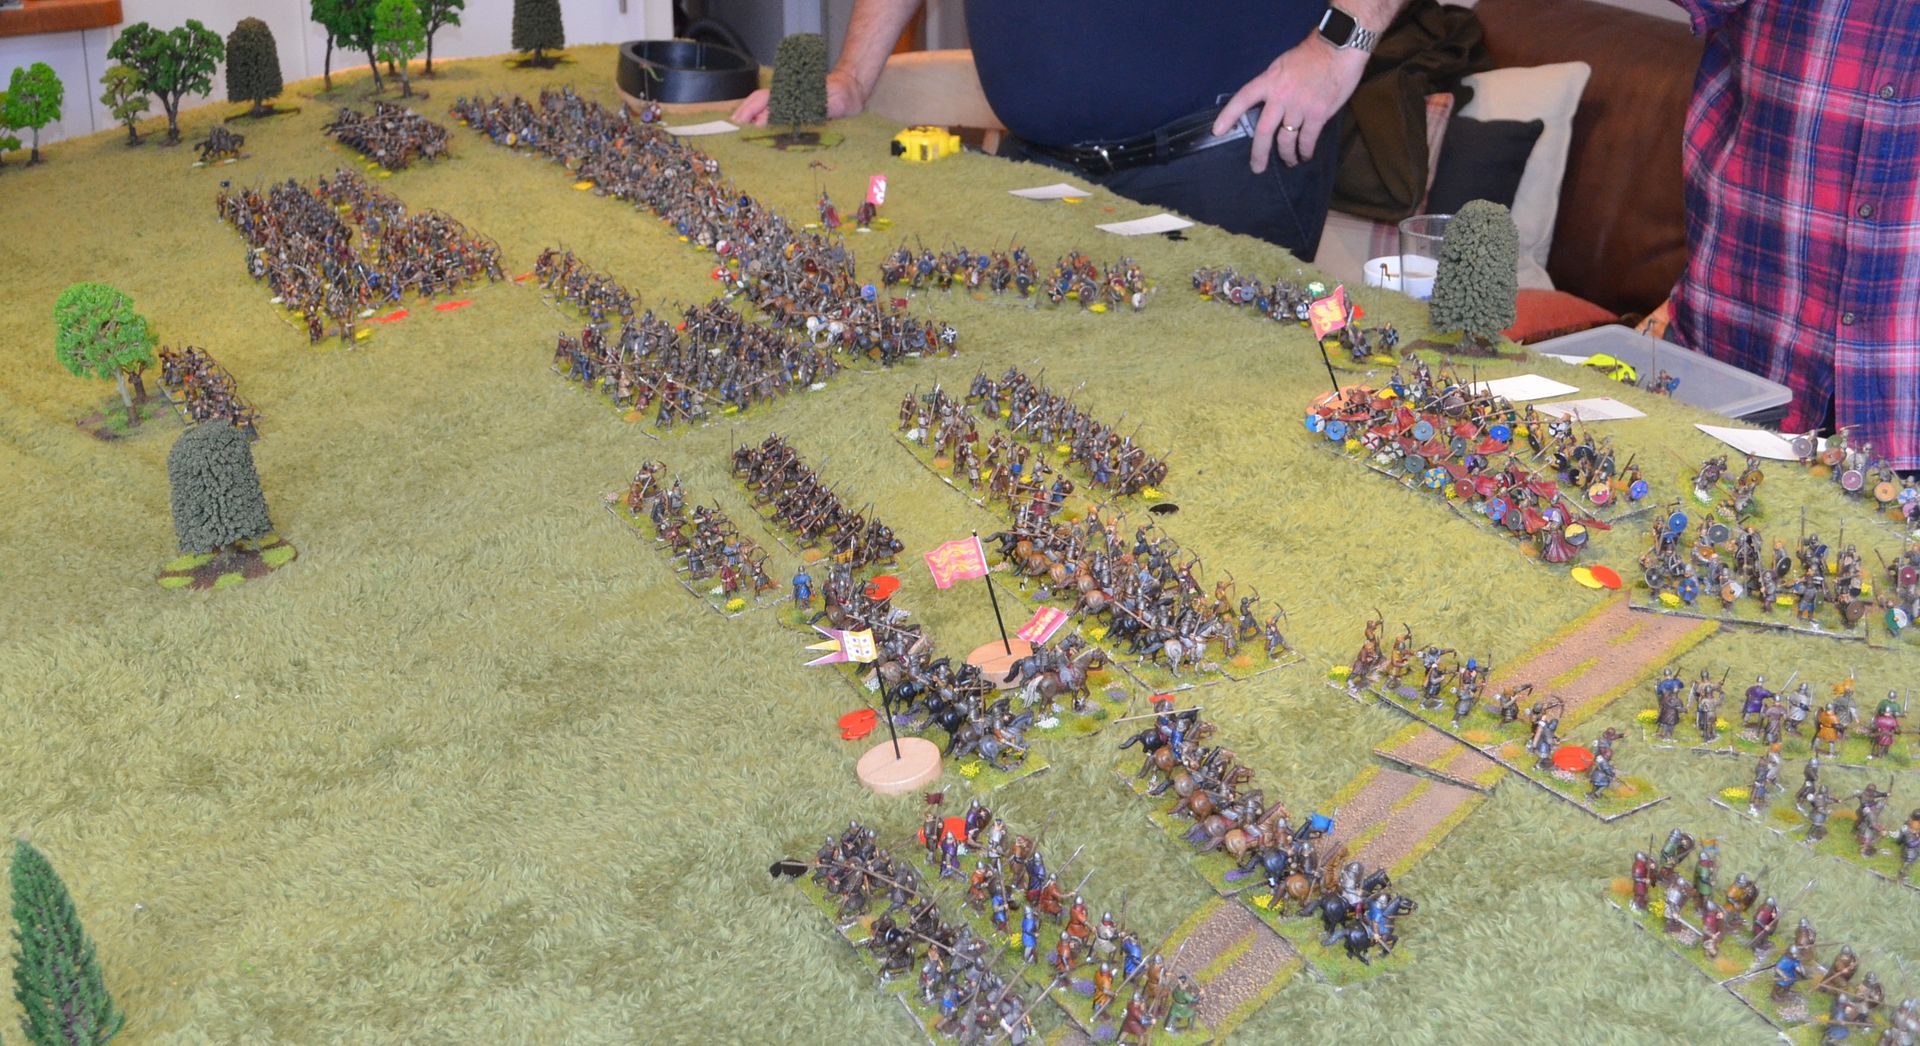
| Birds Eye View - just before kick off |
Lets Fight the Game !!
A short write up followed by pictures...
Having outlined the objectives and house rules of the day I announced who would be playing on which side. As the host I decided that I wanted to play the role of Harold and I knew Mark also wanted to stand behind the shieldwall. This left Alastair, Glenn and a newcomer to our games Steven to take the role of the invaders. Alastair commanded the Normans in the centre, Glenn the Franco/Flemish forces on the right wing and Steven the Bretons (left wing) .
Both sides then broke to discuss their strategies. Mark
& I (Saxon) decided that we would get our frontal units into Shieldwall as
quick as possible and then avoid any movement that might cause a blunder. Our
game at Fulford demonstrated very clearly that a bad order can have devastating
effects on defending troops. Only if the opportunity presented itself would we
come off the hill. Ours was to be a very static defence.
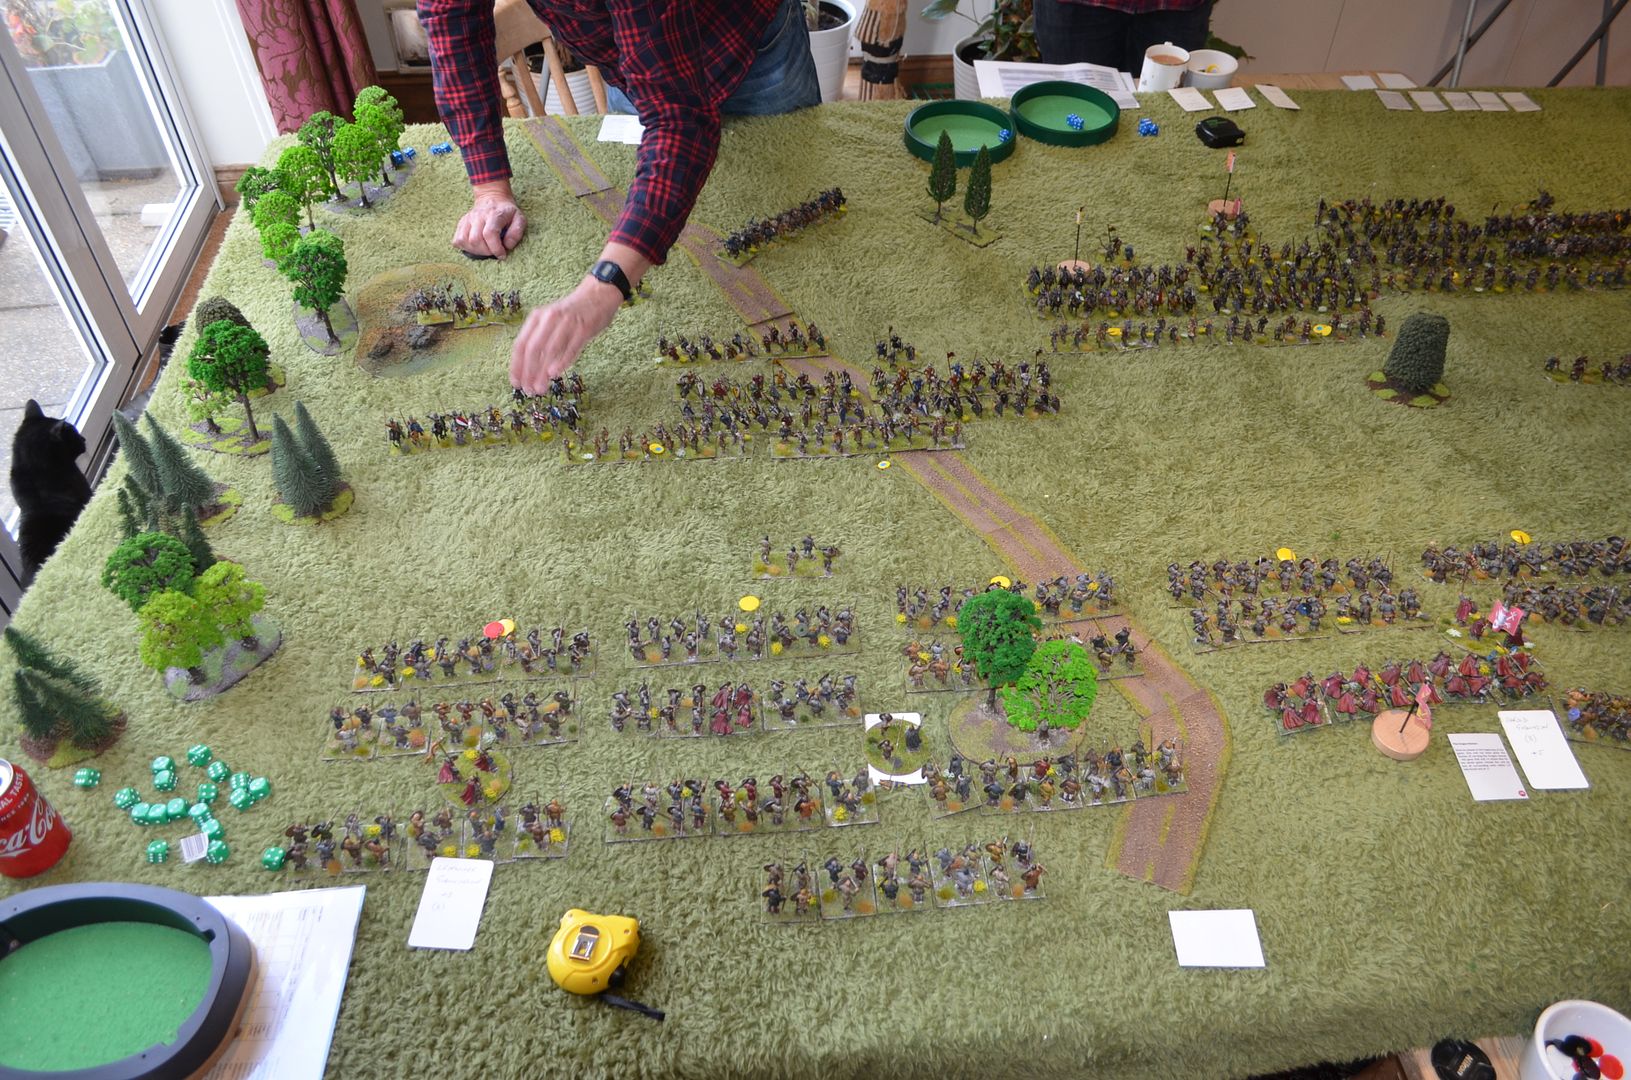
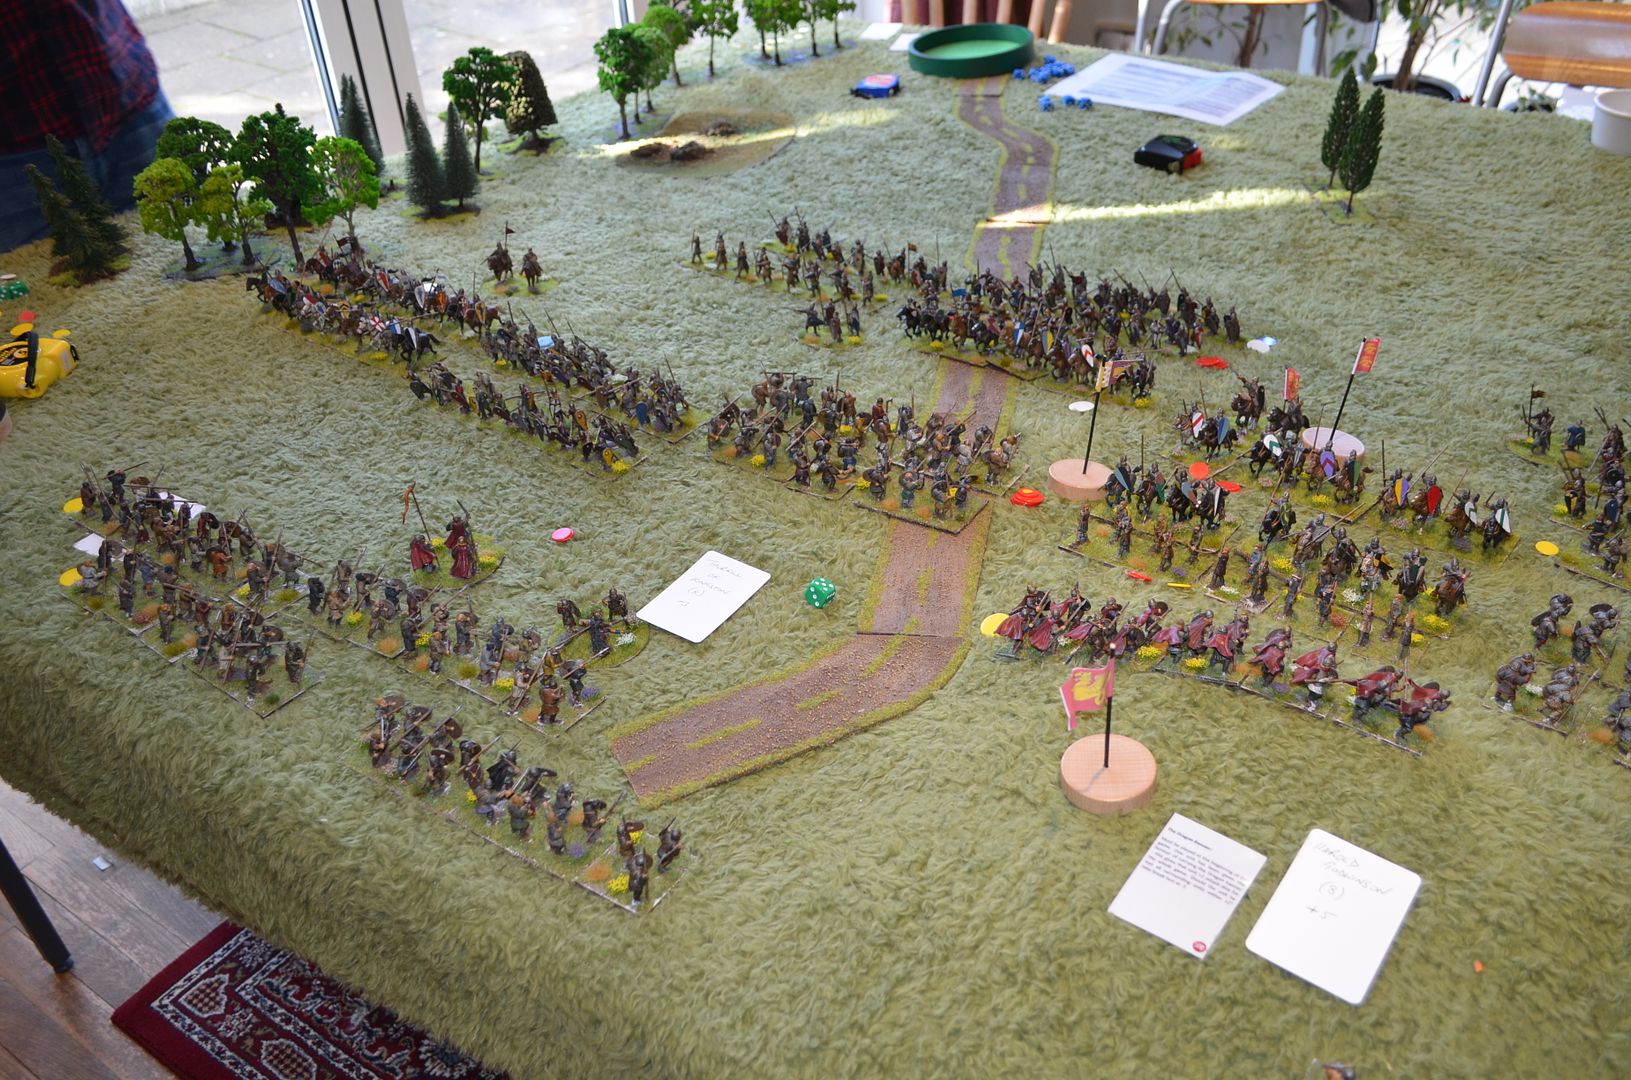
The Normans kicked off proceedings and made a general
advance up this slope. It soon became evident that the Normans were going to
try and pin down our right flank and throw their centre and rightflank against
the Saxon line – it looked like I was going to be the target.
Early on in the game the Norman archers came up against the
limited number of Saxon skirmishers. Some rather fortuitous dice rolling by
yours truly routed a lead archer unit. First blood to the Saxons. It was at
that point my luck deserted me – for the rest of the game all my dice rolls
went against me. I had a nightmare – every set of rolls for hits and saves were
at best average and virtually every break test I was called upon to roll failed
spectacularly. I have never rolled so many snake eyes.
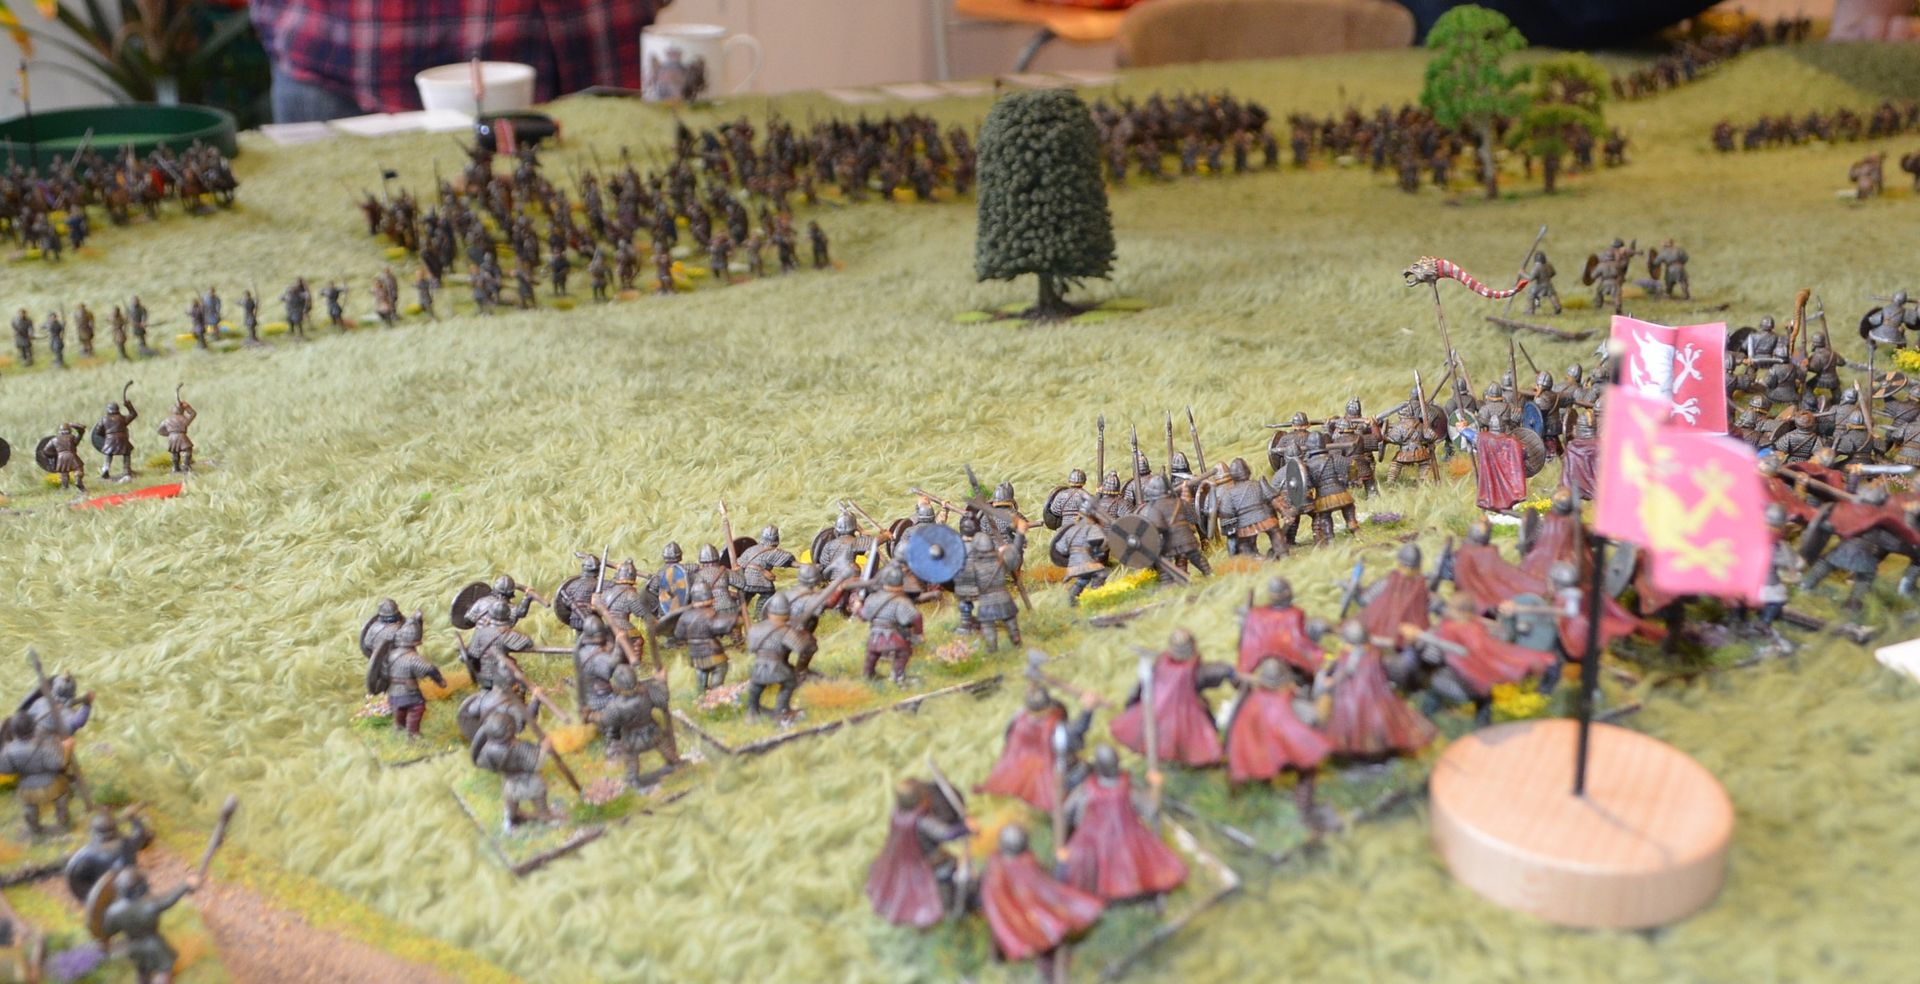
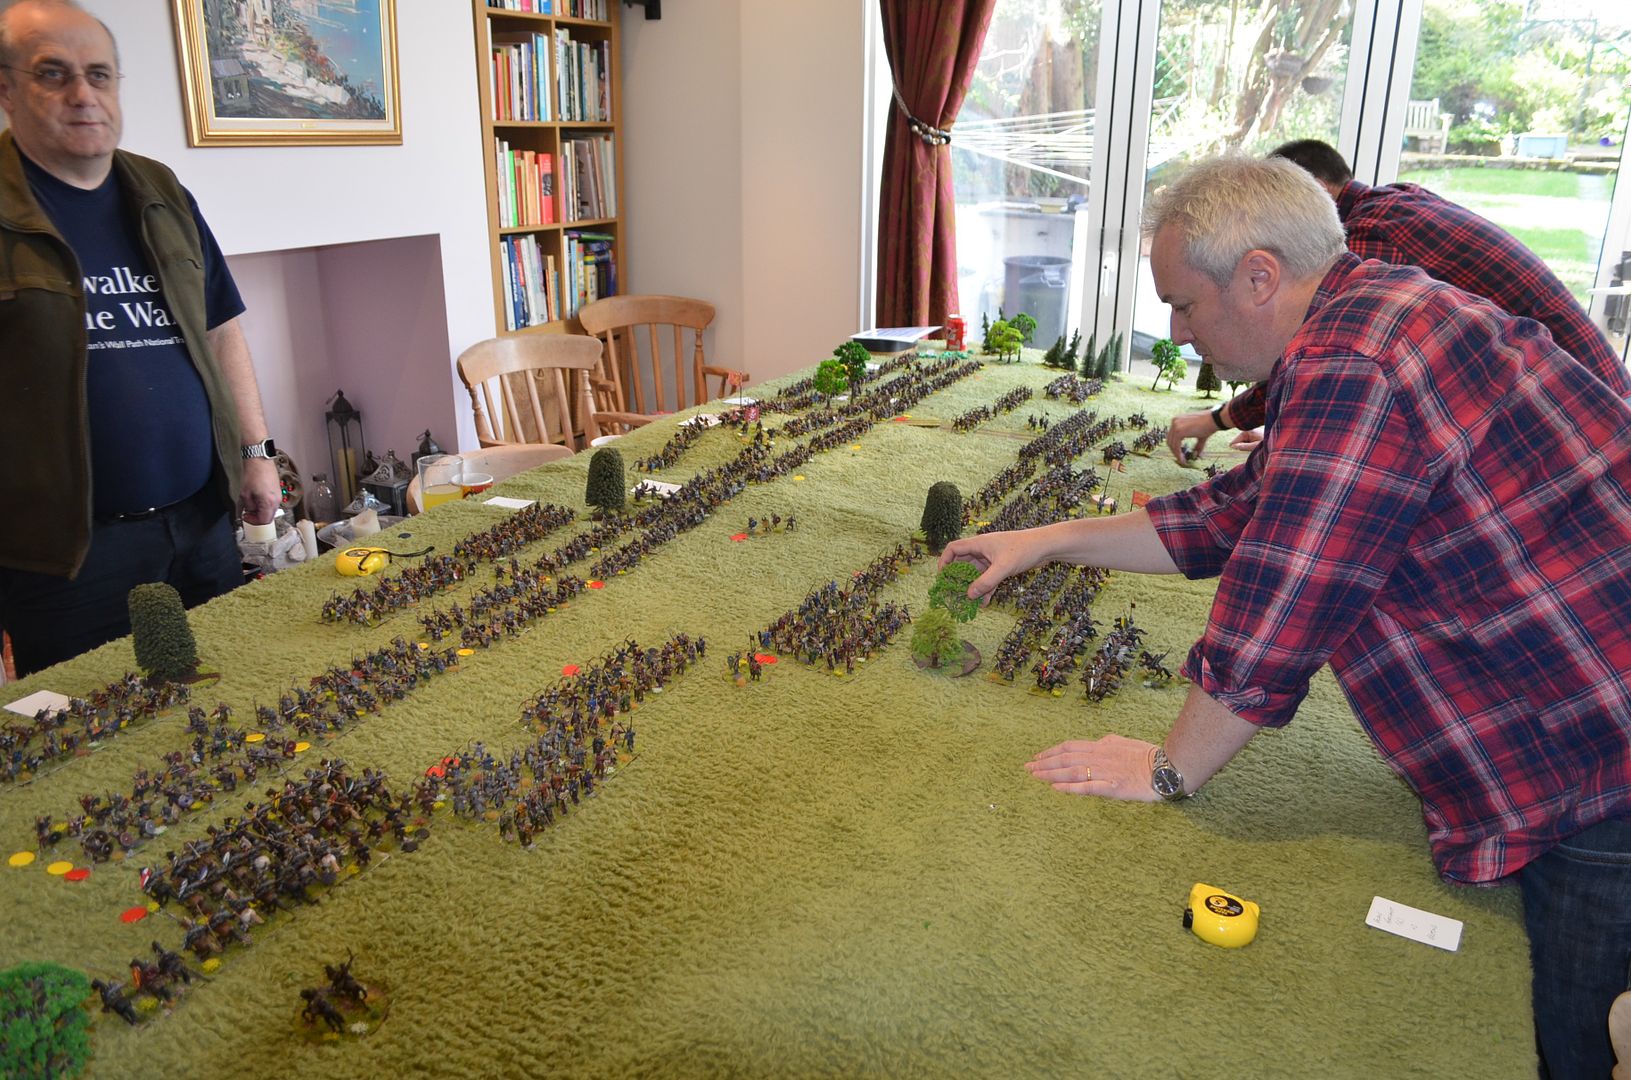
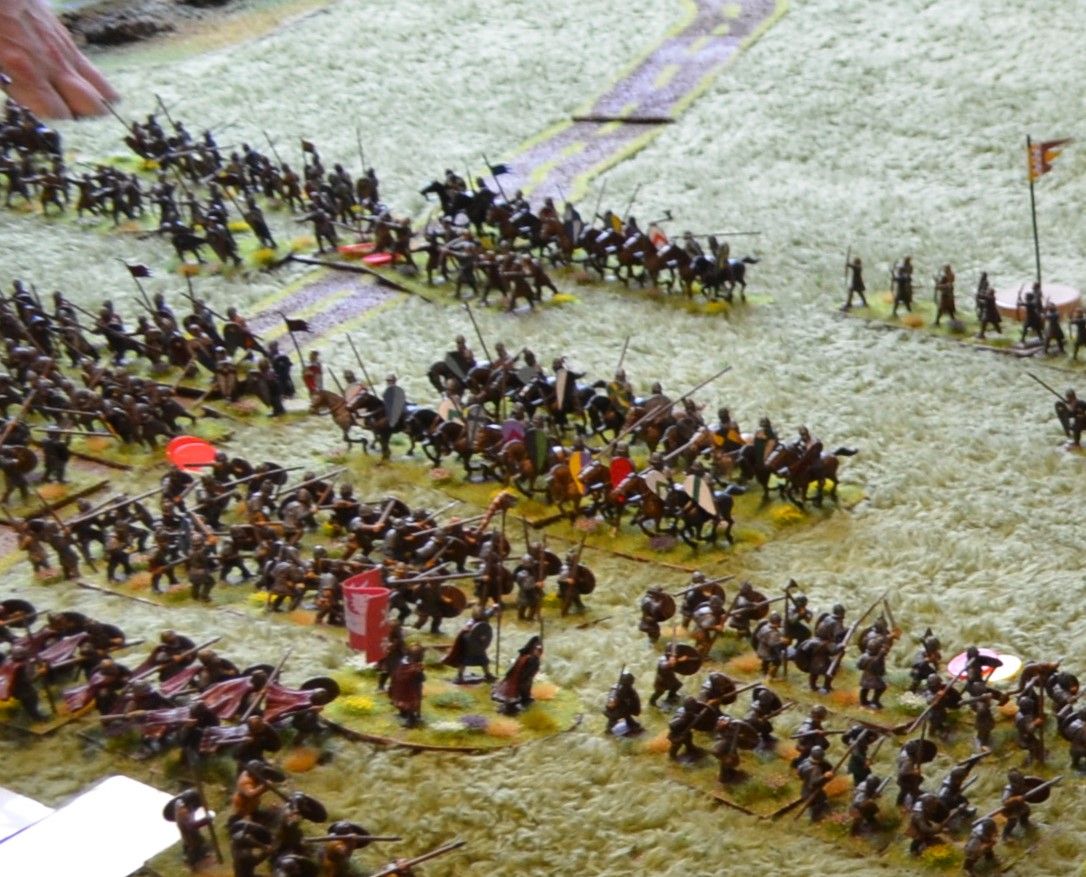
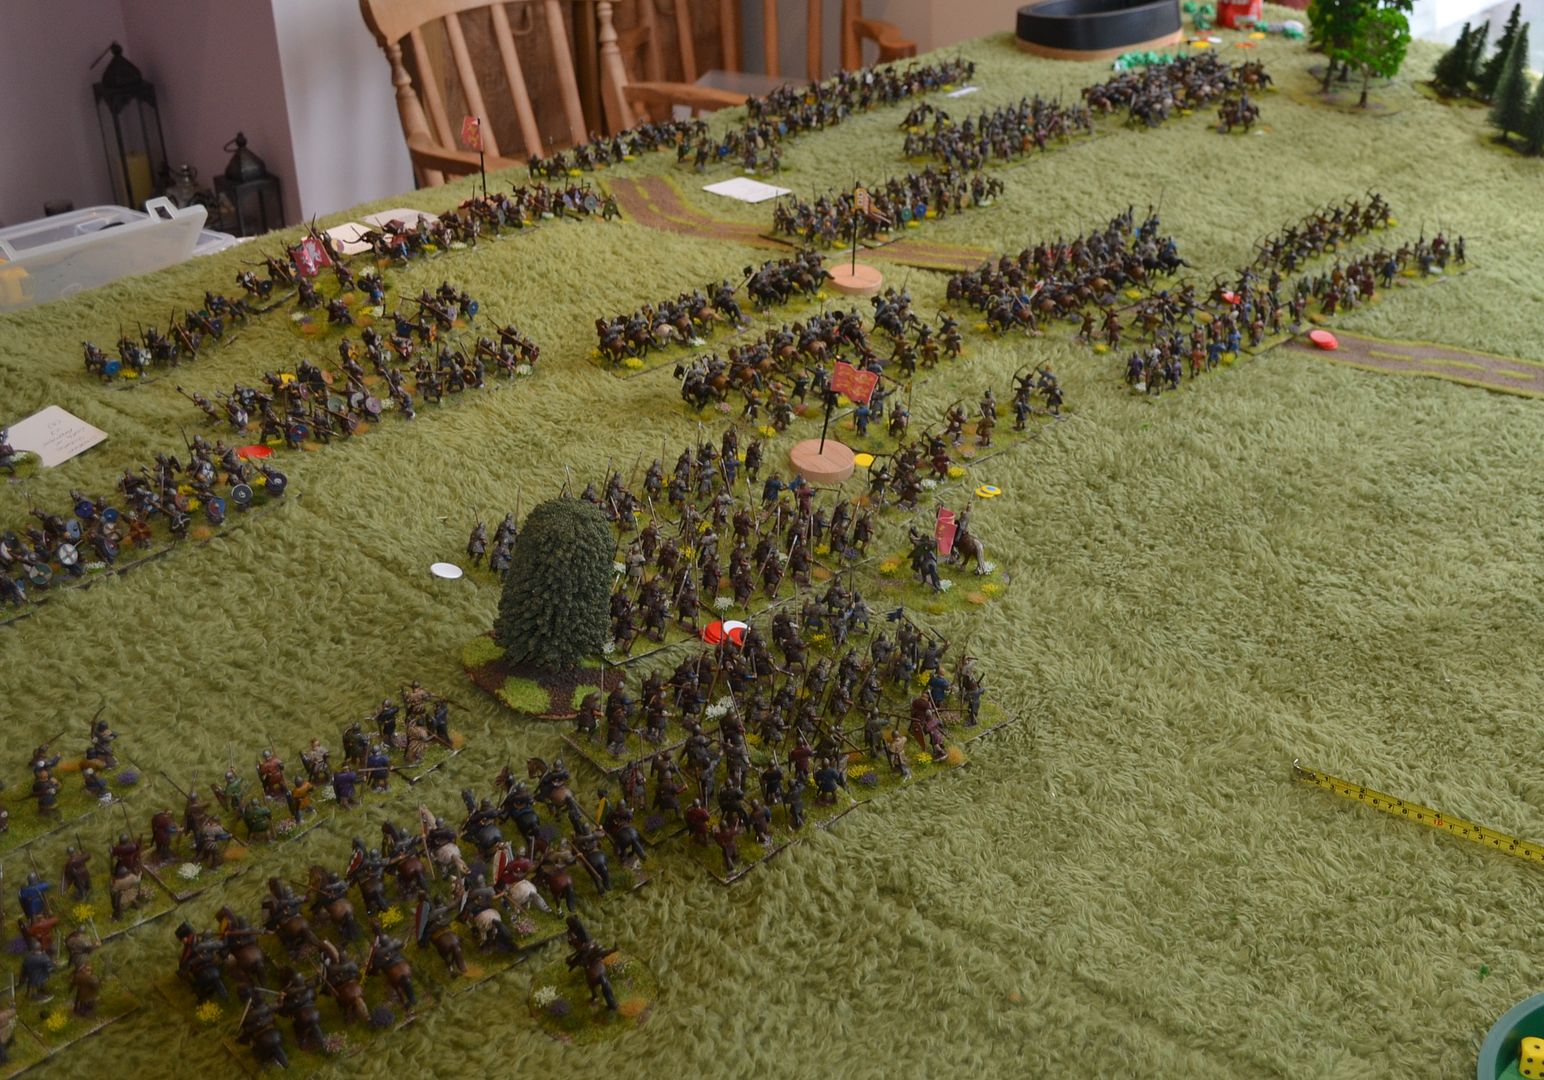
Within a few turns the Norman cavalry on their right flank
had crashed into the Saxon line and were slaughtering my troops. Two Saxon
units quickly succumbed to Glenn’s aggressive actions, and as became the norm
on the Saxon left flank, support units were driven back or routed in the
ensuing action.
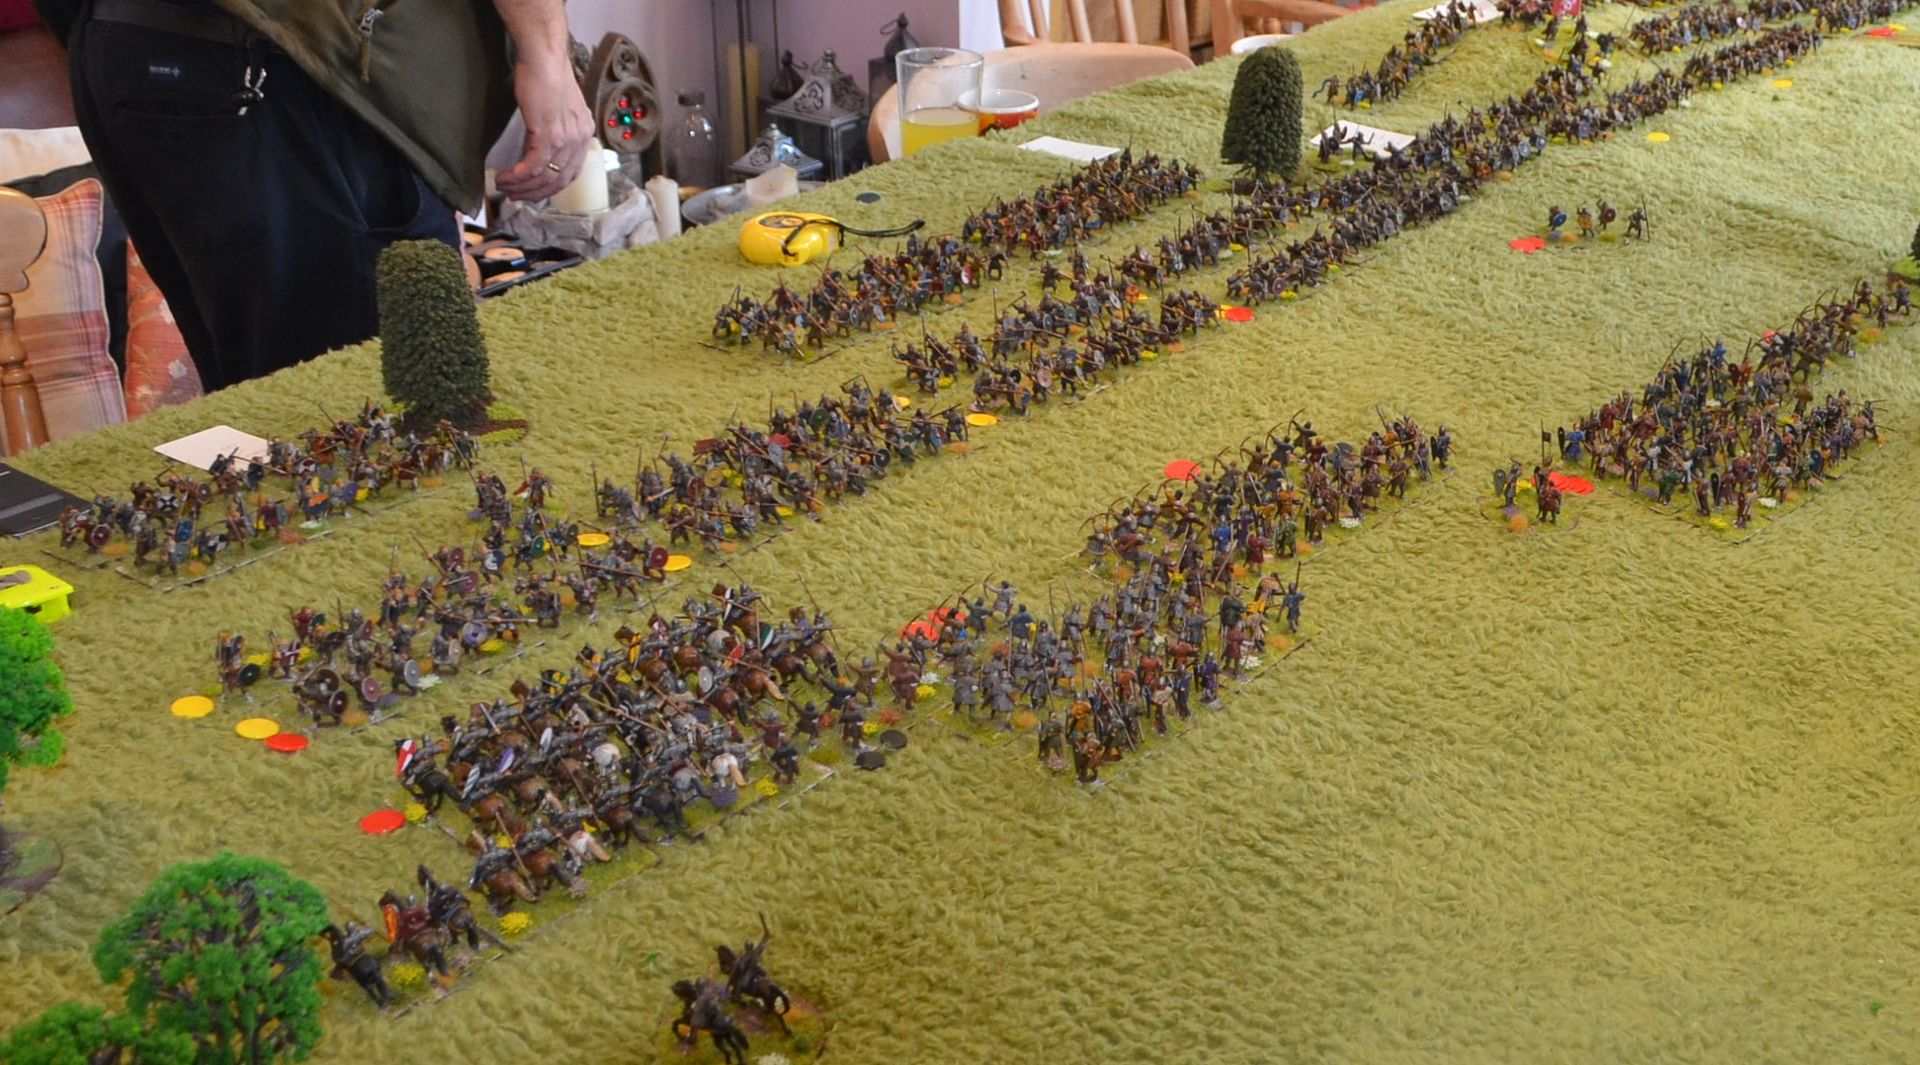
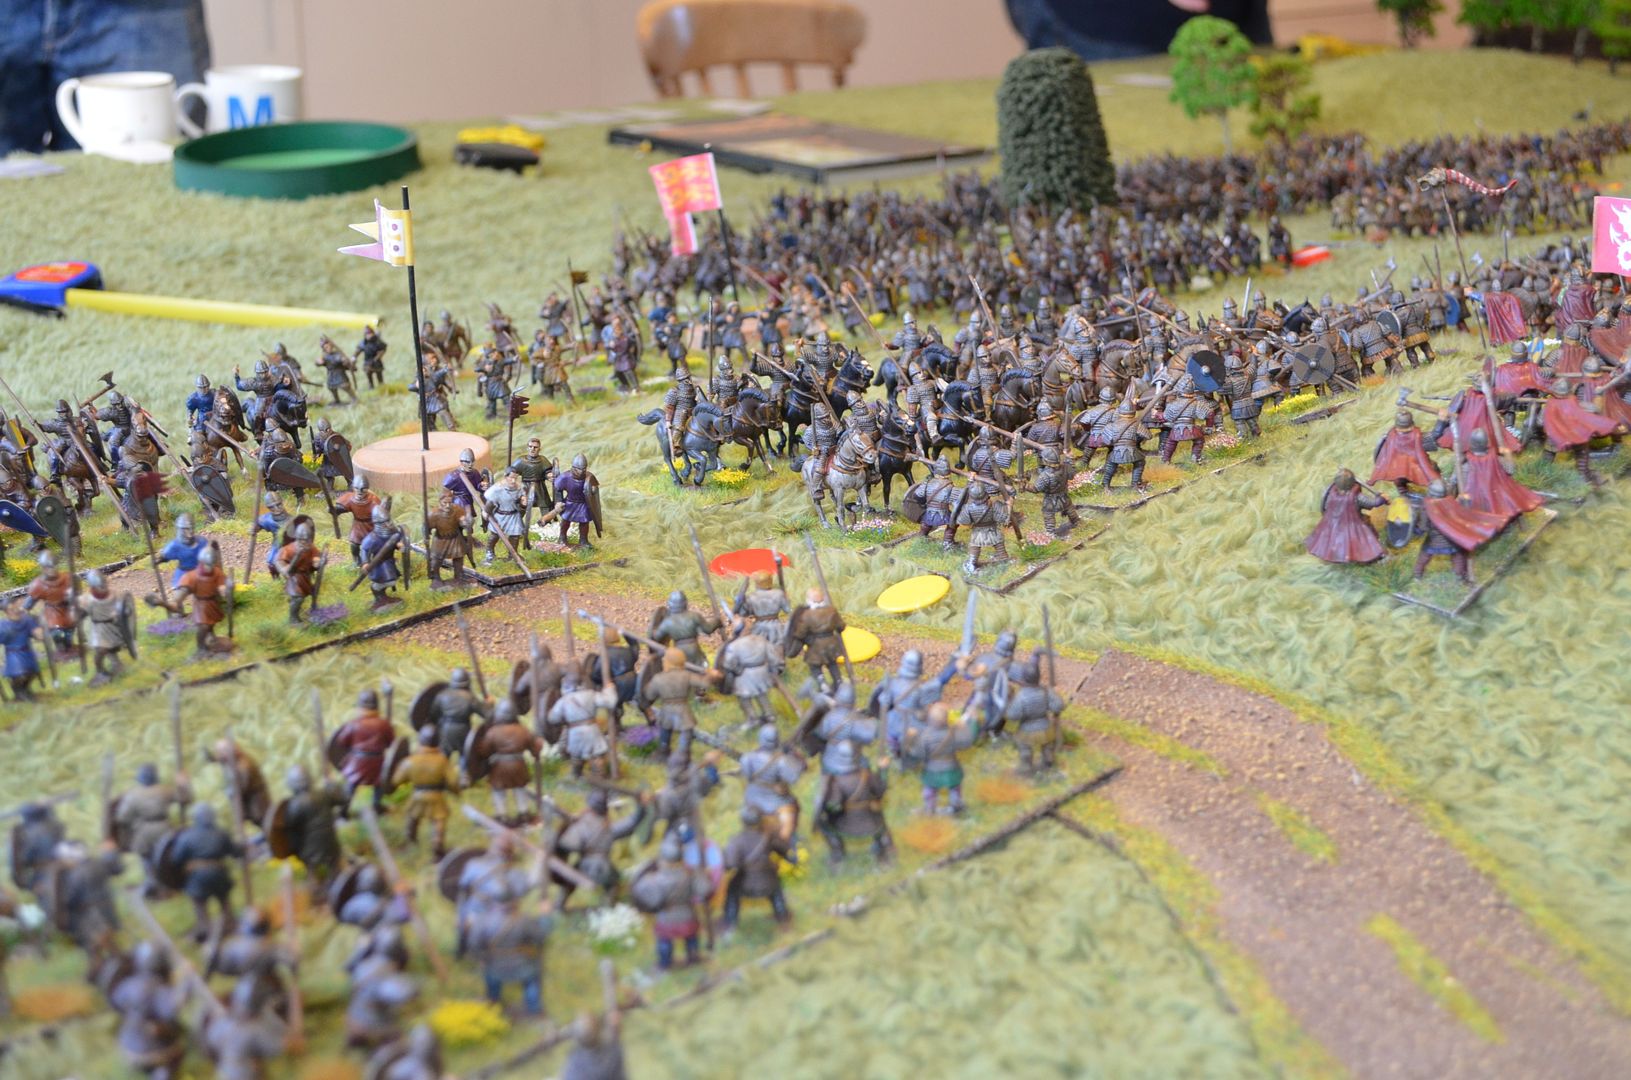
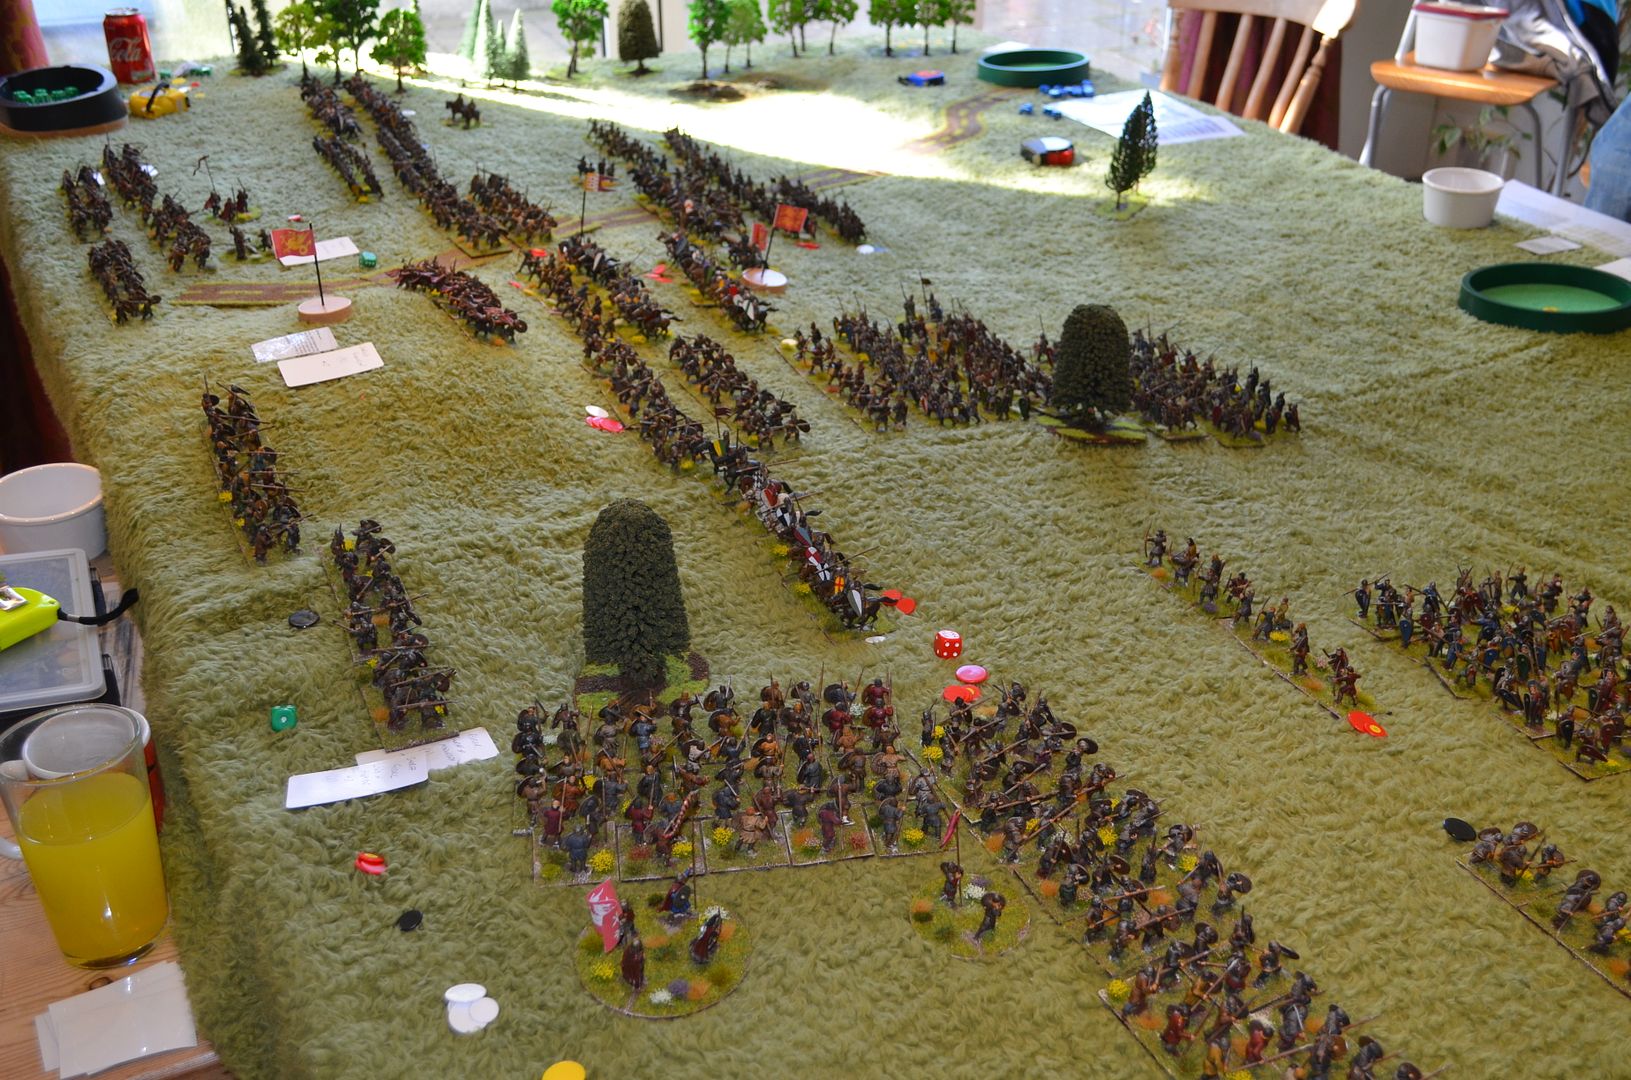
After a couple of hours of gameplay my forces had been
decimated and I was only just holding the line. By now the Norman centre had
reached the Saxon lines and after a brief exchange of missile fire the centre
was under heavy pressure from sustained Norman charges. Only the right flank
was holding for the Saxons (and that was because the Breton’s sole aim was to
pin these guys down rather than force the battle across the line.
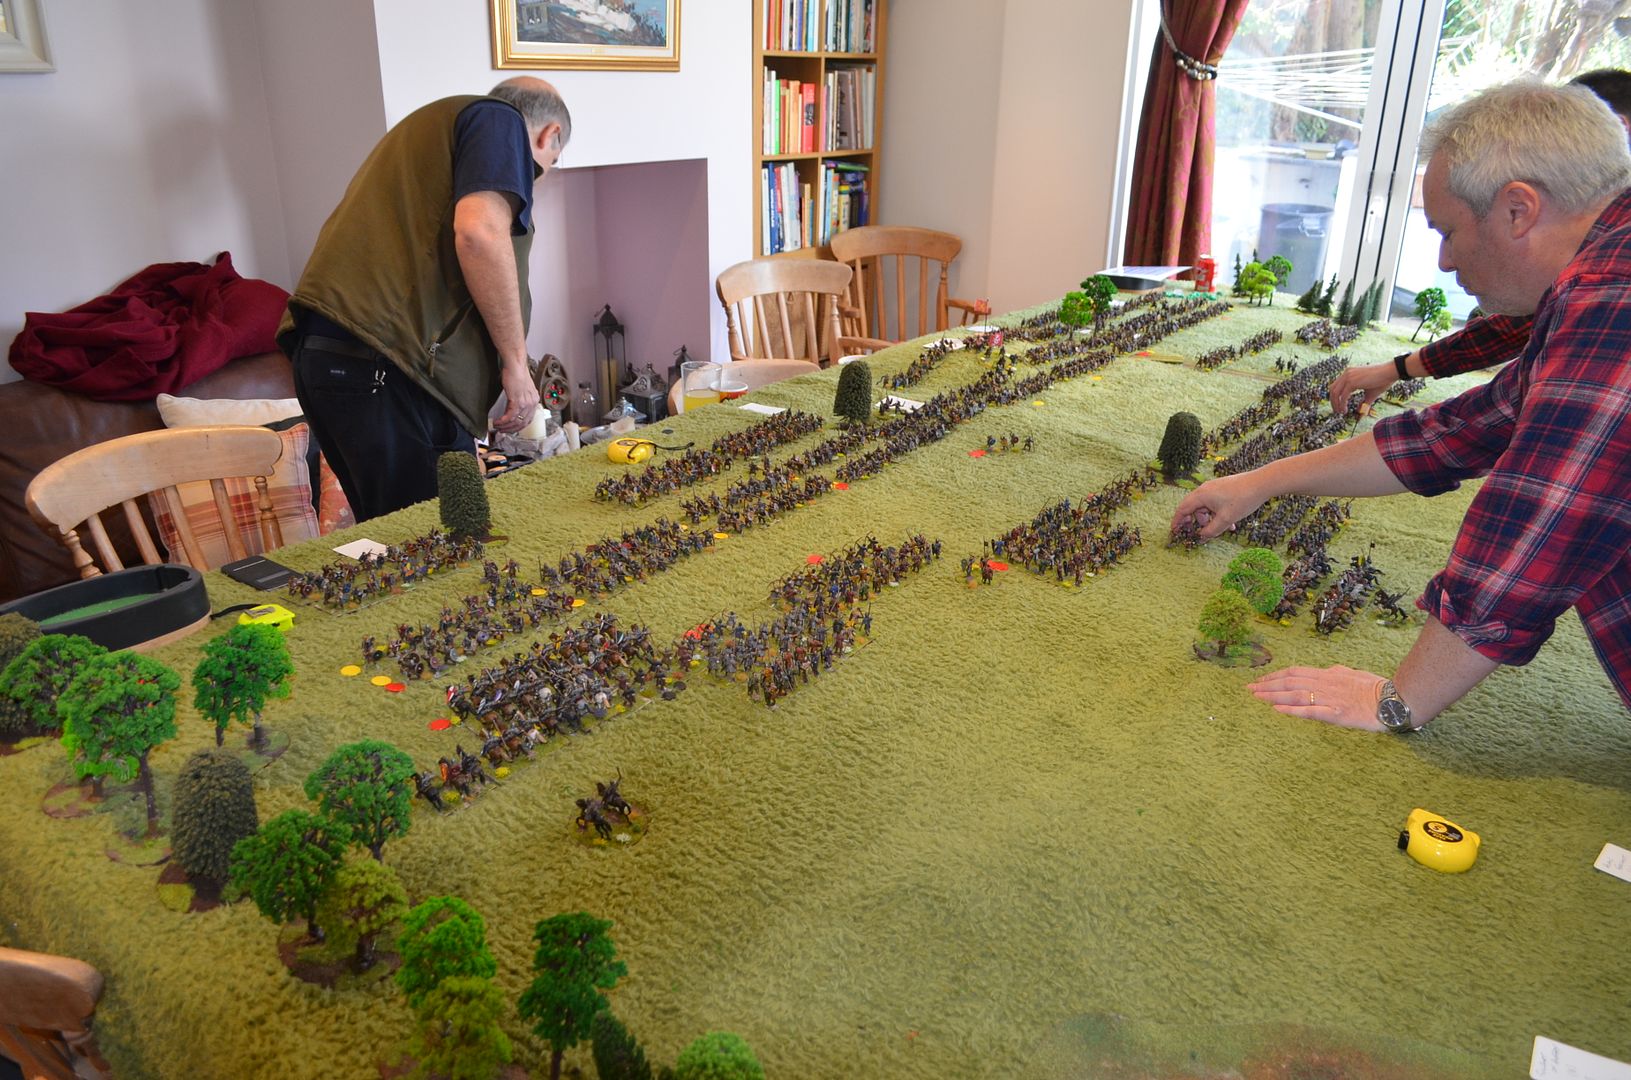
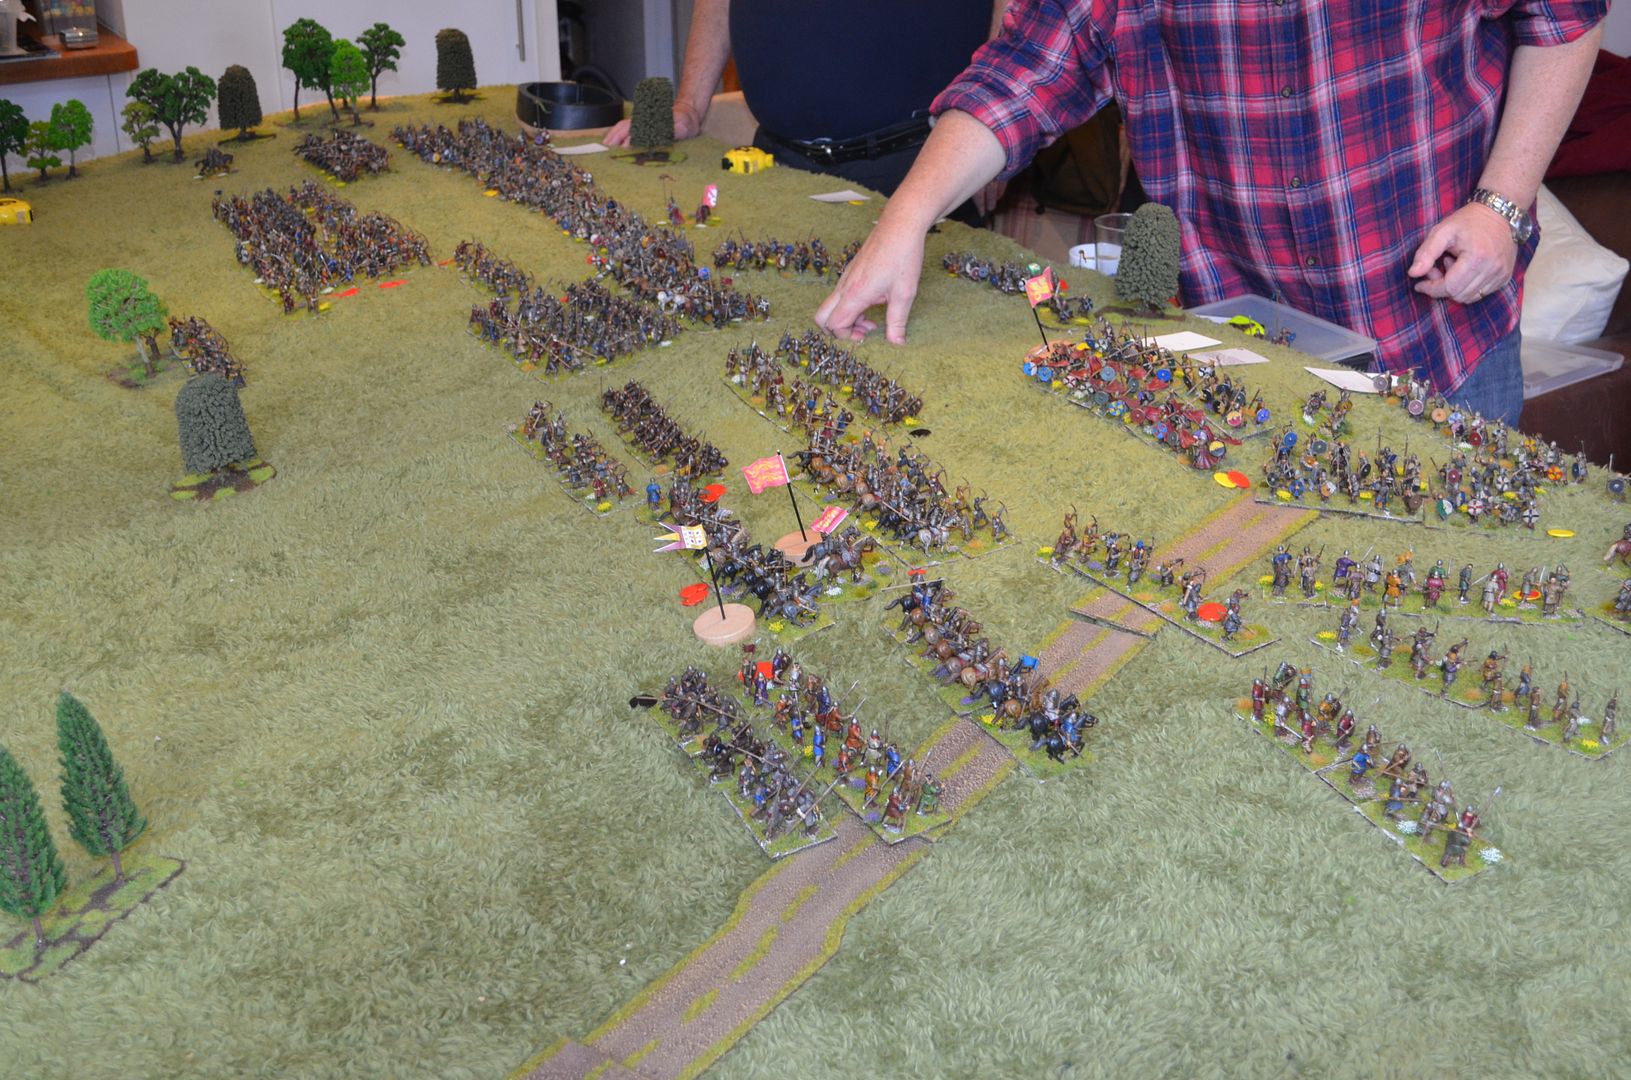
The Norman cavalry were living up to their reputation as the
kings of the dark age battlefield and the combined arms force of William was causing no
end of troubles for the single purpose Saxon line. History was repeating
itself. Despite the judicious use of our tactics cards the Normans were coming
up trumps in virtually every assault. The only saving grace was that both
feigned flights planned by the Normans came to nought and the resilient
Englishmen refused to come off the hill.
As time marched on the casualty lists began to mount – for
every Norman unit taken out in battle the Saxons were losing two. A rate of
attrition that was only going to end one way.
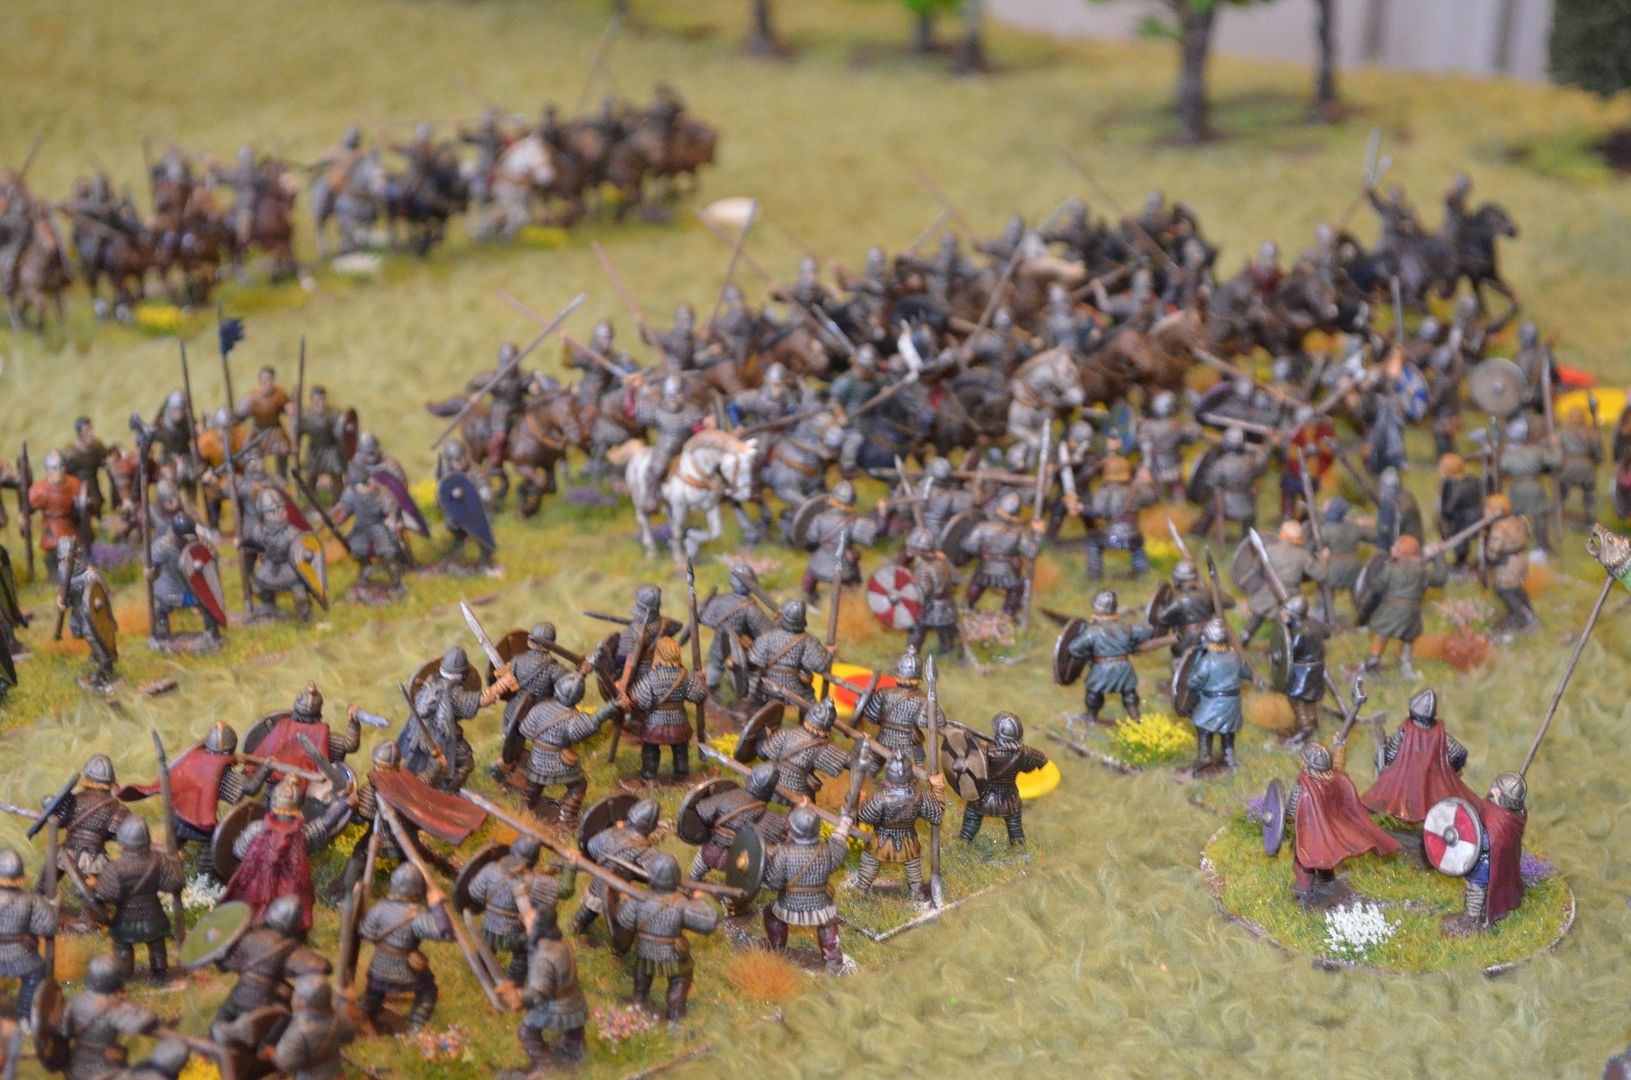
Realising the Saxons were in dire straits Alastair charged his remaining heavy knights, lead by Bisdop Odo, into the centre.
Crashing into the conscripted Fyrd, the middle of Saxon line collapsed. The defences had been breached and Harold was in severe danger of being overrun. Odo’s knights were then turned on by what remained of the Saxon forces gallantly holding on. A small victory for the Anglo's as Odo was dragged from his horse and sent to meet his maker earlier than he intended.
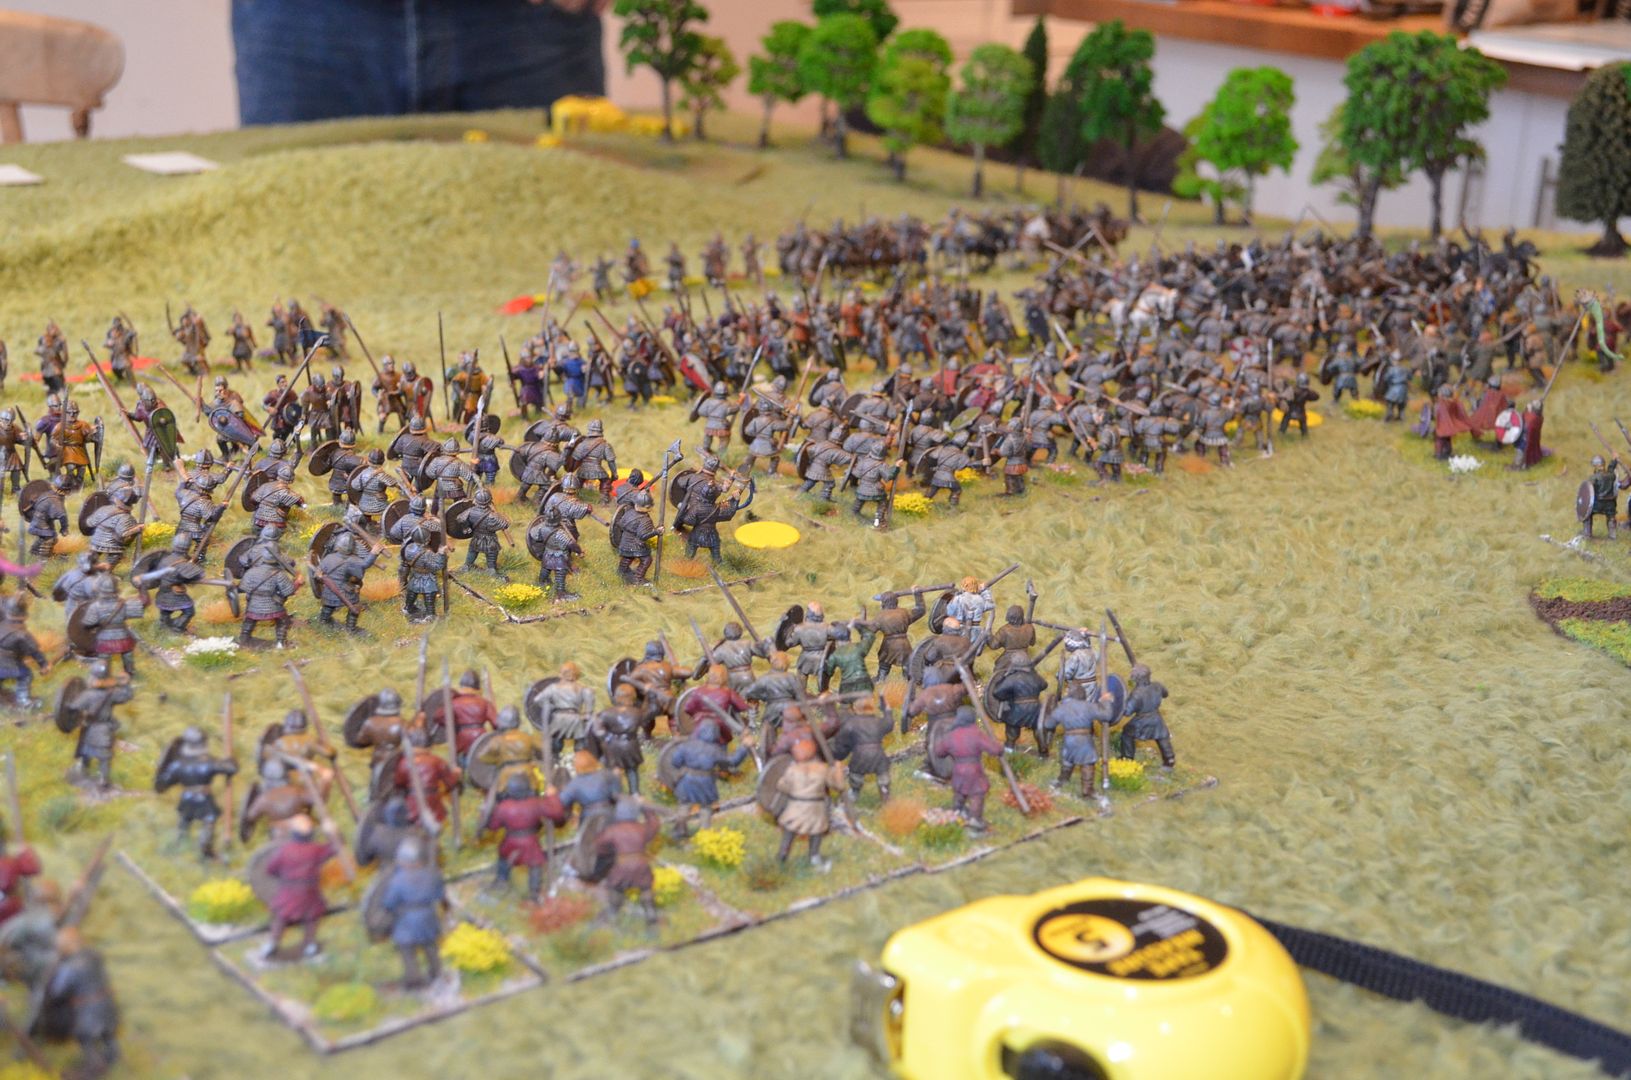
It was almost over – the Saxon left and centre had
disintegrated.
As a final act of defiance the Kings household troops charged down the slope into the fray- these hardened warriors wiping out a unit o archers and a badly mauled unit of knights. But it was too late. William (soon to be known as the Conqueror) personally lead his mounted body guard into the melee delivering the final coup de grace. What of Harold – he survived but his army is in tatters and his reputation severely tarnished.
As a final act of defiance the Kings household troops charged down the slope into the fray- these hardened warriors wiping out a unit o archers and a badly mauled unit of knights. But it was too late. William (soon to be known as the Conqueror) personally lead his mounted body guard into the melee delivering the final coup de grace. What of Harold – he survived but his army is in tatters and his reputation severely tarnished.
In hindsight he was never going to be killed in conflict
unless he put himself in harms way. So on the basis the Normans utterly crushed
the Saxons they were awarded the victory
 |
| The Normans kick off.... |
 |
| Awaiting the the Saxons at the top of the hill |
|
| The Saxon defences look impregnable |
 |
| The Normans advance with care |
 |
| Saxon skirmishers run out to taunt the French |
 |
| A short firefight in no mans land |
 |
| The Breton right advances up to the Saxon line |
 |
| As does the left wing - French and Flemish mercenaries |
 |
| Finally the Norman centre moves up |
 |
| Blows, spears and taunts on the Saxon left |
 |
| The Saxons are still quietly confident |
 |
| Harold studies his lines and forms his troops up in Shieldwall |
 |
| The Normans unleash their arrow storm |
 |
| In the far distance tyhe Norman right flank has made contact |
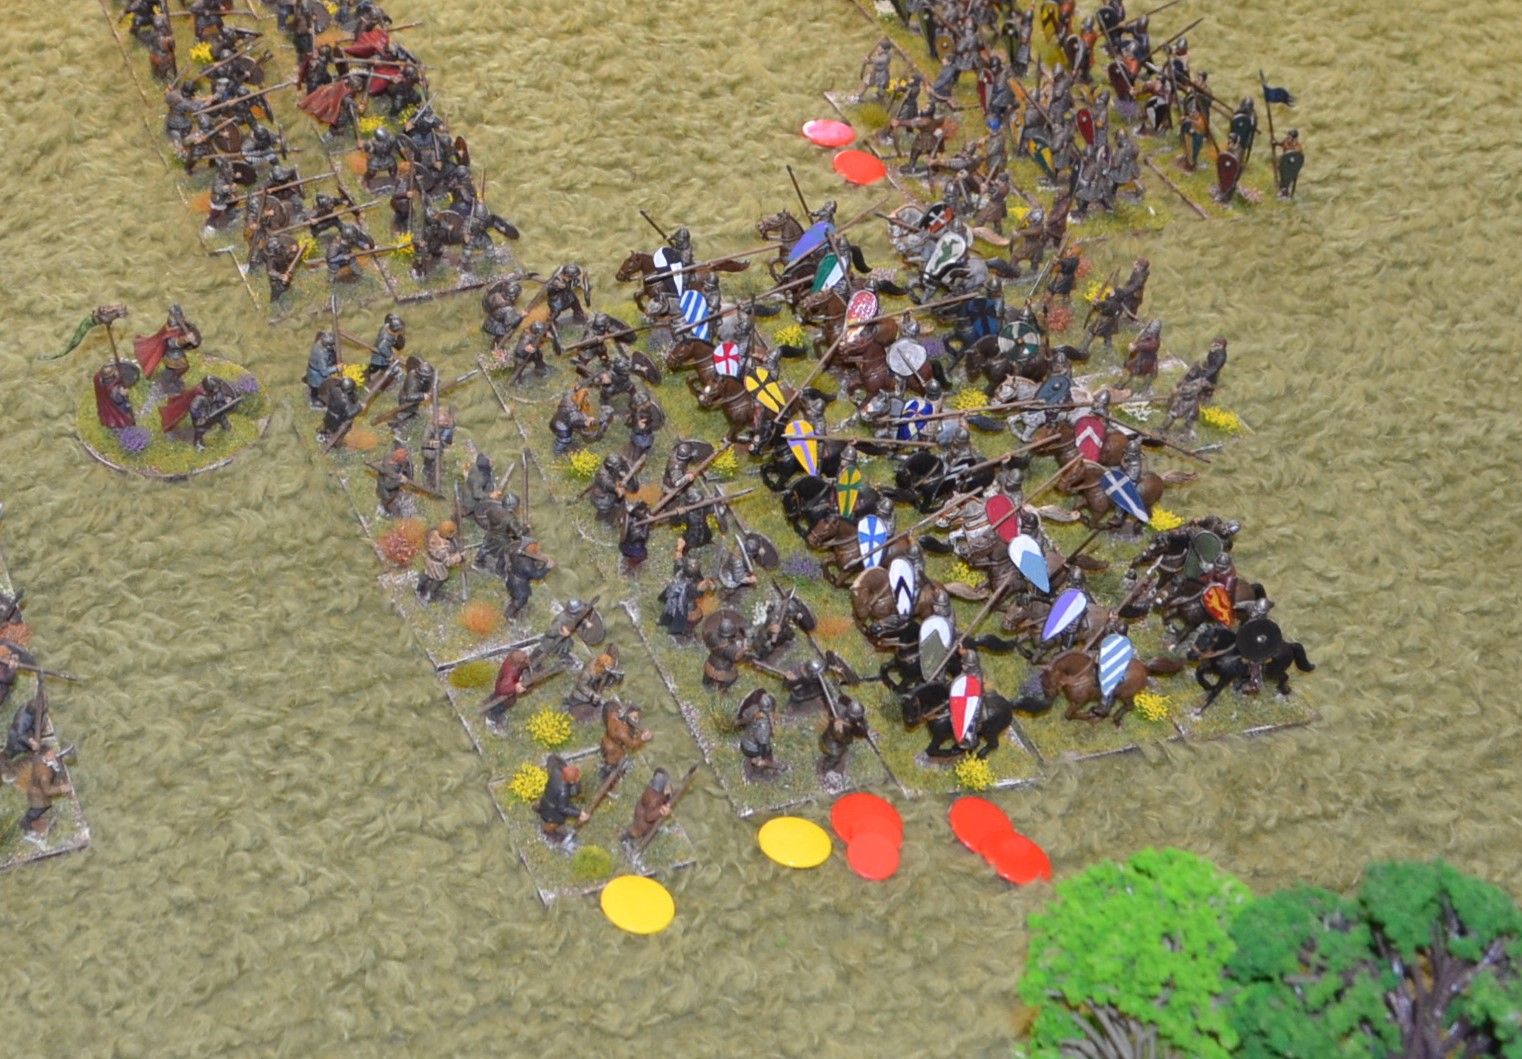 |
| Cavalry crashes into infantry - ouch |
 |
| Here comes the Norman Centre |
 |
| Harold's position is starting to look threatened by advancing Horse |
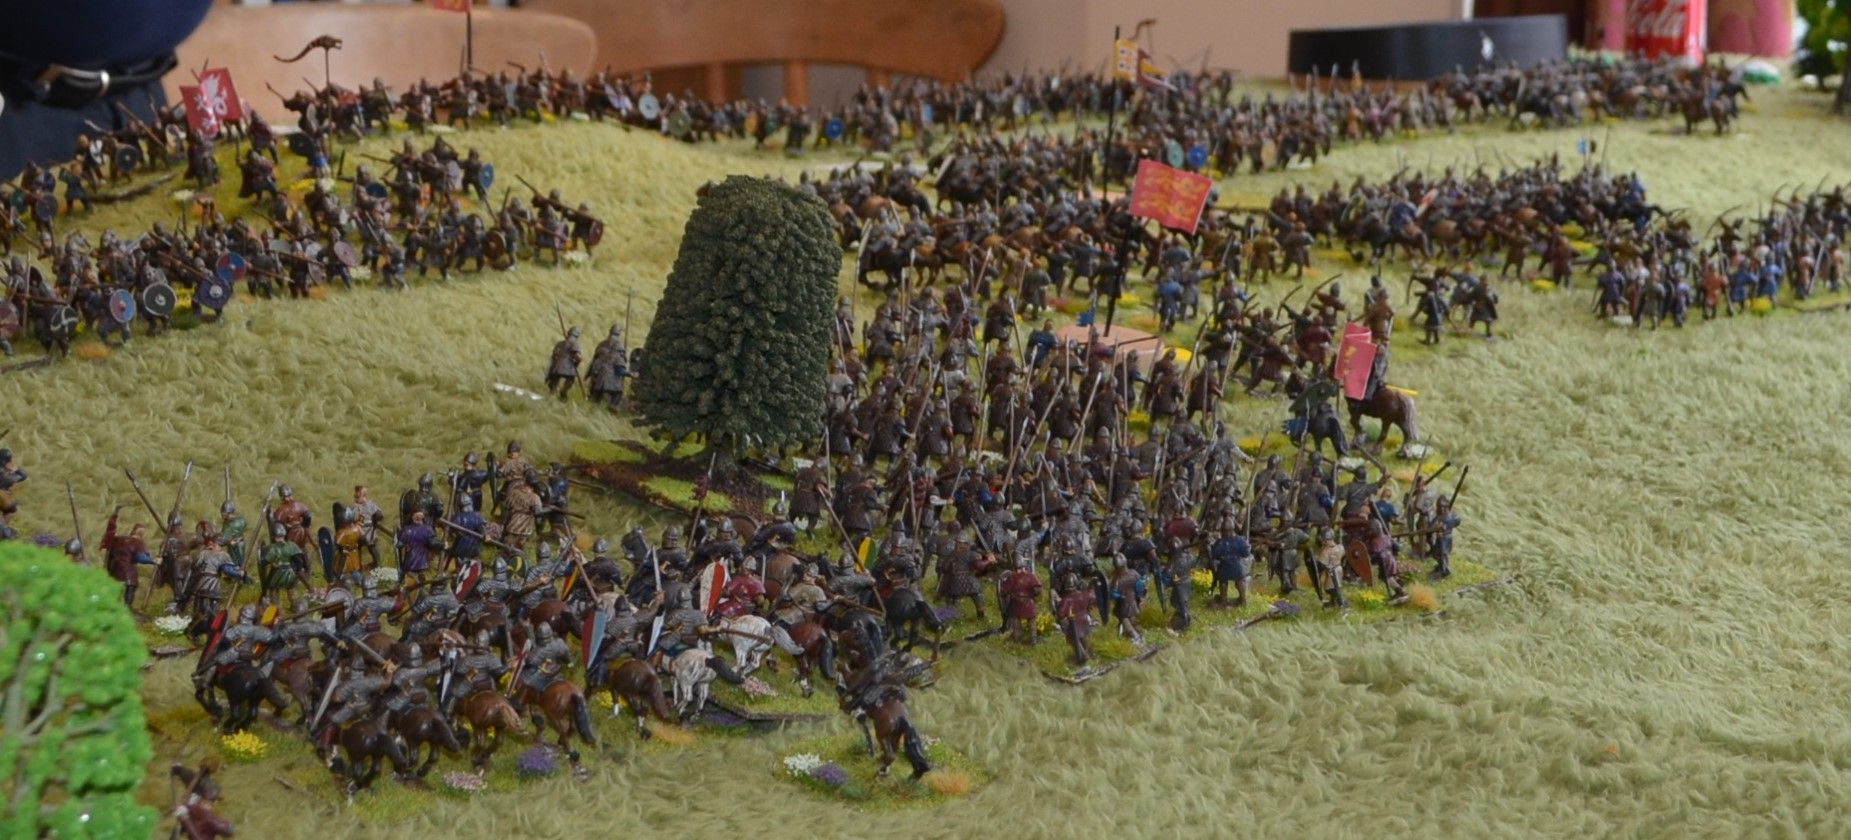
 |
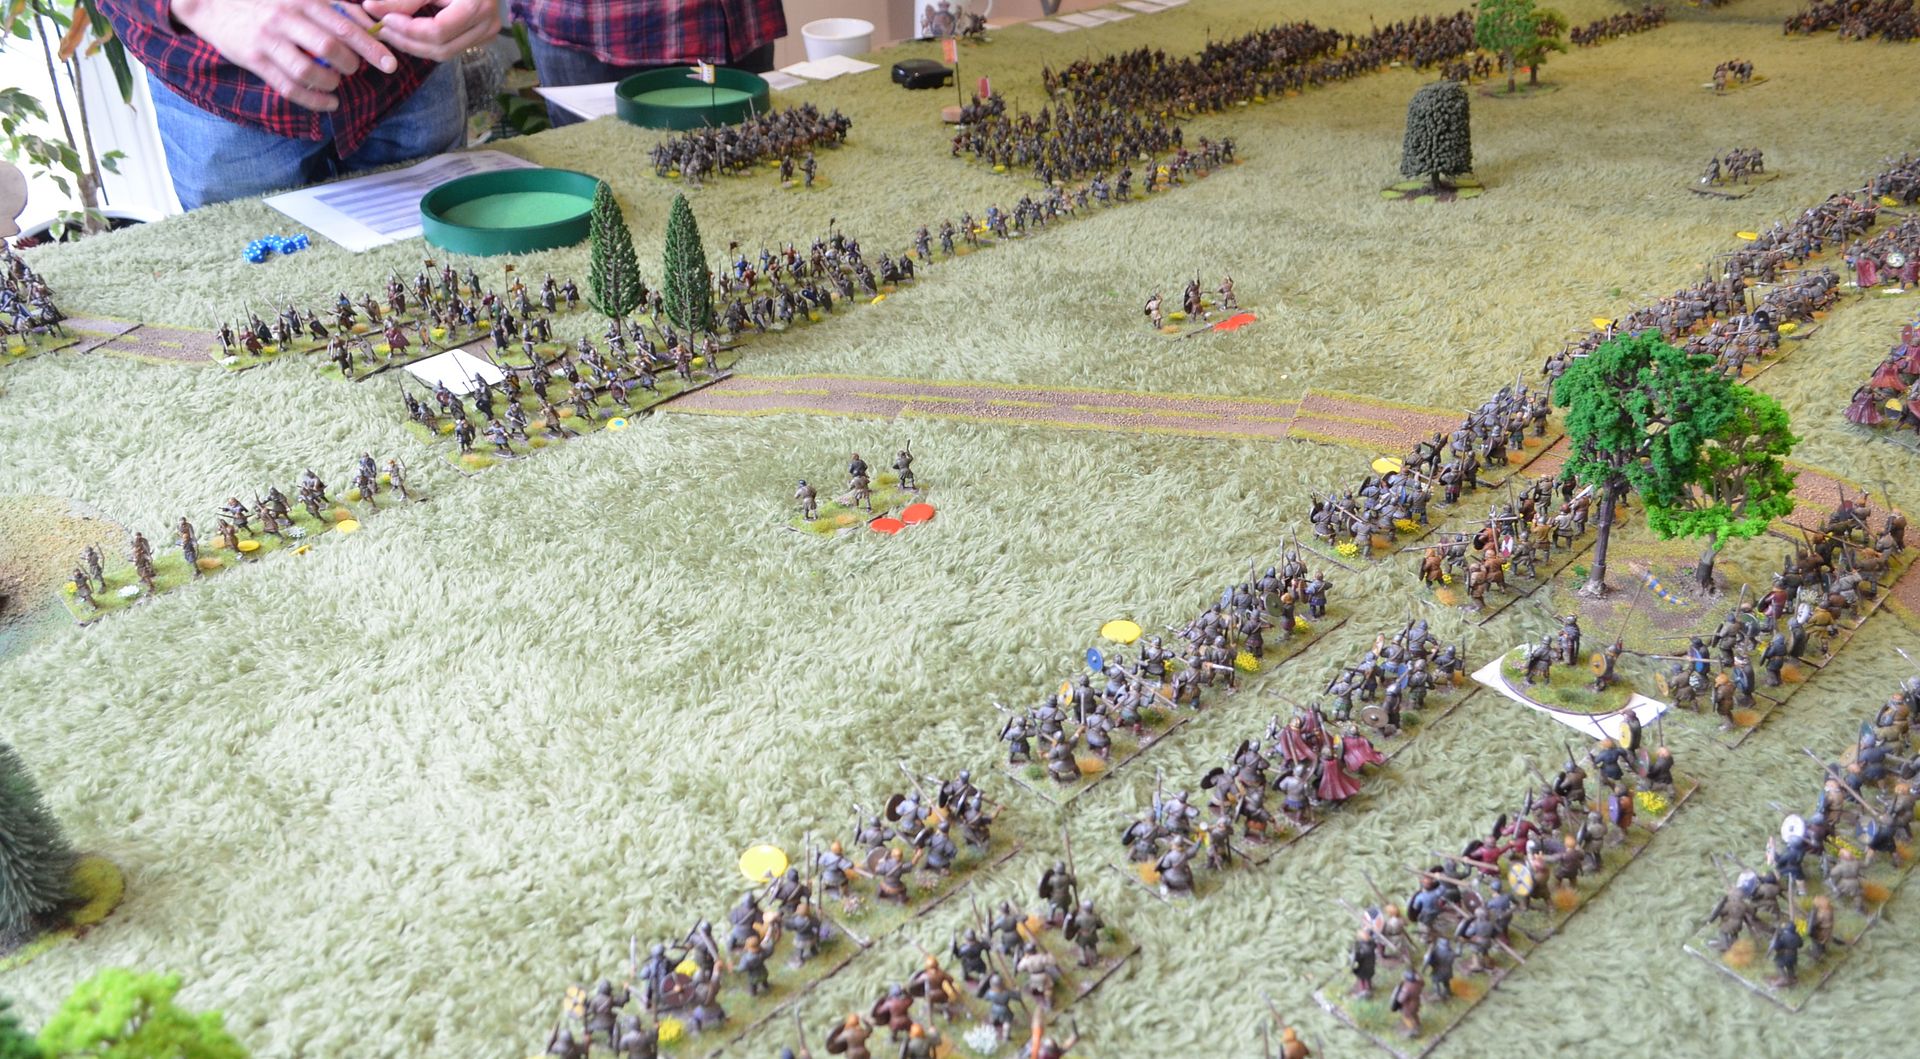
| The battle is raging across the front |
 |
| Those Normans keep coming |
 |
| We are tryng to hold them |
 |
| Combined arms of Normans proving a better job than the single purpose saxon army |
 |
| Pushing up the hill |
 |
| Its getting desperate on the crest |
 |
| The right flank of the Normans regroups |
 |
| Giving time for the Saxons to catch their breath |
 |
| Things are starting to go wrong in the centre |

 |
| The Saxon left collapses |
 |
| As the last stand of the Huscarls is revealed |
 |
| The Normans push on to victory |
 |
| The Saxons are staring at defeat |
 |
| The Housecarls launch a desparate drive to take out William |
 |
| The end...a lot fewer forces grace the table |
Thanks for following this project and in my next post I'll tell you what I am working on next...
Appendix:
Some House Rules for Hastings
Histories report
that the battle started at the 3rd hour (09.00am) and raged all day.
It wasn’t until the late afternoon that William’s forces finally overran the
Saxons and Killed Harold. This would have been around 4-5pm. Sunsets in October
at around 6pm.
Realistically
the soldiers of the day could not bash each other up for eight straight hours.
I believe that
the real battle was probably more like an American Football match with periods
of high intensity and then a series of time outs and breaks.
These interludes
would have allowed both sides to catch their breath, reform battle lines and rally
shaken troops. This view is reinforced by the Bayeux Tapestry which shows the Norman
archers restocking arrows during the battle.
Given the Saxons
were defending the timetable of the battle would have been determined by the
Normans.
To reflect this
in our game William has the opportunity during the game to call time outs. He
may do this twice during the game provided the following criteria are met.
- ·
That there are no formed Saxon
units anywhere other than on the ridge line (ie not disordered)
- ·
none of his forces are either
engaged with enemy troops
- ·
none of his troops are in
initiative range of a Saxon attack.
If all these
criteria are met the Norman player may call the time out.
Note: Should the
Saxon players have decided to come off the hill to attack the time outs may not
be called – until such time that all formed Saxon troops are back on the ridge
line.
At the point a
time out is called the players on both sides may do the following:
Saxon Player:
·
All units currently disordered
are longer disordered and may make one move but not over the ridge line –
exception disordered Saxon units not on the hill may retreat backwards towards
the hill and remove disorder
·
All units that are shaken may
make one move but not forward
·
All commanders may rally one
unit that they are attached to or if not attached within 12” without making a
command roll
Norman Player
·
All units may make two free moves
but not forward up the hill (they may move forward on the valley floor
·
All units currently disordered
are longer disordered and may make one move
·
All units that are shaken may
make one move but not forwards
·
Commanders may rally one unit
that they are either attached to or within 12” without making a command roll
·
Archery units may restock *see
archery
Note: The Norman
player may call a maximum of two timeouts in the battle.
All troops may
pass through one another without causing disorder in this phase.
Archery/Missile Troops
Only the Normans
have designated Archery troops. Every Saxon unit has its short range throwing
weapons as per standard rules.
The considered
historical view is that the initial archery phase of the battle had little
affect on the Saxon shieldwall – the archers were firing up hill and that a
limited arrow supply was evident.
Given the Saxons
had few archers the number of reusable shafts lying in the Norman’s half of the
field would have been minimal.
However, as mentioned
previously, the Bayeux Tapestry shows the archers restocking during the latter
part of the battle and of course we all know what happened to Harold in the
latter part of the day.
Therefore the
Archers units will be limited to three rounds of firing at full effect,
thereafter they fire with only one dice. Once the Normans have called their
second timeout we can assume that supplies have reached the archers and they
can restock back to three fire phases. No
Archery unit may have more than three archery counters.
Moving/Seeing through units
This is a
crowded battlefield with units densely packed.
Only archery
units on the Norman side may freely pass through other units or have units pass
through them with no chance of disorder.
Only Archery units
can be seen through when it comes to charge targets for the Normans. Please
note that these are not skirmish units so may not evade.
Units other than
archers that pass through one another must dice for disorder. Both units
affected dice. On a roll of 123 the unit is deemed to be disordered.
Battlefield Tactic Cards
Each General
will receive a small deck of Battlefield Tactic Cards, these may only be played
once during the game and then discarded. The card should be self-explanatory
when it can be played.
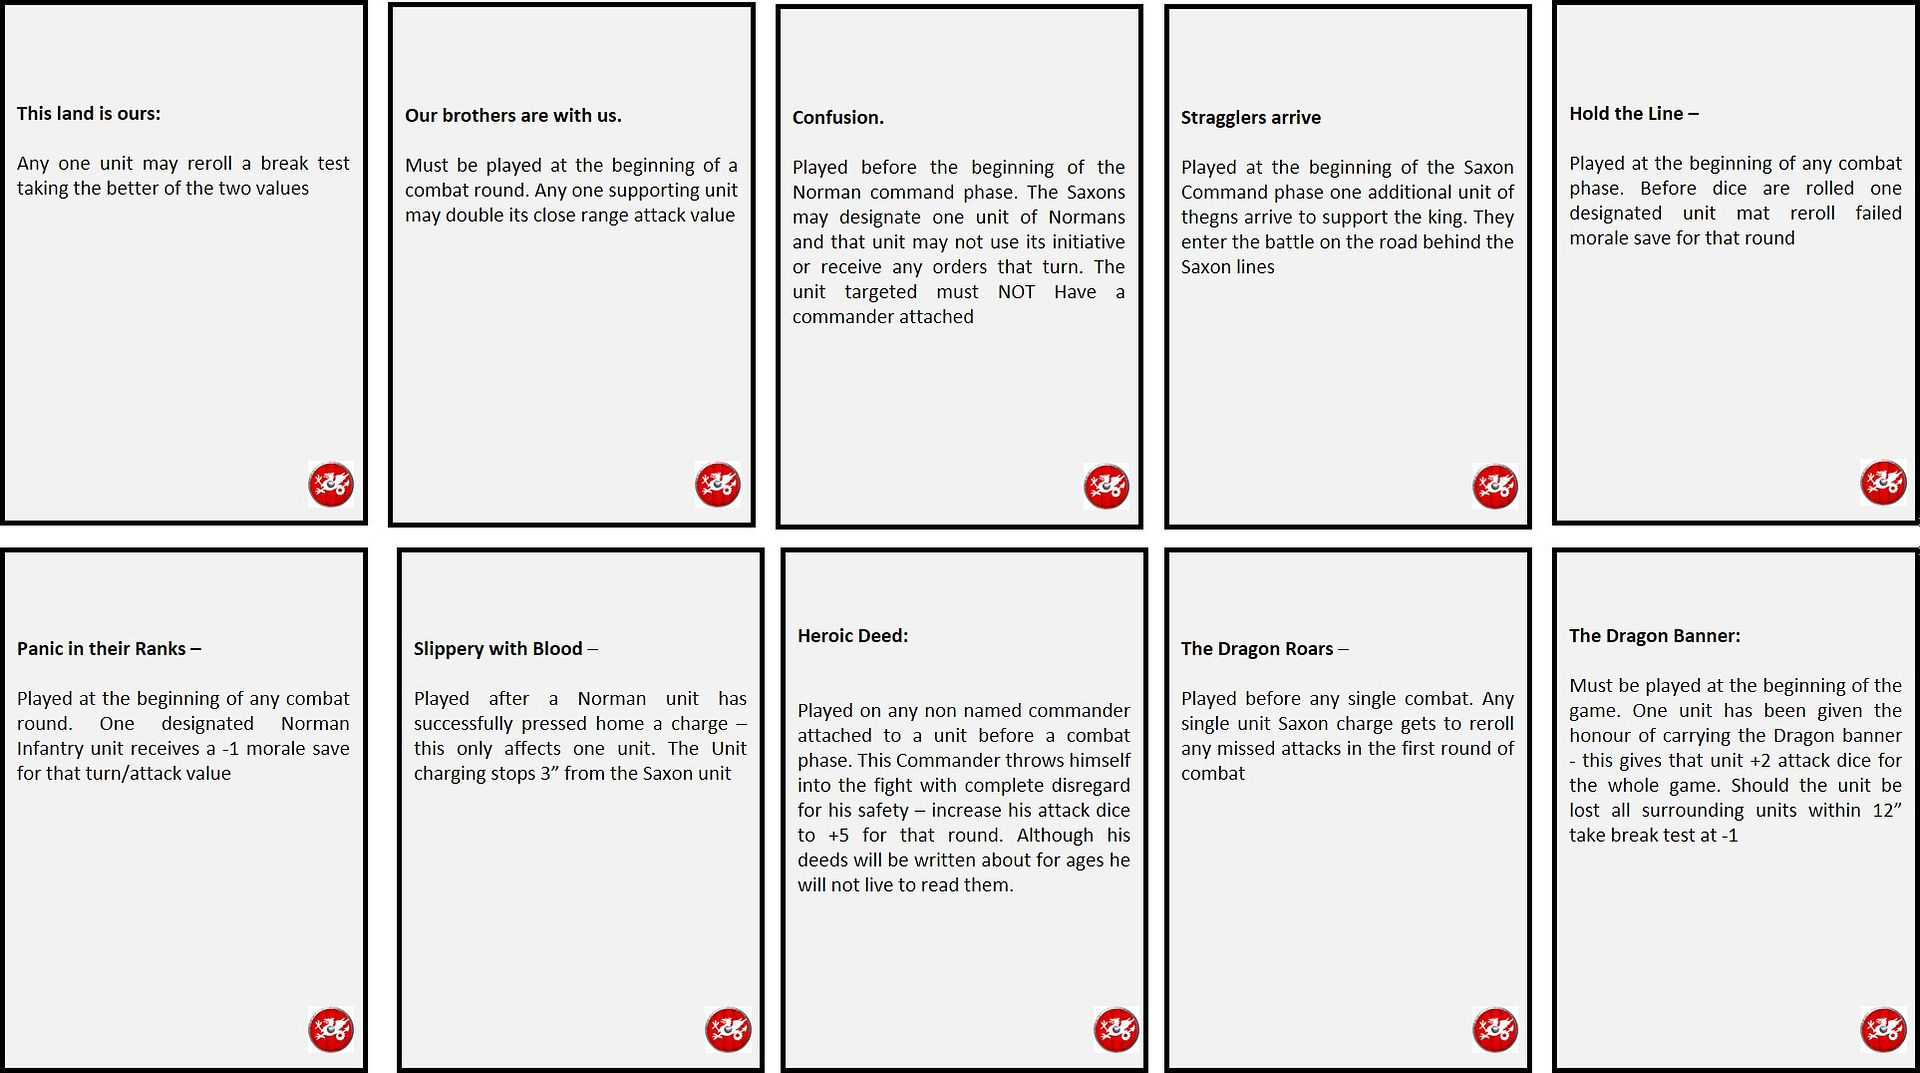 |
| Some of the Saxon Battle cards |
Normans
1. Feigned Flight:
Played at the beginning of the Saxon turn. Any units within 12” of a single
commander may retreat a full move backwards. All enemy units in the front
quarter of these retreating units must then advance x number of moves unless
successfully commanded otherwise – each unit must be commanded successfully. A
failure to command (ie keep them to hold ground) will cause the unit to advance
as any moves forward that they failed (ie think of this as a command roll in
reverse). Should the Saxon units hit the retreating Normans combat ensues
normally.
2. Withering Storm:
Played at the beginning of the Norman archery phase – all archery units add +1
attack dice
3. The Papal Banner:
Must be played at the beginning of the game. One unit has been given the honour
of carrying the Papal banner - this gives that unit +2 attack dice for
the whole game. Should the unit be lost all surrounding units within 12” take
break test at -1
4. The Conqueror
Lives – should William fall in combat (and die) the Saxons might think they
have won the battle – however William survives (albeit wounded) – Place William
within any unit 12” from the point he fell. William may continue to fight but
only has one wound remaining and can only add +3 to a unit’s attacks.
5. An Arrow in the
Eye: Played before the Norman shooting phase. One designated archery unit will
deliver 4 automatic hits and a disorder (Saxons still get their morale
saves) – if this target unit has a commander attached that commander
automatically receives 1 wound. May not be played in conjunction with Withering
Fire.
6. No retreat, No
surrender (as we haven’t got anywhere to go): Maybe played at the beginning of
the Norman order phase – one unit in the Norman army that is not disordered will
automatically rally removing two stamina. The unit may have just taken wounds
or is already shaken.
7. Iron Discipline:
Played at the end of any combat phase. One Norman unit may automatically remove
a disorder marker.
8. Heroic Deed:
Played on any non named commander attached to a unit before a combat phase.
This Commander throws himself into the fight with complete disregard for his
safety – increase his attack dice to +5 for that round. Although his deeds will
be written about for ages he will not live to read them.
9. Confusion in the
ranks. Played before the beginning of the Saxon command phase. The Normans may
designate one unit of Saxons (not Huscarls) and that unit may not use its
initiative or receive any orders that turn. The unit targetted must NOT Have a
commander attached
10. Advance to the
enemy: Played at the beginning of the Norman turn: Every unit in one designated
division may make one move/charge towards the Saxons as if under initiative –
no further command rolls may be made. Units shaken and/or disordered may
retreat.
11. This land will be
ours: Any one unit may reroll a break test taking the better of the two values
12. Our brothers are
with us. May be played at the end of a combat resolution. All supporting units
for one unit may double their value
Saxons
13. Confusion. Played
before the beginning of the Norman command phase. The Saxons may designate one
unit of Normans and that unit may not use its initiative or receive any orders
that turn. The unit targetted must NOT Have a commander attached
14. This land is ours:
Any one unit may reroll a break test taking the better of the two values
15. Stragglers arrive
– played at the beginning of the Saxon Command phase one additional unit of
thegns arrive to support the king. They enter the battle on the road behind the
Saxon lines
16. Hold the Line –
Played at the beginning of any combat phase. Before dice are rolled one
designated unit receives a +1 morale save for that round
17. Panic in their
Ranks - Played at the beginning of any combat round one designated Norman Infantry
unit receives a -1 morale save for that turn.
18. Slippery with
Blood – Played after a Norman unit has successfully pressed home a charge –
this only affects one unit. The Unit charging stops 3” from the Saxon unit
targeted
19. Heroic Deed:
Played on any non named commander attached to a unit before a combat phase.
This Commander throws himself into the fight with complete disregard for his
safety – increase his attack dice to +5 for that round. Although his deeds will
be written about for ages he will not live to read them.
20. The Dragon Roars –
Played before any single combat. Any single unit Saxon charge gets to reroll
any missed attacks in the first round of combat
21. The Dragon Banner:
Must be played at the beginning of the game. One unit has been given the honour
of carrying the Dragon banner - this gives that unit +2 attack dice for
the whole game. Should the unit be lost all surrounding units within 12” take
break test at -1
22. Iron Discipline:
Played at the end of any combat phase. One Saxon unit may automatically remove
a disorder marker.
23. Shields Up: Must
be played at end of Norman command phase and before their shooting. All
shooting attacks lose one attack dice this round.
24. We stand together:
May be played at the end of a combat resolution. All supporting units for one
unit may double their value
Commanders
Historically the
commanders of battles in the Dark Ages got stuck in – they were warriors and
their presence in the front line was not only seen as one of valour but it was
expected.
In this game we
want to see these generals get stuck in, to create the heroic moments of the
sagas and lead those charges.
Please note that
these rules supercede those given in the rule book.
Saying that
leading from the front does not help you to command and order your army, to
take those tactical decisions that will sway the battle and react quickly to
events outside your immediate vicinity. So with that in mind we will adopt the
following rules to get those folks stuck in.
William &
Harold will both add +5 attack dice rolls to a unit that they are attach
themselves to. The other commanders
+3.
When attached to
a unit the commander can in the command phase either use the follow me rule or
issue commands to any unit within 12” of his position But not both. Commanders
not attached to units are not affected by the 12” rule of command.
A unit may not
be rallied unless the commander attaches himself to said unit.(see exception in
phases)
The commanders
themselves must take a hit to be killed -
When the unit
attacks/defends in melee/missile fire but not broken and has a commander
attached
Roll 2d6 - for melee on an 11,12 the commander takes
one wound, for archery the score required is 12
When a unit is
broken in a combat (missile or melee) the number of hits including and pass the
shaken point are added to the 2d6 die roll. A score of 12 or more is an instant
kill,
Eg William is
attached to a cavalry unit that is one point from being shaken. They take four
fits after saves. The commander kill roll is thrown. The saxon player rolls an
8. To this score he adds +3, the number of hits that have been taken including
the shaken point. This gives a score of 11 – William is wounded. Had the Saxons
rolled a nine or more William would be dead.
Any wounded
commander (bar William or Harold) issues commands at -1 for the remainder of
the game. A general attached to a shaken unit will retreat with that unit. They
can either choose to rally that unit the following turn or flee to the safety
of another. Normal rules permitting.
End...
End...
Breathtaking report, an epic effort to reenact that battle and pure eyecandy - thanks for sharing!
ReplyDeleteThank you for your kind words
DeleteIt was a proper 'epic' game in every sense of the word. Even given your unlucky dice throwing, it still felt very finely balanced and a real grind for the Normans...especially as we slowly advanced up that hill! Brilliant day!!
ReplyDeleteOutstanding! Beautiful set up and fabulous figures! Thank you for sharing.
ReplyDeletecheers Charles
DeleteThanks Alastair - Great game to share with some great friends. Thank you for taking part. Those dice are now going in the bin
ReplyDeleteGreat game and a very memorable day. All the effort and attention to detail like the really clever cards gave the battle atmosphere and an epic feel. Really pleased to have taken part. Ps don't throw the dice away the Normans want to put them in Battle Abbey. Glen
ReplyDeleteThank you for taking part
DeleteSuperb in every respect and the ton of effort going in from the first figure painted to the game itself, has made for a superb post to share.
ReplyDeleteThank you Norm
DeleteTruly an amazing display. Well done crafting the scenario and the added cards are genius! I’ve taken the time to read this post a couple of times. Thanks for sharing all the details. Putting on this game is a great accomplishment. Thoroughly enjoyed reading about all the dark ages posts. 😀
ReplyDeleteThank you Stew - much appreciated
DeleteOutstanding! One hell of a write up and scenario. Pictures look great, tons of miniatures ... the mass battle effect is there. Great!
ReplyDeleteCheers Jay - nothing like yours though
DeleteThat was outstanding! Many thanks for taking the time to share the game and present it so wonderfully in this post.
ReplyDeleteThat was outstanding! Many thanks for taking the time to share the game and present it so wonderfully in this post.
ReplyDeleteThank you Sir
DeleteWell done Eric the effort you have put in is enormous and the result looked like an excellent game🙂
ReplyDeleteAstonishing. Huge amount of work, yet you make it look so easy!
ReplyDeleteSimple table, but very effective! Love it all.
ReplyDeleteStunning game, I do admire your commitment to your hobby.
ReplyDeleteVery impressive indeed.
ReplyDeleteImpressive, indeed! Bravo!
ReplyDelete