Showing posts with label WW2. Show all posts

Wednesday, 25 June 2014

England versus Germany 1940


Having had a break for gaming in the shed for a couple of weeks my good friend Mark came over for a spot of Bolt Action. Rather than a VBCW game I decided that we would p[lay a fictitious engagement in Southern 
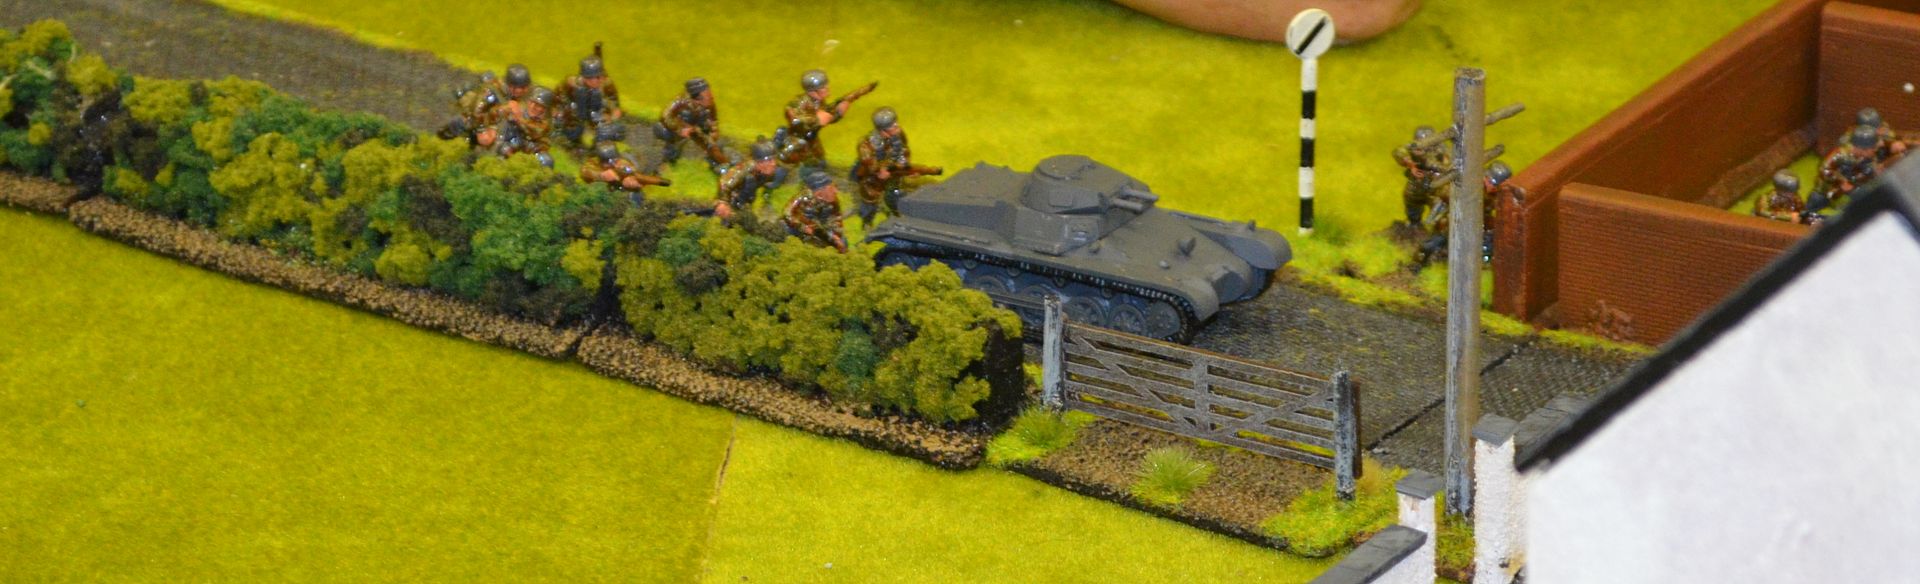
England 1940 just after the German invasion. A unit of German Paratroopers supported by a couple of Panzer 1’s had the objective of capturing the Norman Church – its tower being used as a forward observation post by the defending British.


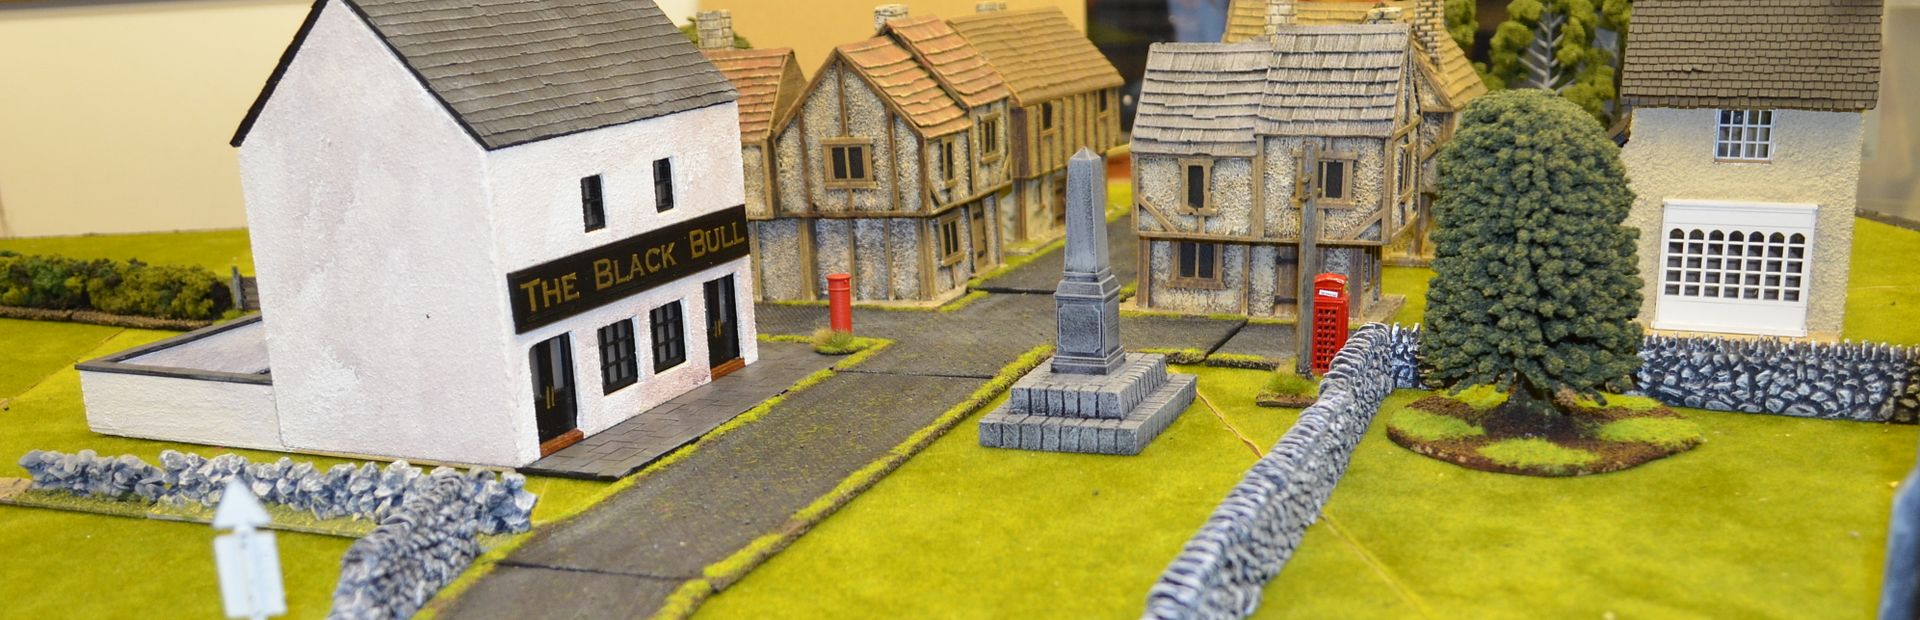
I set up a 5ft x 5ft table and was able to use my latest terrain pieces – namely the church and the pub.


Starting with the forces:

The Germans were all veteran units (their morale and saves being much better and boy did it tell). Mark would play the role of the attacker.

The force consisted of a Command Group

Captain (SMG), a Submachine Gun squad of 4 men and a small mortar

Three Squads each consisting of an NCO (SMG), a 2 man LMG team and seven riflemen.

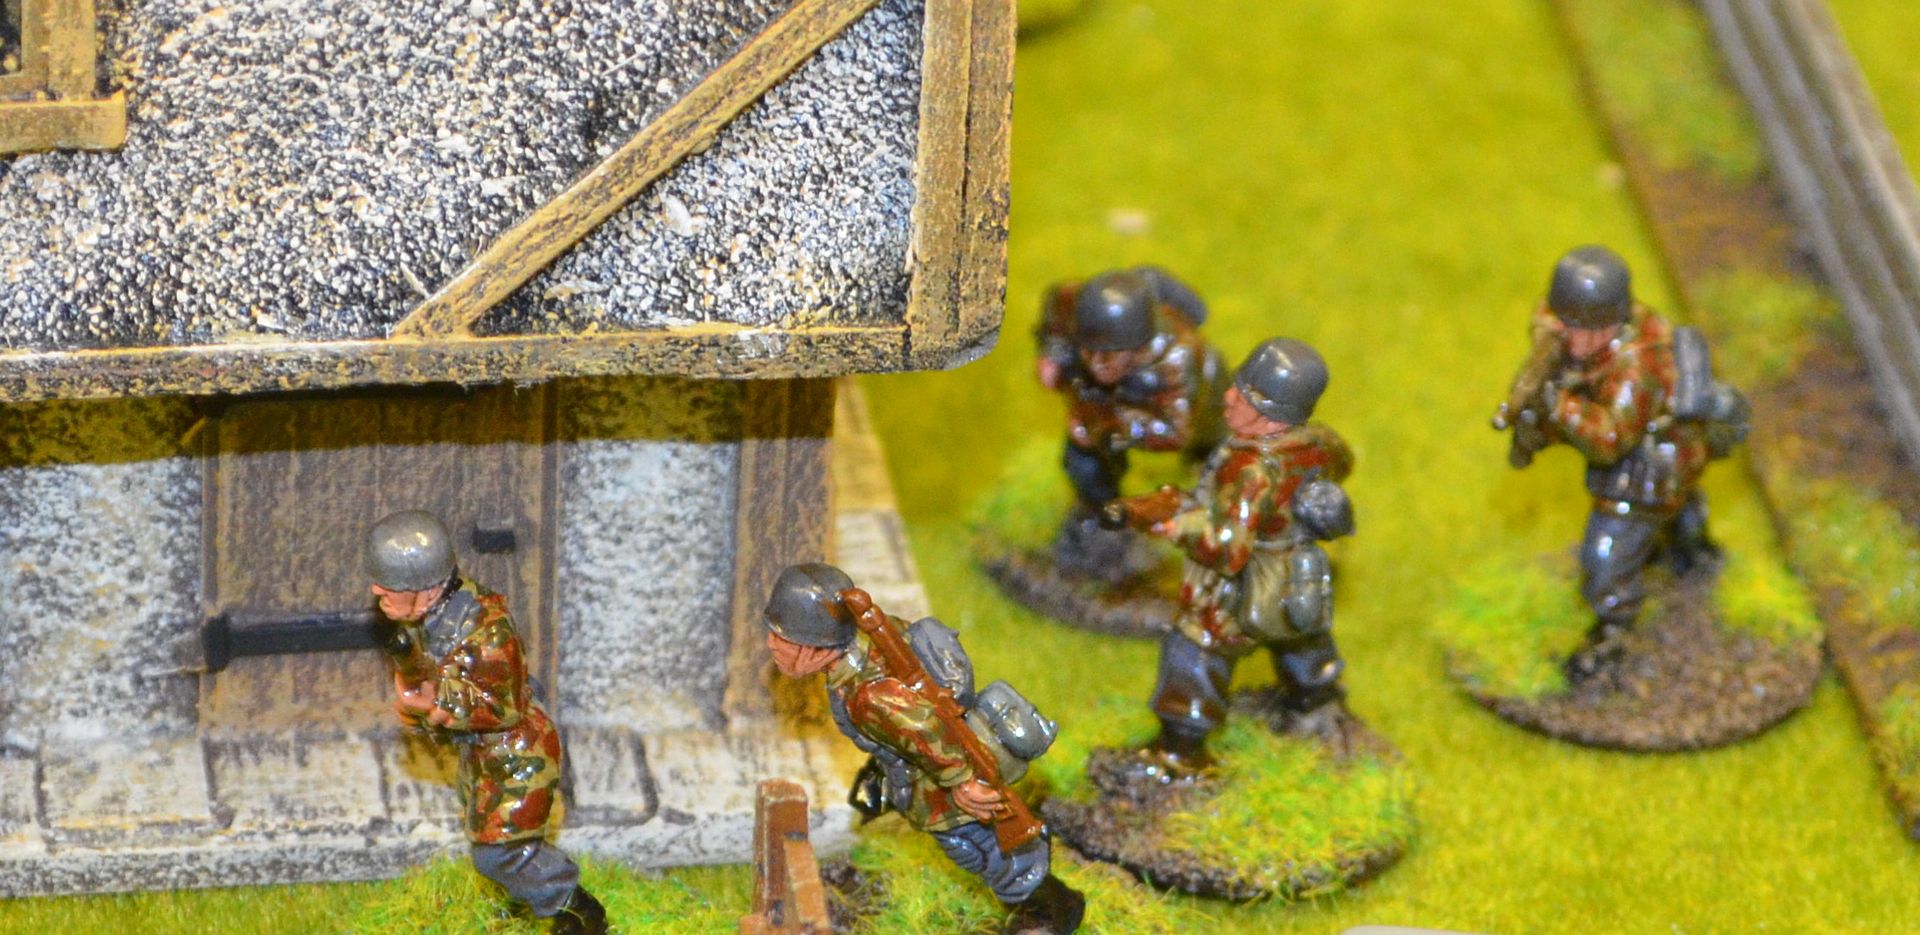
This was the first time my fallschirmjagers had seen action on the table and I was really pleased with their look.


The British Defenders were a rag tag band of Sailors and Home Guard units with NO armour but they did have a trusty medium AT Gun at their disposal.

 Sailor Unit – 8 rifle armed guys and officer (irregulars)

Sailor Gun Battery manning Medium AT Gun (regular) three crew
 
Home Guard Command consisting of Officer and Medic (Mainwaring and Godfrey) - regulars

Three squads of 10 men – each squad had an NCO (smg), a Lewis Gun and 8 riflemen

Two HMG units (separate units – regular)   

Because they were defending I had predetermined their positions before Mark arrived. 


The Germans entered on the southern road. We’d agreed that the tanks would be unable to traverse either the hedgerows or the stone walls prior to starting the game.  Mark pushed his Germans towards the village. Still the field remained eerily quiet. I placed all the British units on Ambush and waited.


In round two he swung his first tank around the outskirts of the village supported by a squad of paratroopers. As the tank crossed the road the naval battery opened fire striking the side armour of the Panzer. Sadly for the gunners their shot failed to strike home merely causing a small fire. This was hastily put out by the tank crew. The tanks was stopped dead in its tracks through pins. Not to worry I’ll get it next time I thought. With the first 
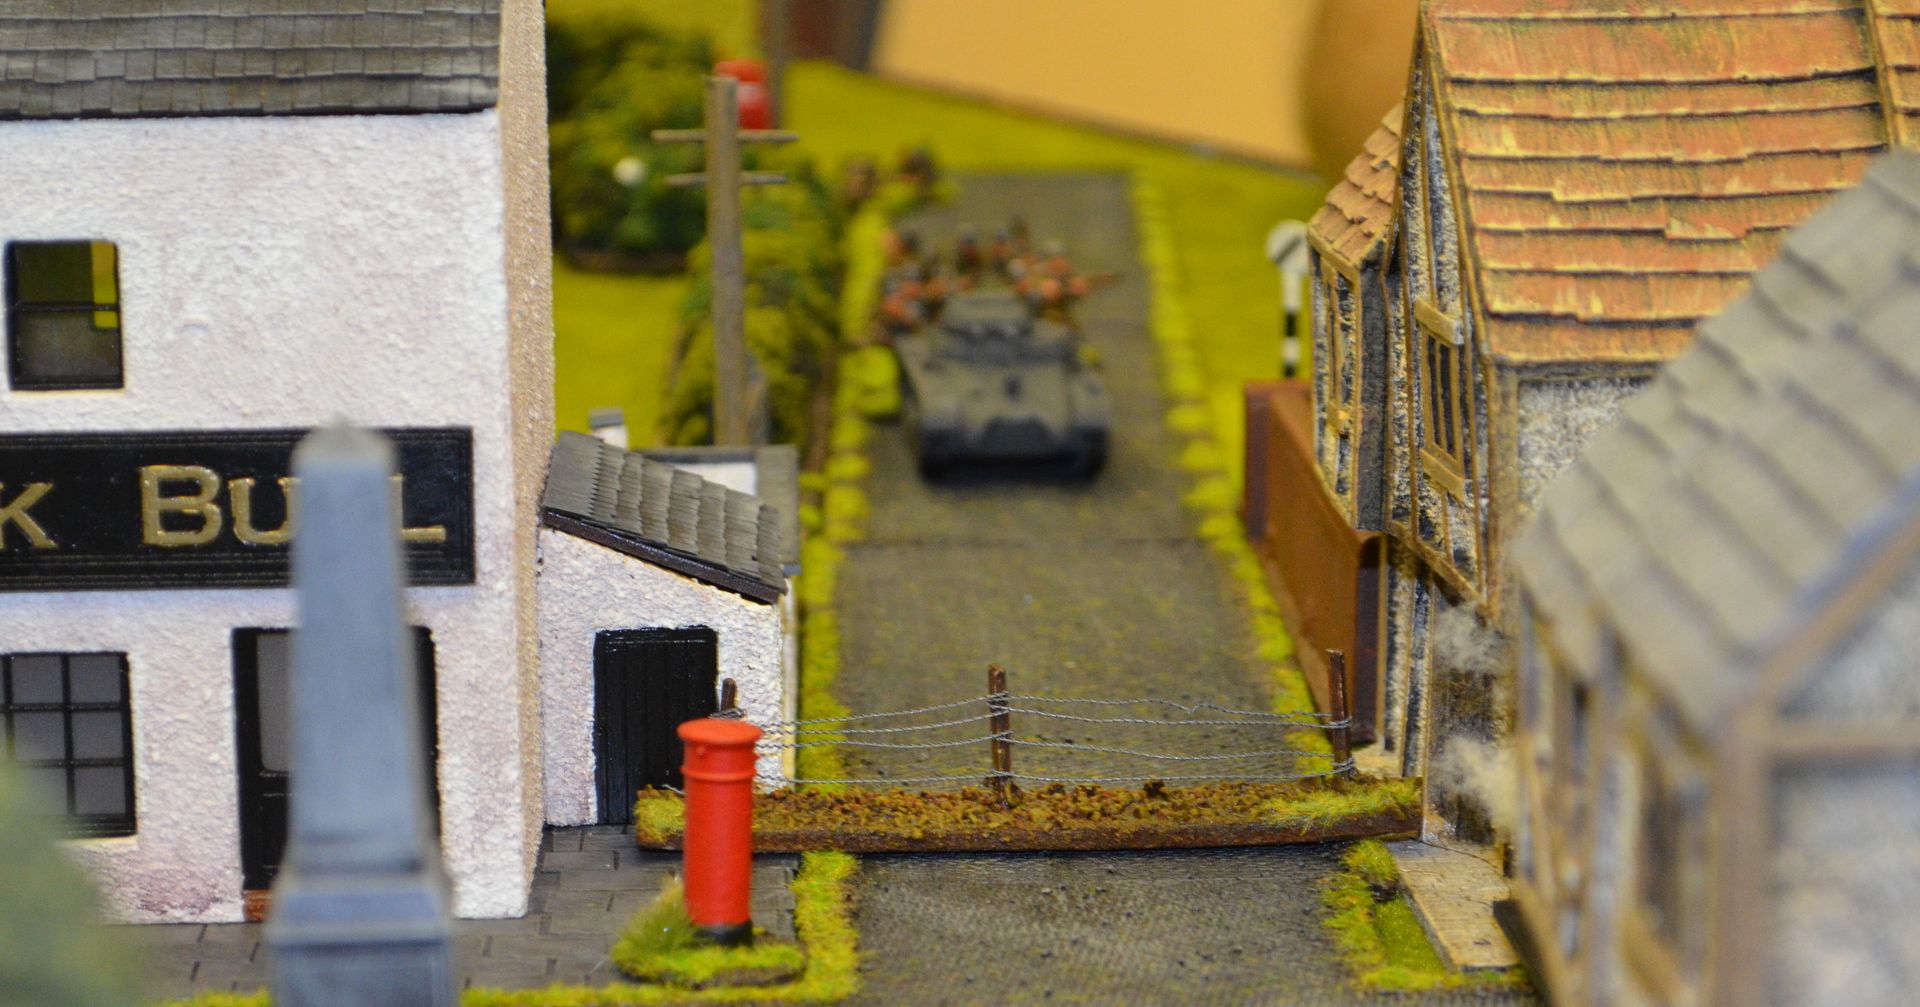
British unit shown the German commander sent his other tank around the Black Bull Pub to take ion the AT gun (each tank had its own dice for movement). With the tanks AT gun somewhat redundant against the positioned battery he let rip with his MG – one hit took out a crew member and therefore reducing the effectiveness of my gun crew. The rest of the Germans pushed forward into the village.


At the beginning of the third turn the Fallschirmjager mortar dropped smoke on the village crossroad – he missed the centre and the smoke drifted across the road blocking off the sight lines between the pinned Panzer and the AT gun. With my original tank target gone the battery switched it attention to the second tank behind the pub. Another hit scored but again the shot failed to penetrate the thin armour.


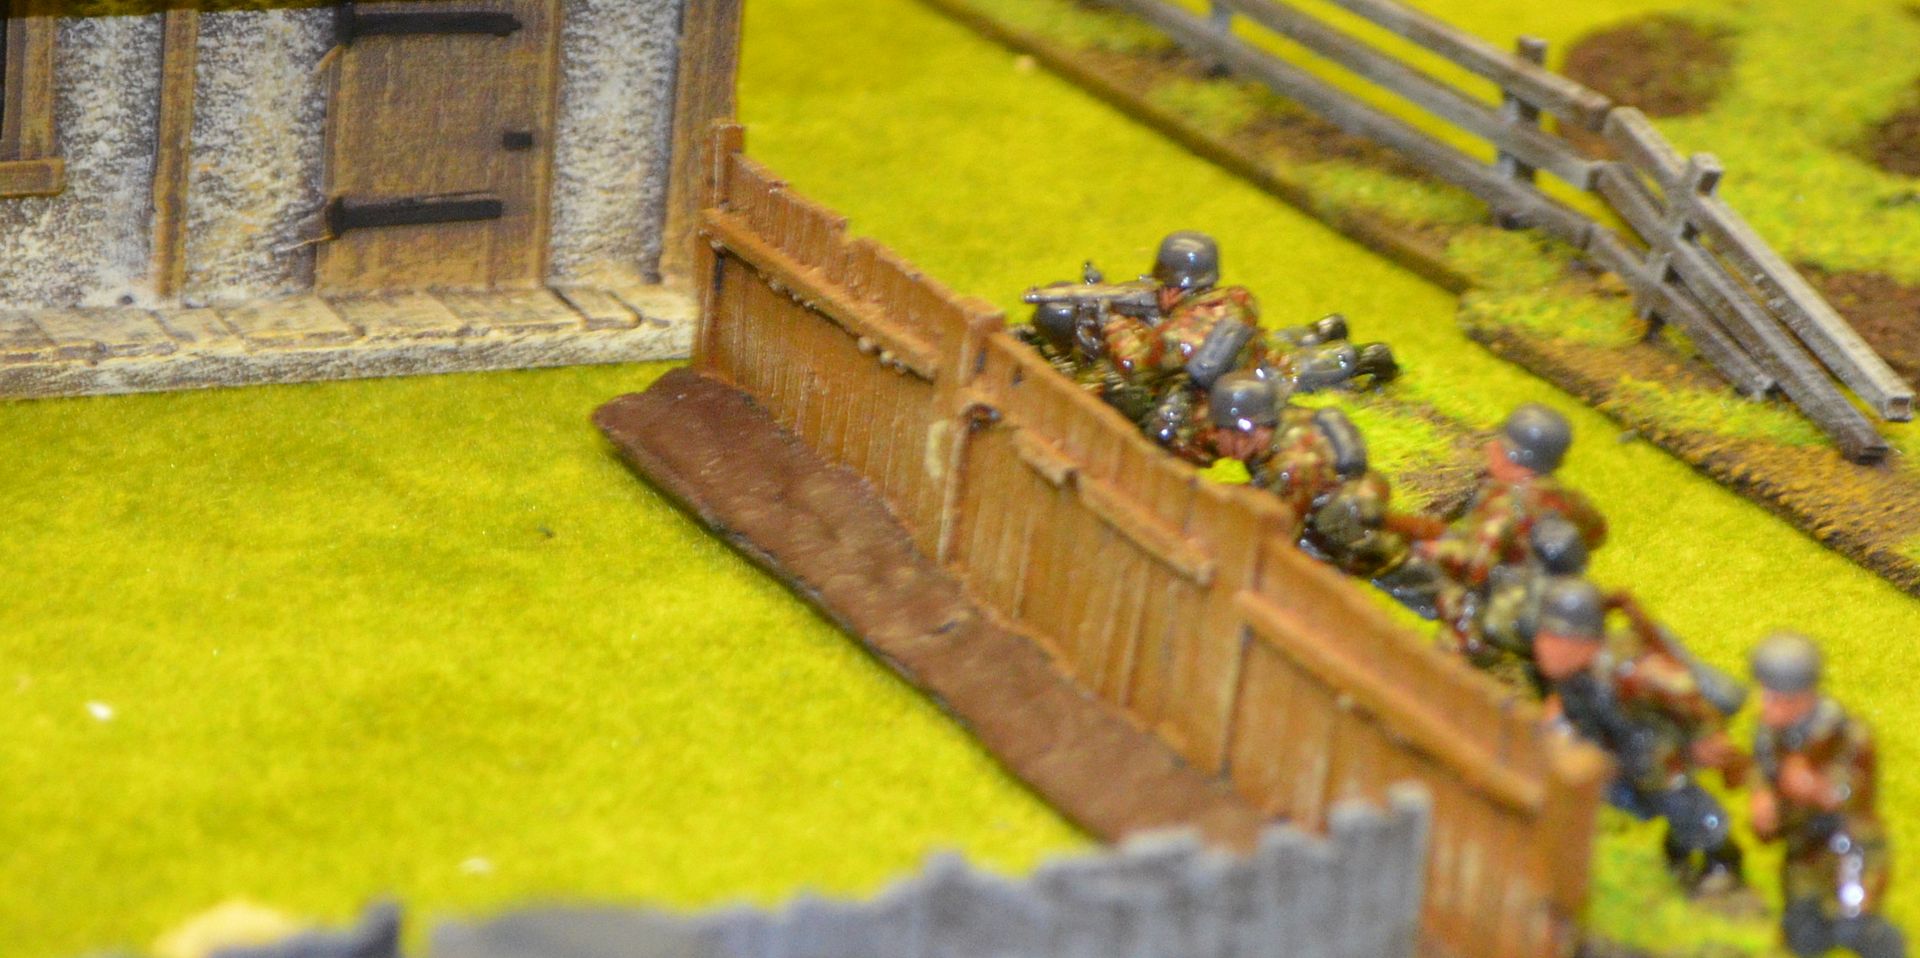
The leading Paratroop unit on the Far side of the village pushed forward. As they crossed the garden fences a hidden British squad opened fire, scoring several hits but the veteran training came into play and only two men dropped. In this isolated engagement the next two rounds the German superiority began was telling as their rounds struck home and drove the British squad into rout.


Elsewhere the Nazis pushed up into the village and took the pub. As they looked out of the pub windows the chatter of HMG fire erupted from the bunker emerged from the bunker. My two HMG units began to pour steady lead into the Public house. My dice rolling was awful and again the superior numbers of Germans began tell. Despite the protection of the bunkers both HMGs ended pinned and lost crew members thereby lessening their chances in return.


At this point in time a tit for tat exchange of fire was taking place between the AT gun and the Panzer. The next AT round hit immobilising the tank. The tanks MGs continued to pin the gun crew who valiantly continued to fire. Eventually a shot struck home and the German armour brewed up. By now the German mortar had sited in on the naval gunners and successive rounds of shooting drove them from the field in blind panic.  


Returning to the village the Germans pushed on round the flank towards the church yard. I decided to reveal the next squad lining the church walls. The Lee Enfields and Lewis Guns putting down serious amounts of fire but unable to holt the German advance.


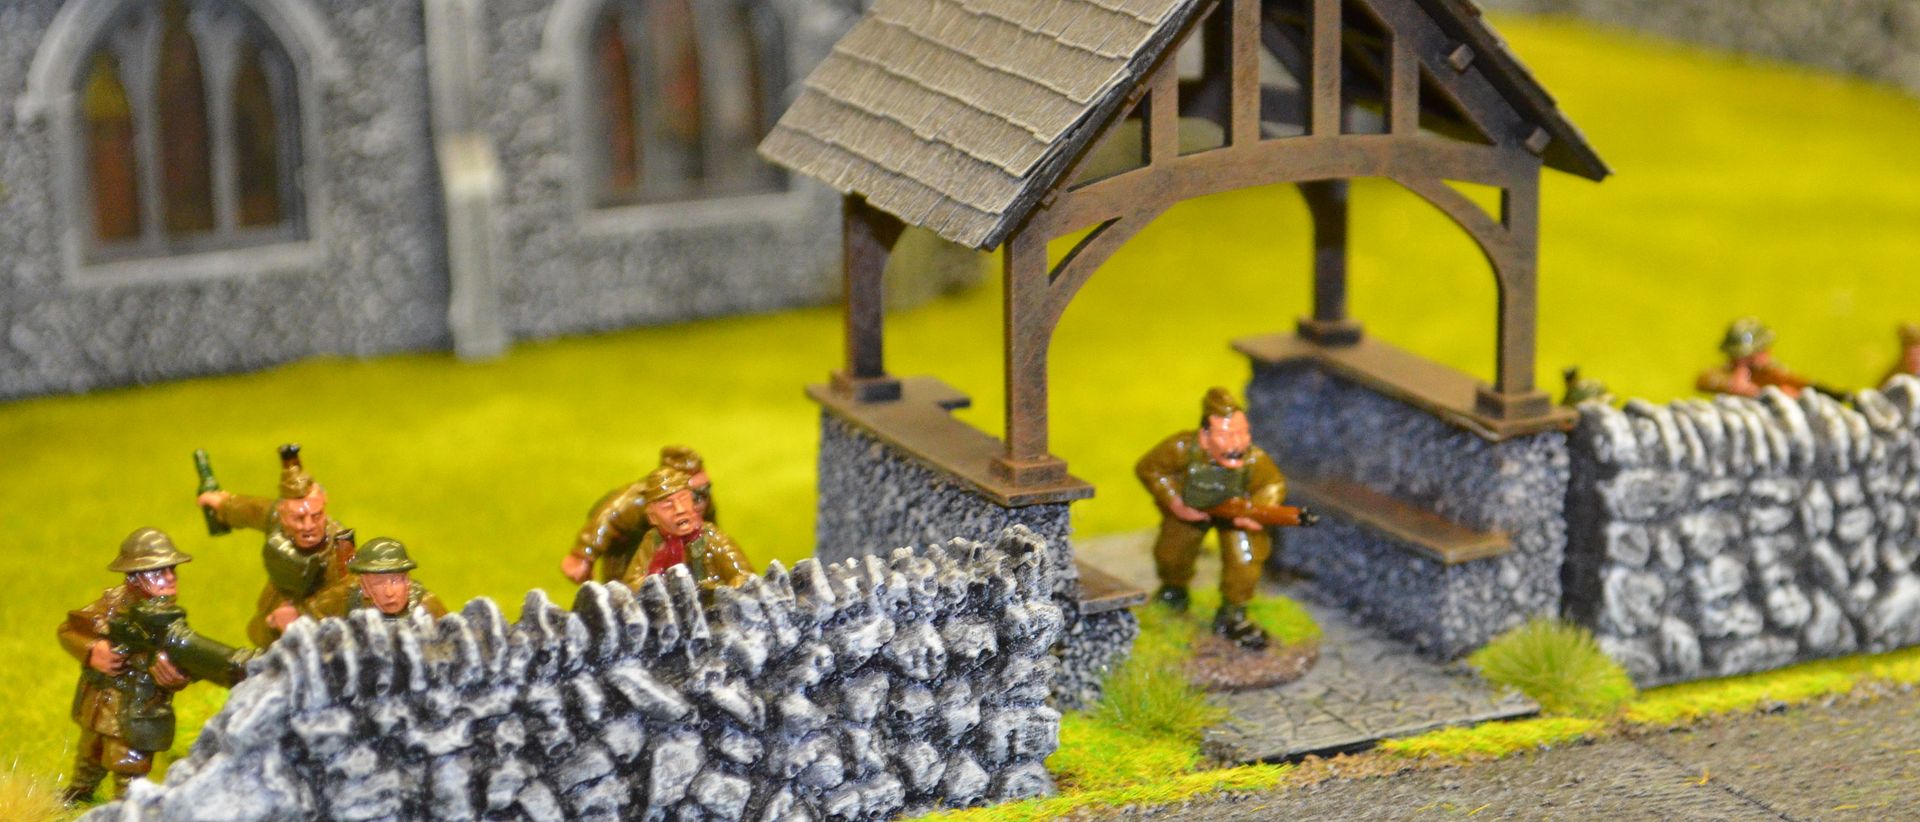
With my pillbox based HMGs suffering the Fallschirmjager advanced towards the defensive position. As the crossed the open ground next to the War memorial I opened up with my last remaining home guard unit at point blank range – again insufficient hits were scored and my Home guard unit fell prey to the advancing German squad and to be finished off by the SMG unit.


Things were somewhat bleak for the British, two units and an AT gun down and the Pillbox about to get stormed. My Sailor unit had just reached the Church having originally been deployed on my far left wing. With no means to counter the Panzer now steadily advancing – remember the one I originally hit well it got going again and now significantly outnumbered the Home Guard surrendered.  


This was a fast and furious fight. The British suffered almost 60% casualties the Germans closer to 25-30%.  My original defences were laid out expecting a German advance from my left – through the country not the village, but Mark chose the opposite route. My ambushes were lousy – I delivered the hits but not the casualties and the high German morale soon made the pins disappear.


I rarely put on evenly matched games preferring to adopt a more realistic approach. Mark had no idea what he might be facing so each turn kept the suspense.


It was a great deal of fun and took just over a couple of hours to play.


Sunday, 16 February 2014

28mm Trains for Wargames part 3


In my last post on trains for wargames I mentioned that I had secured a complete train set for my VBCW/Pulp needs. In this post I’ll begin to explain what my plans are for the track.


Sadly for me my commute takes me into central London everyday and whilst on the journey the other morning it struck me that the track has been made as level as possible. In some places the track cuts through the hills and in others it runs along with embankments either side. Near where I live the train passes by an embankment that must be 40ft high and cuts across the local landscape as a huge man made barrier.

The big box set


Given that the last box turned up with loads of track I have decided that I am going to produced two track sets for the games table. The first of these will be a low level affair complete with a level crossing, station, and road bridges over the track. The second will feature this tall embankment with both river bridges and road tunnels through the embankment.

 
Lots of track including 16 straight sections

I wanted to keep the track on the table as straight as possible – in reality train curves and bends are gentle and only tend to occur where switching takes place. There is no need on the table to have an oval or the like.


The first big question was whether or not I was going to lay down a double track, ie one where trains can travel past each other side by side. This is typical on all lines in the countryside BUT doing so would mean the width of the terrain would double and may end up compromising space on the table. I also had to consider the track I wanted to build on an embankment – these will need to have road tunnels cut through. Given the height of a vehicle is about 4cm the tunnel itself would need to be about 5cm high making the embankment around 7cm in height. With each track requiring  4cm of bedding space a double tracked section would be just too wide. As it is the footprint of these embanked sections is probably going to be at least 16cm wide. Hopefully the diagram below illustrates my point.

 
Settling on the single track approach I decided to start on the low level track. In terms of length of track I am aiming to build enough track to stretch the length of the table.

 Amongst these sections I am going to need


       1.       A level crossing
2.       A small train station
3.       A switch in the track

I’ll start explaining how I managed the simple elements and then come back to the these shortly.
 I needed boards for the tracks – very simple -  I used hardboard 8cm wide.

I got the nice folks in B&Q New Malden to cut these in strips for me. It was then a simple case of marking off the length of track with a pencil and then cutting these boards to the length required. A quick sand to smooth off the edges and we are good to go.


Taking a piece of track I trimmed off the connecting tabs – these are great if you are going to just use the track on their own but would likely to prove problematic once the track is based.


Making sure track and board right length


 Typically rail track rests on sleepers and between these are stones. My track already comes with sleepers but to get the stone affect I decided to use coarse ballast (toy railway supplies). I coated the boards in PVA and then whilst the glue was still tacky stuck down the track (adding superglue for a stronger bond) and then covering the track and board in ballast. The ballast has now fallen between the sleepers and after about 3 hours the pieces are already to paint.


Adding ballast - big plastic tub
 
All stoned up

With all the section constructed it was time to paint them black. I used black acrylic as it is flexible and tough. Painting between the sleepers was a pain and this is not an easy job. It takes time but I am sure the final effect will be worth it.


Once the track has had a good coat of black paint – as I mentioned above- it takes time the next job is to dry brush up the ballast underneath the tracks. By starting inside out it doesn’t matter if they get some paint on them – a coat of dark grey followed by light grey seems to be sufficient.


The start on the sleepers – dark brown followed by light brown – this helps to bring out the grain – finally the tracks. Paint black and then gun metal along the top surface.

Finally add greenery and you are good to go...


3 metres of track


I mentioned above that I was building three additional special pieces. The train station and switch were done in the same manner as above. I did have to extend the track for the switch to ensure that the 8cm wide track boards could butt up to the two exit points on the switch. The stain and platform will be built later on but I did cut out a base board for the unit and run the track through the middle of the board.
 

The Switch plus a signal picked up for £1 at a toy fair
I
The station board


The level crossing necessitated me cutting out the sleepers in the middle of a straight section and then packing this with hardboard (rough side up) so it would match the roads previously built. The crossing itself will be supported with gates and the like.

 
Level crossing - took some thinking about

 
The train is good to go...


Next up the embanked track

My embanked track will stretch 1.5m across the table. In addition I will add one curve section giving some variety to play. With each section stretching circa 20cm I will need to build a minimum of 8 units. There will be two road tunnels. One narrow river bridge section and one wide river bridge section. The fact that all my rivers come in two sizes and the roads are a standard width makes life easy. So I will build in total 6 vanilla section and the above units as described.

More on this shortly.


Wednesday, 29 January 2014

VBCW - Vehicles

OK first posting on my new project for the VBCW ( A very British Civil War) - I think in my next post I'll outline what this is all about but to summarise -

If after reading the following you are interested in reading more about this head over to the VBCW Forum
VBCW Forum

More info can be found on the Interwar page of the Lead Adventure Forum

LAF - Interwar

And for some strange reason VBCW has been added to the WW2 boards on the TMP

TMP WW2  - Interwar Boards


The book on the right is the one you want to get all the background - its a great read


Great Britain 1930's has had a constitutional crisis - Edward won't abdicate following his marriage to the divorcee Wallis Simpson. The Government of the day cant stand idly by and resigns on mass, the leader of the opposition refuses to form a government. With no government in place Edward uses his royal right to ask the fascist Oswald Mosley to form a government. Believe it or not this could happen !

Clearly the electorate disenfranchised by their politicians feel aggrieved and many take things into their hands - motivated by political leanings communism, socialism, capitalism etc etc several splinter groups take advantage of the political vacuum.

Nationalist parties seize the opportunity to declare independence (Scotland, Wales, Cornwall), Ireland erupts into further bloodshed. The Church declares against the current King and wants to see the crown on his brothers head. Governments of Europe pour resources into Britain to support the side that best matches their ambitions - Hitler & Mussolini siding with the British ruling right wing, the workers unions receiving support from Uncle Joe

The British Armed Forces (predominantly overseas guarding the Empire fragment take up allegiances according to the regiments home depots) etc etc, American loyalists, freebooters and smugglers abound...its a mess

The beauty of this period is that players are encouraged to write their own local histories and fight the ficticious battles in the areas they know. With the timing centred on the mid thirties we are beginning to see the mix of the old great war technologies with the new. Its going to be great fun!

So I get home today and a big pile of parcels await...plus more tomorrow!


Having decided to tackle this head on I spent a few quid over the weekend scouring for troops, vehicles and other interesting bits...this post focuses on the Vehicles bought. They are all from the Lledo range and given these were no longer in production were all sourced on ebay.

A few months back I bought some civilian cars but they've gone missing in the shed but once found I'll post them up.

But here goes the Shed Vehicle fleet is starting to build...plus the cars nicely show off my new roads

The star buys...


I was very fortunate to find two perfect box sets - the first a limited edition of the Home war Vehicle range, the second being a second world war range. These are both perfect and as you can see are very close in scale to the 28mm figures - the figure shown is a British Fascist from Gripping Beast (Musketeer range).


We have got ourselves a convoy


No painting needed


The text is just perfect for the VBCW

1930's fire engine & limo


A rather controversial advert


Over the coming weeks I'll share my thoughts on the figures I have bought -and the factions I am painting.

I also have a whole new terrain project to build - a railway line complete with trains, bridges and tunnels for southern England. The first elements have arrived but these can wait for a future post.

Have fun