Showing posts with label Trains. Show all posts

Tuesday, 19 May 2015

Railway Cutting & some more Hills

Following on from my last hill build (see link below) I decided that these were definitely the way to go to give my battle field some undulations and reduce the 'flatness' of my displays.

http://shedwars.blogspot.co.uk/2015/03/the-hills-are-alivewith-sound-of.html

So in this thread I'll talk about the build of my latest addition the railway cutting, which can also be cunningly used as a gorge and also a rod cutting. Nothing beats multi-purpose


I started off with another 9mm thick 50 x 50 board and laid out two hills pieces with a gap running down the middle. This needed to be wide enough for both my railway track pieces and my road sections and the cork escarpments running alongside.


The polystyrene was then shaped to create the slopes


Cork pieces were then glued alongside the flat cliffs using really strong interior adhesive .


A quick check that the railway still fits...


The polystyrene was then covered in filler. Quick tip - by the powder stuff its mucjh much cheaper and you can builf it up to the consistency you want.


Since I had made up a lot of filler I quickly rushed out a couple more hills. Note only make the amount of filler you need.


The cliffs are then given a good coat of black paint. They are going to be grey eventually so they blend in with all the other stone features of my temperate battleground stuff.


Then I painted the whole thing brown umber for the base.


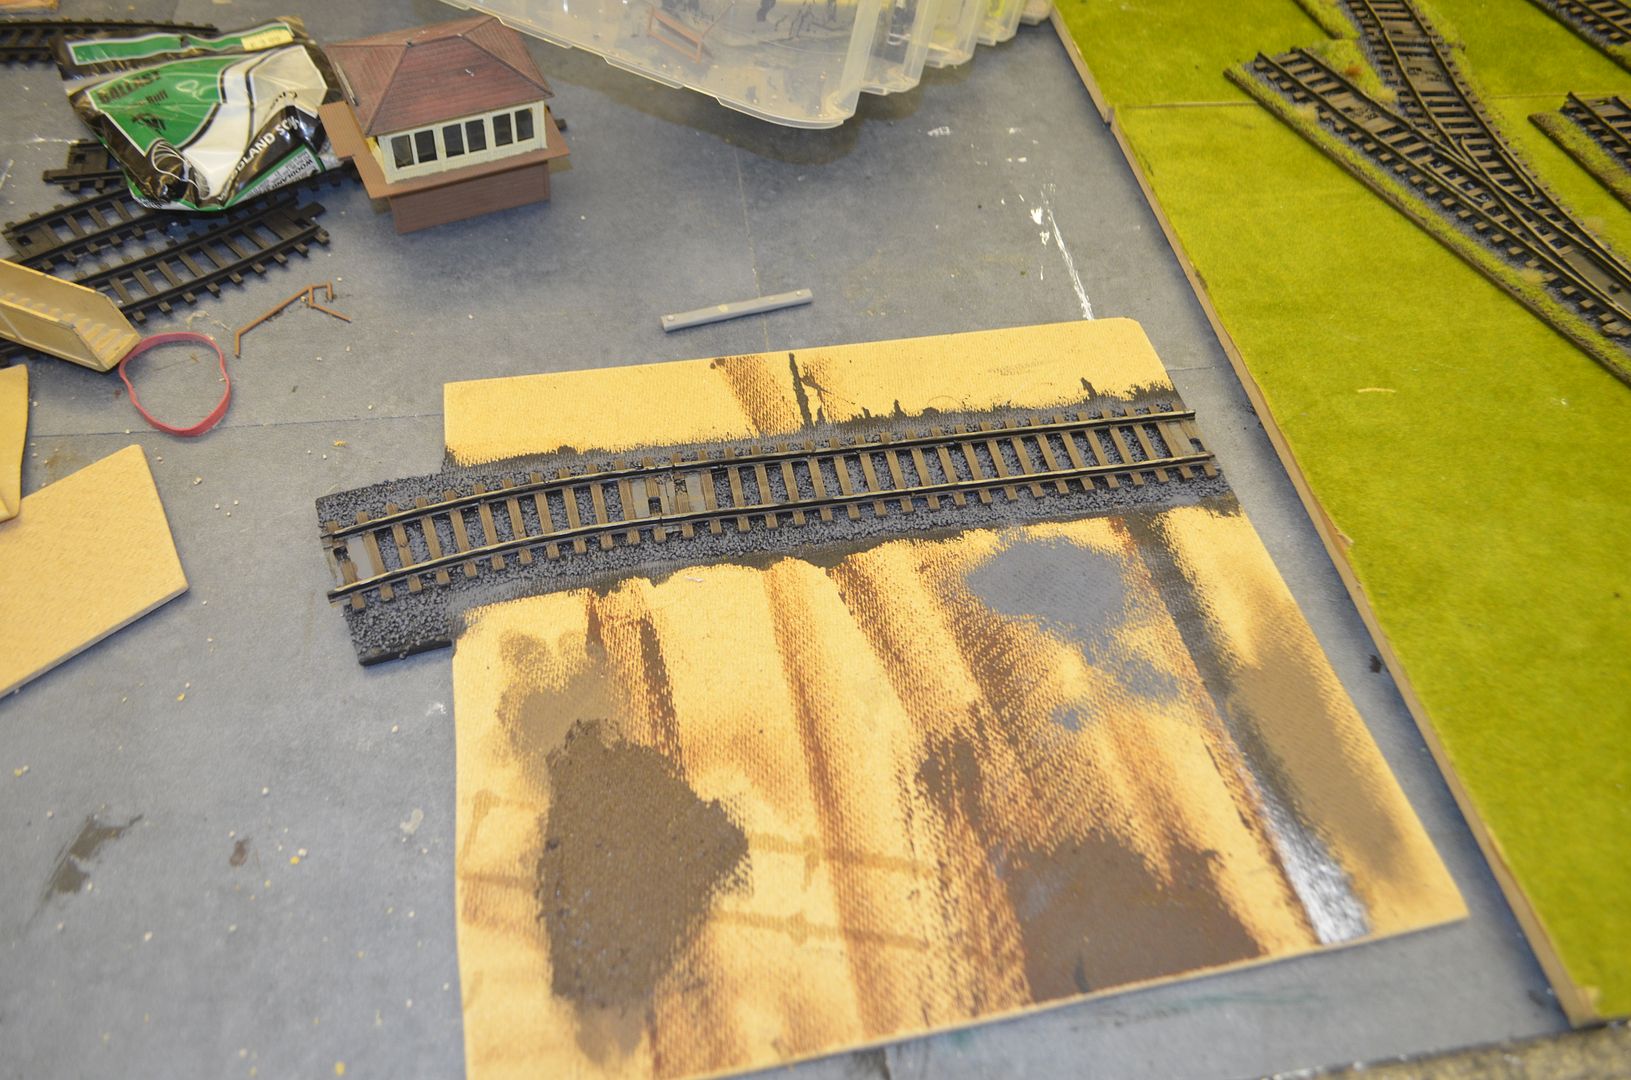
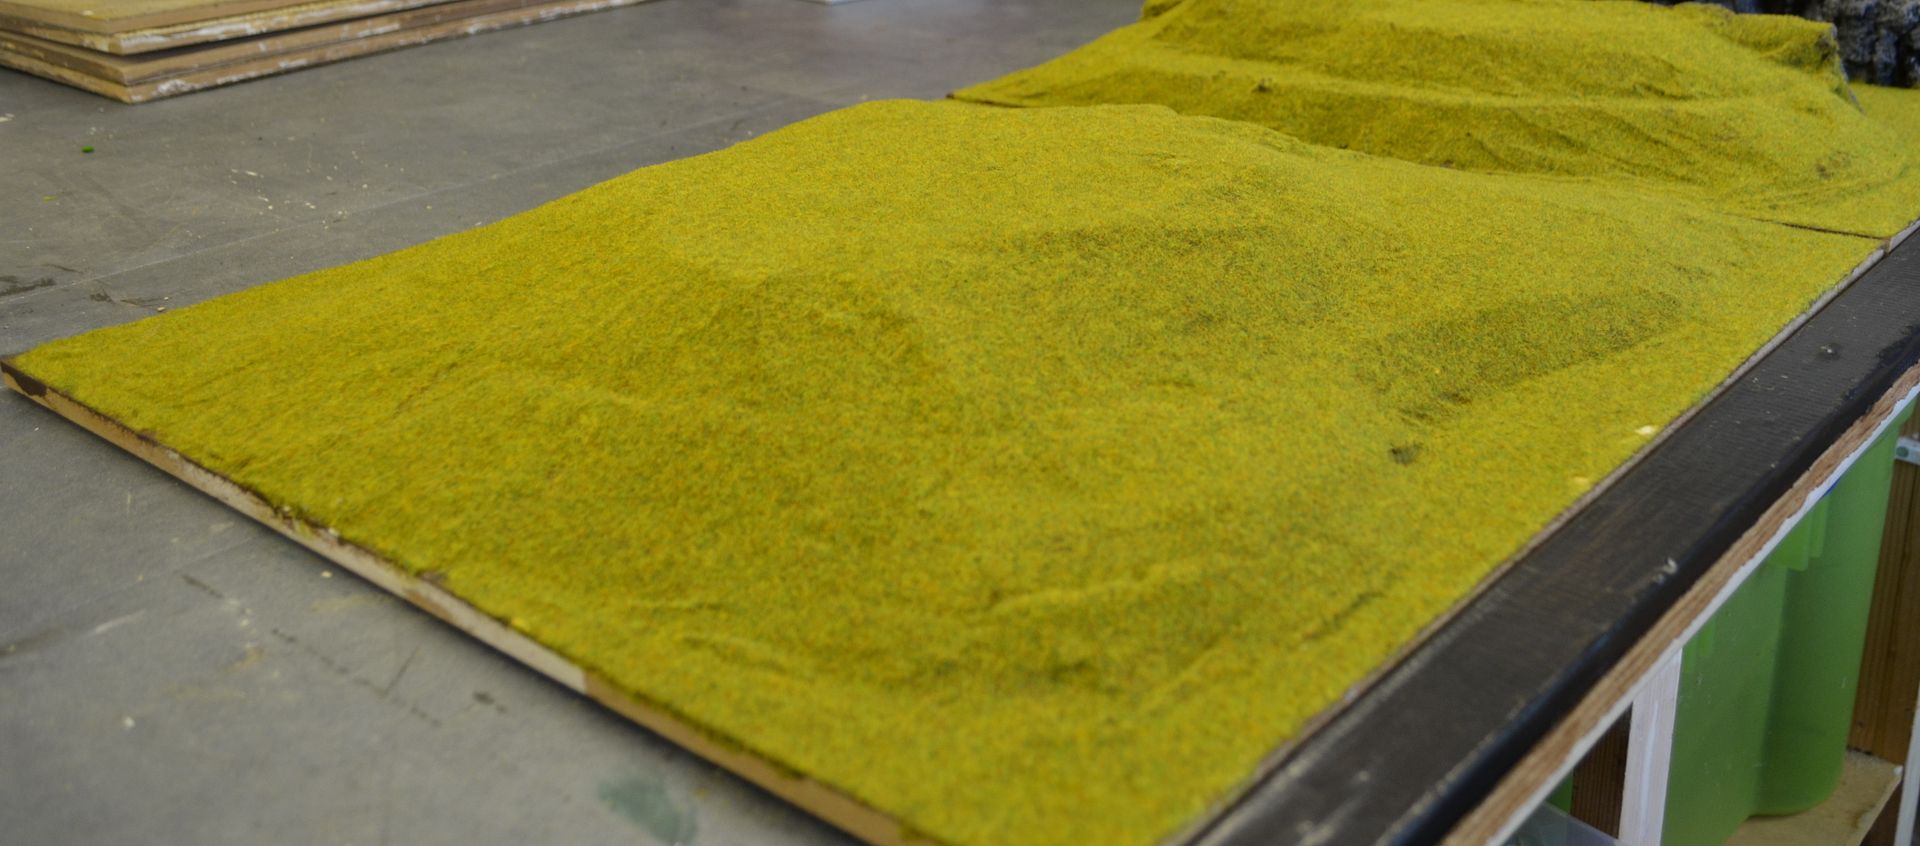
Finally add the static grass. By luck I discovered most of my boards appear to match up with a spring mix green.


Once the grass was dry I could drybrush the cliffs in the cutting


The finished result can either have a road


or a railway line


Oh...and that hill - fortunately I had enough static grass to finish off that as well.


Until next time


Sunday, 29 June 2014

Tickets Please - An English Railway Station part 2


If you want part 1 first start here

Part 1

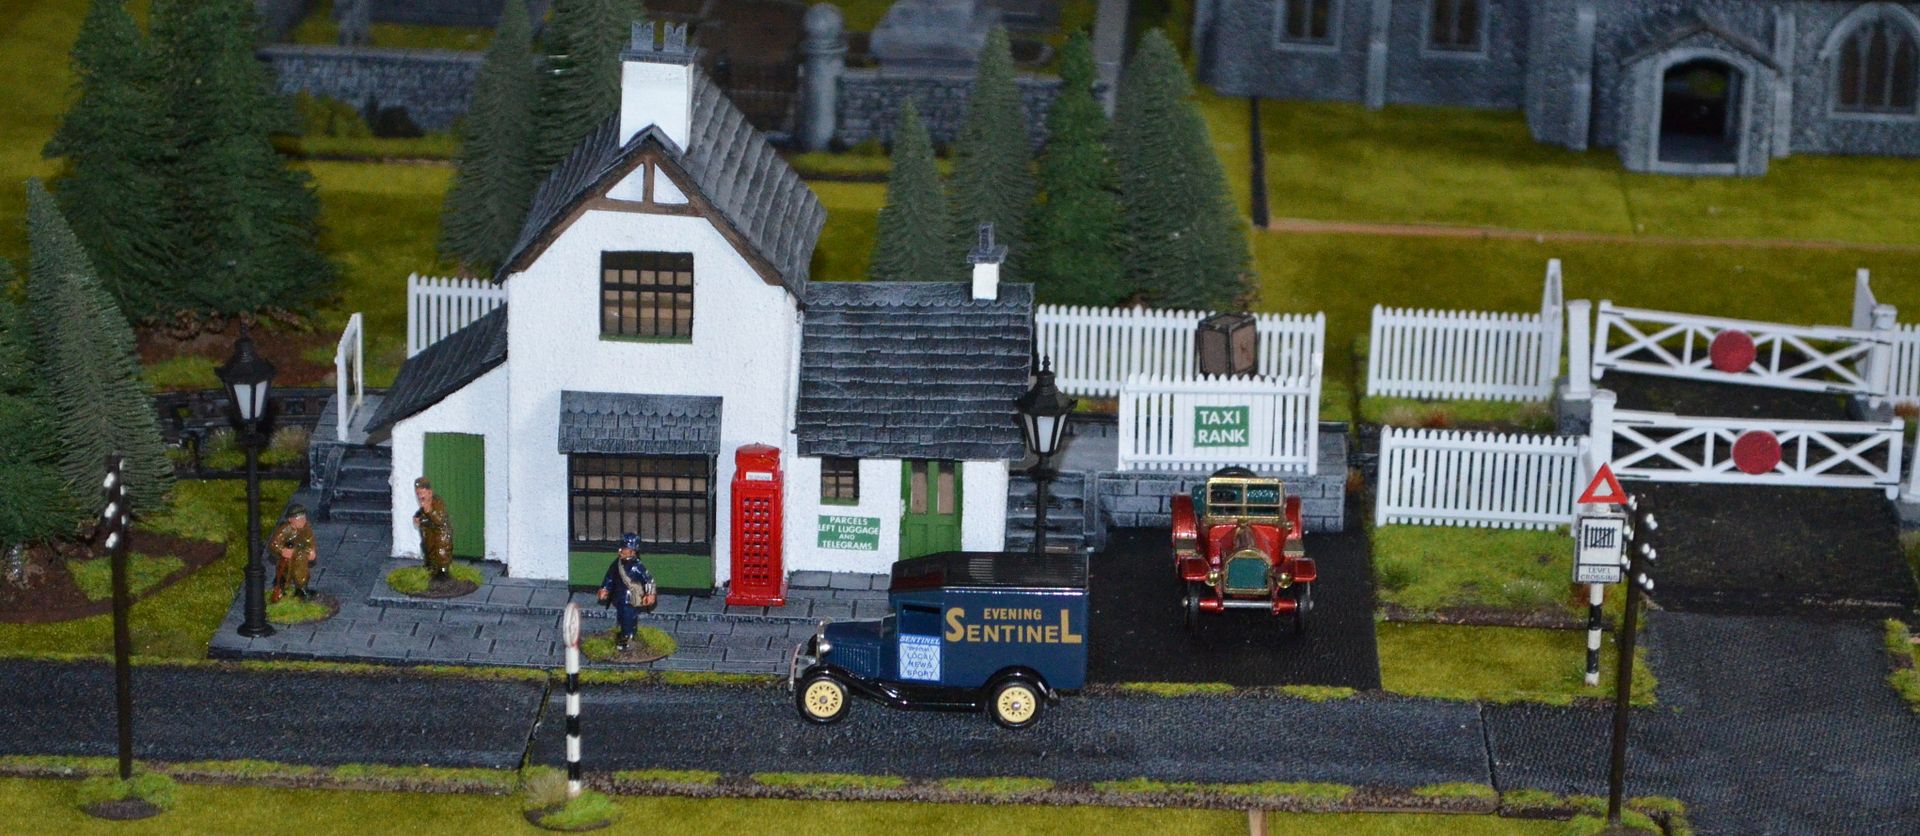
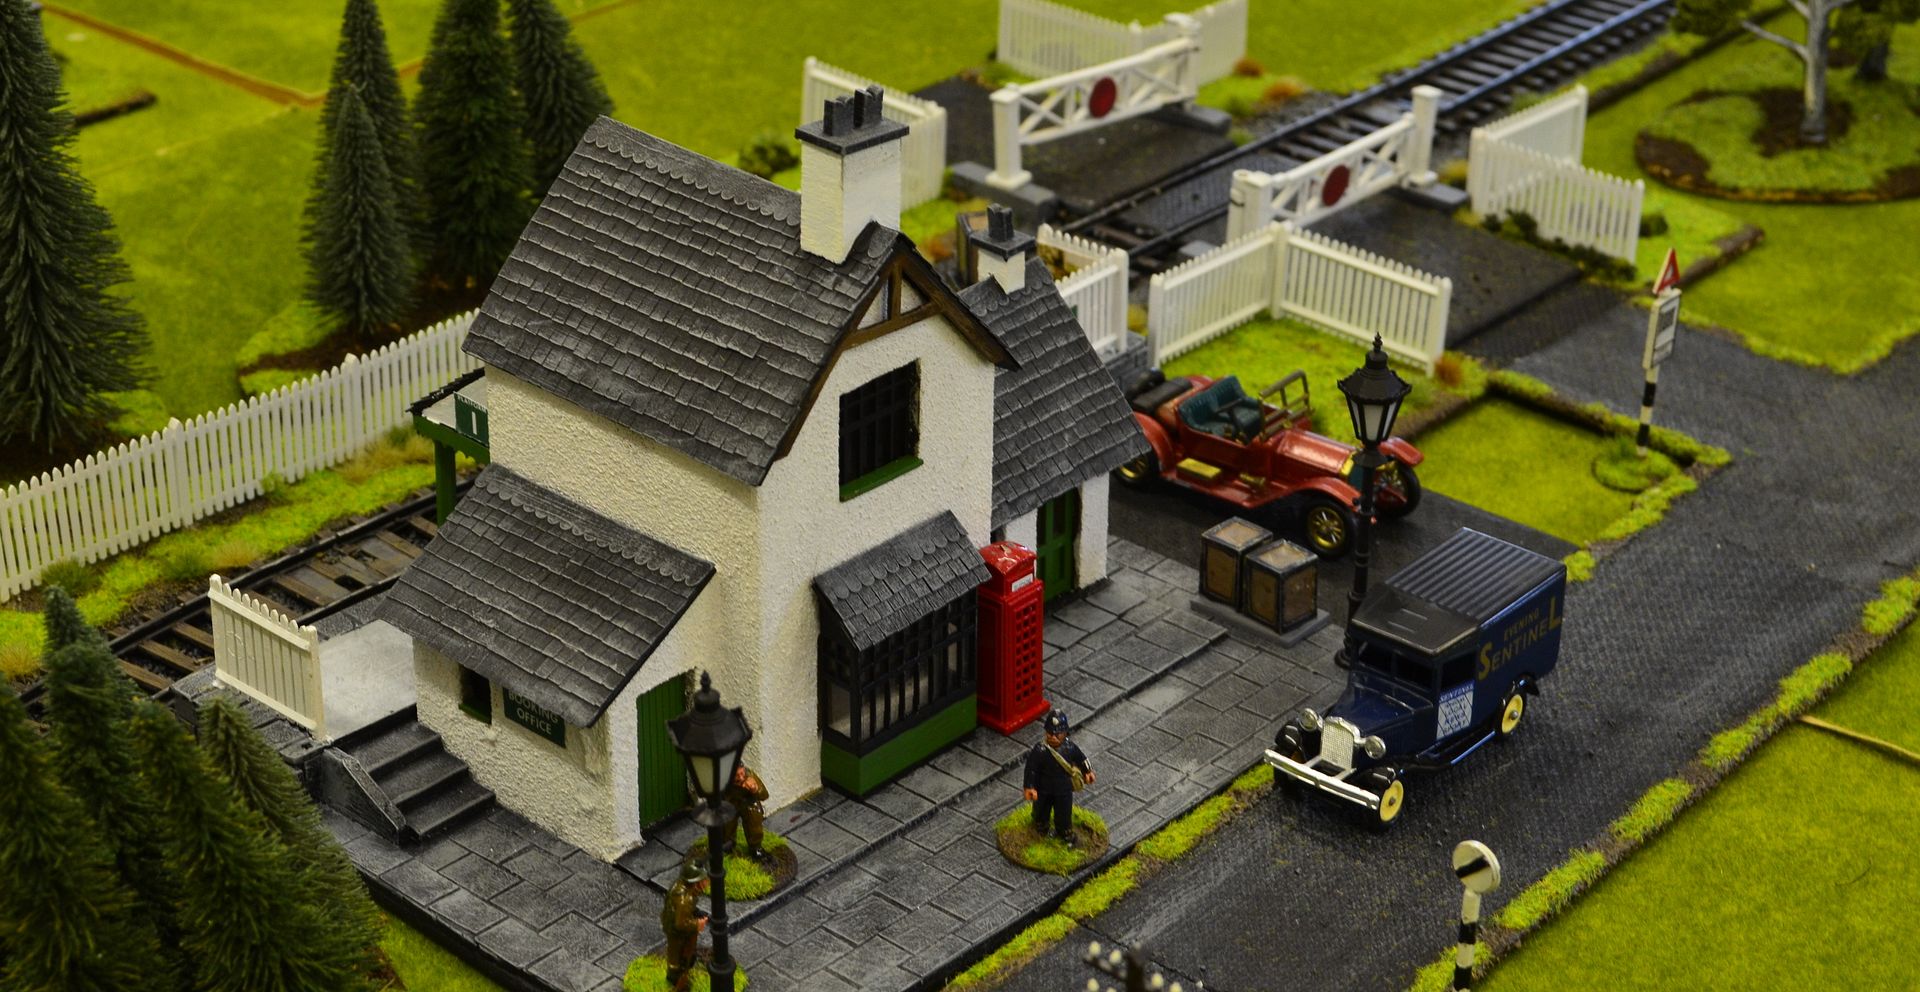
When I left you last the station was nearly complete. Well a bit of work later we are nearly there as you will see from the final photos.

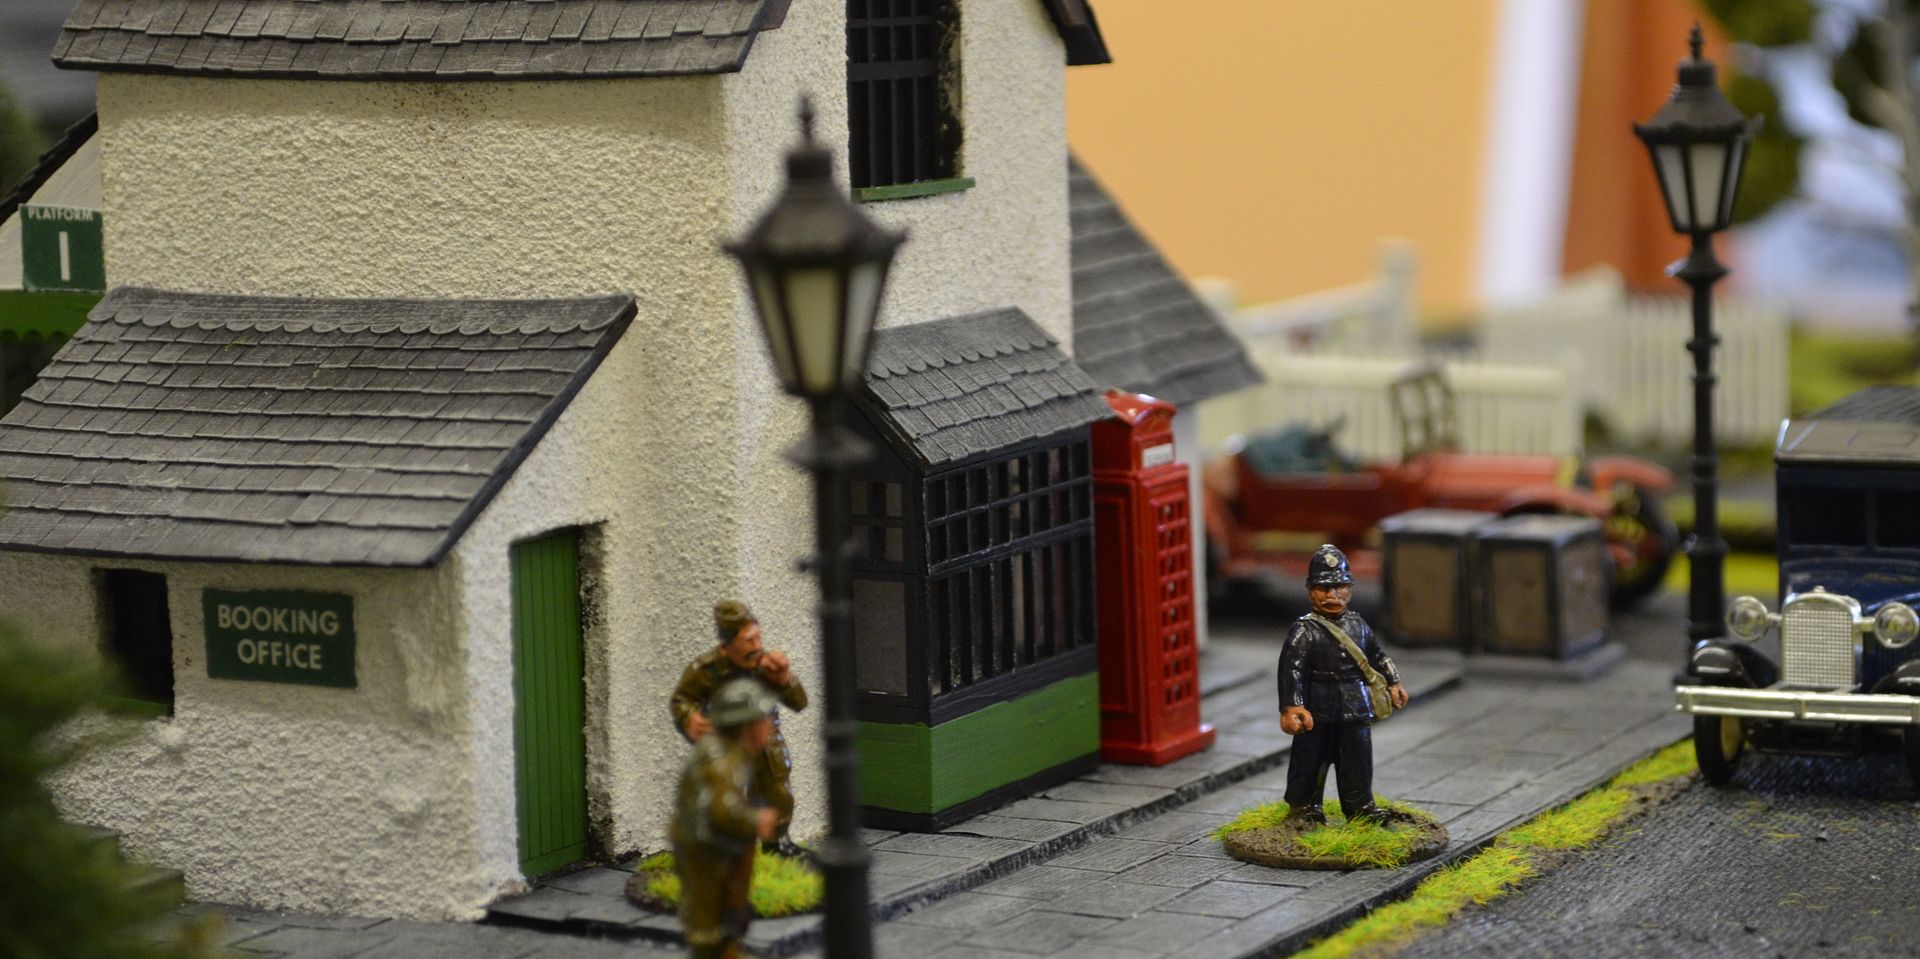
To begin with a new parcel arrived on Monday from China. This contained 8 lamp posts of Victorian style. They are O gauge railway products bought on ebay working out at a about £1.50 a pop. Two of these sit in front of the station. 28mm German to scale.

These were purchased from here

http://www.ebay.co.uk/itm/8-pcs-O-Scale-Long-Life-antique-Lampposts-LEDs-Made-H8-/150645171719?pt=UK_Trains_Railway_Models&hash=item231326e607


You can both of them in the lower picture. These were glued onto the base board. They come with a copper wire inner for structure and support.


Next up I had to give my weary travellers somewhere to rest from the rain. The shelter is built from some old sprue and plasticard. The roof was given the same treatment as the rest of the building.

In time Ill add a door at the back of the building


With the station finished time to work on the groundwork opposite the tracks. The usual static grass and tufts


Starting to get there...


and now onto the finished product. The posters signs etc were all sourced from a railway company called Tiny Signs


From the front with level crossing on the right

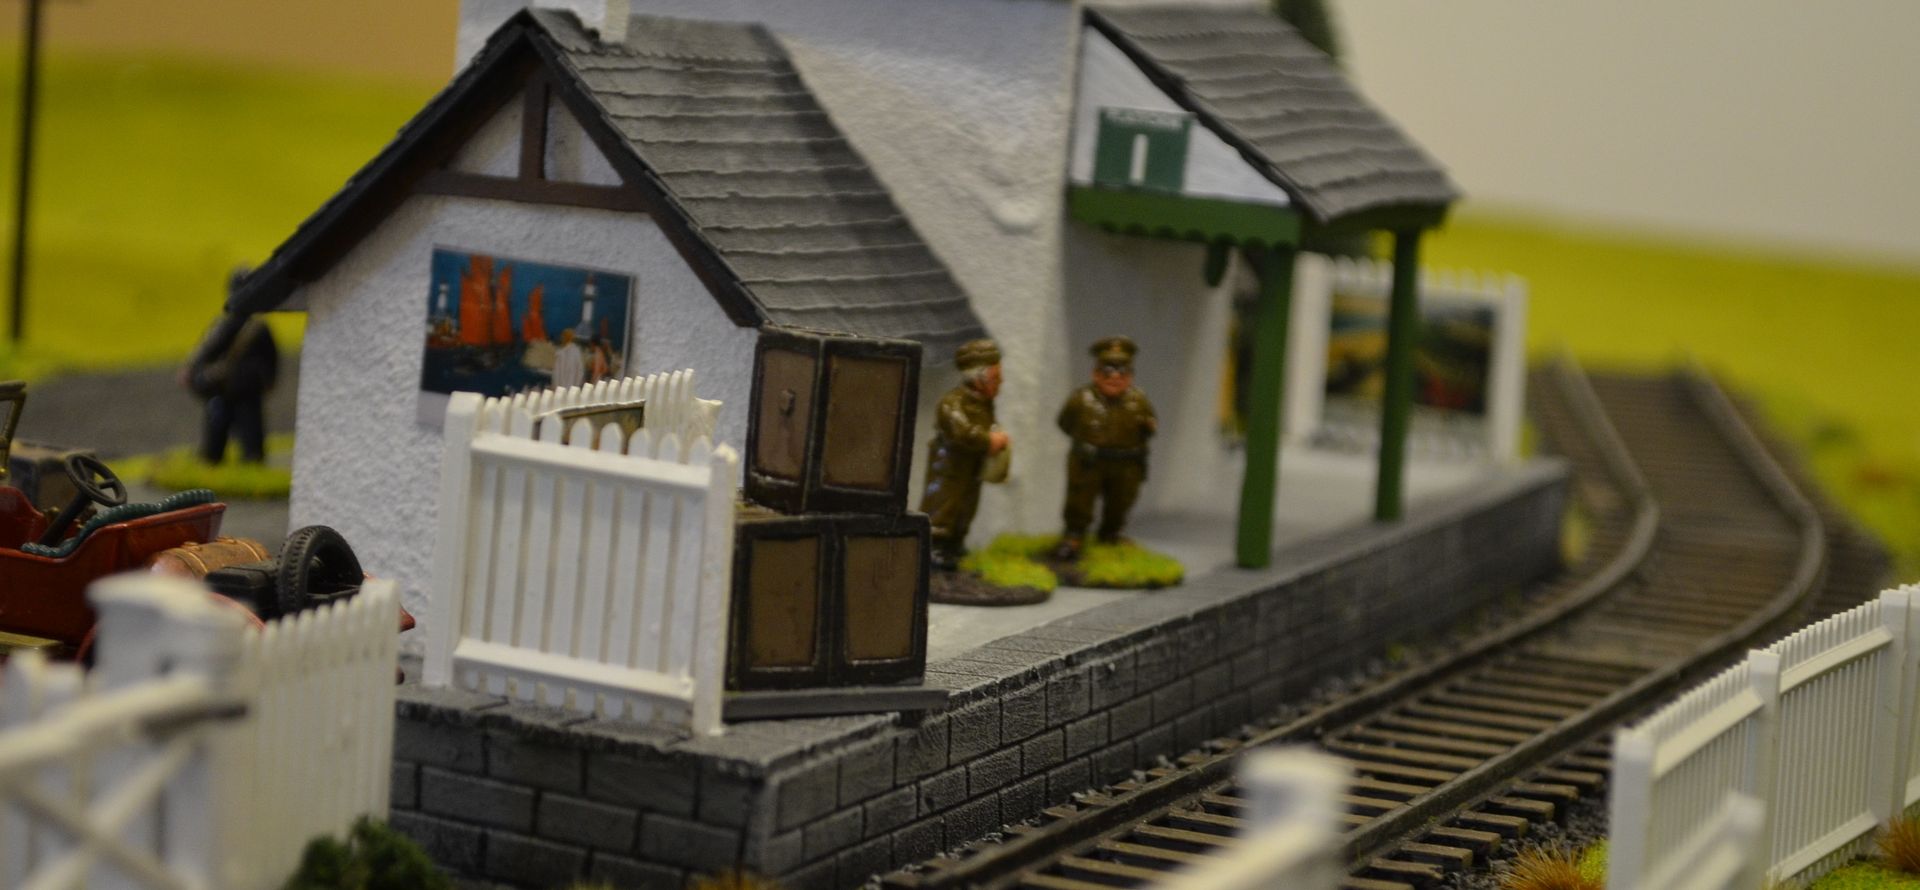
A view along the tracks....


The telephone box is a tourist souvenir key fob - I bought 7 from my local newsagent for a £1 a pop


You can see in the above picture the final paintjob on the platform


The train will be here soon Godfrey....


The posters add a little bit extra of old England


So that's the station built ...onto the village hall and local school next....


Until next time


Friday, 27 June 2014

Tickets please ...An English country railway station part1


Early in the year when I embarked on my railway build for the VBCW project I mentioned that I was going to build a small 28mm station. At the time I’d even laid the track on a sheet of hardboard (about 30cm square) but had no ideas for the rest of the construction.

The original station board

This whole track thing started here

http://shedwars.blogspot.co.uk/2014/02/28mm-trains-gor-wargames-part-3.html


This all changed when I purchased the Station Masters cottage from petite properties - the same dolls house company that provided the church.

Image taken from website


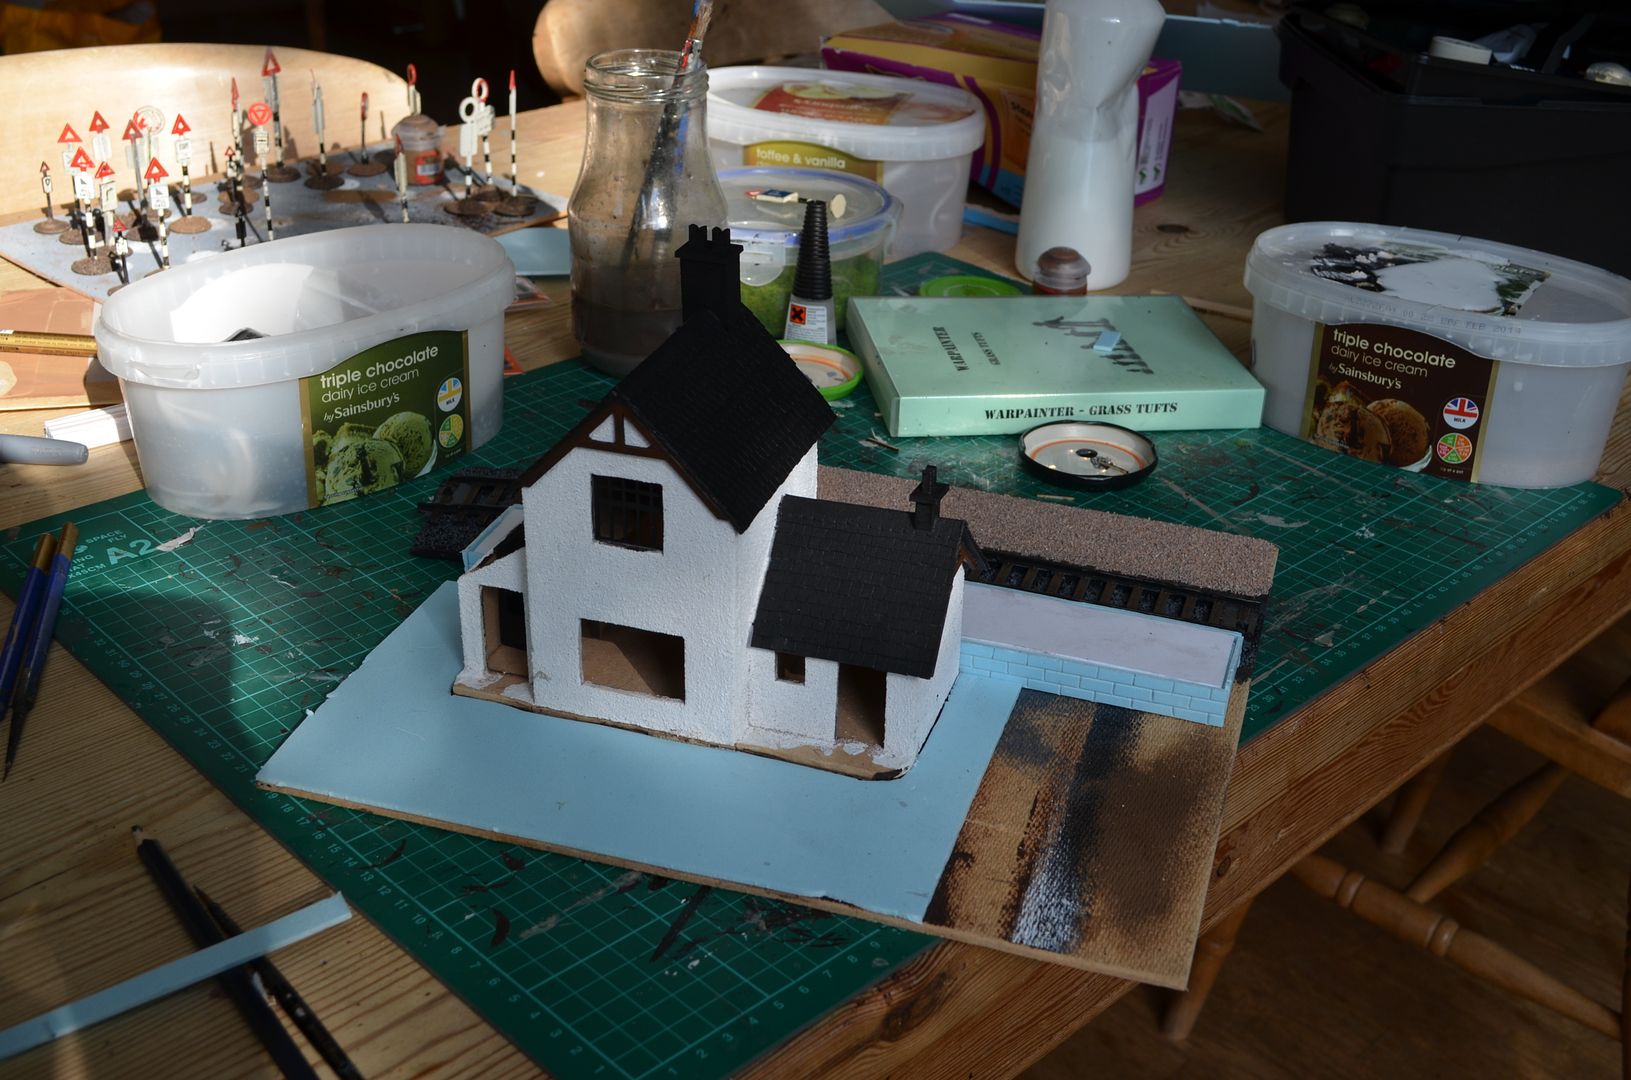
This would form the basis of my station. I positioned this on the board and worked around it. I had contemplated building two platforms but in the end decided one would be sufficient and much easier to build in the long run. The platform itself was constructed from three layers of form core and then clad with blue foam sheet. This stuff is great, although expensive, as you can emboss brick work on to it which then comes up a treat when painted. You will notice that the platform has a small section cut away where the building will fit into the space provided.


A word on scales – the platform itself is not very long. In fact it is less than one carriage long ! As I am sure you will all agree sometimes we need to make compromises in our hobby and in this case I deliberately went for the shortened version. It will look like a station but clearly its functionality will be somewhat limited.

The building itself was nice and easy to build and I treated the roof sections and wall sections in the same way that I built the Black Bull Pub (see earlier post). The really nice things about these dolls houses is that they are full of character and less like some of the boxy wargames style buildings. In the coming weeks you will see a few more appear including the post office, the general store and the Village Hall.


With the platform glued down on the board I turned my attention to the front of the station. The building was slightly higher than I wanted so I have to create a raised section in front of the building – I used some off cuts of blue foam for this. The whole area was then paved using cereal cardboard tiles and helps to blend in with the other pavement areas Ill be creating. To the right of the front of the station I have left one area clear and just painted this black. This will be the car park area. Either side of the building are two small sets of steps that lead onto the platform.


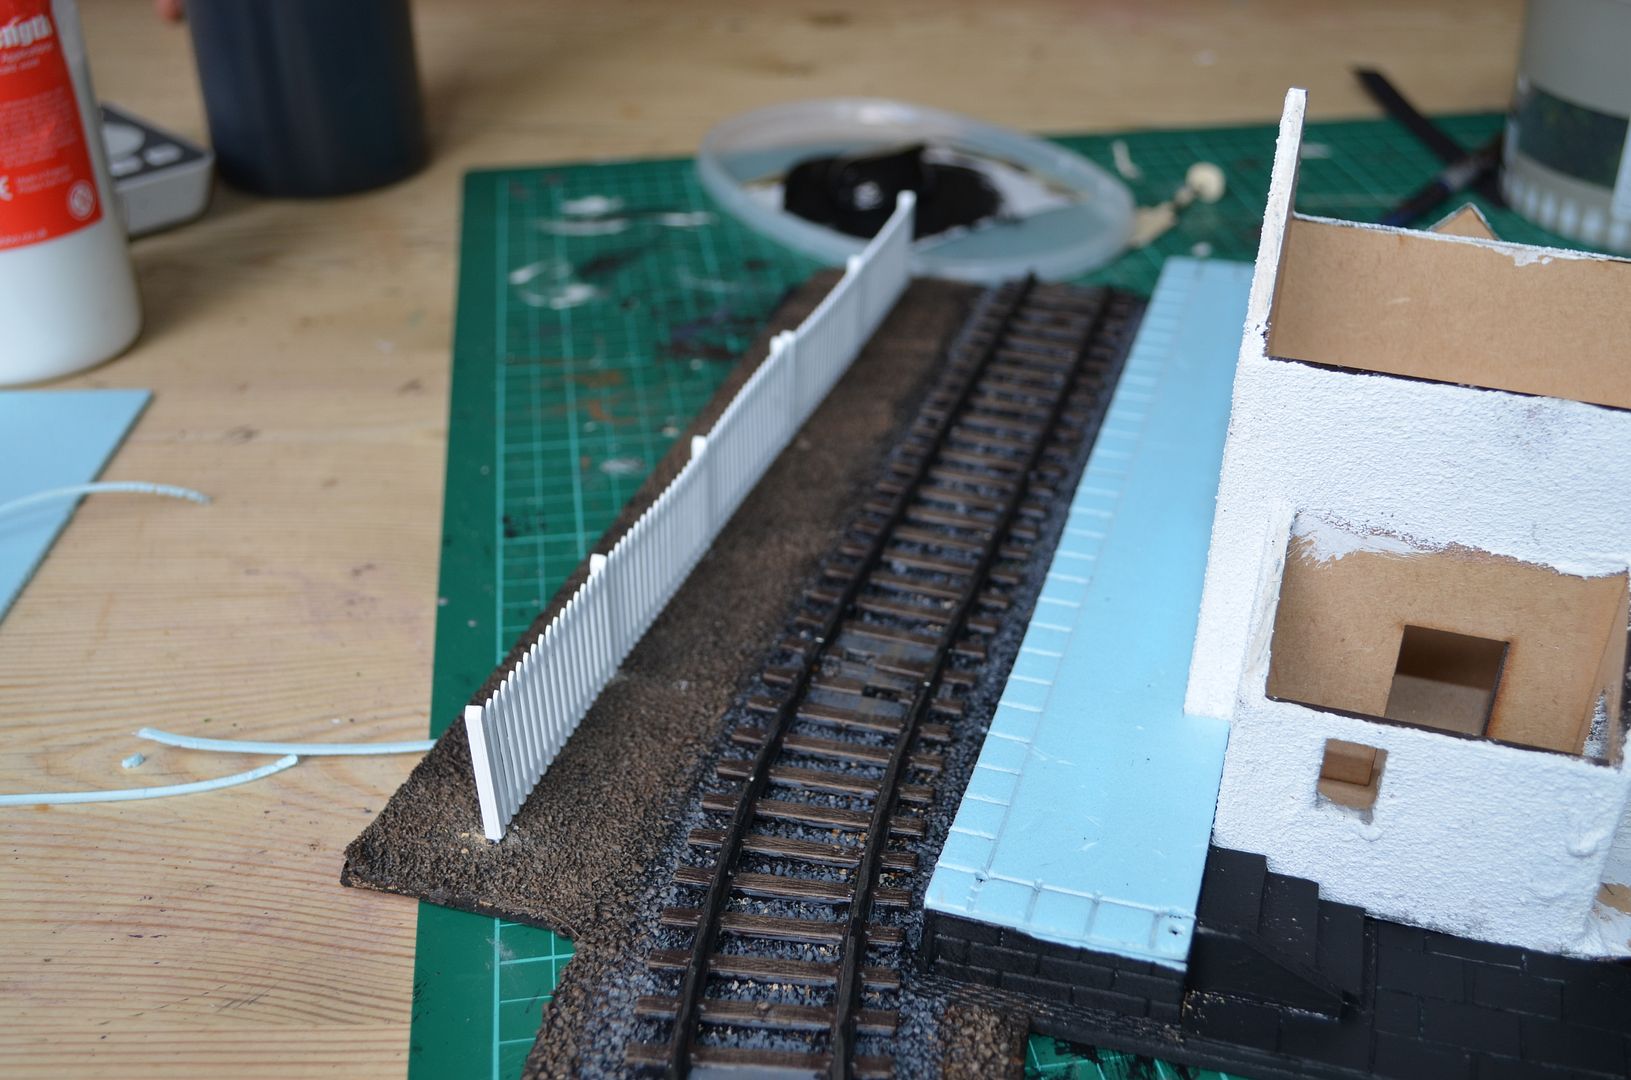
On the other side of the tracks I just covered the area in ballast and sand then drybrushed this up brown. This waste ground will get a coating of static grass and other foliage.

Fortunately I had kept some of the white picket fence back from the level crossing build so this will be used on the station board. I put one long run in along the open side of the track and used what was left to close off the ends of the platforms. The posts of the white fence on the platform itself are matchstickes fixed in with pva. The fences have then been cut to fit. Once this is all done the station and the level crossing should tie in together quite nicely


All the paving and the platform were drybrushed grays. The platform centre was then painted a lighter gray with a white drybrush to simulate smooth concrete.


In the part 2 i'll cover...
some shelter for my waiting passengers
signs an posters
benches and lampposts
 
I am rather pleased the way that this is coming out and it will certainly add another level of rustic charm to the English themed countryside.

Part 2 can be found here

part2

Saturday, 19 April 2014

The Armoured Train part 2


Hi Folks

If you are joining this post for the first time and want to read the first part of this build head here...

Part 1 click here

Don't worry there is a link at the end of part 1 to bring you back here.


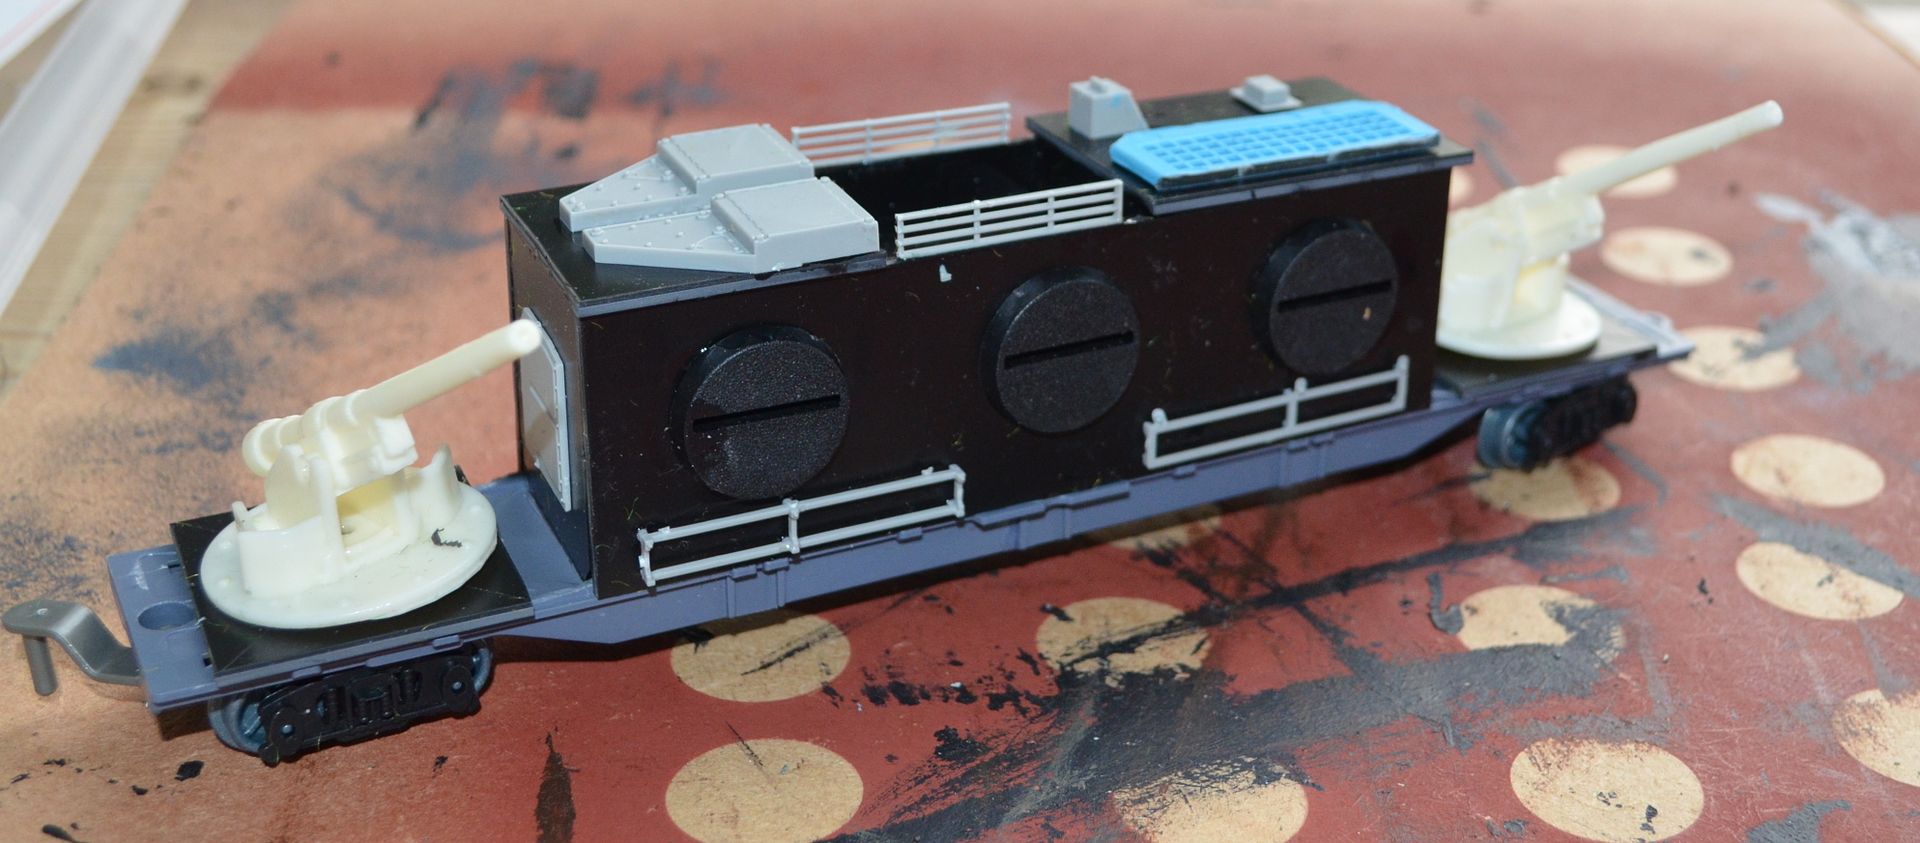
In the first part I really focussed on the central core of the gun carriage but the guns really looked a bit bland and it was recommended to me by somebody on the forums that I should build some covers.
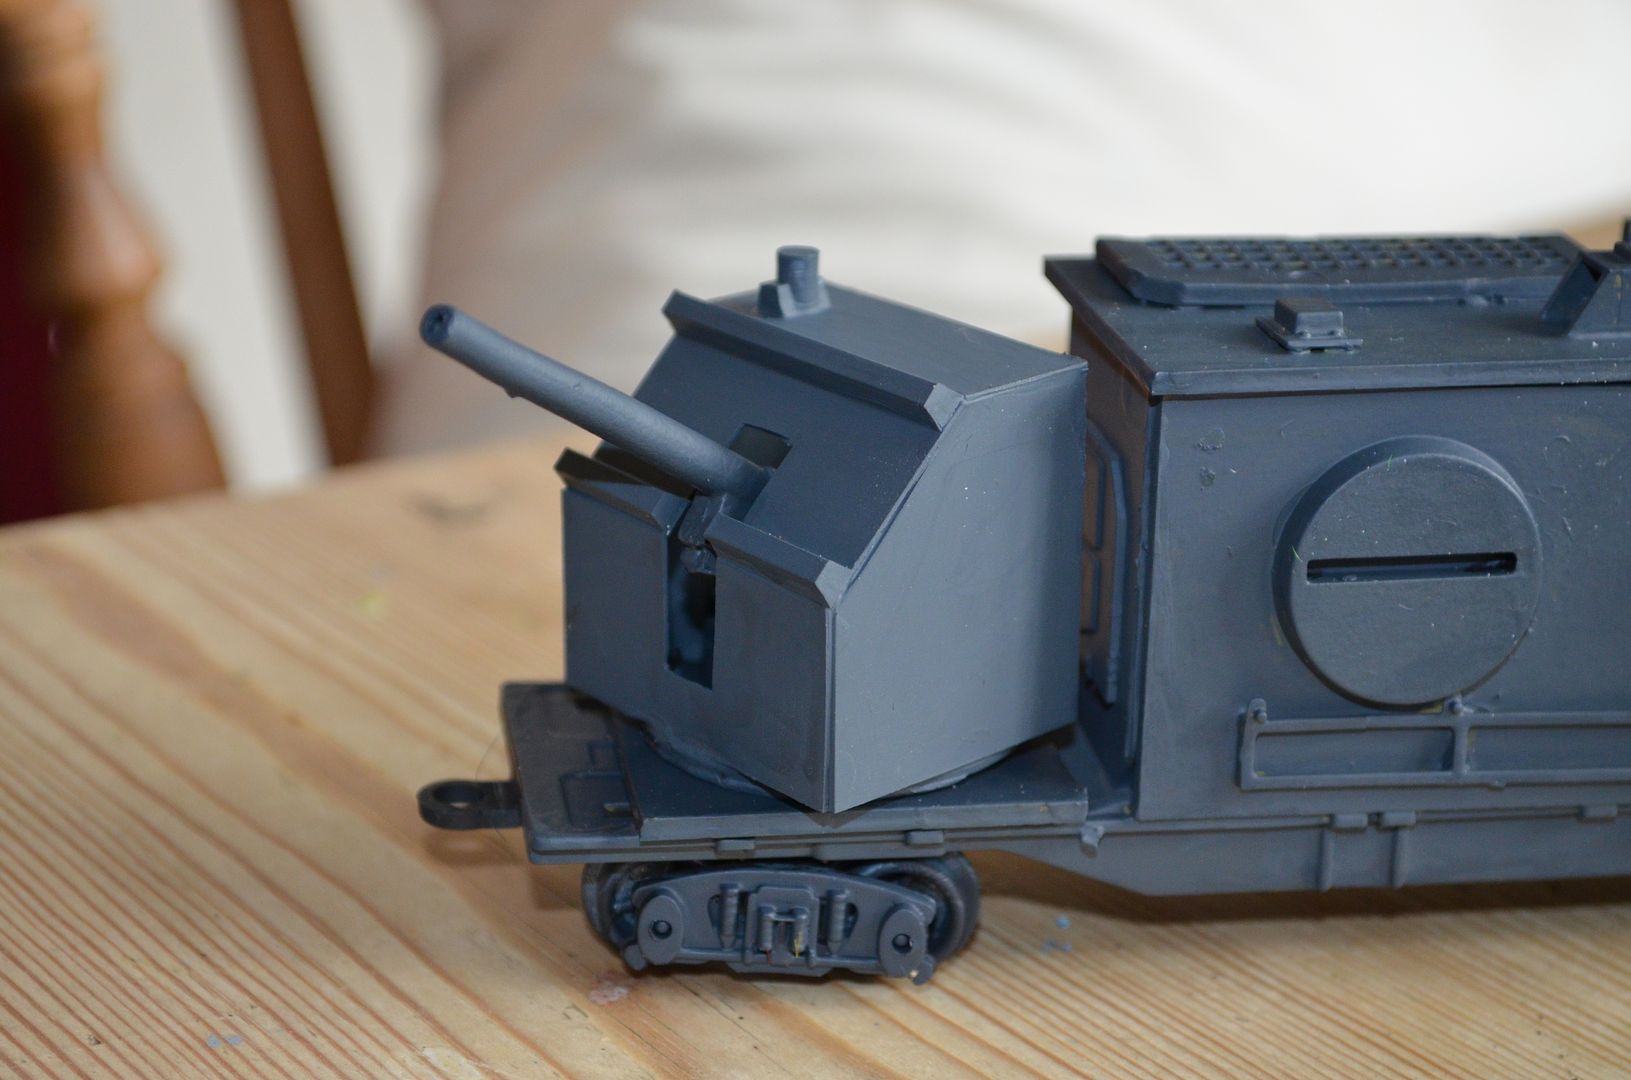
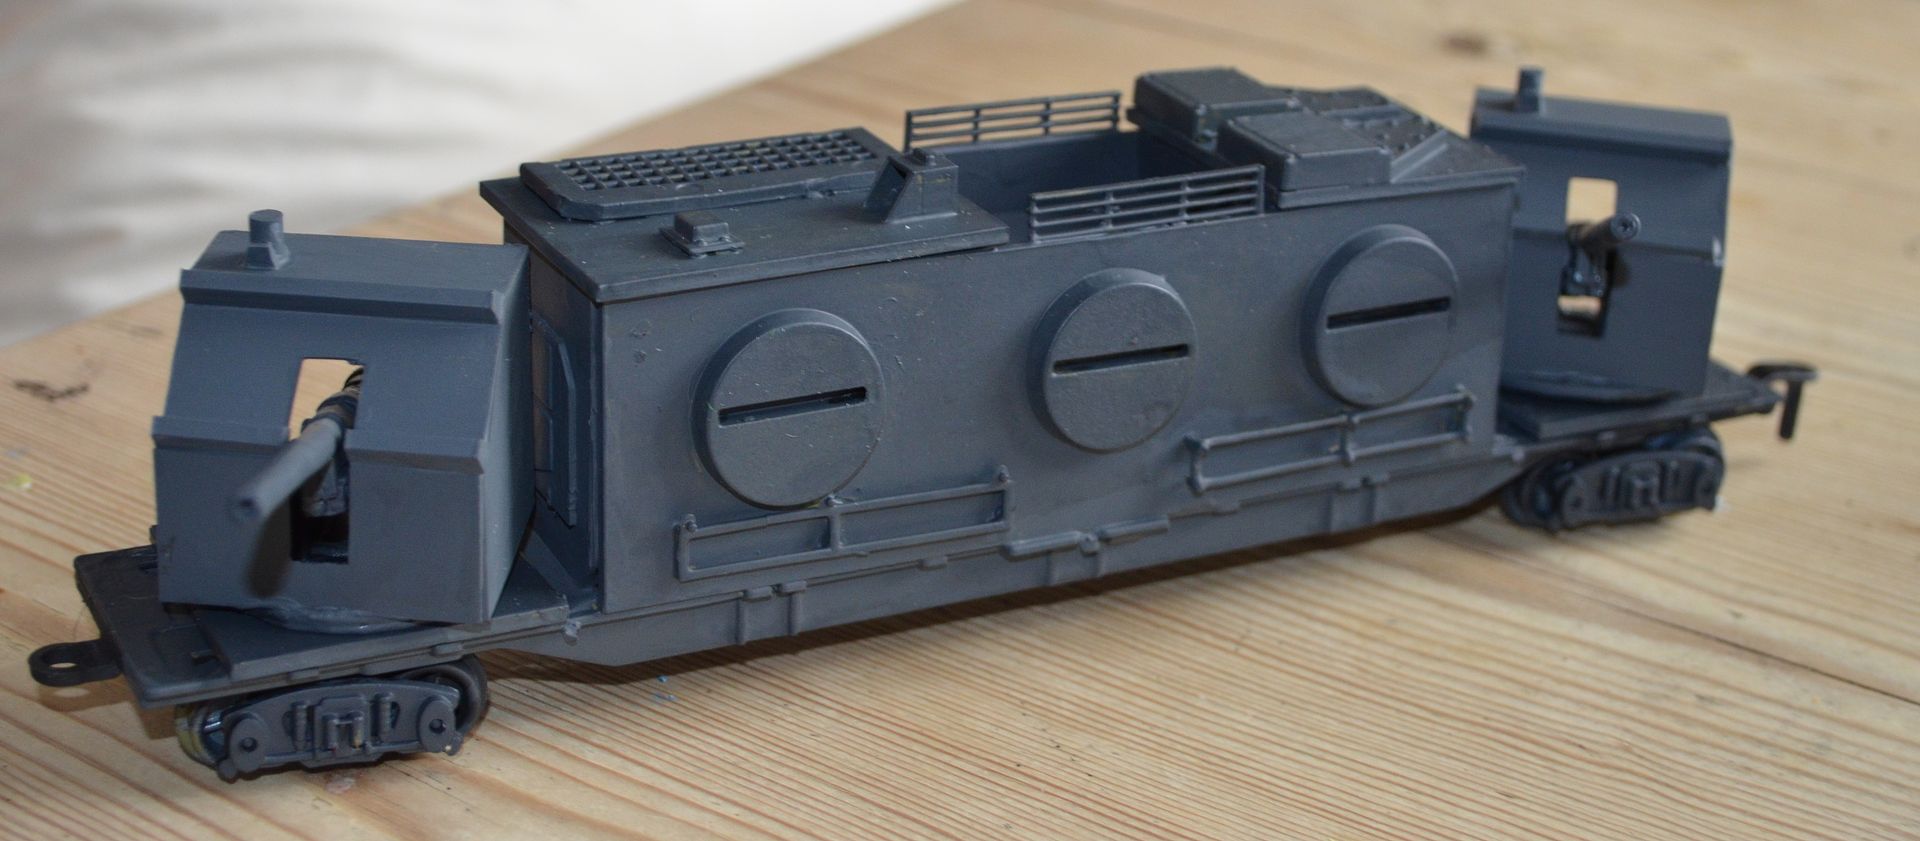
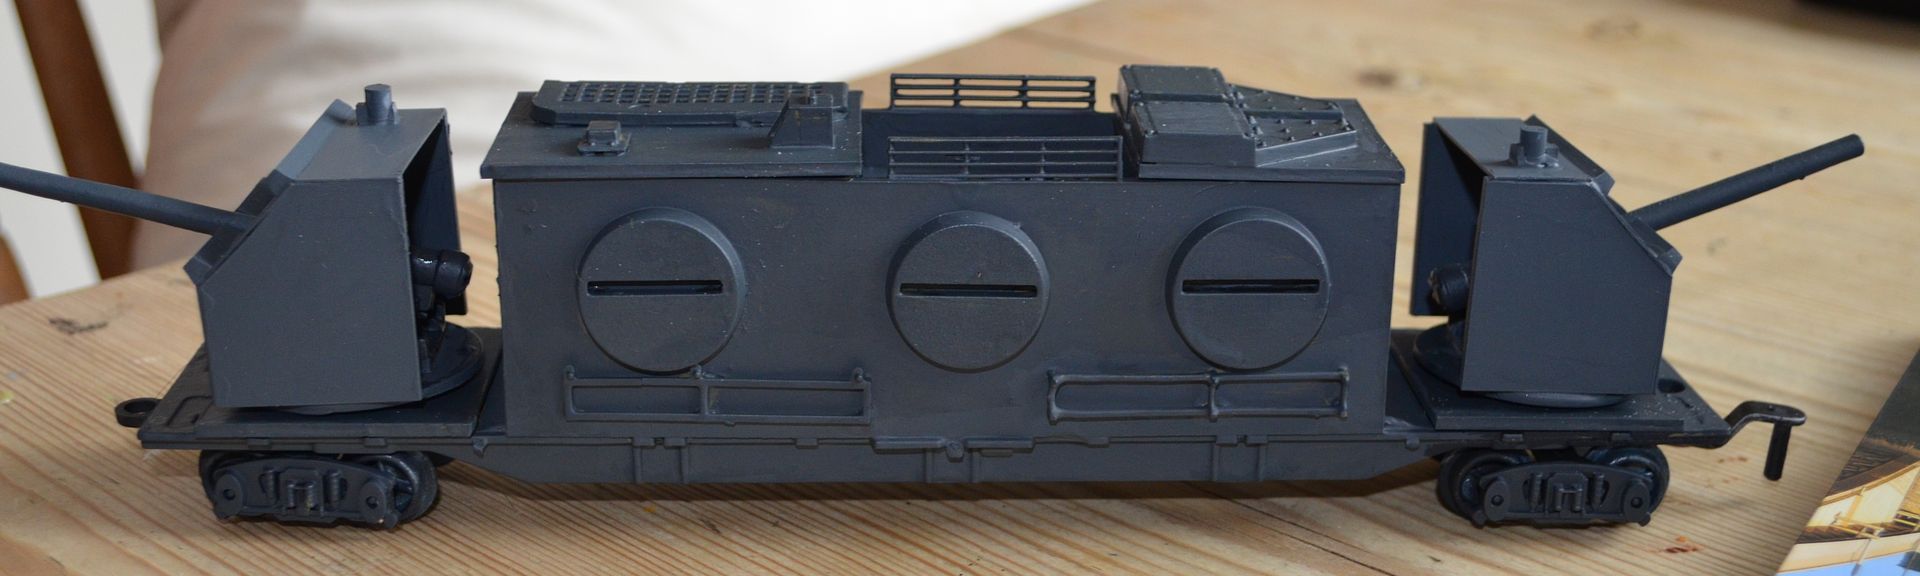
I agreed. An the following shots illustrate the effect. I have also given the whole thing a coat of dark grey which does tend to tie all the bits and pieces together.


The turrets themselves are just constructed from plasticard with some bits of sprue to cover up the joins. Its been quite fun modelling this train just using my imagination and has given me the taste to do more in plastic scratchbuilds.


The turret slits allow full movement of the guns


I have bought an AA gun mount for the centre of the train but seem to have lost it...oh well when it turns up


I now have to decide on a camo pattern for the train but before I start this I think I will turn my attention to the loco and 'modify this'

Friday, 11 April 2014

The Armoured Train part 1

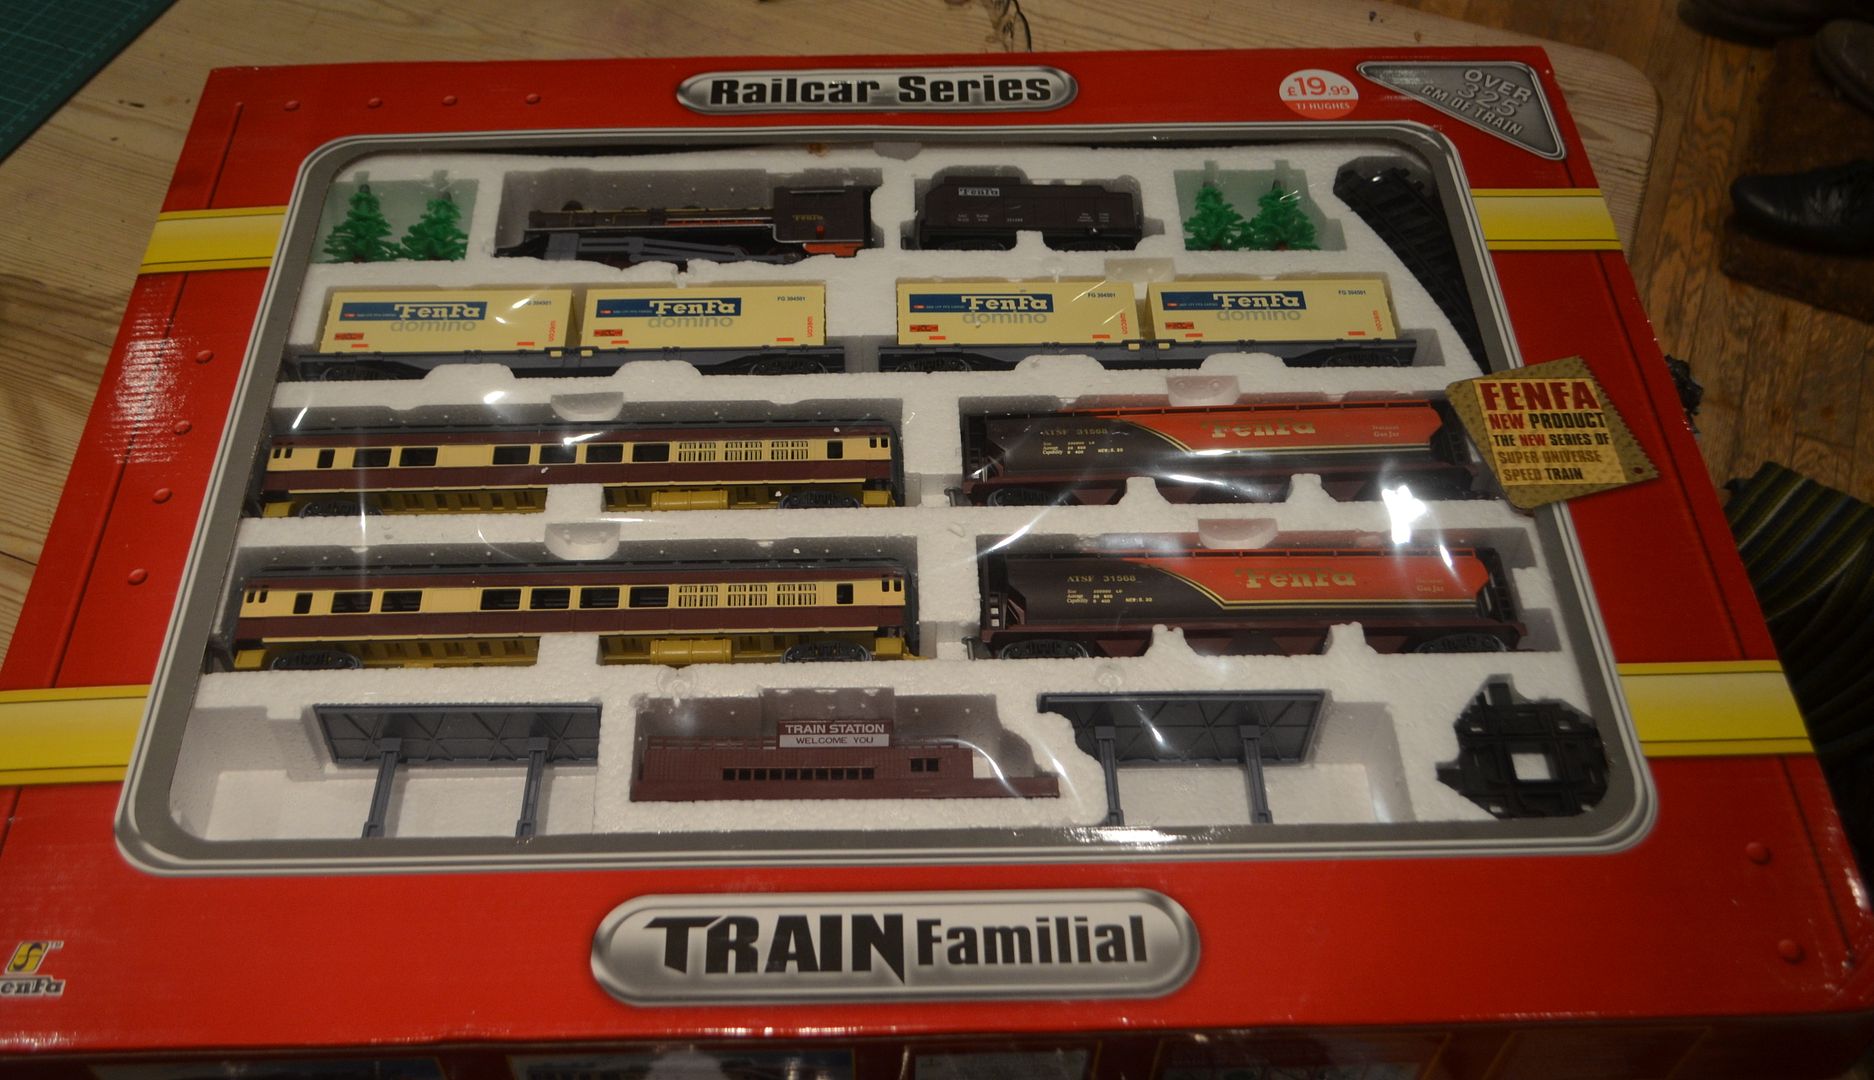
A few weeks back I bought this trainset (below) for conversion purposes-

I've done the tracks and they can be seen in a couple of tutorials here on the blog. But what of the trains themselves? Well in this two part article I'll show you how I built a scratchbuilt armoured train for my VBCW project.

Please note that what you might see in the following pages may offend professional modellers. This is scratchbuilding without plans, few measurements and some interesting red wine.


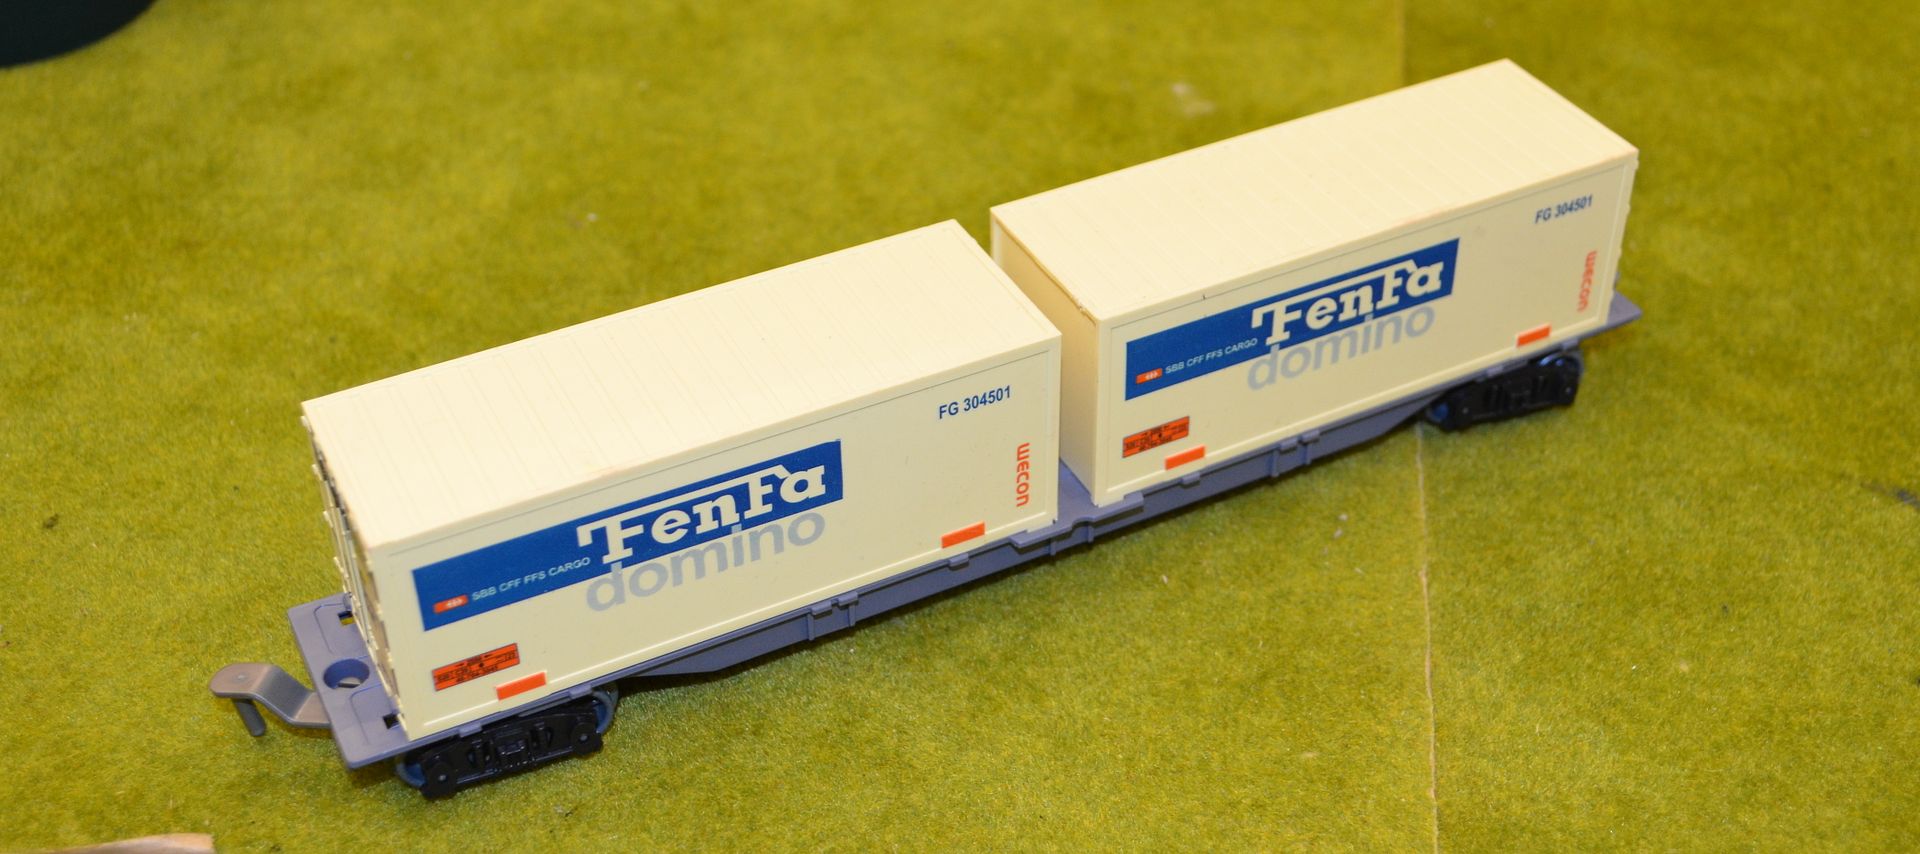
I decided that the armoured section of the train would be based on this two container box section.


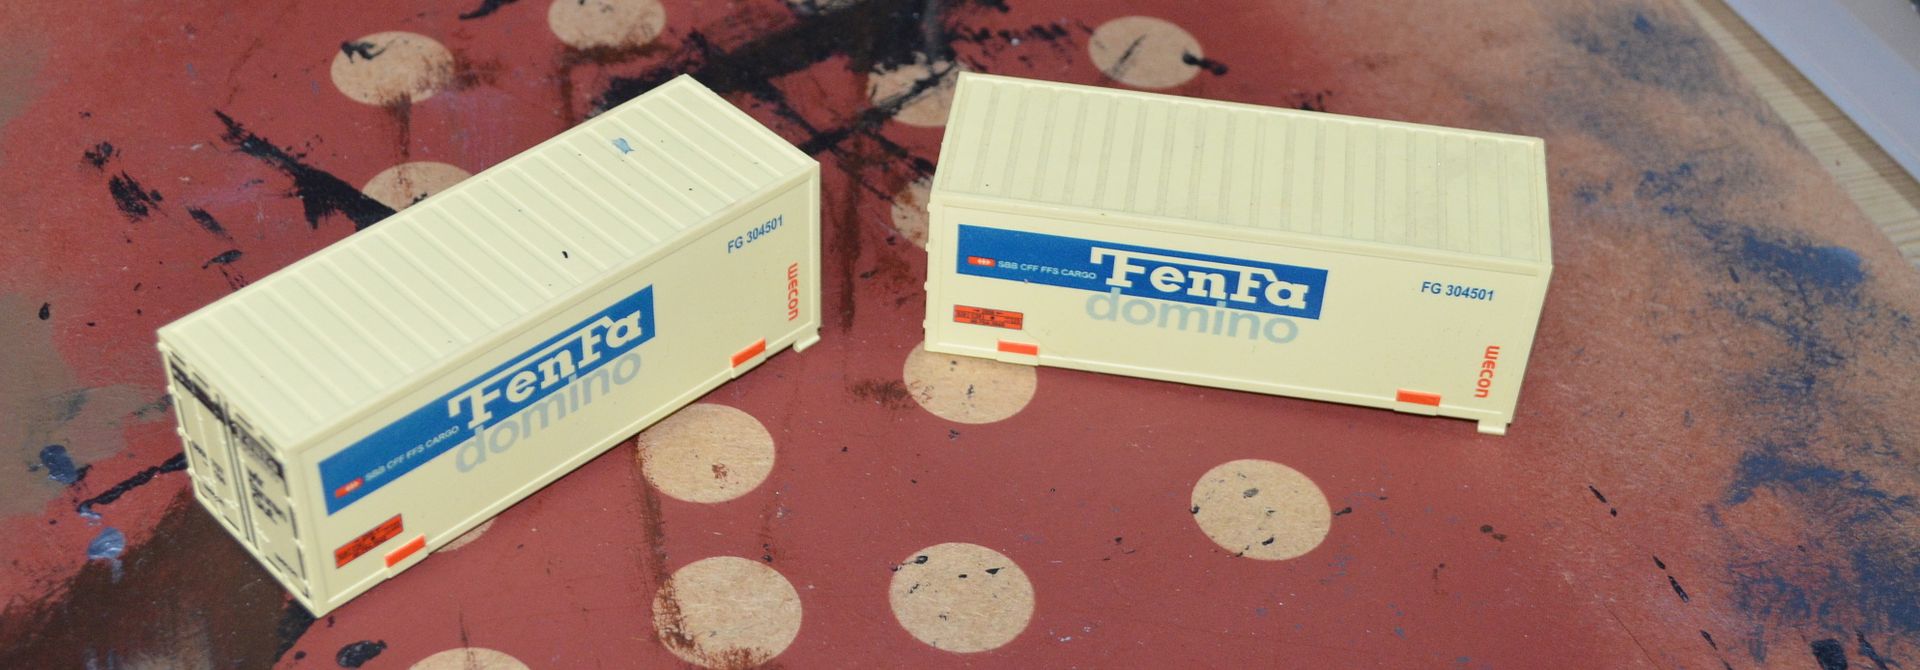
The containers popped off easily and these will be saved for some future project involving...containers


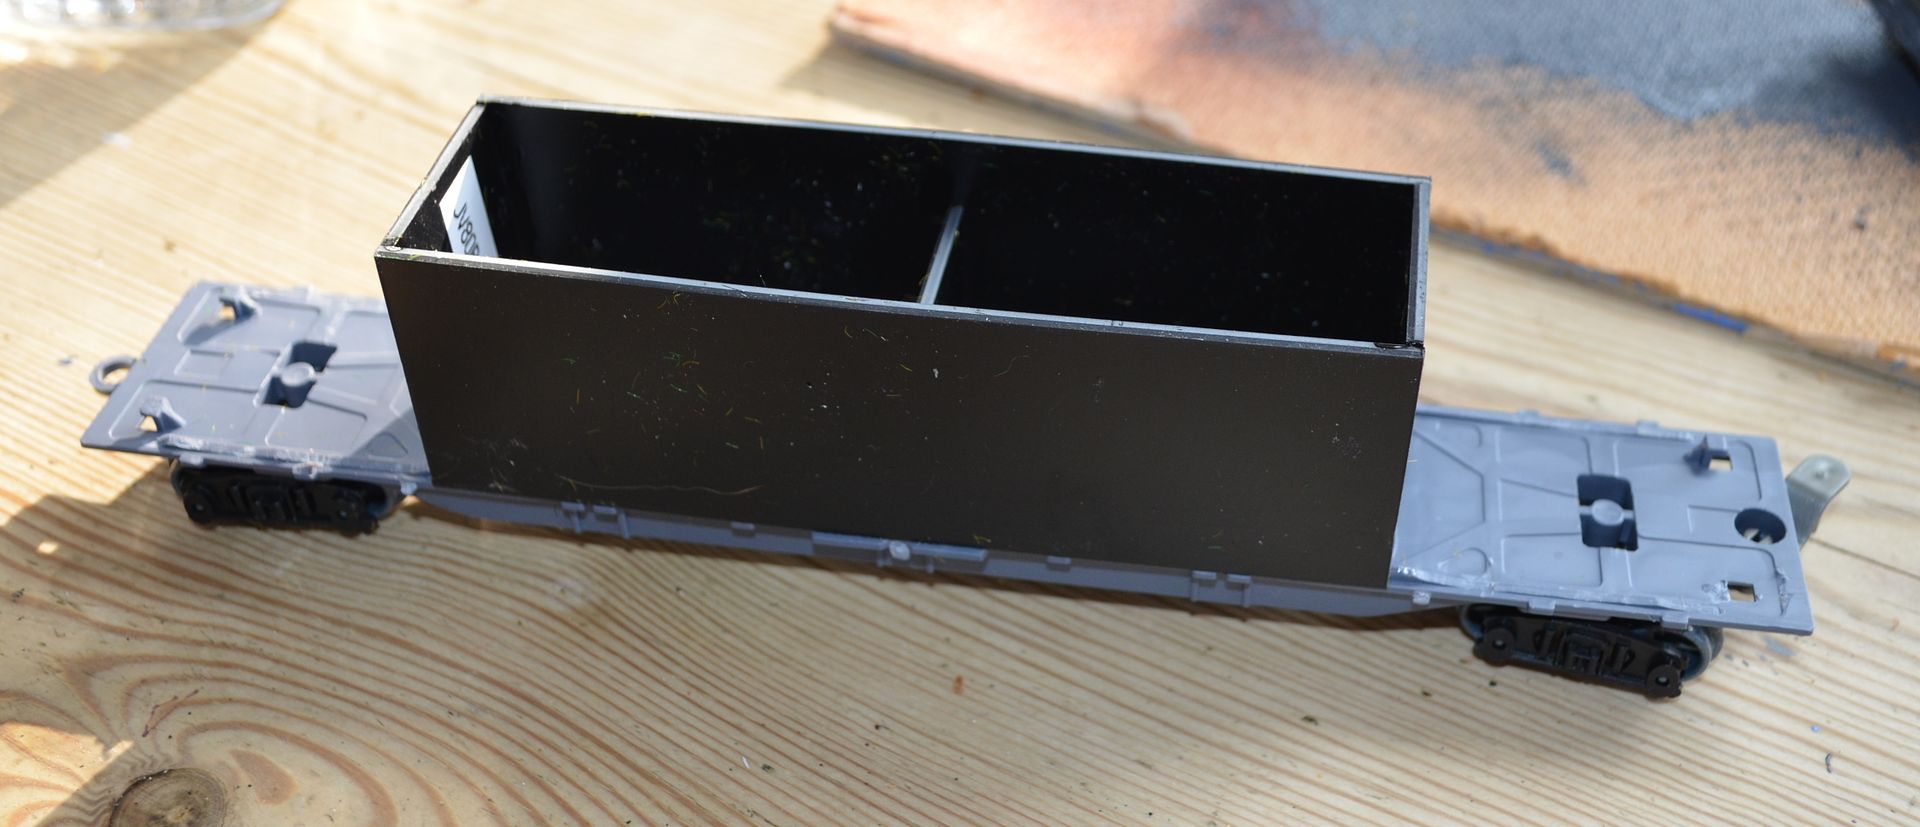
This left me if with a nice flat section - I trimmed off the raised edges on either ends to support the gun platforms


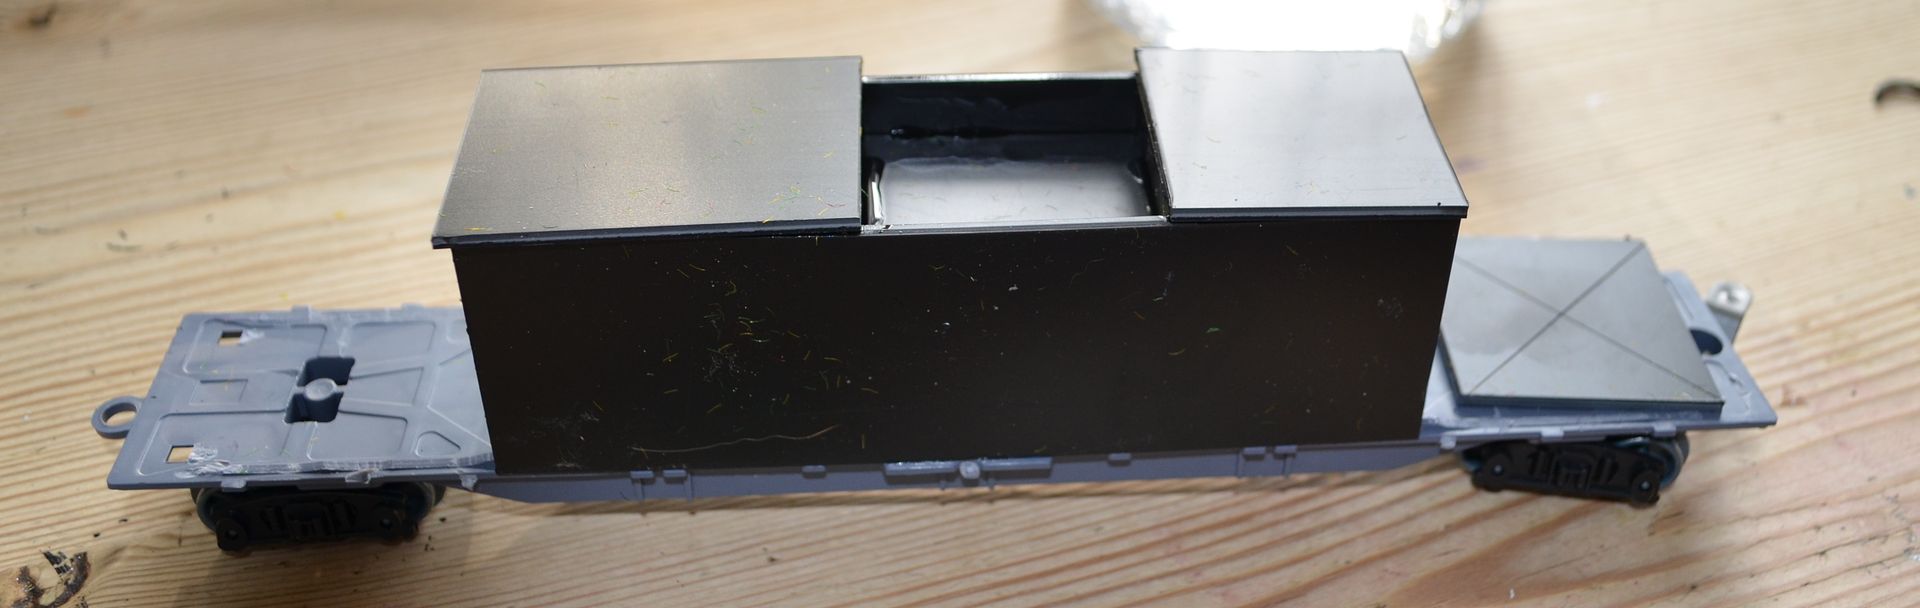
The superstructure of the section was built up using plasticard.


This was topped off with a sunken section - will be used for a flak position.


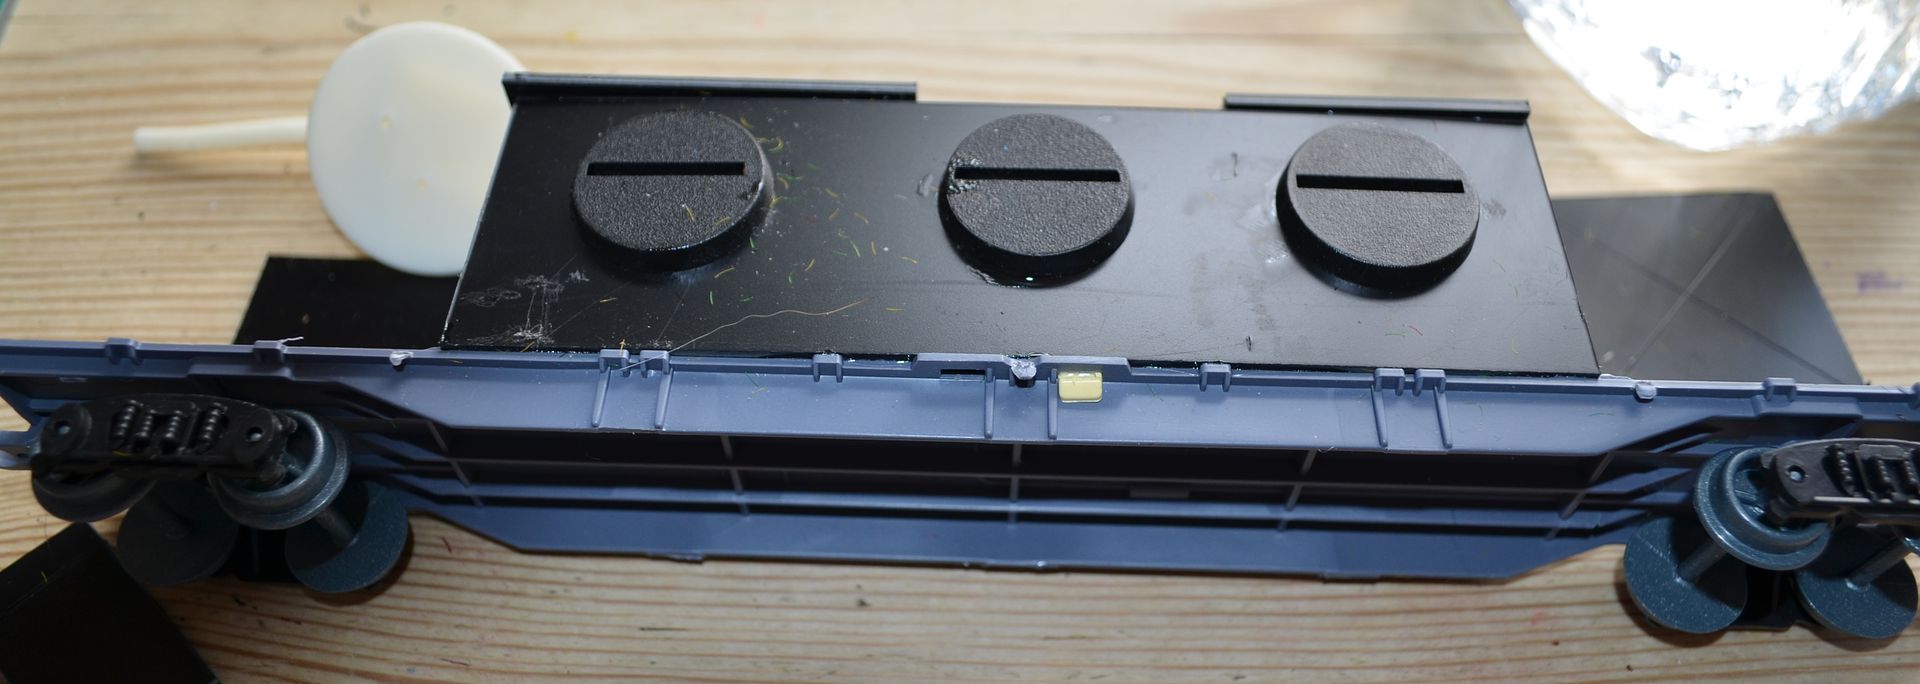
Firing slits using slotta bases added to the sides of the train.


other paraphernalia then added from spare old model kits - rails, vents etc


You can see in the above picture I have mounted the gun platforms and drilled in holes.

The guns themselves have had a pintle added using plastic rod


The guns were picked up from Caliver Books  - they are part of the old PMC range  (Picture courtesy of their website - hope they don't mind) - Listed within the Forgotten Front Range

http://miniaturefigurines.co.uk/Home.aspx

Now when I ordered my gun it turned up all bent out of shape. I contacted Caliver and mentioned that I was not happy - with no fuss they reissued me with a new gun. Customer service was second to none - brilliant !

They also make great tanks for this period.

As I was putting together the train last night the thought occurred to me that if I heated the original bent resin gun over a candle would I be able to bend it back into shape? The answer was yes - so I guess I owe Caliver for another gun.


picture


And here you can see the finished wagon. I'll be buying a flak piece at Salute and then hopefully getting this pointed up in the coming weeks.


cheers

for part 2 go here

Part 2


Wednesday, 5 February 2014

28mm Train for Wargames - part 2

This follows on from my last post - part 1 in which I showed a recent ebay purchase...although the scale wasn't perfect I was happy. But as I mentioned in the post I had bought another set.

http://shedwars.blogspot.co.uk/2014/02/28mm-trains-for-wargamers-part-1.html

This set cost £19.99 from a company called TJ Hughes. I tell you now because the same product is being advertised on Amazon for over £50 quid !

At just under £20 this is a bargain - why ? Because the scale is even better.

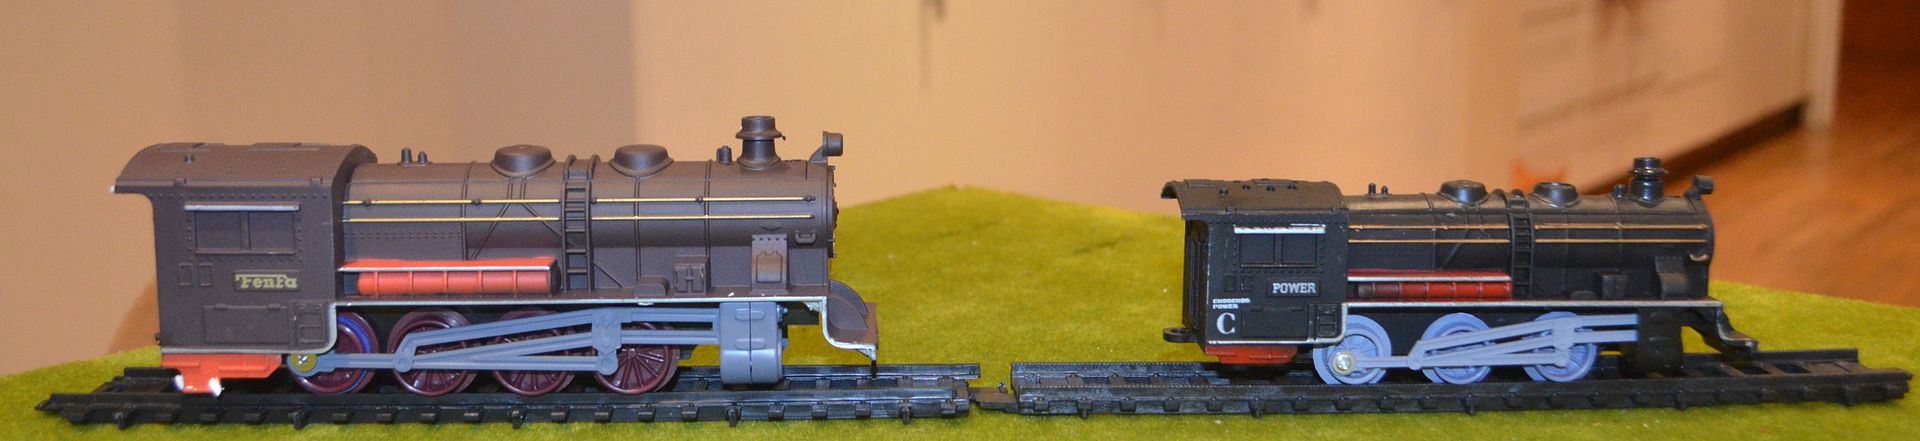
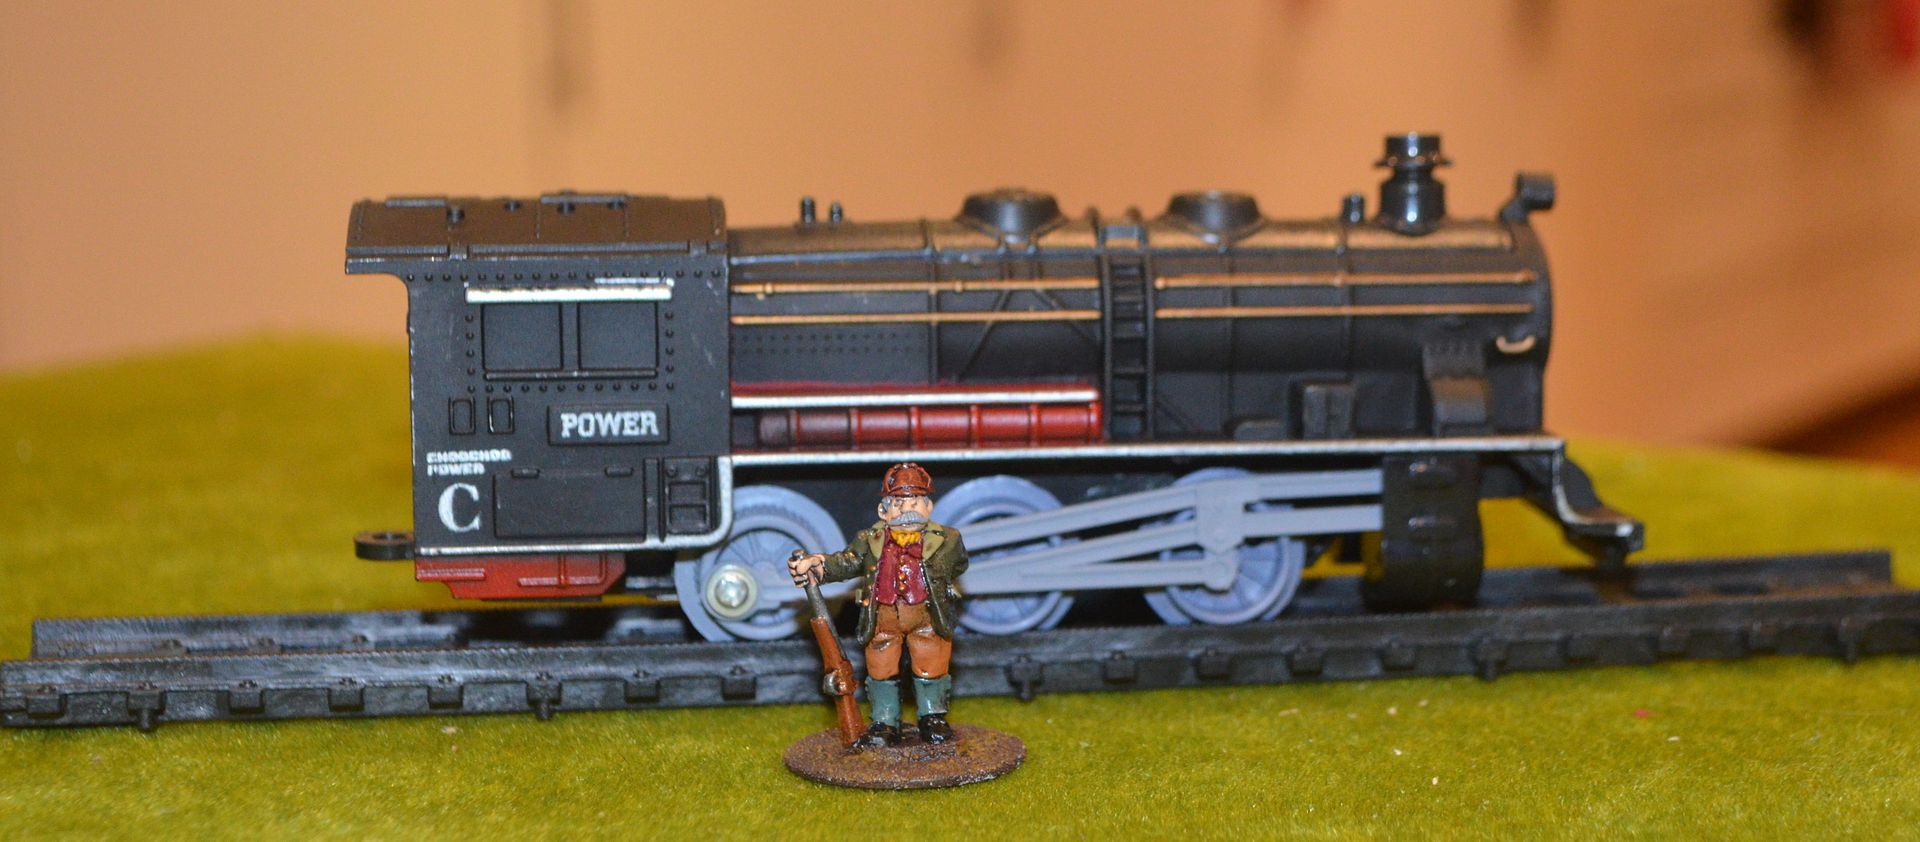
The first photo shows the first train I bought...


The second photo shows the new locomotive.


And here they are side by side - the difference is clear


I think you'll agree this is much more like it. So what did I get for £20 quid....this lot

A loco and coal tender, two passenger carriages, four cargo box/wagons/ and two large tankers. Stretched out that's almost 1.5metres of train !


From a track perspective there is loads. 16 straights, 16 curves, some switch points and six shorter curves. More than enough to run a double track across my board. The distance between rails is 25mm - its almost identical to the other set I bought but not quite. Either way once I have cut off the joining tabs and mounted these on an embankment you wont notice the difference.

Because they are similar gauges I can run both sets of wagons/cars on all the tracks.

The box claims there is over 4.5 metres of track. Each straight is 22cm long - so in straights alone there is over 2 metres. One box will suffice.


I should also point out that the rail way sleepers do have a wood grain effect so these should paint up quite well.


From a passenger car perspective they are a little small but still quite good - again a 28mm figure for scale purposes


Did I mention that the box came with a station?

Its not great but I think I might have a use for the platform and I'll flip the roof sections on their side and turn them into those large white cricket scenes you used to see on village cricket greens.


I think I am all trained out now so I can now start building the track proper and doing the conversions. An armoured wagon is definitely going to appear.

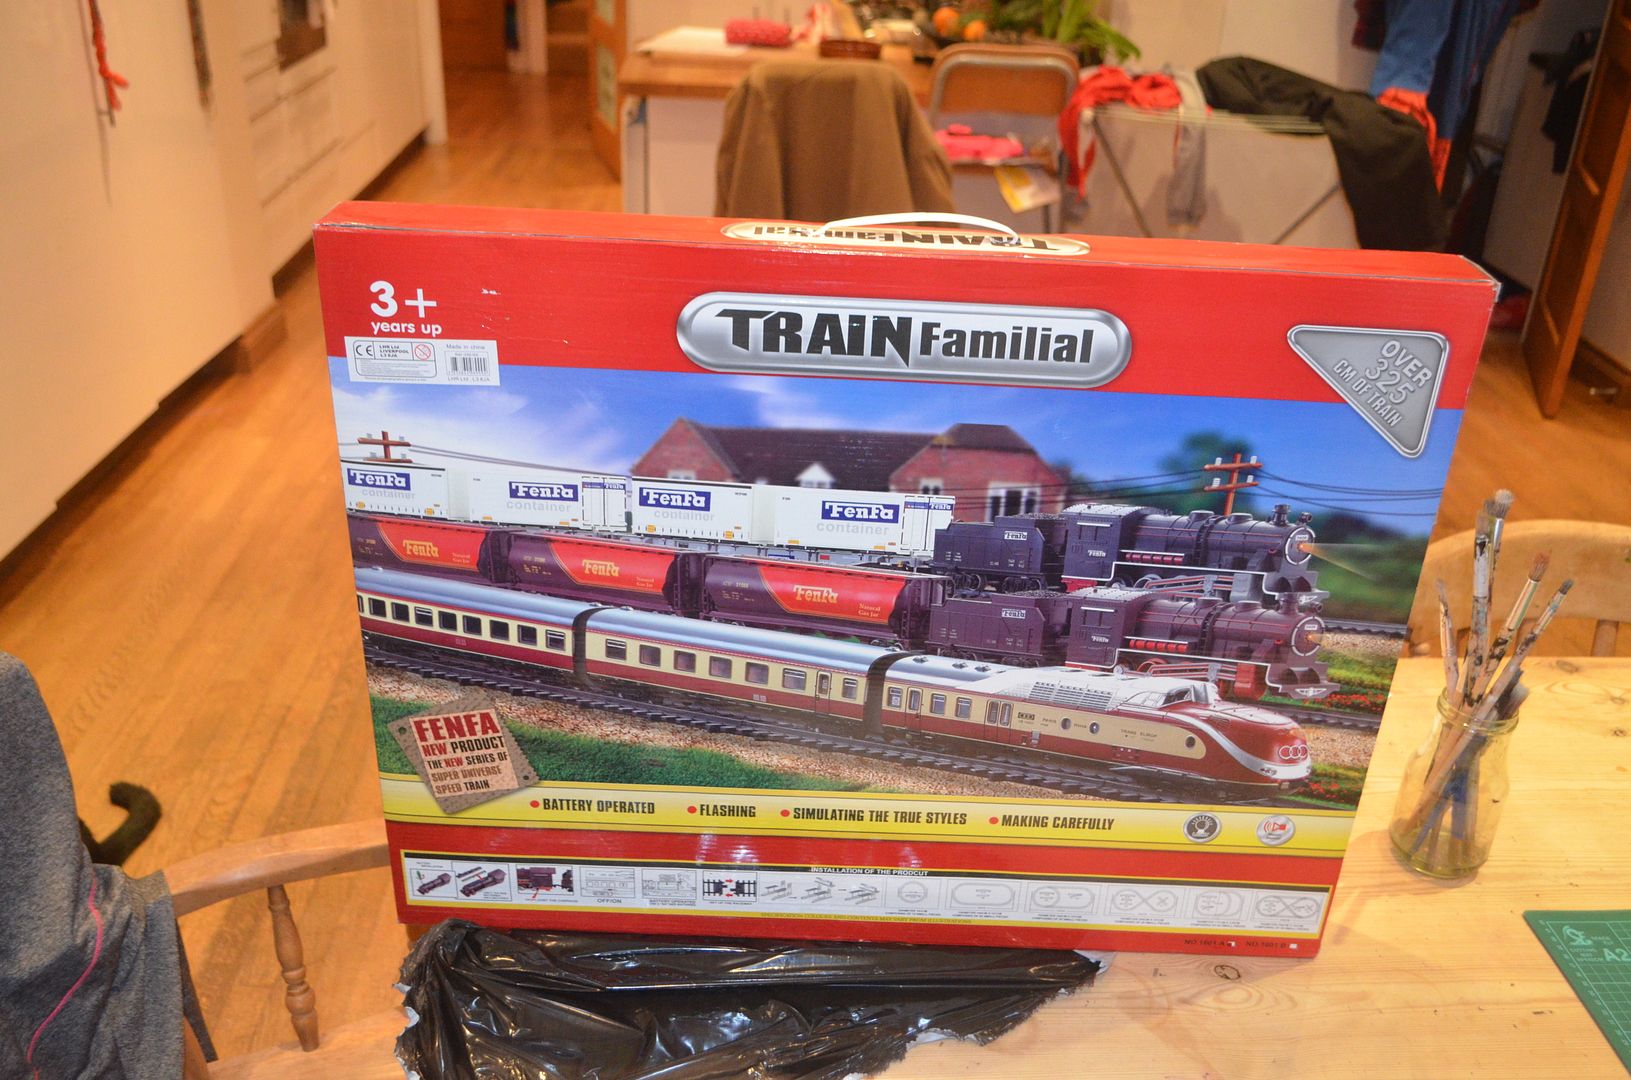
Now of course if you are interested in procuring this set you need to know the details...

heres the box

Front


Reverse

I sourced mine from this site - its still on deal at £19.99

http://www.tjhughes.co.uk/toys-games/toys-by-type/electronic-toys/railcar-train-set

and just to prove the amazon price

http://www.amazon.co.uk/Railcar-Train-Steam-Model-Locomotive/dp/B004MLVG60/ref=sr_1_1?ie=UTF8&qid=1391555720&sr=8-1&keywords=railcar+train+set

Please come back soon